Tag: tamar adler

200!

Well friends, this is post #200 on Serious Crust. It has been roughly 2 1/2 years since I started Serious Crust, and while 200 seems like both a big number and a small number at the same time, I’m definitely feeling a little proud of myself. I wasn’t sure whether to make this post just a normal recipe post, or a review, or a little recap of some memorable moments. After some deliberation, I decided on the last option. I’ve learned a lot about cooking and eating since we first started this blog, and I want to revisit some of my favorite posts that have really made a big impact on my culinary experiences. So, in no particular order…

1. Sea Salt and Thyme Chocolate Chunk Cookies

200! Top posts: Sea Salt and Thyme Chocolate Chunk Cookies // Serious Crust by Annie Fassler
Perhaps my favorite cookies on the blog…

These cookies are definitely one of my most revisited and recommended recipes. They where, I think, the beginning of my passion for interesting flavor combinations. I love the earthiness of them, the slight saltiness, the melty chunks of chocolate.

2. Tamar Adler’s “An Everlasting Meal”

200! Top posts: An Everlasting Meals // Serious Crust by Annie Fassler
Definitely my favorite food-related book.

This book has had a big impact in the way I think about food. I use more of my ingredients, I am more thoughtful of using my leftovers and how I can re-invigorate them, and I am more confident in cooking without recipes. A must read for anyone who likes food, cooking, and eating.

3. Lemon Baked Cod

200! Top posts: Lemon Baked Cod // Serious Crust by Annie Fassler
This lemon baked cod is one of our top hits on Serious Crust.

Funnily enough, of all the things we’ve made on this blog, this recipe is one of the most consistently shared on Pinterest. It continues to be one of the most visited posts on the blog. I can’t remember whether Jonah or I wrote it (it says it’s by me, but I think Jonah is the one who made the fish), but needless to say, it’s delicious, and obviously people like it.

4. Lamb & Love

200! Top posts: Lamb & Love // Serious Crust by Annie Fassler
This leg of lamb made for a memorable night.

This lamb meal was certainly a memorable one for us. First of all, we got a giant leg of lamb in the mail for free. Second, what was supposed to be a dinner gathering for about 6 people quickly turned into 11 people, and while that was stressful, it also ended up being a wonderful evening of delicious food and games with some of my favorite people.

5. Restaurant Review: Besaw’s

200! Top posts: Dinner at Besaw's // Serious Crust by Annie Fassler
What a lovely spot with delicious food for an awesome dinner.

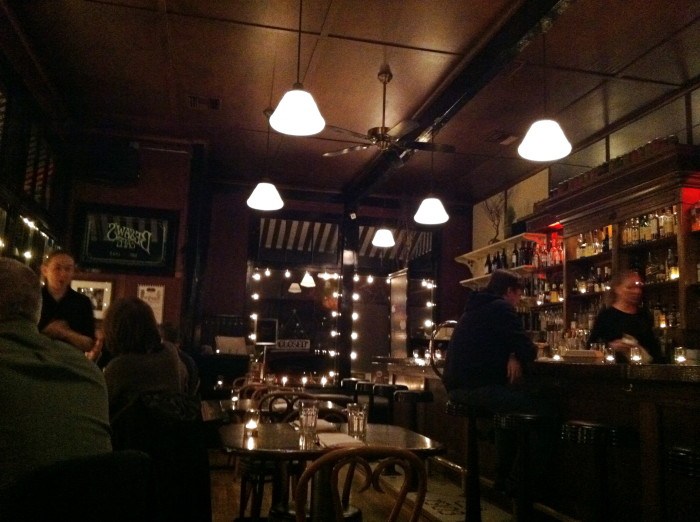
While this dinner at Besaw’s was absolutely delicious, it was also an eye-opening experience for me. It was the first of what would become many media events, and also was the tip of the iceberg that is the food (and food blogger) community in Portland. There are some extraordinary foodie women out there, and they are so inspiring to me. It was ridiculously fun to sit around a table with them (and Jonah), talking and laughing and eating and drinking and learning. I hope to have many more experiences like this one.

Also, keep your eyes peeled in the next week or so for a new look. A little birthday face lift, if you will, for this beauty of a blog.

Stale Bread Soup (Ribollita)

Stale Bread Soup // Serious Crust by Annie FasslerStale Bread Soup // Serious Crust by Annie Fassler

I realize that at this point you might be sick and tired of hearing us harp about how great Tamar Adler’s An Everlasting Meal is. But hear me out one more time. Everyone has stale bread. Or at least everyone who has bread at some point and does not eat it all eventually has stale bread lying around. And most of the time it gets thrown away, or responsibly composted. If you are culinarily educated, dear reader, you may already have known of stale bread soup; but as I read Tamar’s book, I was astounded to find out that not only does such a thing exist, but there is a long and ancient tradition of creating soup from leftover bread (Ribollita in Italian).

There are a few things that should be said about stale bread soup. First, it is not a soup in the same way that chicken noodle is a soup; stale bread soup is usually much thicker and feels more like a hearty chili. Second, stale bread soup is more of a general idea and a starting point than a recipe. It is meant to be made with whatever is around, provided you have some stale bread (otherwise, you will be making whatever-is-around soup – which could turn out to be vegetables-in-water “soup” if you don’t have any broth lying around).

The recipe below is adapted slightly from Tamar’s recipe for Ribollita in An Everlasting Meal. In usual Tamar fashion, you will use A LOT of olive oil in this recipe. We have made stale bread soup twice now, so I’ve noted the different things we used.

Stale Bread Soup (Ribollita)

Ingredients

Olive oil
1 onion, diced
2 cloves garlic
Celery, if you have it (I did not)
salt
1/2 cup chopped fresh herbs like parsley or rosemary or thyme (if you don’t have fresh, maybe do 1/4 cup dried?)
1/2 teaspoon chile flakes
Tomatoes in some form, if you want (3 peeled fresh tomatoes, or I used 1 can diced. Made it once without tomatoes as well)
1 bunch leafy greens (I used kale once and cauliflower greens once; other ideas are swiss chard, collard greens, radish greens, etc)
1/4 cup water
2 cups cooked beans (I used a can of black beans both times, Tamar suggests chickpeas or cannellini beans)
2 cups broth from beans or chicken/veggie stock or cans of tomatoes (I used a combo of all three, and you can make up any shortfall with water)
1 piece of Parmesan rind (Do this if you can, because it makes the soup soooo tasty and rich. Also, what else are you going to do with your Parmesan rind?)
2 cups stale bread, crusts removed, torn/cut into 1/2-inch pieces

Instructions

Heat 1/4 inch olive oil (this is just the beginning) in a big-ish soup pot. Cook the onion and garlic (and celery if you have it) until they soften. Add the herbs and chile flakes and a little bit of salt. Add the tomatoes and cook for a few minutes over medium heat.

Chop the greens (and remove from the stems) then add to the pot, and add the water. Cover and cook over low heat until the greens are wilted. Put in all your broths/waters/juices and the beans, plus the Parmesan rind.

(If you have a bunch of Parmesan left, make sure to cut the rind from the rest of the Parmesan. Otherwise, just save the Parmesan rind for when you will next make bread soup. Make sure your Parmesan is big enough that you can keep track of it, because you’re going to take it out later.)

Bring to a simmer, then add the bread and more olive oil (Tamar says to add 1/2 cup, but I was not brave enough and probably added about a 1/4 cup at this point). Cover and cook for 1/2 hour on low, stirring occasionally to make sure the bottom doesn’t burn. The bread will soak up the soup and then liquify into it.  Taste it, add more broth or salt or whatever you want, and then take it off the heat.

Add in another 1/2 cup olive oil (Tamar, are you crazy!?!? I probably added 3 tablespoons here) and take out the Parmesan rind. You can grate Parmesan on top and add some pepper to serve.

This soup is perfect for a windy, rainy, cold, or dark winter/fall night.

Chicken Liver Pâté

Chicken Liver Pâté

Chicken Liver Pâté

Chicken Liver Pâté
Chicken Liver Pâté

Recently I have discovered my love of liver in pâté form. When I was younger and my parents would eat liver, I would screw up my face and impolitely decline a taste. Now I wonder why I was so against the stuff. It’s rich and creamy and makes a delicious spread for a snack or appetizer.

After seeing a recipe in An Everlasting Meal for chicken liver pâté, I had been wanting to try it. But, like anything I’ve never cooked before, I was a little nervous about it. I didn’t know if it could go wrong, and if it could, how badly. I had been checking the meat counter at my grocery store for a few weeks and hadn’t seen any chicken livers until one day, there they were, slimy and maroon, in all their glory. So I grabbed a pound of them. How much did a pound of chicken livers cost me? $2.73. This stuff is cheap AND delicious? I’m so in.

I got home, pulled out my book, and started cooking.

Chicken Liver Pâté

Ingredients

1 lb chicken livers
salt and pepper
roughly 12 Tbl butter (1 1/2 sticks)
2 Tbl white wine (sherry, bourbon, scotch, cognac, or brandy will also do)
1 shallot, finely chopped
1/2 leek, finely sliced
1 small clove garlic, minced
2 Tbl water
a pinch of cloves
a pinch of cinnamon
1/8 bay leaf, crumbled
1/4 cup fresh thyme leaves, chopped (I didn’t do quite a quarter of a cup)

Instructions

Trim any connective membrane type stuff from the livers and season them with some salt and pepper. Melt 1 Tbl of butter in a nonstick pan. When it’s starting to sizzle, add a batch of livers (depending on how big your pan is, you’ll need to cook the livers in 2-3 batches). Don’t crowd them in the pan; leave some space around each liver. Let each liver brown on one side, then flip and brown on the other side. Put the livers on a plate or in a shallow bowl – they will release some juices. Add 1 Tbl of wine to the pan and scrape the brown bits from the pan. Pour the wine over the cooked livers. Add more butter to the pan, and cook the rest of the livers as you did above, skipping the wine step.

After you’ve cooked all the livers, add the shallot, leek, and garlic to the pan with the remaining 1 Tbl of wine and 2 Tbl of water. This will help the veggies become tender. Cook the veggies over medium heat until they’re tender.

When the veggies are done, add them, the livers and their juice, the cinnamon, clove, thyme, and bay leave to the blender. Don’t blend yet! Cube one stick of butter and add the cubes to the blender too. Blend it up and taste. Season as you see fit (I found myself adding more salt…). When it’s seasoned to your liking, put the pâté in a bowl and allow to cool for 30 minutes before serving. It may seem liquidy, but it will solidify as it cools. If you’ve got leftovers (like we did), melt some butter and spread it over the top of the pate, and allow to cool. You can store it like this (according to Adler) for up to 2 weeks.

We liked our pate with crostini and herbed goat cheese, or nut thins and various cheeses from our grocery store’s scrap bin as well as one from the PSU Farmers Market.

Beet Tart

beet tart

OK people – I know we read a lot of food books and talk about them all the time, but if there is ONE book you are going to read from our suggestions, let it be An Everlasting Meal by Tamar Adler.  It is amazing book that changed my life, and is sure to make you think and act differently around food.  If you have not read it yet, go read our blog post on her book, and then continue below.

This beet tart is a perfect example of Tamar’s philosophy and grace: if you attacked this beet tart recipe from start to finish in one cooking session alone – it would take most of your day; first you would have to roast the beets (which takes a long time anyway), then make tart dough and chill it for an hour, then bake the tart dough, then put together the filling, bake some more, add the sliced beets, and bake once again.  Sounds daunting! I would never have done this recipe if it wasn’t spread out over many days and incorporated in the general meal preparations for the week.  However, the manner in which it was made made it feel like I was just throwing leftovers together in a very creative way, rather than a labor intensive ordeal.

Here’s what happened: A few days before, Annie and I roasted a whole bunch of veggies for dinner (or was it lunch?).  We filled the whole oven and roasted lots of different veggies with olive oil and salt.  I fit the beets in a small pan with a 1/2 inch of water in the bottom, covered them with foil, and let them roast for a long time (probably too long, I may have forgotten about them).  We ate the other roasted veggies as part of our dinner that night, but we had no intention of eating the beets that day, so we didn’t have to wait around for them to roast.  We let them cool and then peeled them and put them in the fridge before bed.  Now we had roasted beets peeled beets in the fridge.  We had no plan but we had ideas: beet salad, beet pasta, or beet anything; they were simply a nice starting point.

A few days before roasting the veggies, we had made a different veggie tart using the Olive Oil Tart dough recipe that can be found in Tamar’s book, so we had some leftover in the fridge.  A few days later, I looked in the fridge and saw that a perfect storm had brewed for a beet tart.  There, sitting in the fridge waiting to be used, were roasted peeled beets, tart dough, and some leftover ricotta cheese.

If you want to make this recipe from start to finish, more power to you.  However, I would suggest at least making the tart dough a day ahead, and then looking through your fridge to find any vegetables that would work, roast them, and put them on top of the tart in place of beets.

Beet Tart

Note: You’ll want to roast your beets or other vegetables before you make the tart dough.

Ingredients

Olive Oil Tart Dough

2 1/2 cups all-purpose flour
1/3 cup olive oil
1/2 cup ice water
1 teaspoon salt

Beet Tart Filling

1 1/2 cups ricotta (fresh)
1/4 cup olive oil
2 Tb. cream (I think I just used leftover creme fraiche)
1/2 t. salt
2 egg yolks
a pinch of fresh thym or rosemary

Instructions

Olive Oil Tart Dough

Mix all ingredients together in a bowl. If its too dry, add more water, a tablespoon at a time. Divide the dough in half and roll into balls, then put them in the fridge to chill.

Take out one dough ball (you get to save the rest for another day!) and roll it out on a floured counter until its about 1/4 inch thick. Heat the oven to 400 degrees.  Grease the bottom of a 9-inch pie pan and dust with a bit of flour. Lay the crust in the pan and trim the edges. Prick the bottom a few times (this dissuades bubbles from appearing in your tart dough). Cover the crust in aluminum foil and put some dried beans or pie weights in to fill the tart and hold down the dough. Bake for 20 minutes.

Beet Tart Filling

Whisk together filling ingredients. Pour into the pre-baked tart dough (remember to take out the dried beans and aluminum foil!) and bake at 400 degrees for 15 minutes.  Now lay your beet slices (I cut mine into half-moons) on top of the ricotta filling in a single layer and bake for another 10 minutes.  Let it cool and eat at room temperature.

It is very filling and great for lunch the next day and many days after!