Other

Carrot Ginger Sauce/Dressing | Serious Crust by Annie Fassler

Carrot Ginger Dressing

Carrot Ginger Sauce/Dressing | Serious Crust by Annie Fassler

When I was younger and we went out to a sushi restaurant, my parents would make us order a salad. This salad was usually mostly iceberg lettuce, topped with a neon-orange clumpy dressing, and I loved it. I loved how crunchy and bright it was. I hadn’t really thought about that dressing until a year or two ago when Saveur‘s recipe for it popped up on my Facebook feed. I made it immediately and was SO HAPPY.

These days there is always a jar of the stuff in my fridge since it can be used for pretty much anything. How do I use it? Most often to top my grain bowls with whatever random assortment of vegetables and proteins I’ve got around. I love using it to dress a simple salad with whatever greens I have in my fridge (romaine, baby kale, and baby spinach are the usual suspects) and topping it with sesame seeds. Or I drizzle it over my lazy breakfast of crisped leftover rice and a fried egg, plus some hot sauce and everything bagel seasoning. The point is, if there is an opportunity to use this dressing, I do.

Continue reading “Carrot Ginger Dressing”

Asian Hot Sauce | Serious Crust by Annie Fassler

Asian Hot Sauce

Asian Hot Sauce | Serious Crust by Annie Fassler

Asian Hot Sauce | Serious Crust by Annie Fassler

My cooking these days feels torn. On the one hand, we’ve been having people over for dinner all the time and when we do, I take it as an opportunity to make those dishes that are just a bit too much of a production for any old night with me and Jonah (i.e. anything from my newest and also favorite cookbook Six Seasons). On the other hand, when it is just me and Jonah I tend to turn to what I have in the fridge. This is a great practice, but when I go to the grocery store, I generally buy the same things for weeknight dinner staples: I pick up some tofu, mushrooms, peppers, leafy greens, onions, occasionally some sweet potatoes, and a bulb of fennel if I’m feeling fancy. These ingredients most often turn themselves into a rice or soba noodle bowl because, well, we love Asian flavors, and it’s simple enough that we don’t have to think about it too much before it can become dinner. But the key to any good rice or noodle bowl is the right sauce.

In my recipe box that sits in my spice drawer, I’ve got at least 3 different asian marinades/sauces. They all have roughly the same ingredients, with a couple extras thrown in or substituted. They are ingredients that are used almost daily in my kitchen: soy sauce, rice vinegar, sriracha, garlic, lime juice. Occasionally there will be honey or maple syrup, sesame oil or miso. But this sauce, the one below, it’s different. Instead of being the base sauce for a meal, it’s a sauce that I keep in a small jar in the fridge. I drizzle it on a plate of food when it needs an extra kick, that beloved tingling on the lips, the gentle burning on the edges of your tongue. It’s not too hot – you can still taste all the ingredients in it because the heat is just at the right level where the flavors don’t get lost. I put it on noodles and rice bowls, but I also put it on fried eggs in the morning, orzo salads that need a little jazzing up after a few days in the fridge, and an afternoon snack of avocado. It has gotten to a point where I like to always have a jar on hand, should the need for it arise. And the need does arise. It always comes in handy.

Continue reading “Asian Hot Sauce”

Hummus Three Ways: Basic, Balsamic, and Chipotle | Serious Crust by Annie Fassler

Hummus Three Ways: Basic, Balsamic, and Chipotle

Hummus Three Ways: Basic, Balsamic, and Chipotle | Serious Crust by Annie Fassler

There are some foods that have such a sense of place. For me, scallops take me back to the first time I gathered the courage to taste them – my dad had doused them in a carrot sauce – on the back patio of my childhood home. Deeper n’ ever pie takes me to my mom’s kitchen. Beer bread takes me to my apartment, senior year of college, my friend Rosie and I standing in the kitchen, waiting impatiently for the bread to cool so we could eat a slice. Annie’s mac n’ cheese takes me to the early days of my relationship with Jonah, standing in his college kitchen, scraping the pot of the tangy cheese sauce to procrastinate on our studies.

Hummus was never a food I loved growing up. I never understood why you would purée beans and then dip dry, bland pita chips in it. I would’ve rather eaten broccoli dipped in ranch, or Doritos, or almost anything else you would find hummus next to at the food table at whatever party you were at. It was cold, thick, and grainy, and seemed like a punishment to have to eat. I avoided eating it mostly until the past few years. I remember a hike that my dad and I went on, and we took a little tub of Sabra’s roasted garlic hummus to the top of Little Si outside Seattle and nearly polished the whole thing off. From then on, Sabra was the standard for me: rich, creamy, and smooth. At parties, I stopped avoiding hummus altogether, but I never really sought it out.

When I went to Israel a couple years ago, I knew I was going to eat the best hummus of my life. And I did, four times over. I ate hummus dusted with za’atar, hummus slathered in olive oil, hummus sprinkled with ground lamb and pine nuts, and hummus dolloped with roasted mushrooms. I would go back to Israel just for the hummus, eaten in the Jerusalem heat, watching the city bustle around me as I sat licking my fingers. When I got back from that trip, I started making my own hummus – I have become a snob about it, and I futzed with Ottolenghi’s recipe until it was as close as possible to the plates I scraped in Israel.

Continue reading “Hummus Three Ways: Basic, Balsamic, and Chipotle”

24 Hour Pickled Green Beans | Serious Crust

24 Hour Pickled Green Beans

24 Hour Pickled Green Beans | Serious Crust

Some time ago, maybe last fall, my older sister introduced me to Mama Lil’s pickled green beans. I have a love for good pickles, especially ones that are still crispy and super tart, and these green beans were just that. They don’t carry them at my grocery store, so when Jonah and I spotted them at Boda’s Kitchen in Hood River, we bought a jar, and finished them within the week.

These green beans are one of those things that you eat and figure, “Ok, I can make these.” So the research began, and after a couple of batches I can confidently say that these are really REALLY good. Everyone I’ve fed them to has found themselves reach back into the jar for more. They are crunchy, tangy, and perfectly spicy. And they take about 20 minutes to make. Who doesn’t have 20 minutes?

24 Hour Pickled Green Beans

Ingredients

3-4 tsp red chili flakes
6-8 large cloves of garlic, peeled and quartered
1.5 lbs green beans, trimmed and rinsed
3 cups white vinegar
3 cups water
3 Tbsp salt

Instructions

In the bottom of each of 3 or 4 16-oz wide mouth jars, sprinkle a teaspoon of chili flakes and 2 quartered cloves of garlic. On top of the chili flakes and garlic, pack as many green beans as you can fit vertically.

In a large saucepan combine the white vinegar, water, and salt. Bring to a boil, then remove from heat and pour over the green beans. You want to completely cover the beans, so you’ll need to fill the jars right to the edge.

Put the lids loosely on the jars and leave them on the counter to cool down. Once the jars are cool enough to handle, screw the lids on all the way and put them in the fridge to store overnight. They’re ready to eat in 24 hours and will keep for a month in the fridge!

Quick Pickled Rhubarb | Serious Crust by Annie Fassler

Quick Pickled Rhubarb

Quick Pickled Rhubarb | Serious Crust by Annie Fassler

A couple weeks ago, Jonah and I went to a Timbers game, and before the game started, it started to rain. It rained on and off for the whole game (which we lost) and when we left the stadium it was really pouring. We quickly decided to wait out the crowds and the downpour by ducking into a bar near the stadium called Shift Drinks. We got some tasty drinks and then decided to get a snack. I have a serious weakness for chicken liver pâté, so when I saw some on the menu, accompanied by pickled rhubarb, I knew I’d be ordering that.

Their pâté was creamy and sweet, and contrasted beautifully with the crunchy, sour rhubarb. I always love finding a new use for rhubarb, especially if it’s savory, so when I had that pickled rhubarb at Shift Drinks I knew I wanted to try making my own (and pairing it with my own chicken liver pâté, for which I use this recipe). This recipe is so ridiculously easy, and it makes a great snack either on it’s own or accompanying meats and cheeses on a homemade charcuterie board.

Quick Pickled Rhubarb

Ingredients

3 large stalks rhubarb
1 cup red wine vinegar
1 cup water
1/2 cup sugar
2 Tbsp salt
1 1/2 tsp fennel seeds
3 mint sprigs

Instructions

Slice the rhubarb into roughly half inch slices. Put the slices into a heat proof jar or bowl. In a small saucepan, combine the red wine vinegar, water, sugar, salt, fennel seeds, and mint. Bring to a simmer, remove the mint sprigs, and pour the liquid over the rhubarb. Cover and let stand overnight. In the morning, you’ve got quick pickled rhubarb!

Cheese Crackers | Serious Crust

Cheese Crackers

Cheese Crackers | Serious CrustCheese Crackers | Serious Crust

A while back, I went to the Oregon coast, which obviously meant a stop at the Tillamook Cheese Factory for a few trips through the tasting line and being entranced by the packaging of cheese. You wouldn’t think it would be so interesting, but I totally zone out on those machines trimming, wrapping, vacuuming, and sending off a zillion pounds of cheese.

The other great thing about the cheese factory is that not only do they have EVERY kind of Tillamook Cheese you could want, but they also have basically half-priced packages of the little ends and bits that they trim when they’re packaging the cheese. So when I saw a pound of Garlic White Cheddar for cheap, I said, “Yes, please,” and brought it home with me. I used almost all of it for some macaroni and cheese, and the rest went into these very (cheesy) crackers.

I’ve had a weakness for Cheez-its ever since I was a young child (seriously, if you every need to bribe me for any reason, Cheez-its will do the trick), and I love baking my own at home every once in a while. I figured the garlic in this cheese would add a great flavor to these cheese crackers, and it did. If you can, I highly recommend getting your hands on some garlic cheddar for these bad boys, but if you can’t, any sharp (or extra sharp) cheddar will do.

Cheese Crackers

Ingredients

4 Tbsp unsalted butter, at room temperature
4 oz sharp cheddar cheese, finely grated
4 oz Tillamook garlic white cheddar (or any other garlic cheddar), finely grated
1/2 tsp salt
1/4 tsp chili powder, optional (if you’re down to have your crackers on the slightly spicier side, I recommend it)
1/2 tsp smoked paprika
1 cup AP flour
1-4 Tbsp cold milk
salt for dusting

Instructions

In a stand mixer, cream together the butter and grated cheese. While that is mixing, in a small bowl sift together the flour, salt, chili powder, and paprika. Add the dry ingredients to the butter and cheese mixture and mix until combined. Yes, it’ll be crumbly!

A tablespoon at a time, add the milk, mixing after each addition, until the dough comes together. Form the dough into two discs, wrap in plastic, and chill for at least 30 minutes.

Preheat your oven to 400°F. Line a baking sheet with parchment paper. On a floured surface, roll out the dough to 1/8 of an inch (or slightly thinner). Cut into squares, and using the tine of a fork or end of a skewer, make a hole in the center of each square. Sprinkle with salt, and transfer to the baking sheet. Bake for 8-11 minutes, until the edges are just golden brown (they can burn quickly, so if you want to go darker, keep a close eye on them). Transfer to a cooling rack and let cool for 5 minutes before enjoying.

Easy Energy Bites // Serious Crust

Easy Energy Bites

Easy Energy Bites // Serious Crust

So these energy bite things have been popping up in my life for a while now. I’ve seen them everywhere: favorite foodie websites, blogs, Pinterest (duh, everything is on Pinterest), and on my sister’s Facebook. I tried a batch inspired by Sprouted Kitchen that was peanut butter heavy, but they weren’t really my jam (but maybe peanut butter is your jam, or jelly, as it were). After talking to my sister, she inspired me to try her version. And they were great. They were fruity, jammy, chewy, and a little nutty, similar to Larabars.

The beauty of these is that they could not be easier to make. Also, people have found them really impressive, even though they took a mere pressing of buttons to make. The other beauty of these is that you can make them using whatever you’re in the mood for. On this particular day, dried apricots and cherries were calling my name. But I also wanted a little decadence, so I threw in some semi-sweet chocolate chips. The possibilities are endless. And I like that.

Easy Energy Bites

Note: you will need a food processor to make these. You could try them in a blender, but I’m not making any promises about what might happen.

Ingredients

1 cup nuts (I used almond) – toasting optional
1 cup pitted dates
1 cup dried fruit (I went for half apricots, half sour cherries)
Optional: 1/2 cup semi-sweet or dark chocolate, or cocoa nibs

Instructions

Get out a large piece of wax or parchment paper.

Combine the nuts, dates, whatever dried fruit, and chocolate (if you’re using it) in a food processor. Pulse a few times to break up the ingredients, stopping to separate the dates if they clump together. Now, turn the food processor on for 30 seconds or so. Everything should break down every more to crumbly pieces. Scrape down the edges of the bowl. Process again for 1-2 minutes until a paste starts to form and the ingredients clump together into a ball. Dump the paste/dough onto the piece of parchment or wax paper, and press it with your hands until it forms a square, roughly 8×8. Wrap up the dough, and let cool in the fridge for at least an hour, or up to overnight.

Once the dough is chilled, unwrap it, slice it into bars of whatever size. You can individually wrap the bars if you’d like, but I stacked mine in a tupperware and stored them in the fridge. Note that they don’t necessarily need to be kept in the fridge, but doing so will help them maintain their shape and firmness. Room temperature bars will be softer and pastier.

Kale Stem Pesto // Serious Crust by Annie Fassler

Kale Stem Pesto

Kale Stem Pesto // Serious Crust by Annie FasslerKale Stem Pesto // Serious Crust by Annie Fassler

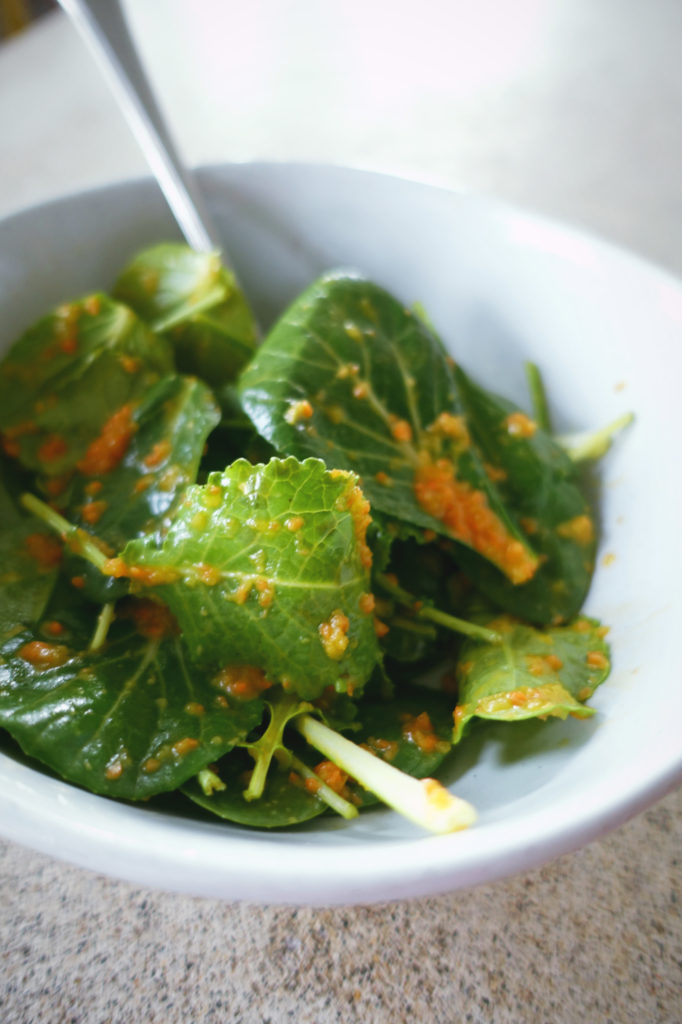
I often find myself frustrated with how much stuff I put in my compost. I guess I should stop right there and say, at least I have a compost, right? The beautiful city of Portland has roadside pickup every week, making it so wonderfully easy to make more environmentally conscious choices. There aren’t a lot of cities that do that. Anyway, I know I could save some bones and carrot tops and onion tops and parsley stems for stock… But I just don’t do it. I mean, I do sometimes… But not as often as I should. And there’s one thing lately that I have always felt guilty after putting it in the compost: kale stems. Jonah and I eat a fair amount of kale – usually sautéed with butter and garlic or something like that, sometimes in a salad. But I always am frustrated at the toughness of the stems, and wish I could do more with them.

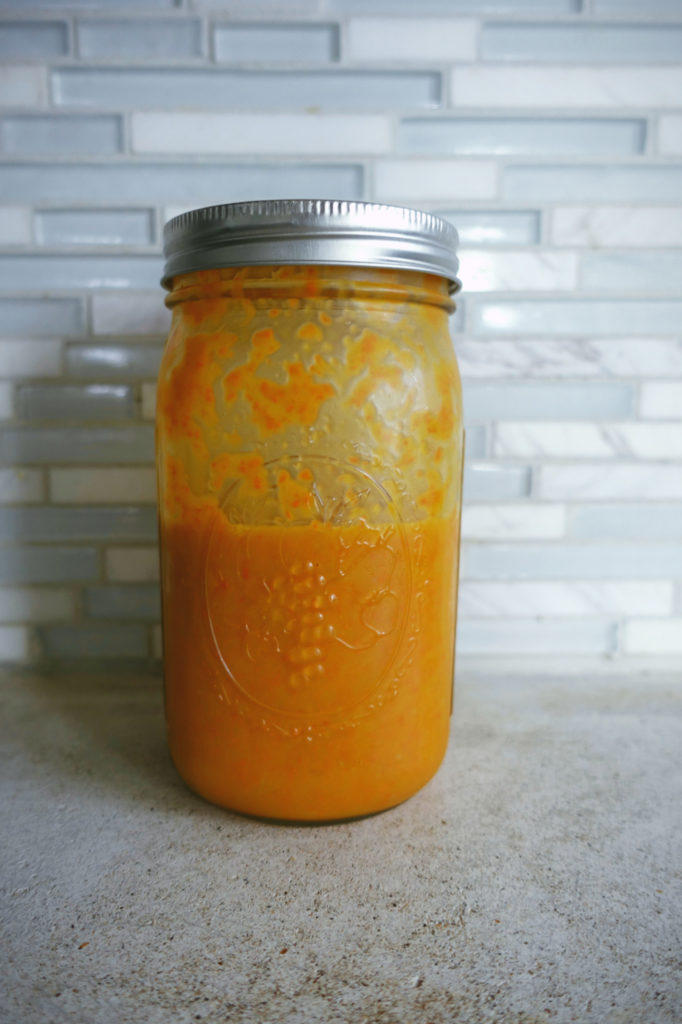
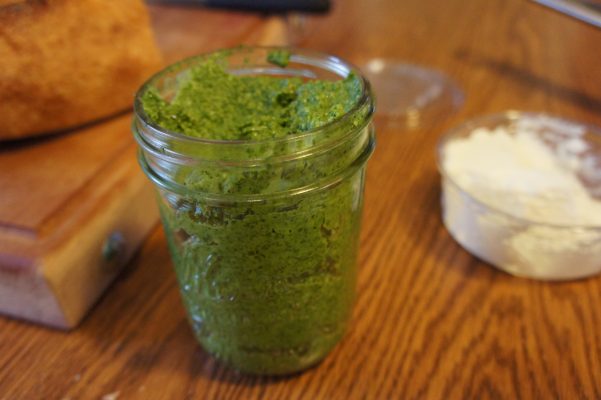
After a little research and looking around, I mostly found that people who do use their kale stems either sauté them with their kale, simply adding the stems first so they cook for longer, or put them in smoothies. I wasn’t really into either of these options, so I made myself a third one. With the all-in pesto in mind, and a container of pine nuts whining from my pantry, I got to work making some kale stem pesto. I wasn’t planning on sharing this pesto here, since the recipe is really improvised, but I got so many comments and questions about what it was when I posted pictures on my Instagram and Facebook, that I thought, why not? This pesto is certainly a product of whatever you’ve got around, which is generally my theory about pesto. Herbs are good, parmesan is good, and other than that, you can kind of go crazy. Nearly any kind of nut will work, any greens, and you can really play until you find some flavors that you like. I didn’t do any measuring here – mostly just throwing in handfuls of this or that – but below is an approximation of what I used.

The beautiful thing about pesto is that it can be a complete reflection of your kitchen: if you just went to the market and have some radish greens, use them. If you don’t have any pine nuts but plenty of pistachios or walnuts, use them. If it’s raining and you want something heartier, add more cheese.

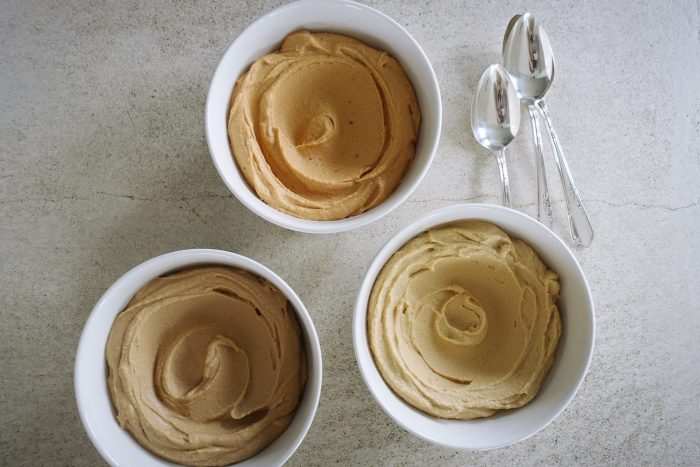
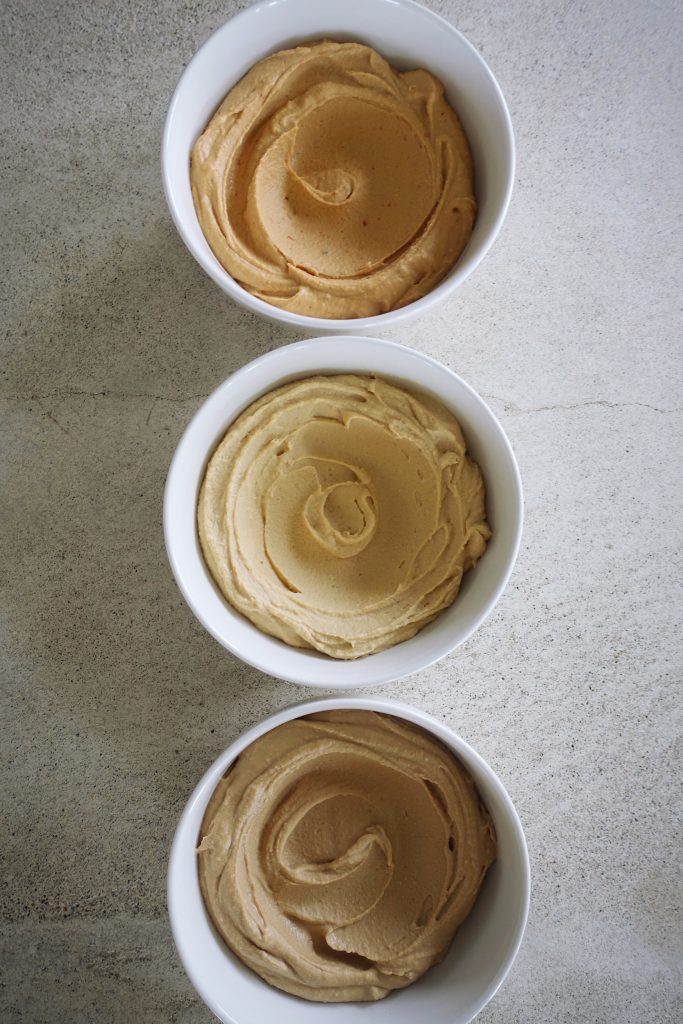
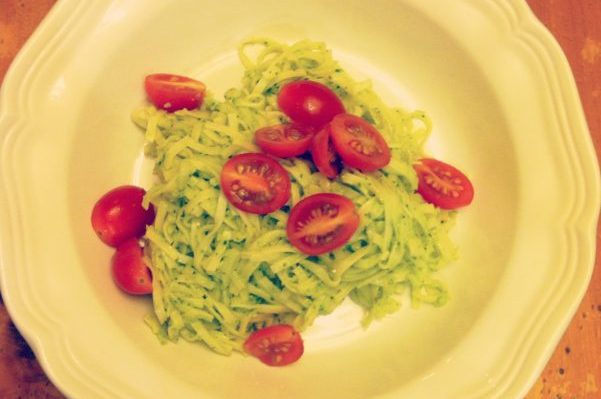
We tossed our kale stem pesto with fresh spaghetti (you can find a recipe here) and topped it with sliced grape tomatoes, which added a really nice juicy brightness. I also like to make a thick piece of toast and slather it with fresh pesto.

Kale Stem Pesto

Ingredients

1 bunch of kale stems, plus probably the equivalent of 1 leaf of kale
1 cup spinach
1/4 cup parsley
~ 3/4 cup pine nuts
Parmesan cheese
Garlic
Olive oil
Salt

Instructions

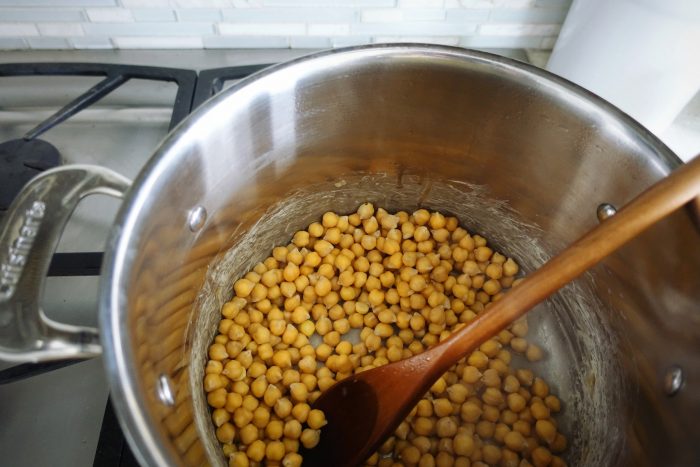
Fill a small pot halfway with water, salt well, and bring to a boil. Roughly chop kale stems into about 1/2 – 1 inch pieces. Add to boiling water, and cook until stems are easily pierced with a knife. Drain and cool.

In the bowl of a food processor (or blender), combine kale stems, a few small chunks of parmesan, about half the pine nuts, 2 cloves of peeled garlic, and a few glugs of olive oil. Pulse to combine. Add spinach, some parsley, and a hefty sprinkling of salt. The key here is to taste and add. If you want a little more spice, add another clove or two of garlic. If you want it creamier, more nuts, and olive oil. If you want it greener, add more spinach and parsley, or some fresh basil or chard if you’ve got some around.

Easy Year-Round Tomato Sauce // Serious Crust by Annie Fassler

Easy Year-Round Tomato Sauce

Easy Year-Round Tomato Sauce // Serious Crust by Annie FasslerEasy Year-Round Tomato Sauce // Serious Crust by Annie Fassler

Over Christmas, my sister Emily was raving about this tomato sauce on Smitten Kitchen that I’d seen several times. For some reason, it never really stuck out to me. It’s almost too easy.

But for New Year’s Eve we were having some friends over, and I decided to make fresh pasta with homemade sauce. Knowing full well that I wouldn’t be able to find incredible fresh tomatoes, I decided to give the recipe a shot. And you know what? It was awesome.

I did a few things differently. Firstly, I doubled the recipe. I probably could have still only used one onion, but I used two. Instead of just mashing the tomatoes against the side of the pan, after removing the onion I used an immersion blender to slightly puree the sauce. I’m not a huge fan of chunks in my tomato sauce, so it was a personal taste thing. I also added some chili flakes for a bit of heat.

Easy Year-Round Tomato Sauce

Ingredients

1 28-oz can of whole, peeled tomatoes, preferably San Marzano (yes, you can taste the difference)
5 Tbl unsalted butter
1 medium yellow onion, peeled and halved
Red chili flakes
Salt

Instructions

In a heavy bottomed saucepan, combine butter, tomatoes, onion, and a pinch of red chili flakes. Choose a pan bigger than you might think. The onions can be a little unwieldy while stirring as they’re in such big chunks. Over medium heat, bring the sauce to a simmer, then reduce heat to maintain that simmer. Cook for 45 minutes, stirring every once in a while, and smashing the tomatoes against the sides of the pot (be careful not to squirt all over yourself here). Remove onions from sauce, turn off heat, and, if you’d like, use an immersion blender to lightly purée the sauce. If not, that’s ok too. Season to taste. Use sauce to dress your favorite pasta (homemade or otherwise), or in a lasagna or on pizza.

All-in Pesto by Serious Crust

All-In Pesto

All-in Pesto by Serious Crust

A few weeks ago, my dad and Darla came down to Portland for my cousin Lia’s oral thesis defense. I really wanted to go to the farmer’s market before brunch, and Dad came along. My dad is a lover of produce. I cannot tell you how excited he got about the range of items available at our market (and how decently priced everything was compared to his fancy Seattle market). I’ve never seen someone so excited over nettles before.

Anyway, between the two of us, we bought 3 bunches of radishes. My dad, needing to drive back to Seattle with a large dog in the car, was trying to minimize his load as much as possible, ripped the radishes from the greens, and left the greens to me. A la Tamar, I knew I could use them, I just had to figure out how. And then it hit me: pesto.

I have since made 2 batches of the stuff, and people LOVE it. And you can use greens other than radish tops: kale, kohlrabi greens… anything green and leafy. The other beautiful thing about this recipe is that it’s not really a recipe – it’s more like guidelines. Use whatever you’ve got around (ergo the all-in title: you can put it all in), and put it on anything and everything. We started with pasta and went from there: we used it as a rub for a whole chicken and potatoes that we roasted, ate it with cheese and crackers and charcuterie, and (my favorite) topped some crusty bread with fromage blanc, the pesto, and a soft boiled egg.

All-In Pesto

Ingredients

Radish tops, stems picked off, and rinsed
Basil, rinsed
A hard salty cheese, like pecorino romano or parmesan
Pine nuts or shelled pistachios (or any combination of the two)
Garlic, peeled and roughly chopped
Olive oil
Salt

Instructions

In a food processor combine all ingredients. It’s best to start with all of your greens, but about half of everything else, so that you can adjust flavor and texture to your liking. Pulse until smooth, and enjoy!

Chicken Liver Pâté

Chicken Liver Pâté

Chicken Liver Pâté

Chicken Liver Pâté

Chicken Liver Pâté
Chicken Liver Pâté

Recently I have discovered my love of liver in pâté form. When I was younger and my parents would eat liver, I would screw up my face and impolitely decline a taste. Now I wonder why I was so against the stuff. It’s rich and creamy and makes a delicious spread for a snack or appetizer.

After seeing a recipe in An Everlasting Meal for chicken liver pâté, I had been wanting to try it. But, like anything I’ve never cooked before, I was a little nervous about it. I didn’t know if it could go wrong, and if it could, how badly. I had been checking the meat counter at my grocery store for a few weeks and hadn’t seen any chicken livers until one day, there they were, slimy and maroon, in all their glory. So I grabbed a pound of them. How much did a pound of chicken livers cost me? $2.73. This stuff is cheap AND delicious? I’m so in.

I got home, pulled out my book, and started cooking.

Chicken Liver Pâté

Ingredients

1 lb chicken livers
salt and pepper
roughly 12 Tbl butter (1 1/2 sticks)
2 Tbl white wine (sherry, bourbon, scotch, cognac, or brandy will also do)
1 shallot, finely chopped
1/2 leek, finely sliced
1 small clove garlic, minced
2 Tbl water
a pinch of cloves
a pinch of cinnamon
1/8 bay leaf, crumbled
1/4 cup fresh thyme leaves, chopped (I didn’t do quite a quarter of a cup)

Instructions

Trim any connective membrane type stuff from the livers and season them with some salt and pepper. Melt 1 Tbl of butter in a nonstick pan. When it’s starting to sizzle, add a batch of livers (depending on how big your pan is, you’ll need to cook the livers in 2-3 batches). Don’t crowd them in the pan; leave some space around each liver. Let each liver brown on one side, then flip and brown on the other side. Put the livers on a plate or in a shallow bowl – they will release some juices. Add 1 Tbl of wine to the pan and scrape the brown bits from the pan. Pour the wine over the cooked livers. Add more butter to the pan, and cook the rest of the livers as you did above, skipping the wine step.

After you’ve cooked all the livers, add the shallot, leek, and garlic to the pan with the remaining 1 Tbl of wine and 2 Tbl of water. This will help the veggies become tender. Cook the veggies over medium heat until they’re tender.

When the veggies are done, add them, the livers and their juice, the cinnamon, clove, thyme, and bay leave to the blender. Don’t blend yet! Cube one stick of butter and add the cubes to the blender too. Blend it up and taste. Season as you see fit (I found myself adding more salt…). When it’s seasoned to your liking, put the pâté in a bowl and allow to cool for 30 minutes before serving. It may seem liquidy, but it will solidify as it cools. If you’ve got leftovers (like we did), melt some butter and spread it over the top of the pate, and allow to cool. You can store it like this (according to Adler) for up to 2 weeks.

We liked our pate with crostini and herbed goat cheese, or nut thins and various cheeses from our grocery store’s scrap bin as well as one from the PSU Farmers Market.

Candy for Grown Ups (or Roasted Tomatoes)

roasted tomatoes

Every summer, I get excited about the produce that will soon be available and all the delicious things I can make with it. I’ve already started with the rhubarb. I am waiting impatiently to go to Sauvie Island and pick strawberries. Soon there will be peaches and nectarines aplenty for me to use for things like salsa, smoothies, pies, etc. The other thing I love? Tomatoes. My little sister worked at a tomato stand at various farmer’s markets in Seattle last summer, and is slowly teaching me the joys of all these different weirdly colored tomatoes. But my favorite thing to do with tomatoes is to season them a little and roast them in the oven forever. And last week I got antsy. I couldn’t wait for the perfectly ripe, soft tomatoes to arrive at the markets. So I went to New Seasons and bought a bag of not-the-ripest roma tomatoes. I left them in our fruit bowl for a few days to soften up, and then I made roasted tomatoes.

Simple Roasted Tomatoes

Ingredients

Tomatoes (any kind will do – I usually go for just regular old vine tomatoes or romas or whatever is prettiest looking)
Olive Oil
Garlic
Salt
Dried basil and/or oregano

Instructions

All of the amounts of the ingredients above are based on your personal taste. If you like garlic, use a bunch. If you are trying to cut back on salt, don’t use it. They’re also great without the basil or oregano.

Preheat your oven to 300 degrees. If you have more time to cook, you can heat your oven to 250 degrees. Drizzle some olive oil into a large baking dish. Slice your tomatoes in half and, if you want, cut out the little stem bit. Rub the tomatoes sliced-side down in the olive oil, then flip them so the sliced-side faces up. Mince the garlic and sprinkle it over the tomatoes. Now sprinkle on some salt and whatever other seasoning you want (this is the time for the basil or oregano if you’re using it). Now here’s the fun part: set it and forget it. Throw the suckers in the oven and let them cook for 3-4 hours. I took these ones out at 4 hours because we were leaving the apartment, but they probably could have gone another 30 minutes. You’ll want to check on them after the 3.5-4 hour mark, as the way they cook will depend on the kind of tomatoes and the temperature of your oven. When they’re caramelized and cooked to your liking, remove them from the oven.

I suggest letting them cool enough to eat one before using them for anything else, just so you can taste heaven. After enjoying one all by itself, the rest is up to you: cut them up and put them on a pizza or in a salad, throw them in your food processor or blender for soup (I suggest looking up a recipe so you know what else to add) or pasta sauce. Also, the oil that is still at the bottom of the pan is delicious, so scrape this into whatever container you’re saving them in so you can use it too. These things are amazing. The kids I nanny for didn’t like tomatoes until I made these; I made a giant dish of roasted tomatoes, and they were almost gone by the time their mom got home from work. That’s how hard it is not to eat these all up.