Course

Chicken Liver Pâté

Chicken Liver Pâté

Chicken Liver Pâté

Chicken Liver Pâté
Chicken Liver Pâté

Recently I have discovered my love of liver in pâté form. When I was younger and my parents would eat liver, I would screw up my face and impolitely decline a taste. Now I wonder why I was so against the stuff. It’s rich and creamy and makes a delicious spread for a snack or appetizer.

After seeing a recipe in An Everlasting Meal for chicken liver pâté, I had been wanting to try it. But, like anything I’ve never cooked before, I was a little nervous about it. I didn’t know if it could go wrong, and if it could, how badly. I had been checking the meat counter at my grocery store for a few weeks and hadn’t seen any chicken livers until one day, there they were, slimy and maroon, in all their glory. So I grabbed a pound of them. How much did a pound of chicken livers cost me? $2.73. This stuff is cheap AND delicious? I’m so in.

I got home, pulled out my book, and started cooking.

Chicken Liver Pâté

Ingredients

1 lb chicken livers
salt and pepper
roughly 12 Tbl butter (1 1/2 sticks)
2 Tbl white wine (sherry, bourbon, scotch, cognac, or brandy will also do)
1 shallot, finely chopped
1/2 leek, finely sliced
1 small clove garlic, minced
2 Tbl water
a pinch of cloves
a pinch of cinnamon
1/8 bay leaf, crumbled
1/4 cup fresh thyme leaves, chopped (I didn’t do quite a quarter of a cup)

Instructions

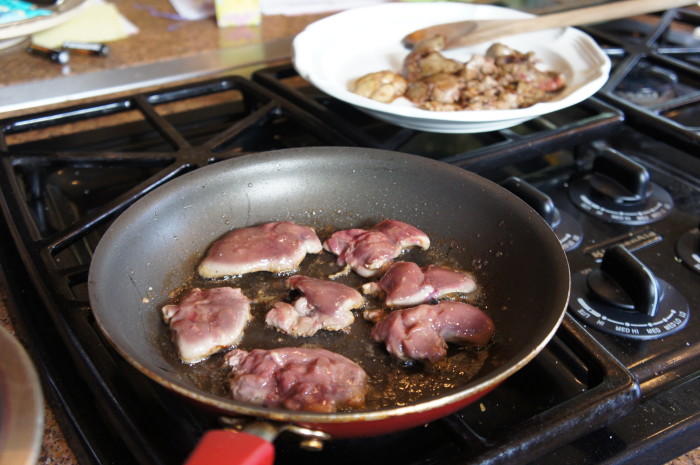
Trim any connective membrane type stuff from the livers and season them with some salt and pepper. Melt 1 Tbl of butter in a nonstick pan. When it’s starting to sizzle, add a batch of livers (depending on how big your pan is, you’ll need to cook the livers in 2-3 batches). Don’t crowd them in the pan; leave some space around each liver. Let each liver brown on one side, then flip and brown on the other side. Put the livers on a plate or in a shallow bowl – they will release some juices. Add 1 Tbl of wine to the pan and scrape the brown bits from the pan. Pour the wine over the cooked livers. Add more butter to the pan, and cook the rest of the livers as you did above, skipping the wine step.

After you’ve cooked all the livers, add the shallot, leek, and garlic to the pan with the remaining 1 Tbl of wine and 2 Tbl of water. This will help the veggies become tender. Cook the veggies over medium heat until they’re tender.

When the veggies are done, add them, the livers and their juice, the cinnamon, clove, thyme, and bay leave to the blender. Don’t blend yet! Cube one stick of butter and add the cubes to the blender too. Blend it up and taste. Season as you see fit (I found myself adding more salt…). When it’s seasoned to your liking, put the pâté in a bowl and allow to cool for 30 minutes before serving. It may seem liquidy, but it will solidify as it cools. If you’ve got leftovers (like we did), melt some butter and spread it over the top of the pate, and allow to cool. You can store it like this (according to Adler) for up to 2 weeks.

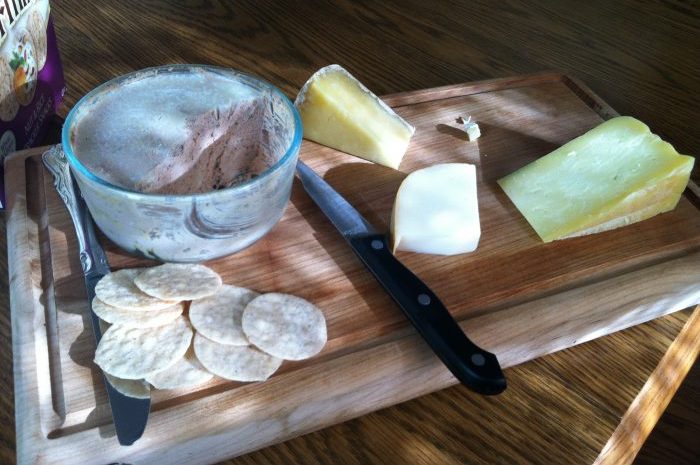
We liked our pate with crostini and herbed goat cheese, or nut thins and various cheeses from our grocery store’s scrap bin as well as one from the PSU Farmers Market.

Beet Tart

beet tart

OK people – I know we read a lot of food books and talk about them all the time, but if there is ONE book you are going to read from our suggestions, let it be An Everlasting Meal by Tamar Adler.  It is amazing book that changed my life, and is sure to make you think and act differently around food.  If you have not read it yet, go read our blog post on her book, and then continue below.

This beet tart is a perfect example of Tamar’s philosophy and grace: if you attacked this beet tart recipe from start to finish in one cooking session alone – it would take most of your day; first you would have to roast the beets (which takes a long time anyway), then make tart dough and chill it for an hour, then bake the tart dough, then put together the filling, bake some more, add the sliced beets, and bake once again.  Sounds daunting! I would never have done this recipe if it wasn’t spread out over many days and incorporated in the general meal preparations for the week.  However, the manner in which it was made made it feel like I was just throwing leftovers together in a very creative way, rather than a labor intensive ordeal.

Here’s what happened: A few days before, Annie and I roasted a whole bunch of veggies for dinner (or was it lunch?).  We filled the whole oven and roasted lots of different veggies with olive oil and salt.  I fit the beets in a small pan with a 1/2 inch of water in the bottom, covered them with foil, and let them roast for a long time (probably too long, I may have forgotten about them).  We ate the other roasted veggies as part of our dinner that night, but we had no intention of eating the beets that day, so we didn’t have to wait around for them to roast.  We let them cool and then peeled them and put them in the fridge before bed.  Now we had roasted beets peeled beets in the fridge.  We had no plan but we had ideas: beet salad, beet pasta, or beet anything; they were simply a nice starting point.

A few days before roasting the veggies, we had made a different veggie tart using the Olive Oil Tart dough recipe that can be found in Tamar’s book, so we had some leftover in the fridge.  A few days later, I looked in the fridge and saw that a perfect storm had brewed for a beet tart.  There, sitting in the fridge waiting to be used, were roasted peeled beets, tart dough, and some leftover ricotta cheese.

If you want to make this recipe from start to finish, more power to you.  However, I would suggest at least making the tart dough a day ahead, and then looking through your fridge to find any vegetables that would work, roast them, and put them on top of the tart in place of beets.

Beet Tart

Note: You’ll want to roast your beets or other vegetables before you make the tart dough.

Ingredients

Olive Oil Tart Dough

2 1/2 cups all-purpose flour
1/3 cup olive oil
1/2 cup ice water
1 teaspoon salt

Beet Tart Filling

1 1/2 cups ricotta (fresh)
1/4 cup olive oil
2 Tb. cream (I think I just used leftover creme fraiche)
1/2 t. salt
2 egg yolks
a pinch of fresh thym or rosemary

Instructions

Olive Oil Tart Dough

Mix all ingredients together in a bowl. If its too dry, add more water, a tablespoon at a time. Divide the dough in half and roll into balls, then put them in the fridge to chill.

Take out one dough ball (you get to save the rest for another day!) and roll it out on a floured counter until its about 1/4 inch thick. Heat the oven to 400 degrees.  Grease the bottom of a 9-inch pie pan and dust with a bit of flour. Lay the crust in the pan and trim the edges. Prick the bottom a few times (this dissuades bubbles from appearing in your tart dough). Cover the crust in aluminum foil and put some dried beans or pie weights in to fill the tart and hold down the dough. Bake for 20 minutes.

Beet Tart Filling

Whisk together filling ingredients. Pour into the pre-baked tart dough (remember to take out the dried beans and aluminum foil!) and bake at 400 degrees for 15 minutes.  Now lay your beet slices (I cut mine into half-moons) on top of the ricotta filling in a single layer and bake for another 10 minutes.  Let it cool and eat at room temperature.

It is very filling and great for lunch the next day and many days after!

Soba Noodles with Mango and Eggplant

Soba noodles, eggplant, onion, mango, cilantro, basil, and dressing all tossed into a bowl.

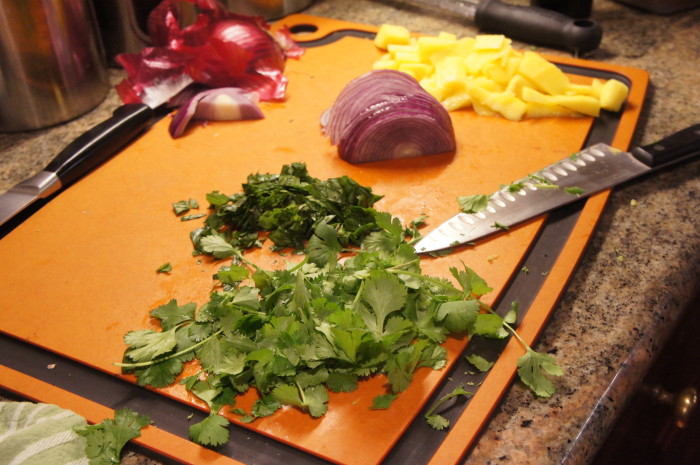
Jonah slices and dices all the colorful ingredients for the soba noodles.
It feels very weird to spread a pile of noodles on a dish towel to dry... But I'll do pretty much anything Ottolenghi tell me to.

As I mentioned in an earlier post, Jonah and I made dinner for my mom and her boyfriend back in December. Now I believe I have told you of my love for Yotam Ottolenghi’s cookbook “Plenty,” yes? This meal was no exception. The meal was all vegetarian, and 2/3 dishes were from that cookbook. The meal was light, refreshing, and packed with flavor. Not to mention the great company.

I fear that I am reaching a point where I cannot keep posting variations of these recipes, I just need to tell you to please, please, please go buy this cookbook. Even if vegetarian food isn’t your thing, even if the photos don’t make your stomach growl, even if the lists of ingredients leave you with questions swirling around in your hear. I beg you. Just go buy it. And then, please proceed to make everything in it, even if it doesn’t jump off the page. Every single dish I have made from this book (as well as his other book, “Jerusalem”) has been so lovely and flavorful that I wish I had tripled them all so I could enjoy the leftovers or share with a bunch of my friends.

Back to the dinner. These room temperature soba noodles are one of the few recipes in the book that did jump off the page for me. But somehow, I still hadn’t made it. While it’s a little prep-heavy, trust me, it’s worth it. Packing a lot of flavor and lots of little bites with different tastes (onion, eggplant, peppers, mango, the list goes on…), this recipe is bound to be a crowd pleaser. I can see it being especially good for kids. What kids don’t love noodles and mango? That’s what I thought: none.

Soba Noodles with Mango and Eggplant

Ingredients

1/2 cup rice vinegar
3 Tbl sugar
1/2 tsp salt
2 crushed garlic cloves
1/2 of a red chile, finely chopped
1 tsp sesame oil
zest and juice of a lime
1 cup sunflower oil (we used canola)
2 eggplants, cut into ~1 inch cubes
a bag of soba noodles
1 large ripe mango (let’s be honest, more than one probably couldn’t hurt…), cut into ~3/4 inch cubes or thin strips
1 2/3 cups fresh basil leaves, roughly chopped
2 cups cilantro leaves, roughly chopped
1/2 red onion, thinly sliced (think paper thin, if you can)

Instructions

In small pot, warm the vinegar, sugar, and salt until the sugar just dissolves. Remove from heat, then add the garlic, chile, and sesame oil, and, once it’s cool, the lime zest and juice.

In a large saute pan, heat the oil and fry up the eggplant. You’ll probably need to do this in a few batches. But you want the eggplant to be nice and golden brown. After all the eggplant is cooked, put it in a colander in the sink, sprinkle (“liberally”) with salt, and leave to drain.

While cooking the eggplant, bring a large pot of salted water to a boil. Cook the soba noodles in the boiling water – you want them to be soft, but still a little al dente. Drain the noodles and rinse them under cold water to stop them cooking. Spread them on a dish towel to dry.

Now the fun part: throw the noodles, dressing, mango, eggplant, onion, and half the basil and cilantro in a bowl and toss to coat/combine everything. You can make this a couple hours ahead of serving, and stop here, letting it sit to absorb flavors and come to room temperature. When you’re ready to serve it, add the rest of the herbs. Enjoy!

Mom's dinner prep activities: playing tug-of-war with Lulu while Jonah and I chopped and sauteed in the kitchen a few feet away.

Jonah’s Birthday: Mint Chocolate Chip Cake

I wasn't able to catch it before it was thoroughly enjoyed by our house, but hey, it still looks delicious!

Jonah’s birthday was a little over a month ago, but I am just now getting around to posting about his birthday cake. It has been a little busy around here! We are finishing up the recording of Jonah’s first solo full length album – I was in the studio Friday afternoon, Saturday afternoon, and am going back today. Let me tell you guys, it sounds amazing. I’ll tell you all more about it when we get closer to the release. But big cool things happening, I promise.

Anyway, for Jonah’s birthday, my roommate Carmelle and I made him a mint chocolate chip cake, a recipe I’ve been eyeing for quite some time. And let me say, of our birthday treats, this one has been my favorite. This chocolate cake recipe was definitely one of the more perfect ones I’ve made. It was perfectly chocolatey, light, and moist. In the future, I will use this cake as a base for many exciting things, I can tell. The frosting was wonderfully minty, but not overpowering. Overall, the flavors were really nice, and it’s definitely a good occasion cake because it’s unique.

Mint Chocolate Chip Cake

Ingredients

Cake

9 Tbl unsweetened cocoa powder
1 1/2 cups cake flour (If you don’t have cake flour and don’t want to buy a whole bag for 1 1/2 cups, use plain flour and replace 3 tbsp with cornstarch)
1 1/2 tsp salt
1 tsp baking soda
1/4 tsp baking powder
1 stick unsalted butter, at room temperature
1 1/2 cups sugar
2 large eggs
1/2 cup coffee
1/2 cup milk

Frosting

2 1/2 sticks unsalted butter
~4 cups powdered sugar
2-3 tsp peppermint extract (plus some for taste)
Milk, if necessary
150g dark chocolate, very finely chopped
green food coloring

Instructions

Cake

Butter and line with parchment paper two 9-inch cake pans and preheat oven to 350 degrees. In a medium bowl, sift together the cocoa, flour, salt, baking soda, and baking powder. In an electric mixer, beat the butter and sugar fora  few minutes until it’s smooth. Add the eggs, mixing after each addition until fully combined.

In a cup, mix the milk and coffee together and set aside. Add half of the dry ingredients and the coffee/milk mixture to the butter mixture, and stir. Add the second half of the dry ingredients and mix until smooth. Split the batter into the prepared cake pans, and bake for about 25 minutes, or until you’ve had a successful toothpick test. Remove from the oven and allow the cakes to cool for about 5 minutes in their pans, then remove them onto a wire cooling rack and allow them to cool completely before icing them.

Frosting

Now it’s time for the icing. I will give full disclosure: Carmelle and Mac made the icing, iced the cake, and decorated while I was out… doing something… I can’t quite remember at the time. I advise rinsing out the bowl of your electric mixer and using that again. Cut the butter into smaller pieces and put them in the mixing bowl. Beat until it’s fluffy. Now add the powdered sugar one cup at a time (or 1/2 cup at a time once you’re getting closer to the right consistency), beating between each addition until combined. If it gets too stiff, you can add a little bit of milk (think 1 Tbl at a time) to get it back to the right consistency. Add the peppermint extract and enough green food coloring to get it to that pretty mint green color. Slowly add the chocolate pieces until it looks the way you’d like and, more importantly, there’s a good amount of chocolate.

Put the first cake on whatever you’re going to use to serve: a cake stand, a plate, etc. Using about 1/4 of the icing,  frost the top of the first layer. Place second cake one top of the first, and cover the whole dang thing with the rest of the icing. Carmelle pointed out that one of the beauties of this cake was that if little crumbs came off the cake and got in the icing, it didn’t really matter, because there were already little brown bits of chocolate in it. Mac used the extra chopped chocolate to make a lovely little design op top. Serve with candles and a glass of milk!