Tag: bread

Fresh Pasta with Pancetta, Leeks, & Breadcrumbs with Porcini Powder

Fresh Pasta with Breadcrumbs, Leeks, and Pancetta // Serious Crust by Annie Fassler

Fresh Pasta with Breadcrumbs, Leeks, and Pancetta // Serious Crust by Annie Fassler

Fresh Pasta with Breadcrumbs, Leeks, and Pancetta // Serious Crust by Annie Fassler

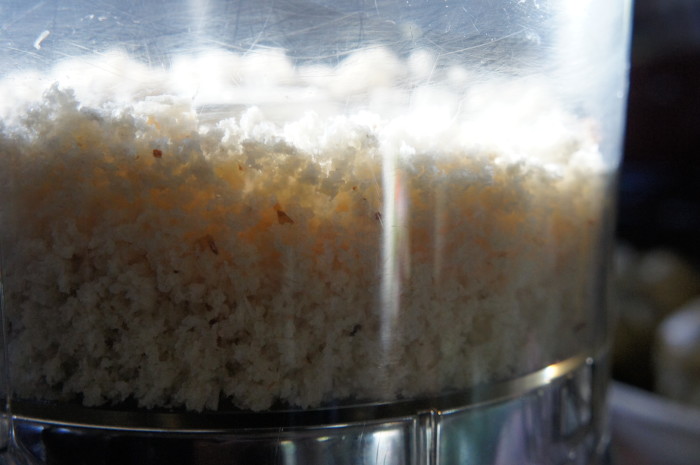
Porcini powder. Porcini powder? Yes. From the farmers market. I was told it was wonderful, and was given a little bag as a gift. But what to do with the stuff, that’s the question. I’m not sure I made the right choice… This pasta dish had so much going on in it that the porcini flavor was hiding. It was hiding behind the sourdough breadcrumbs and butter it had been sprinkled into, and under the pancetta it had been tossed with, and between the fresh pasta noodles it had been swirled around with.

All that being said, this dish was dang good, if I do say so myself. There were a few elements, and it took a few pans to get it all prepped. So no, this is not one of those magical one pot meals. Certainly not.

My dear friend Elsa was staying with us, and my friend Dylan came over for dinner, as well as Elsa’s friend Sarah, so we had help in manning all the pans. Tamar Adler said in The Everlasting Meal that there is value in, when a guest asks “is there anything I can do to help?” being able to say, “yes.” I have found that to be very true.

Think of this recipe as a guideline. Or a lightly painted upon canvas. You can remove, add, flavor, sprinkle, drizzle anything you like. I must say, though, that I used a different pasta recipe this time, and I liked it much better than the one I had been using. There’s something to be said for trying something new.
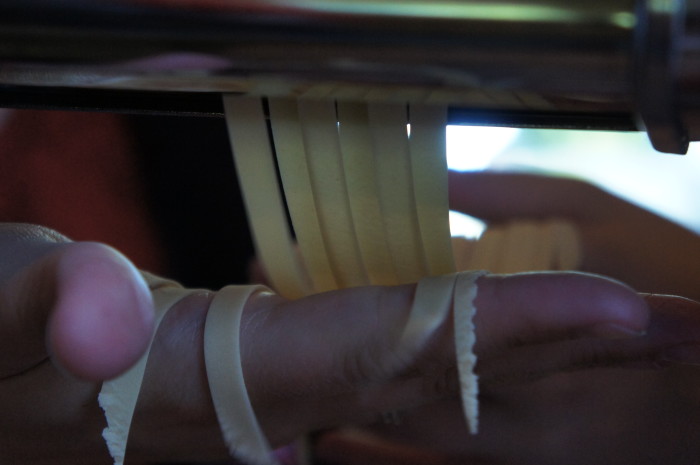
Fresh Pasta with Pancetta, Leeks, & Breadcrumbs with Porcini Powder

Ingredients

Fresh Pasta

2 cups all-purpose flour
3 eggs

Toppings

Olive oil
1 large or 2 small leek(s), sliced and rinsed
1 small white onion, chopped
2-3 cloves garlic, minced
Pancetta – the amount is up to you. I like the pancetta that is thin, almost like prosciutto, though that isn’t what we used here. I think if we’d used the thinner kind, it would’ve clung to the noodles better.
Fresh breadcrumbs
Butter
Porcini powder
Salt and pepper

Instructions

Fresh Pasta

To make the pasta, pulse the flour alone in a food processor a few times. In a bowl, beat the eggs and then add them to flour, and process until the dough forms a ball. If your dough is dry and looks like little pea sized pieces of dough, you can add water 1/2 tsp at a time. If it sticks to the bowl of the processor, add flour 1 Tbl at a time. When the dough has formed a ball, turn it out onto a floured work surface and knead for 1-2 minutes. Wrap the dough in saran wrap and set it aside for up to 2 hours to relax (at least 15 minutes). Then roll out the pasta as you usually do and cut it as you normally would.

Toppings

In a pan over medium (or medium low), cook your pancetta, then set aside on a plate with a paper towel on it. Once the pancetta is removed, you can use that same pan to sautée the leeks, onion, and garlic, seasoning lightly with salt and pepper. You may want to add a drizzle of olive oil to the pan to help keep things from sticking. But then again, maybe you won’t.

In another pan, melt some butter, then add the breadcrumbs and as much porcini powder as you feel like adding. Toast the breadcrumbs on low heat, stirring frequently to prevent burning.

As things are moving along, get out a big pot, fill it with water and a healthy serving of salt, and bring to a boil. Add the pasta (I like to cook fresh pasta in batches, as it makes it less likely to stick together). If you’re cooking fresh pasta, it really only needs to cook for a few minutes. I like to remove it when all the noodles are floating. Do you have a better method? I’d like to know it. If you’re cooking your pasta in batches, you can remove it with tongs into a colander to keep the water boiling on your stovetop.

Strain the pasta, put it in a bowl, and toss with all the various bits and pieces. Enjoy with a glass of buttery, nutty white wine and friends, around a table, on a sunny evening.

Beer Bread

This recipe is a bit famous in my family. And I wanted to be sure to share it with you while there is still Pumpkin Beer on the shelves because that’s my favorite kind of beer to use. We got this bread recipe from a friend of my sister’s from college, Graham. As soon as Emily introduced me to it, I was hooked. However, it’s not the healthiest (as you will see, you dump a melted stick of butter over the whole thing), so I try not to make it all too often. This specific one I made to take to the first rehearsal of a play I was just cast in. Baked goods always make a good first impression.

Beer Bread

Makes 1 loaf

Ingredients

3 cups of flour
3 tsp baking powder
1 tsp salt
1/4 cup sugar
1 can/bottle of beer (12 oz) – Having made this a few times, here is my take on what beer to use: Nothing too dark or hoppy, it gives the bread kind of a funny aftertaste. Seasonal beers are nice (think pumpkin ale or christmas beers), as are more fruity beers (back when the only beer I liked was apricot hefeweizen, that worked well), and anything on the lighter side. But I would steer clear of IPAs and reds.
1 stick of butter, melted

Instructions

Preheat your oven to 375 degrees. Mix dry ingredients in a bowl. Add beer, stir to combine. Grease a bread pan, and dump the dough into it. Warning: the dough will be sticky. Put the bread pan on a rimmed baking sheet – this is important as you won’t want the butter to seep over and just end up in the bottom of your oven. In a small bowl, melt the stick of butter in the microwave. Pour the melted butter over the dough in the bread pan. Bake for 1 hour, turning halfway through.

Remove the bread from the oven, run a knife around the edge of the pan, and turn out onto a cooling rack to cool. This bread is pretty crumbly, so good luck getting it to stay in one piece when you slice it. But it’s so worth it. Enjoy!

Another Easy Bread Recipe

Bread
Bread

Bread

It has been so long since I’ve posted. I’m so sorry. It’s been a little busy around here! Here’s what I’ve been up to: applying for a new job, getting a new job (doing social media for a local nutritionist), going to a big scary audition (and a big scary callback, with another one tomorrow night), and having Jonah’s mom and sister in town!

I know, excuses excuses! But hopefully this post is me getting back in the saddle. So this is another venture into the world of bread. I promised myself that I would finally make a starter, but of course, I didn’t because we’ve been so busy. Maybe next week? Or something?

Anyway, this bread is easy. Easier than all the other breads. No kneading, no let it rise, beat it down, let it rise again, do all this fancy stuff. Put everything in a bowl, let it rise, split it up, let it sit again for a bit, then bake. Can it get any easier? I’m gonna go with…not really.

No Knead Bread

Makes 2 loaves

Note: I didn’t want 3 loaves of bread, so I made 2/3 of the recipe. I’ll give you the full recipe though, and you can decide how much you want to make! I’ll put the amounts I did for 2/3 of the recipe in parentheses.

Ingredients

3 cups lukewarm water (2 cups)
1 1/2 Tbl granulated yeast (1 Tbl)
1 1/2 Tbl kosher or other course salt (1 Tbl)
6 1/2 cups unbleached all purpose flour (4 1/3 cups)
a handful of cornmeal for the pan

Instructions

Ok, put the yeast, flour, and salt in a bowl (I used my electric mixer with the dough hook). Pour the water over the dry ingredients and mix until it’s combined, a few minutes. Now cover your mixing bowl with foil or oiled plastic wrap and let it rise for 2-5 hours (I went with 5 because I was out doing stuff all day).

Now, cover your counter with PLENTY of flour. The dough is crazy sticky and wet, so be prepared for that. Dump it out onto the counter and separate the dough into however many loaves you’re making (original recipe: 3, my recipe: 2). Spread your handful of cornmeal over you baking sheet. Using lots of flour, form the dough into balls and place them on the baking sheet. The easiest way to form the balls is to pull the edges of the dough and tuck them underneath. Hopefully that makes sense. Once they’re on the baking sheet, you can let them rest for 30 minutes.

About halfway through the resting process, preheat your oven to 450 degrees. Once they’re done resting, slash your loaves with 3-4 lines. You can do whatever design you like, as long as you do something! The slashes allow the loaves to expand while they’re baking in a kind of designated way rather than just exploding however they want. When your oven is heated, put the loaves in! On a lower rack, put a pan filled with about 1 cup of water. This will create steam which will make the crust crispier. Bake the bread for 30-35 minutes.

After removing the bread from the oven, put it on a wire rack to cool. Try to let it cool all the way before cutting a slice, slather it in butter, and chowing down. Enjoy!

Bread, again, but different

Bread

Bread
Bread

Bread

Bread

Jonah and I keep a little white board in our apartment next to our refrigerator where we write all kinds of things: items to get at the grocery store, tasks to do (such as getting a watch so we can time our couch-to-5k runs which we’ve just started), occasionally notes to each other, and there are also little magnets so we can put checks to be deposited and notes from our bosses, etc. It’s really a handy little space near the door to remind us of all the little things we need to do.

Anyway, on Monday, Jonah wrote a little grocery list on the board before he went into work. Upon seeing that bread was on the list and I hadn’t baked anything in a couple days and hadn’t made bread in quite some time, I decided to make some instead of just buying some. I had found this incredibly easy looking recipe over at Joy the Baker and had been waiting to try it. I think it’s my last “super easy” recipe before I try making my own sourdough starter. So keep an eye out. The other great thing about the recipe was that it only called for bread flour, and I’m still trying to use up that giant bag, so it was perfect. You’ll only need 4 ingredients, one of which is water, so really, only 3.

This bread is delicious with just some butter, toasted with butter and jam. Jonah said it also made a delicious PB+J. And I’m about to go try using it for a grilled cheese. This bread was so supremely simple to make, I think everyone should try it. It’s great for a beginner recipe that still has some of that crispy crust. Enjoy!

Simple Bread

Makes 2 loaves

Ingredients

4 cups bread flour
2 tsp salt
2 tsp active dry yeast
1 1/2 cups warm water

Instructions

Put 3 3/4 cups of the flour into a mixing bowl (electric mixer would be nice). Reserve the other 1/4 cup of the flour for kneading/incorporating later. On one side of the pile of flour in your mixing bowl, put the salt, and on the other side, put the yeast. Not sure why this is so important as everything is about to get mixed together, but whatever. Now pour the water over the flour and mix it until it just comes together (I started with the paddle attachment and then switched to the dough hook once the dough had come together).

Once the dough comes together and you switch to a dough hook, put your mixer on a medium speed and let it knead the dough for 2 minutes. The dough should easily clear the sides of the bowl but stick to the bottom a little bit. If you feel the need, you can add a little flour or water depending on the status of your dough, but mine was pretty spot on, so I didn’t want to mess with it. After mixing it for 2 minutes, let it rest for 5 minutes. After the 5 minute rest, mix it again for 3 minutes. At this point you can flour your counter (with that 1/4 cup of bread flour you reserved) and dump the dough out.

Now you can hand-knead the dough, incorporating the 1/4 cup of the flour reserved. You may not need to incorporate the whole 1/4 cup. I’d say I got about 1/8 cup into the dough, and then stopped. This was the first time in my bread-making experience that I felt like I could tell by the feel of the dough when it was ready. Right when I dumped it onto the counter, it was not as dense as my other doughs have been; instead it was light and easy to work with. I didn’t want to push it, so when it stopped taking the extra flour in, I stopped adding. When the dough seems smooth enough, form it into a ball, lightly oil a bowl (I just used the same mixing bowl) and put the dough in, turning to coat the dough with oil. Cover the bowl with plastic wrap and a dish towel, and let rest for 1 1/2 hours.

After the 1 1/2 hours, the dough should have about doubled in size. Remove the dough from the bowl, punch it down, and reform it into a ball, replace it in the bowl and cover it, letting it rise for another half hour.

After this second shorter rest, remove the dough from the bowl onto a lightly floured surface (I just never cleaned my counter till the bread was in the oven) and cut it into two pieces. Form each lump into a smooth and round ball. The best way to do this is to just keep grabbing the edges of the dough and tucking them underneath. Eventually you’ll have a tight, smooth ball. Cover the two balls of dough with a damp cloth and let them rest on the lightly floured surface (aka counter) for 45 minutes to an hour.

Towards the end of this resting period, you can preheat your oven to 450 degrees. Make sure your rack is in the bottom half of your oven because the bread will rise. And put another rack below it. Put a baking sheet (or baking stone if that’s what you’re using) in the oven while it’s heating so it gets hot. Uncover your balls of dough, and slash the tops with 2-4 slashes to guide the expansion of the bread while it’s baking. When your oven is heated, take out the hot baking sheet and carefully put the dough on it, and put it in the oven.

Now it’s time for the steam. A couple minutes after you put the bread in the oven, you can dump 1/4 cup of water onto the oven floor (if you have an electric oven) and immediately close the door, then repeat in a couple minutes. I wasn’t all about dumping water in my oven for some reason, so I did what I’d read in a previous recipe and put half a cup (so I didn’t have to open the oven again and let the heat escape) of water on another baking sheet and put it on the rack beneath the bread. It also works just fine and creates steam. the steam is what helps make the crust nice and crispy, I think.

Anyway, you’ll want to bake the loaves for 20-25 minutes. They’ll be a beautiful golden brown. It’s smart to throw a thermometer in there too, just to make sure. They should register between 190-210 degrees. Now, transfer them to a wire rack to cool (mine were still making crackling/baking noises for a couple minutes, it was kind of cool). Make sure they are completely cool before taking a slice, spreading on some butter, and enjoying.