Chocolate Crinkle Cookies

Chocolate Crinkle Cookies

Chocolate Crinkle Cookies

You’ll notice that this is my second chocolate cookie recipe within a week. I know, I know, why Annie? Why do you tempt yourself with these delicious chocolatey cookies? First, I can’t help it. Sometimes I just want something fudgy and gooey and crisp around the edges. Second, I don’t eat all of them myself. The first cookies (the salted chocolate cookies) were mostly consumed by a bunch of friends we had over, and the second cookies (the ones I’m about to tell you about) I brought to Jonah’s boss. We’ve started a little tradition that whenever I make cookies, Jonah takes some into work so that we don’t eat them all, and his coworkers are loving it. Jonah works at a great start-up company in Portland that does internet radio, and we may be hitting the airwaves ourselves soon with a food/cooking show. We’ll see what happens, but we’re talking about it. Thoughts?

Anyway, now onto some chocolate crinkle cookies. I wanted to make something that did not require me to buy anything since we have so much baking stuff in our apartment. So after some searching, I found this recipe on 17 and baking for these. Easy, delicious, and pretty. I halved the recipe because, well it supposedly yields 7 DOZEN COOKIES and let’s face it, we really didn’t need that many. So I’ll give you my miniature version.

Chocolate Crinkle Cookies

Makes 3 dozen cookies

Ingredients

1/2 cup unsweetened cocoa powder
1 cups granulated sugar
1/4 cup vegetable oil
2 eggs
1 tsp vanilla extract
1 cup all-purpose flour
1 tsp baking powder
1/4 tsp salt
1/4-1/3 cup confectioners’ sugar

Instructions
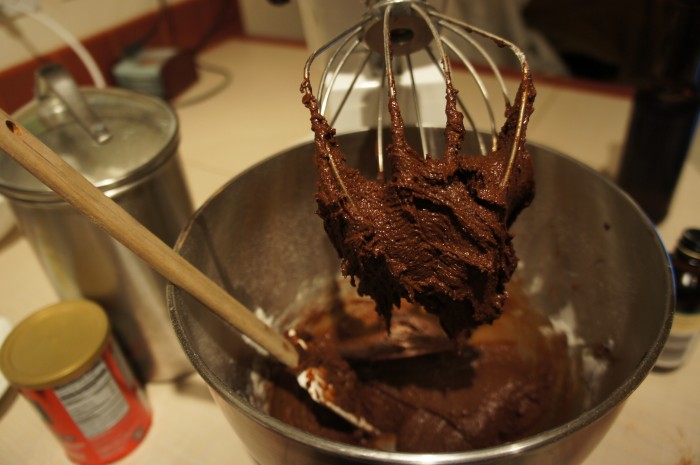
In a bowl (or in the bowl of your electric mixer, if you’re using one) combine the cocoa powder, sugar, and oil. Scrape down the sides, and add the eggs one at a time, mixing well between each addition. Add the vanilla. Now throw in the flour, baking powder, and salt and mix to combine. Cover the bowl and refrigerate for at least 4 hours. I let mine sit in the fridge overnight because I didn’t feel like starting the baking process at 11 p.m.

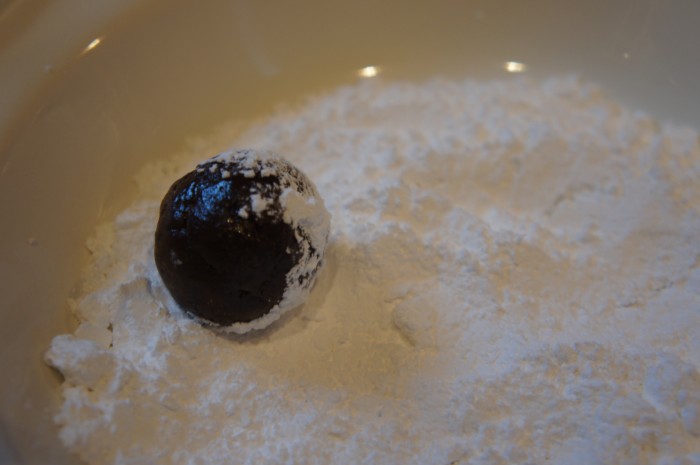
When you’re ready to bake the suckers, preheat your oven to 350 degrees, line a baking sheet with parchment paper, and pull out the cookie dough. Put the powdered sugar into a shallow bowl, and roll the dough into balls about 1 inch in diameter or about a rounded teaspoon. You’ll want to lightly oil your hands so the dough doesn’t stick to your palms when you’r rolling it. After making the balls of dough, roll them in powdered sugar to coat evenly, dusting off any extra, and put them on the cookie sheet at least an inch apart.

Now put them in the oven and bake for 10-12 minutes (mine were perfect at 11). Let them cool on the cookie sheet for a minute before moving them to a rack to cool completely. These cookies look like cookies you see in the magazine. They cracked beautifully and looked so pretty with the contrast of the white powdered sugar and the dark chocolate insides. Enjoy these treats with a glass of milk!

Mexican Bowls

Mexican Bowls

Mexican Bowls
Mexican Bowls

Mexican Bowls

The other night, dinner rolled around, and I was feeling incredibly lazy. Nothing that I could think of eating actually sounded good to me, so I put Jonah in charge. There’s a restaurant here in Portland called Por Que Non that has really good Mexican food. They have this dish called a Bryan’s Bowl that is just a bowl of delicious rice and beans and meat and cheese and guacamole and salsa and everything you could ever want in a little bowl. It’s incredibly good. So Jonah suggested making something like the Bryan’s Bowl, and I was not particularly optimistic, because usually when restaurants have something like that they have some secret delicious sauce they pour over it to make it so freaking good. And we didn’t. But…oh well. So he searched something or other on the internet and found this recipe for Cilantro Lime Rice to use as the base for our Mexican bowls. And man oh man, it made all the difference.

Mexican Rice Bowls

Ingredients

Cilantro Lime Rice

1 cup uncooked white rice
1 teaspoon butter
2 cloves garlic, minced
2 tsp plus 1 Tbl lime juice, freshly squeezed is highly preferred
1 15-oz can vegetable or chicken broth
1 cup water
2 tsp granulated sugar
4 Tbl fresh chopped cilantro

Mexican Rice Bowl

Cilantro Lime Rice
Black Beans
Chopped Red Onion
Chopped tomato (or salsa)
Chopped avocado (or guacamole)
Sour Cream
Hot sauce
Lime wedges
Chopped cilantro
Tortilla chips

Instructions

Cilantro Lime Rice

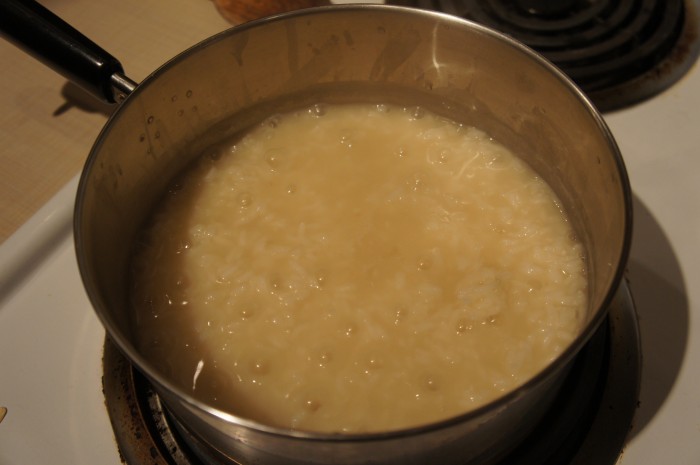
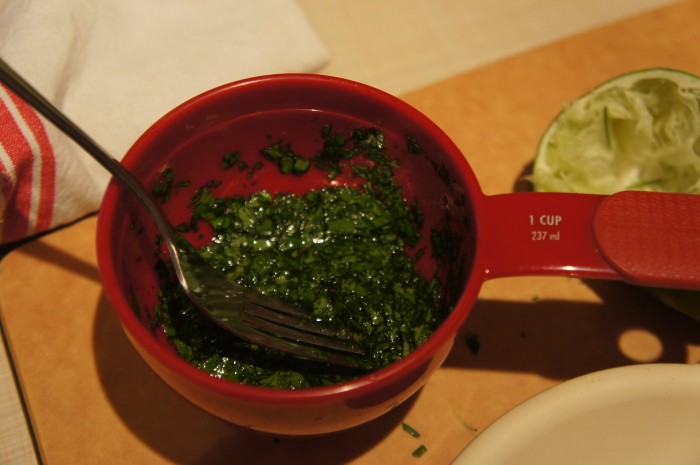
Let’s start with the rice. Put the rice, butter, garlic, 2 tsp of lime juice, broth, and water in a pan. Bring the contents to a boil, reduce the heat to low, and cover and cook the rice until it’s tender (about 15-20 minutes). While the rice is cooking, mix the leftover Tbl of lime juice with the sugar and cilantro. When the rice is done, remove it from the heat and stir in the cilantro/lime mixture.

Mexican Rice Bowl

While the rice is cooking you can also prep the rest of your ingredients for your bowl. We drained the beans and just heated them in the microwave, chopped the onions, and got out the salsa, guacamole, sour cream, cholula, and some tortilla chips.

Now it’s time to assemble your bowl. I did mine kind of like you would if it were the filling of a burrito, making even layers of all the ingredients I wanted. I also used my bowl as kind of a layered dip and ate it with tortilla chips for an added bit of crunch. Oh man. I may not have been in the mood for this meal at the beginning of the evening, but it really hit the spot! Enjoy!

Cheese Straws with a Bite

Cheese Straws with a Bite

Cheese Straws with a Bite

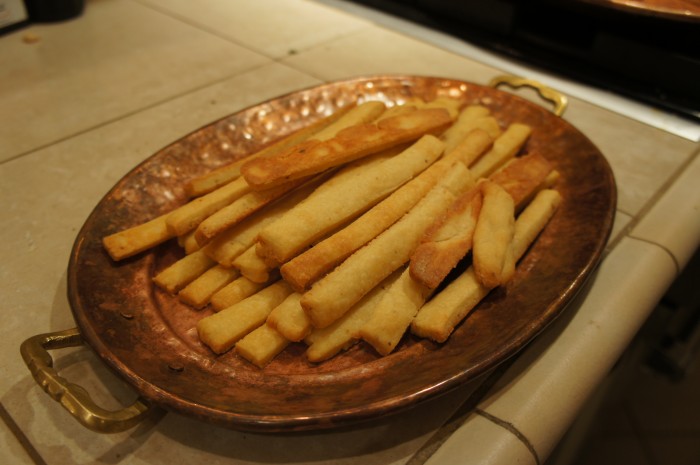
For some reason I’ve been in the mood to make some kind of cheesy snacking food lately, like crackers or something. So this weekend when I was up in Seattle, I took the opportunity to make these cheese straws from Smitten Kitchen. They are ridiculously easy and have quite a bite to them due to the red pepper flakes. If you don’t want to risk them being too spicy for you (or whoever else may be eating them), you can easily reduce the amount of red pepper flakes, but I thought it was quite delicious.

Cheese Straws

Ingredients

1 1/2 cups grated extra-sharp Cheddar cheese
4 tablespoons (1/2 a stick) unsalted butter, room temperature and cut into 4 pieces
3/4 cup flour, plus some for rolling out the dough
1/2 teaspoon salt
1/2 teaspoon crushed red pepper flakes
1 tablespoon milk or half-and-half

Instructions

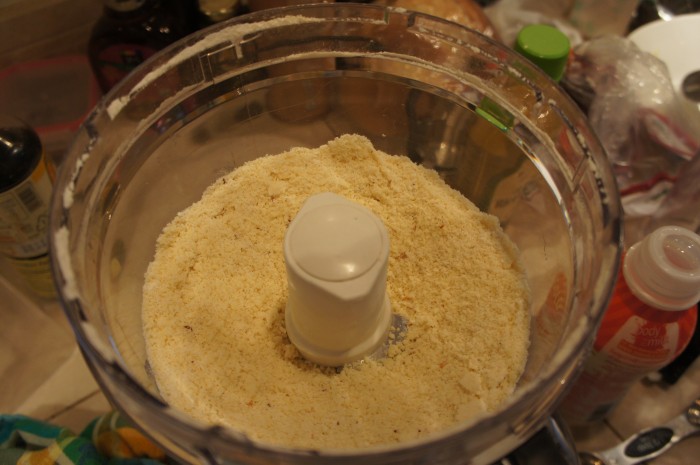
Preheat your oven to 350 degrees. In a food processor, pulse the cheese, butter, flour, salt, and pepper flakes. Pulse it until the mixture is in coarse crumbs.

Now add the milk until the dough comes together and forms a ball. Lightly flour a cutting board or your kitchen counter, dump the dough out, and roll it into as rectangular of a shape as possible and about 1/8 of an inch thick. With a sharp knife slice the dough into 1/4 inch – 1/3 inch strips. I left some edges ragged and trimmed others, I don’t think it really matters.

Now you can gently put the strips onto a cookie sheet (no need to grease it because of the butter). You want to leave a little space between them, but they don’t need much (1/4-1/2 an inch is plenty). The dough is fragile, so they might break, but don’t worry about it. The cheese straws can be any length really.

Bake them in the oven for 12 – 15 minutes (I think I baked mine closer to 15, I like the ends nice and brown). Remove them from the oven, allow to cool for a minute or two on the baking sheet, and then transfer to a cooling rack.

Good luck keeping these around for long. They were gone pretty quickly. They’re perfectly crispy and cheesy with a bit of spice… Mm! I love them. Enjoy!

Salted Chocolate Cookies

Salted Chocolate Cookies

Salted Chocolate Cookies

Salted Chocolate Cookies

If you are into salt, and want to venture into the world of fancy salt, a good start is Maldon. This salt is the saltiest, crunchiest salt I’ve tasted, and made from the sea! Anyway, as I’ve mentioned before, there are members of my family who are in love with salt. So when my dad came across a recipe for salted chocolate cookies, we decided we had to make them the next time we were together, which happened to be this past weekend. I mean, come on, the recipe even calls for Maldon.

Another wonderful thing that comes from this recipe is the discovery of the wonderful blog Orangette. I knew I would like this blog immediately for 2 reasons: 1) the salted chocolate cookies you will see below. 2) it is written by Molly Wizenberg, one of the founders of Delancey in Seattle. If you live in Seattle, I recommend that you immediately stop reading this blog, get in your car, and go to Delancey. Delicious salads, delicate and scrumptious pizzas, and lovely desserts. It’s ok, the blog will be here when you get back. Just go.

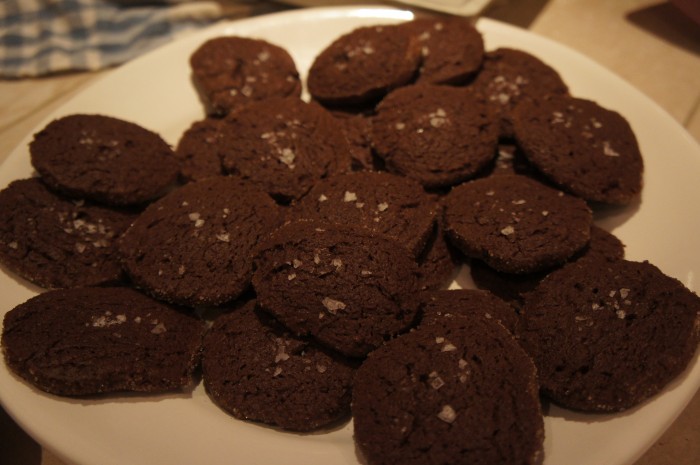
Now that you’re back, let’s continue. So these cookies are rich and light at the same time, and I am recently of the impression that salt makes everything better, so it’s a good sign that they’re decorated with fancy salt. Right?

Salted Chocolate Cookies

Makes 5 dozen cookies

Ingredients

8 ounces bittersweet chocolate, coarsely chopped
1 ¼ cups all-purpose flour
½ cup plus 2 Tbl unsweetened cocoa powder
2 tsp baking powder
8 Tbl (1 stick) unsalted butter, at room temperature
1 cup plus 2 Tbl sugar, plus more for rolling the logs
2 large eggs
¼ tsp table salt
1 tsp vanilla extract
1/3 cup whole milk
Maldon salt, for finishing

Instructions

First thing you’ll need to do is melt your chocolate. After you’ve cut it up, put it in a heatproof bowl that will fit securely on a small saucepan you’ve got. Put about 2 inches of water in the saucepan, bring it to a simmer, and put the bowl of chocolate on the pan. The bowl shouldn’t be touching the water, just getting the steam. You also want to make sure that no moisture gets into the chocolate as this will make it seize, which isn’t really good for anyone. Anyway, heat the chocolate and stir it occasionally until it is melty and smooth. Remove it from the heat (carefully, the bowl will be hot) and set it aside to cool.

Now, in a medium mixing bowl (not your electric mixer, mind you, if you’re planning on using one), combine the flour, cocoa, and baking powder. Set aside. In your electric mixer, beat the butter on a medium speed until it’s nice and creamy. Slowly pour in the sugar (perhaps even while the mixer is going, just be careful not to get sugar everywhere), and continue to mix until the butter/sugar mixture is smooth and soft. Now add the eggs one at a time, mixing well to incorporate after each one. Add the salt and vanilla, and, making sure it’s cool (you don’t want it to cook the eggs), the melted chocolate. Beat to incorporate all of these things into one beautiful mixture.

Now beat in the milk, and lastly, the flour mixture. Beat on low speed until it’s just incorporated. Here’s a little note about electric mixers: sometimes I turn mine up higher to fling off the stuff stuck on the paddle or whisk and get it mixed in. I should not do this unless the recipe I’m following specifically tells me to turn the mixer up high. Why? Because by doing this, I’m adding air to the dough/batter, which can make the cookies (or whatever I’m making) a different texture than they were intended to be. So now you know.

Now comes a fun/weird part. Dampen a counter and lay out a big piece of plastic wrap (dampening it – wiping it with a wet sponge – will help keep the plastic wrap in place while you work) and dump 1/2 or 1/3 of your dough onto it. Now you’re going to have to mush and mold and roll the dough using the plastic wrap to shape a log. The size of the log totally depends on how big you want your cookies to be. Mine was probably about 1 1/2 inches in diameter. Anyway, after you’ve smooshed it into a good log, you can wrap it up in the plastic wrap, twist up the ends, and stick it in your fridge to chill overnight.

When you’re ready to make some freaking cookies, preheat your oven to 350 degrees, and line a baking sheet with parchment paper. Also, remove your dough from the fridge. You’ll need that. Now, the recipe says to put parchment paper on your work surface, make a pile of sugar on it, and roll the dough in it. That did not work for me, though I did try. It probably would have worked better to put a cup of sugar in a shallow bowl and dunk the logs in that, but because I already had sugar all over my work surface (I also just used a cutting board instead of more parchment paper), I just decided to sprinkle sugar over the logs. Anyway, however you do it, coat your dough logs with sugar, and then slice them with a sharp knife into 1/4-1/3 inch slices. Put the cookies on the cookie sheet about an inch apart, and sprinkle each cookie with some Maldon salt. Note: the amount of salt we put on the cookies increased with each batch because we love the stuff so much.

Bake the cookies for about 10 minutes. The cookies should still feel soft to the touch, but look set. After allowing them to cool on the sheet for a minute, transfer them to a wire rack to cool. This recipe made SO MANY COOKIES. Seriously. Like… 5 or 6 dozen. And they are hard to stop eating, so be warned. Make them for a party or a gathering or something.

Chicken Pot Pie

Chicken Pot Pie

Chicken Pot Pie
Chicken Pot Pie

Chicken Pot Pie

I will tell you that while I write this, we are at Jonah’s office recording a cover of The Counting Crows’ “St. Robinson in his Cadillac Dream.” I discovered today that the band is holding a cover contest and if you place in the top three you win 1) a signed guitar, 2) $600 to Guitar Center, and 3) a spot on an EP that they’re distributing to fans, etc. By the time this is published, we will be long finished, but for now, we’re working away. We discovered the contest about 24 hours before the deadline, so we’ve recruited our singer/musician friend Jon to help us create an a cappella infused cover. It’s currently just after 1 am, and one of us (me or Jonah) has to wake up at quarter to 7 tomorrow morning to drive the kids to school, and then we both have to go on our couch-to-5k run… We may have bitten off more than we can chew, but by golly we’re gonna get something in for this contest!

Now onto the food. Yesterday I wanted to make dinner. I wanted to make a dinner that was delicious and wintery, not too difficult, but a little bit impressive. After browsing a few recipes, I settled on Chicken Pot Pie. Relatively easy, but impressive because, you know, it’s a pie. I didn’t use a particular recipe, and also instead of making it in a pie dish, I made it in two little ramekins, so Jonah and I each had our own little servings. Which was cute. So I’m gonna give you the measurements I used, but I suggest doubling it if you’re looking to feed more than 2 people (though we did have leftovers).

Chicken Pot Pie

Makes 2 personal pies

Ingredients

Pie Dough

2 cups flour
1 tsp salt
1/2 cup cold butter
1/2 cup cold shortening
3-5 Tbl of ice water

Chicken Filling

1 boneless skinless chicken breast
1 cup chicken broth
2 tsp vegetable oil
1 small onion, chopped fine
2 carrots, peeled and sliced 1/4 inch thick
2 stalks of celery, washed and sliced 1/4 inch thick
salt and pepper
2 Tbl butter
1/4 cup all-purpose flour
3/4 cup milk
1/2 tsp dried thyme
1/2 cup frozen peas, thawed

Instructions

Pie Dough

Start by making the pie dough, which you can find a recipe for here.

Chicken Filling

Start by putting the chicken and broth in a saucepan and bringing it to a nice simmer. Cook it until the chicken is tender and cooked through. Transfer the chicken to a mixing bowl, and strain the broth into a measuring cup or some other vessel. Don’t bother washing the pot, you’ll reuse it a bunch of times. Heat your oven to 400 degrees.

Heat the oil in the pot and when it’s nice and hot add the onion, carrots, celery, and about 1/8 tsp each of salt and pepper. Cook the veggies till they’re mostly softened (covering them while they cook helps with this by adding some steam). While the veggies cook, take a couple forks or a fork and knife and shred the chicken into bite-size pieces. When the vegetables are done cooking, add them to the bowl with the chicken.

Remove your pie dough from the fridge so it can start warming up. In that same dang pot, melt the butter over medium heat. Then add the flour and stir it up. You’ll have some clumps, but don’t worry about it. After cooking your clumps for a little bit, throw in most of the reserved chicken broth (I probably did about half of it, maybe 3/4), the milk, and the thyme. Whisk it up so the clumps dissolve, and cook it until the sauce thickens. Remove from the heat, and stir in the chicken/veggie mixture, the peas, and season it with salt and pepper to taste.

Now you can roll out your dough. Because we were doing the little ramekins, I split each disc of pie two in two and rolled each half out, laying it gently in the dish and making sure there were no pockets of air in the sides or bottom. Once both had their bottom crust in, I split the filling between the two dishes. Then roll out the second disc (again split in two) and cover the pies, trim the excess dough, and form an edge. Put the ramekins on a baking sheet (foil lined if you so wish), and put them in the oven for 30 minutes, or until the crust is golden brown.

Allow them to cool for at least 10 minutes before digging in and enjoying!