Easy Peasy Cranberry Scones

Cranberry Scones

Cranberry Scones
Cranberry Scones

The other morning, before Jonah went to work, I decided to whip up some cranberry scones. There is no better way to start your day than with a fresh, warm, baked good. I found an easy recipe on Martha’s website (marthastewart.com) that didn’t require me to go out and buy anything, so it’s the one I went with in the end. Although, I’ll tell you it did call for fresh cranberries, but I substituted dried because it’s what I had.

Cranberry Scones

Makes 8 scones

Ingredients

2 cups all-purpose flour, plus more rolling out
5 Tbl sugar, plus 1 tablespoon for sprinkling atop
1 Tbl baking powder
1/2 tsp salt
6 Tbl chilled unsalted butter, cut into pieces
2/3 cup, plus 1 tablespoon milk or half-and-half
1/2 cup cranberries (halved if fresh, or dried)

Instructions

Preheat your oven to 425 degrees. I used my food processor, and combine flour, 5 Tbl sugar, baking powder, and salt. Add in the butter and pulse until you’ve got coarse crumbs. Now pour in 2/3 cup milk and pulse again until the dough comes together.

At this point, I dumped my dough out onto a floured surface and folded in the cranberries by hand by throwing them on top in a pile and then kneading the dough a few times. Now pat the dough into a 1-inch-thick disc. Cut the disc into 8 wedges and put the wedges on a baking sheet a couple of inches apart. Brush the tops of the scones with the remaining milk and sprinkle with the remaining sugar. Bake them for 12-15 minutes or golden brown.

After removing the scones from the oven, transfer them to a wire rack to cool. But don’t wait too long to eat them! These are best warm with some butter, jam, and accompanied by a nice mug of tea. Enjoy!

Another Easy Bread Recipe

Bread
Bread

Bread

It has been so long since I’ve posted. I’m so sorry. It’s been a little busy around here! Here’s what I’ve been up to: applying for a new job, getting a new job (doing social media for a local nutritionist), going to a big scary audition (and a big scary callback, with another one tomorrow night), and having Jonah’s mom and sister in town!

I know, excuses excuses! But hopefully this post is me getting back in the saddle. So this is another venture into the world of bread. I promised myself that I would finally make a starter, but of course, I didn’t because we’ve been so busy. Maybe next week? Or something?

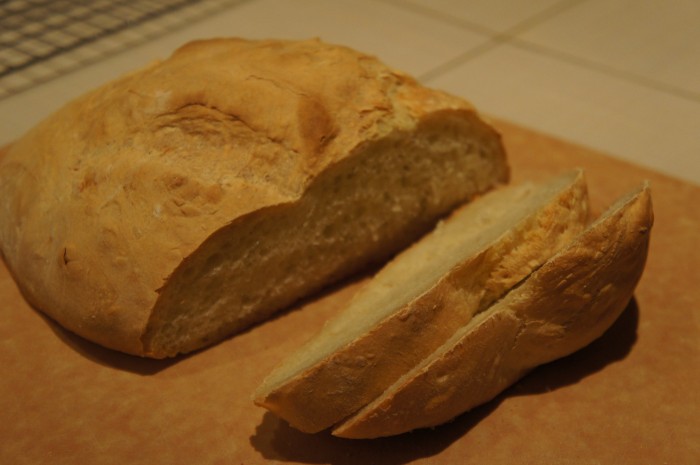
Anyway, this bread is easy. Easier than all the other breads. No kneading, no let it rise, beat it down, let it rise again, do all this fancy stuff. Put everything in a bowl, let it rise, split it up, let it sit again for a bit, then bake. Can it get any easier? I’m gonna go with…not really.

No Knead Bread

Makes 2 loaves

Note: I didn’t want 3 loaves of bread, so I made 2/3 of the recipe. I’ll give you the full recipe though, and you can decide how much you want to make! I’ll put the amounts I did for 2/3 of the recipe in parentheses.

Ingredients

3 cups lukewarm water (2 cups)
1 1/2 Tbl granulated yeast (1 Tbl)
1 1/2 Tbl kosher or other course salt (1 Tbl)
6 1/2 cups unbleached all purpose flour (4 1/3 cups)
a handful of cornmeal for the pan

Instructions

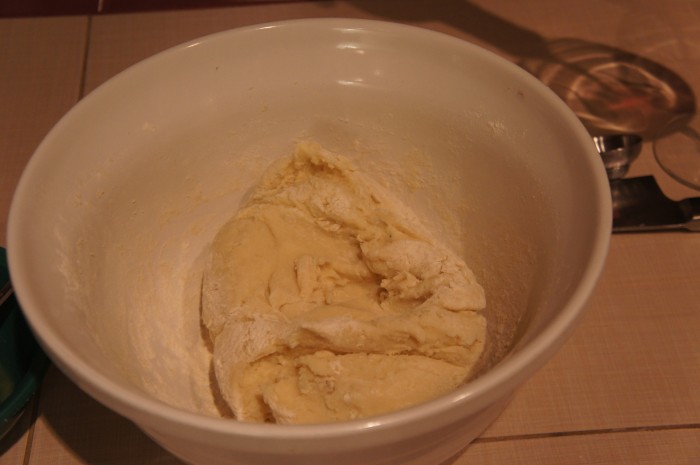
Ok, put the yeast, flour, and salt in a bowl (I used my electric mixer with the dough hook). Pour the water over the dry ingredients and mix until it’s combined, a few minutes. Now cover your mixing bowl with foil or oiled plastic wrap and let it rise for 2-5 hours (I went with 5 because I was out doing stuff all day).

Now, cover your counter with PLENTY of flour. The dough is crazy sticky and wet, so be prepared for that. Dump it out onto the counter and separate the dough into however many loaves you’re making (original recipe: 3, my recipe: 2). Spread your handful of cornmeal over you baking sheet. Using lots of flour, form the dough into balls and place them on the baking sheet. The easiest way to form the balls is to pull the edges of the dough and tuck them underneath. Hopefully that makes sense. Once they’re on the baking sheet, you can let them rest for 30 minutes.

About halfway through the resting process, preheat your oven to 450 degrees. Once they’re done resting, slash your loaves with 3-4 lines. You can do whatever design you like, as long as you do something! The slashes allow the loaves to expand while they’re baking in a kind of designated way rather than just exploding however they want. When your oven is heated, put the loaves in! On a lower rack, put a pan filled with about 1 cup of water. This will create steam which will make the crust crispier. Bake the bread for 30-35 minutes.

After removing the bread from the oven, put it on a wire rack to cool. Try to let it cool all the way before cutting a slice, slather it in butter, and chowing down. Enjoy!

Gnocchi with Spicy Tomato Sauce

Gnocchi
Gnocchi
Gnocchi
Gnocchi
Gnocchi
Gnocchi
Gnocchi

I’ve been lusting after the pasta attachments for my KitchenAid. Dreaming of them, of all the beautiful pasta I would make if I had them. Oh man. I want them so badly. But I don’t have them. And I probably won’t for a while. But I want to make pasta, so I after eyeing a few gnocchi recipes, I thought, hell, I’ll try it.

This may not have been my best decision ever. I mean, you have to start somewhere, right? But I decided to do it when we had a friend coming for dinner. But she was supportive of my endeavors. After reading many recipes and such about how to handle your potatoes and how much flour and egg to add, onward I went. One important thing is you don’t want to put your potatoes in a food processor or use an immersion blender or anything like that. You want to put it through a ricer or a grater or mash it with a fork. I chose the last route.

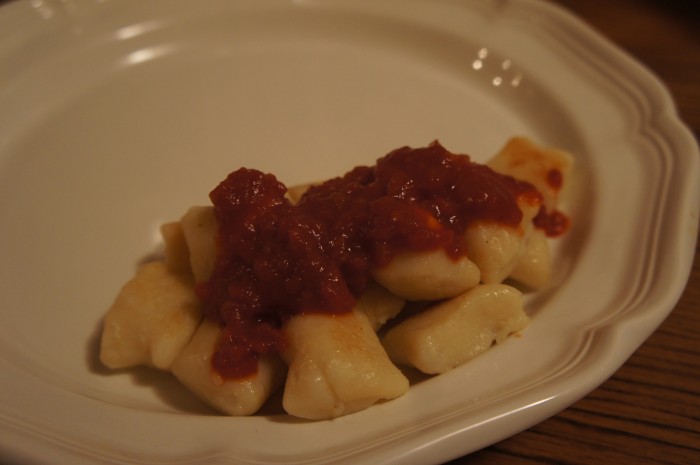
These gnocchi were pretty good for a first try. As I mentioned before, I think they were a little over-cooked. They also were a little dense, and I’m not sure why. There are a few possible explanations: 1) boiling them instead of roasting them? 2) added to much flour? 3) added too much egg? Who knows, but all of these are variables I plan on futzing with the next time around.

Potato Gnocchi and Spicy Tomato Sauce

Ingredients

Potato Gnocchi

2 lbs russet potatoes
1 tsp salt
1 egg, slightly beaten
1 1/2 cups flour, plus some for rolling/dusting

Spicy Tomato Sauce

1 tsp butter
2-3 large shallots
1/2 tsp red pepper flakes
1 tsp salt
1 28-oz can whole tomatoes, drained
1 15-oz can tomato puree/sauce
a pinch (or two) of sugar

Instructions

Potato Gnocchi

Cut your potatoes in half and put them in a pot of water. Bring the pot to a boil and cook until the potatoes are tender throughout. This will take about 40-50 minutes. When the potatoes are cooked, remove each half one at a time onto a cutting board and peel each piece before you move onto the next. Be careful as they’ll be very hot! But the skins come off pretty easy, and if not, just use a paring knife. Once all the potatoes are removed and peeled, mash them. I used a fork so that I could be more thorough and make sure there weren’t any big clumps. Anyway, mash the potatoes and spread them out on the cutting board so that they can cool.

Once cool, put the potatoes in a bowl, add the egg and salt and mix together. Now add the flour a little bit at a time (I probably did 1/4 cup at a time) and mix it in. You don’t have to add all the flour. In fact, it’s probably better if you don’t (I don’t know this for a fact) because I assume the gnocchi will be less dense when cooked. Just add flour until the dough doesn’t stick to your hands anymore. Now dump the dough onto a lightly floured surface (read: counter) and knead it gently for a few minutes, incorporating more flour if necessary.

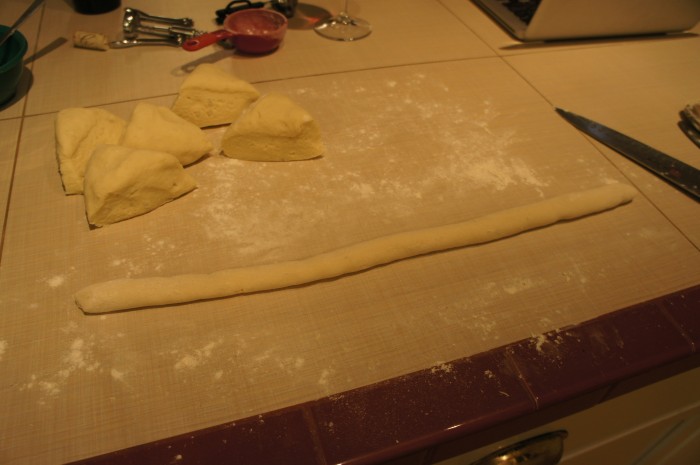
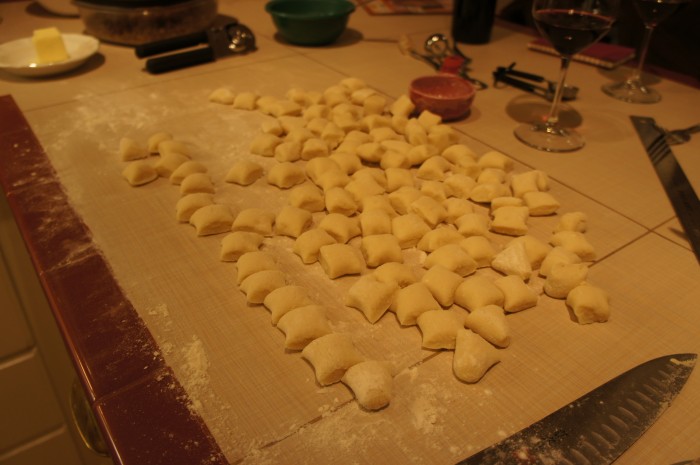
After kneading, divide the dough into 6 equal parts, and roll each chunk one at a time into a rope about 3/4 inch thick. Cut each rope into 1 inch pieces. You’ll want to be sure to do this on a floured surface, as the rolling and cutting especially can result in the dough stick to the counter, which makes it hard to…ya know…remove them.

While you’re rolling out your dough, you can bring a large pot of salted water to a boil. When it’s boiling, add the gnocchi in batches. I made the mistake of putting all of mine in at once and I think this caused the ones that were put in at the beginning. So do it in batches. After a little bit, your gnocchi will rise to the top of the pot. Let them cook for another minute after they do that, and then remove them with a slotted spoon to a bowl or colander or whatever. Do the same with the rest of the gnocchi.

I also decided to cook them in a pan after boiling them for 2 reasons: 1) they were pretty mushy and I wanted to dry them out a bit, and I knew this would help. 2) I love gnocchi that has that little bit of crunch from being lightly seared in a pan of butter. Yum. So if you want to do that, melt a bit of butter in a pan and cook the gnocchi in batches until it’s lightly browned on each side.

Spicy Tomato Sauce

Be warned, this pasta sauce has quite a bite to it from the chili flakes. I thought it was a perfect amount of spiciness, but if you are nervous about it, add less than 1/2 a tsp and add more till it suits your tastebuds.

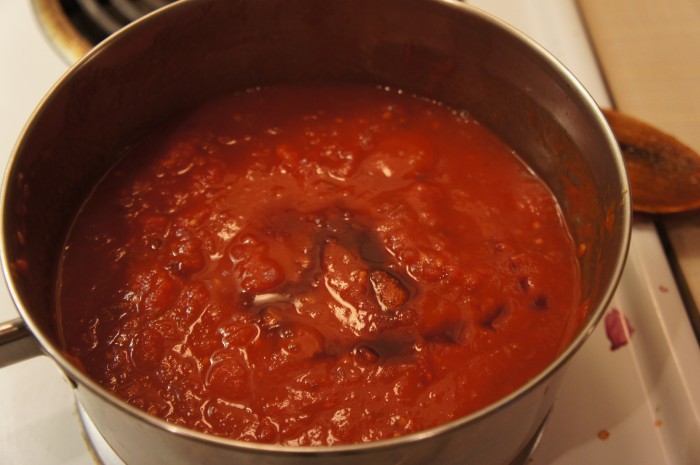
Melt the butter in a saucepan. Add the shallots, pepper flakes, and salt. Cook until the shallots are translucent and beginning to brown. At this point, add the wine and let it cook down. Now add the whole tomatoes and tomato puree, breaking the whole tomatoes up with a wooden spoon as they cook. Taste the sauce, and if it’s a little too spicy, add some sugar (a little bit at a time) and perhaps some wine. Allow the sauce to cook down until it’s the right consistency and put it atop your favorite pasta (or perhaps the gnocchi you just made).

Granola by Orangette

Granola
Granola

Granola

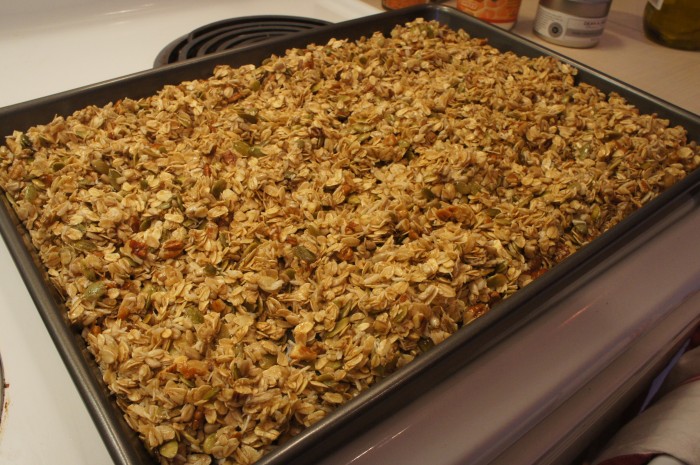
I am a big fan of homemade granola. I used to not like granola very much. The stuff you buy in the paper bags at the store was just too hard and crunchy for me, and I didn’t like not knowing what all the seeds and dried fruits in it were. This all changed when I had a roommate for a summer who made her own granola. The stuff used to make our entire house smell like heaven for days. It was amazing. So then I started using her secret recipe (secret being the operative word here, otherwise it would be on the blog, trust me) to make my own as well. I added some flax seeds here and some raisins there, and before I knew it, I became a lover of granola.

Remember those salted chocolate cookies I made last week? Well on the same blog, the post before those cookies is a recipe for Olive Oil and Maple Granola. That sounds…um…heavenly. Right? Am I right? You will, especially after I tell you the ingredients. Anyway, so I decided to make it. I love having granola around, it’s another quick alternative to cereal (try this granola with some Greek yogurt and slices of banana).

Olive Oil & Maple Granola

Ingredients

3 cups rolled oats
1 cup raw hulled pumpkin seeds
1 cup raw hulled sunflower seeds
1 cup unsweetened coconut chips
1 1/4 cups raw pecans, whole or chopped
1/2 cup packed light brown sugar
1 tsp kosher salt
3/4 cup maple syrup
1/2 cup olive oil (plus some for coating the pan)

Instructions

Preheat the oven to 300 degrees. Prepare a baking sheet by spraying it with baking oil or just pouring on a little olive oil and spreading it around.

In a bowl, combine the oats, pumpkin seeds, sunflower seeds, coconut chips, pecans, light brown sugar, and salt, and mix it all up.  Add the olive oil and maple syrup, and stir until the dry ingredients are evenly and well-coated.

Spread the oat mixture onto your baking pan in one even layer. Put it in the oven and bake for 45 minutes, stirring around every 15 minutes. When it’s done, the granola will be golden brown and toasted. Take it out of the oven (add more salt if you want to, but do a taste check first), and set the pan on a wire rack to cool. If you want to stir in any dried fruit – think cherries, raisins, or cranberries – now’s the time.

The granola will store well in an airtight container. It’s delicious, perfectly sweet, and nutty – try not to eat it too quickly. One great thing about this recipe is that it makes about 7 cups, so plenty of granola to last you at least a couple weeks. Enjoy with some rich greek yogurt!

Asparagus Salad with Prosciutto and Poached Eggs

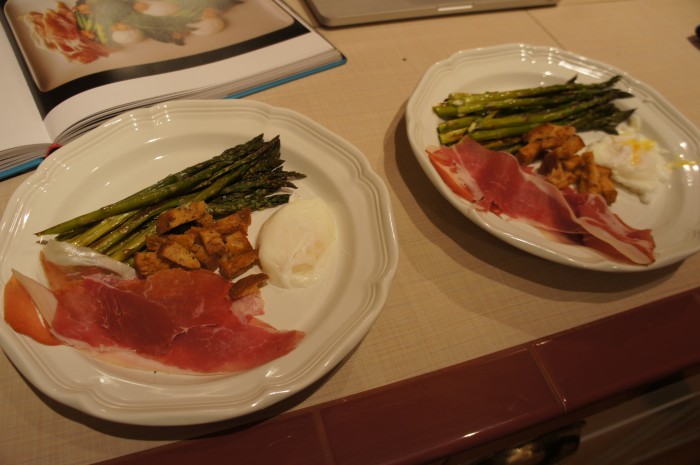
Asparagus salad with croutons, prosciutto, and poached eggs

Asparagus salad with croutons, prosciutto, and poached eggs

In the Ad Hoc cookbook (by Thomas Keller), there’s this delicious looking asparagus salad with croutons, prosciutto, and poached eggs. Sounds good, right? I don’t know about you, but I love all of those things. Jonah and I were in the mood for a light dinner, so we decided to make it the other night. The only problem? Neither of us had ever poached an egg before. It’s one of those things, like baking with yeast, that scared me even though it’s probably not actually that hard.

But I did it! And you can do it! I did! My first attempt was much more successful than my second attempt. After having some little egg bits in the pot from the first egg and then swishing it all around to create my whirlpool, the visibility was not so good, so I had trouble telling where my egg was in it’s cooking process. And then it broke when I removed it. Don’t worry, I made Jonah eat that one. Hahaha.

Fall Salad with Poached Eggs, Asparagus, and Proscuitto

Ingredients

2 eggs
1 bunch asparagus
olive oil
salt
8 slices of prosciutto
Croutons (fresh! our grocery store has some really delicious ones made in house. please don’t buy those gross ones in the resealable bags. blech.)
balsamic vinegar, olive oil, salt, and pepper for finishing

Instructions

Poached eggs

Put a few inches of water in it plus a dash of vinegar (white distilled, because that was the only kind I had that seemed reasonable), and started heating it. The important thing (it would seem, from my research) is to have the water hot enough but not so hot that it’s boiling or even simmering. Got that? No bubbles breaking the surface. While your water is heating, break your egg into a small bowl or ramekin. It’s good to not break the egg directly into the water because it gives you a little more control.

When the water is hot enough, take a wooden spoon or spatula (I would advise a spatula… I liked it better for helping the egg along later) and stir it so that it creates a nice little whirlpool. Pour your egg gently into the middle of the whirlpool. It will look, for a moment, like you’ve done something horribly wrong and this will never work and you’ll be asking yourself why you even tried in the first place. But just wait! After the egg has been in the water for about 30 seconds or so, you can start to help it along by nudging it with your spatula, pushing the bits together. After a minute or so, you may notice that your egg has stuck to the bottom of your pan. Gently slide your spatula underneath it to get it unstuck. I also liked to roll my egg over because the bottom of the pot is hotter (duh) and it helped it to cook a little more evenly. Now, after about 3-5 minutes, you should be done! Remove the egg with a slotted spoon and put it in one of 3 places: 1) an ice bath, and then reheat it in the pot of water when you’re ready to serve (Thomas Keller). 2) on a paper towel to dry a little bit (Smitten Kitchen). 3) If you are out of paper towels and don’t feel like preparing an ice bath and then reheating your eggs, a lint-free dishtowel (me).

Fall Salad

Preheat your oven to 375 degrees. Trim your asparagus, put on a baking sheet, and toss with olive oil and salt. Put it in the oven for about 20 minutes, or until the asparagus is cooked to your liking (some people like it crunchy, some people like it soft). Note: Thomas Keller wanted us to grill our asparagus, but we don’t have a grill. Roasting it is a wonderful and winter-friendly alternative.

On a plate, arrange your asparagus, eggs, prosciutto, and croutons. Season to taste with salt and pepper and drizzle with oil and vinegar.

This meal was delicious and light. I can see it being lovely for a summer dinner party. It’s fairly easy too, once you get the whole egg poaching thing down (I’m still working on that part). Enjoy!