Year Round

Easy Energy Bites // Serious Crust

Easy Energy Bites

Easy Energy Bites // Serious Crust

So these energy bite things have been popping up in my life for a while now. I’ve seen them everywhere: favorite foodie websites, blogs, Pinterest (duh, everything is on Pinterest), and on my sister’s Facebook. I tried a batch inspired by Sprouted Kitchen that was peanut butter heavy, but they weren’t really my jam (but maybe peanut butter is your jam, or jelly, as it were). After talking to my sister, she inspired me to try her version. And they were great. They were fruity, jammy, chewy, and a little nutty, similar to Larabars.

The beauty of these is that they could not be easier to make. Also, people have found them really impressive, even though they took a mere pressing of buttons to make. The other beauty of these is that you can make them using whatever you’re in the mood for. On this particular day, dried apricots and cherries were calling my name. But I also wanted a little decadence, so I threw in some semi-sweet chocolate chips. The possibilities are endless. And I like that.

Easy Energy Bites

Note: you will need a food processor to make these. You could try them in a blender, but I’m not making any promises about what might happen.

Ingredients

1 cup nuts (I used almond) – toasting optional
1 cup pitted dates
1 cup dried fruit (I went for half apricots, half sour cherries)
Optional: 1/2 cup semi-sweet or dark chocolate, or cocoa nibs

Instructions

Get out a large piece of wax or parchment paper.

Combine the nuts, dates, whatever dried fruit, and chocolate (if you’re using it) in a food processor. Pulse a few times to break up the ingredients, stopping to separate the dates if they clump together. Now, turn the food processor on for 30 seconds or so. Everything should break down every more to crumbly pieces. Scrape down the edges of the bowl. Process again for 1-2 minutes until a paste starts to form and the ingredients clump together into a ball. Dump the paste/dough onto the piece of parchment or wax paper, and press it with your hands until it forms a square, roughly 8×8. Wrap up the dough, and let cool in the fridge for at least an hour, or up to overnight.

Once the dough is chilled, unwrap it, slice it into bars of whatever size. You can individually wrap the bars if you’d like, but I stacked mine in a tupperware and stored them in the fridge. Note that they don’t necessarily need to be kept in the fridge, but doing so will help them maintain their shape and firmness. Room temperature bars will be softer and pastier.

Mariam's Salad Rolls // Serious Crust

Mariam’s Salad Rolls

Mariam's Salad Rolls // Serious Crust

Mariam's Salad Rolls // Serious Crust

It was 100 degrees in Portland yesterday. The sun was not beating down, no. It was a cloudy, muggy day (by Pacific Northwest standards). And so when the time came to cook dinner, the thought of turning on any heating device just felt wrong. So I went to the store and picked up some fresh, crunchy, fruity, flavor packed ingredients to make salad rolls.

I had seen a recipe for salad rolls using lentils, but I didn’t really have time to cook them, so I thought I’d use another flavor of Mariam’s lentil dips (which I’ve written about before here). I went with the curry and green lentil flavor, thinking it would go nicely with the kind of Asian flavor. I’m not sure a few of these rolls would have made enough for dinner without the lentils – they’re packed with protein, and they made the rolls much more filling. They were delicious!

You can fill these rolls with whatever you’d like, really. You can slice up some tofu and put it in raw or cooked. You can grill some shrimp. You can add some vermicelli noodles, bean sprouts, red onions, or even shiitake mushrooms. The possibilities are endless!

Mariam’s Salad Rolls

Note: If Mariam’s lentil dip isn’t available where you are, feel free to substitute with some cooked green lentils, tossed with a little sesame oil, soy sauce, sriracha, salt, etc. Or see above for other recommendations.

Ingredients

½ cucumber, thinly sliced
2 carrots, thinly sliced
1 large ripe mango (or 2 small ripe mangos), thinly sliced
1 ripe avocado, thinly sliced
Cilantro, picked from stems
Mariam’s Curry and Green Lentil Dip
Spring roll wrappers (available in the Asian section of most grocery stores)
Sweet chili sauce for dipping

Instructions

Arrange all of your ingredients in bowls or on plates, so that they are easily accessible. Set out a large bowl of room temperature water, and a damp dishtowel. Follow the instructions on the spring roll wrapper package to prepare, or if they don’t have instructions, prepare like this: soak in room temperature water for 15 seconds, until the wrappers have almost no crinkle left, and spread on a damp dish towel. Arrange a few slices of cucumber, carrot, mango, avocado, a few leaves of cilantro, and a few dollops of Mariam’s Curry and Green Lentil Dip down the center of the wrapper, leaving about an inch on either end. Fold in the short ends over the ingredients, fold the bottom half of the wrapper up over the ingredients, and roll up the rest of the way. Enjoy dipped in sweet chili sauce or other dipping sauces.

This is a sponsored post. All of the opinions below are my own.

Chocolate Banana Bread // Serious Crust

Chocolate Banana Bread

Chocolate Banana Bread // Serious Crust

Let’s talk about the beauty of roommates. After living with just Jonah in a studio apartment, we have been lucky enough to find the greatest housing situation either of us have ever really had. We live with two other couples, all of whom are friends from college. Six people may seem like a lot, but when it’s three couples, it’s really not that many. Each couple has our own bathroom (score!), and while the kitchen is small, we’ve almost never had everyone trying to cook at once.

The other fantastic thing about roommates is that they eat things. My roommates are wonderful about sharing food. Sure, borrow a banana. Let’s all make brunch, I have potatoes, you have bell peppers, frittata sounds great. One of the things that always used to stress me out about baking for this blog is that I always have all these sweets to pawn off on other people. Living with five other people means that I don’t have to look too far for someone to eat the rest of those cookies, or give me their opinion of this bread. And when I say things like, “I really feel like baking. Should I bake something?” their answer is usually, “Is that even a question that people ask?”

Jonah was away traveling the world, as he is wont to do, and I was home, wanting to bake. There were many contributing factors to my making a very slight variation on this chocolate banana bread from Pastry Affair. First, it had been a little cool out, and I wanted something less summery, a little chocolate, and cozy. Second, there was a can on the back of my pantry shelf, hidden from view, of cocoa nibs that I hadn’t used in a very long time. Third, we had some awfully ripe bananas. So this bread seemed like the perfect choice.

I like that this bread is chocolatey without being too sweet. I like the crunch of the cocoa nibs, almost like adding walnuts (which you could totally do also). I like that the banana isn’t overpowering at all. I like this bread.

Chocolate Banana Bread

Makes 1 loaf

Note: If cocoa nibs are not your thing, or you don’t happen to have them sitting around like I do, feel free to substitute some chopped walnuts or pecans. Alternatively, if you’d like your bread to be a little more dessert-like, feel free to use chocolate chips.

Ingredients

1 cup all-purpose flour
1/2 cup whole wheat flour
1/2 cup cocoa powder
1 tsp baking soda
1 tsp baking powder
1/2 tsp salt
3/4 tsp cinnamon
1/2 cup (1 stick) butter, room temperature
3/4 cup packed brown sugar
2 eggs
1 tsp vanilla extract
3 ripe bananas, mashed
1/2 cup milk
1/2 cup cacao nibs

Instructions

Preheat your oven to 350 degrees and butter a loaf pan. In a medium bowl, sift together the flours, cocoa powder, baking soda and powder, salt, and cinnamon. Stir to combine and set aside.

Using an electric mixer, cream together the butter and sugar. Add the eggs, mixing after each addition, then the vanilla extract and bananas. Mix until thoroughly combined. Add the flour mixture and mix again – no pockets of flour or clumps of cocoa powder here! Add the milk, mix, and the cocoa nibs, and mix again.

Pour the batter into the greased pan. If you’d like to sprinkle a few additional cocoa nibs on top, go for it. Bake for about an hour, give or take 5 minutes, or until your bread successfully passes the toothpick test (or if you’re like me and can never find toothpicks, the sharp knife test). Allow the bread to cool in the pan for about 10 minutes before removing it to a cooling rack to cool the rest of the way. A slice of this bread is best served warm, accompanied by a glass of cold milk.

Herb and Lemon Shortbread // Serious Crust

Herb and Lemon Shortbread with Straus Family Butter {Sponsored}

Herb and Lemon Shortbread // Serious Crust

I love butter. Let’s be clear here, I don’t like to grab a stick and eat it like a candy bar, the way my mother used to. Certainly not. But there is something to be said for a good piece of sourdough covered in melty butter. Or a roast chicken that’s been slathered in butter and salt and pepper. You know what I mean?

Recently, Jonah and I have become more interested in buying “good” butter. Butter is butter – it’s good. But we were wanting to buy butter made with milk from grass-fed cows. It started a couple months ago when our roommate’s dad, Bruce, came to visit. Bruce is very knowledgeable about diet and nutrition, and while he was here we had many conversations about foods that people think are bad for you (aka butter) but aren’t really if you eat them well. Good fats are good for you, guys! Things like good olive oil, good butter, even chicken livers (fatty, yes, but full of nutrients), are things we can enjoy without feeling guilty about it.

So when I was sent some coupons for Straus Dairy products, I knew immediately I wanted to try their butter. I started with ye old piece of toast. What better way to judge a butter’s character? It was good. It was richer and creamier than your average butter. So I took things to another level. I had bought some chicken livers the day before, so I made some chicken liver paté (Julia Child’s recipe, in case you were interested). And let me tell you, it was some incredibly creamy paté.

Let’s talk for a second about Straus Family Creamery. After spending a fair amount of time on Straus’s website, perhaps one of the things I find the coolest is that they were the first 100% certified organic creamery in the country. For real! Evolving from a family dairy farm, Straus Family Creamery was officially founded in 1994, when Albert Straus saw going organic as a way to differentiate himself and save the state of local family farming. The butter has 85% butterfat content, and is less moist than normal butter. What does this mean for us bakers? It means it’ll brown more evenly and be more flaky. And for the cooks? It doesn’t burn as easily. Now I know, this butter ain’t cheap. But when you’re making butter heavy things like paté or shortbread, I think it’s worth spending the extra few dollars. You don’t skimp on a pork shoulder or buy cheap-o chocolate for your chocolate chip cookies, do you? I thought not.

Enough waxing poetic about butter, Annie. Let’s get on to this recipe for herb and lemon shortbread. On our front steps, we have a little pot of herbs that we carried with us from our last home. Our thyme isn’t looking so hot, but the sage is coming back strong this spring. And every time I walk by that pot, I start thinking of things I could do with those herbs. This week, I had an idea for this herb and lemon shortbread. And lo and behold, I had one stick of this beautiful butter left. It was perfect.

Herb and Lemon Shortbread

Note: I used solely sage for this recipe, but any combination of sage, rosemary, and thyme would be great, I think.

Ingredients

1 cup flour
1/4 tsp salt
2 Tbl plus 1 tsp sugar
1-2 tsp freshly chopped herbs (I used 1 tsp of freshly chopped sage, and wish I had used more)
1/2 tsp lemon zest
1 stick (8 oz) Straus Family butter, unsalted, at room temperature

Instructions

Preheat your oven to 350 degrees.

Sift flour and salt together in a medium bowl, set aside. In a small bowl, combine 2 Tbl sugar plus chopped herbs and lemon zest. Rub these ingredients together with your fingers – this will make sure the sugar absorbs the oils from the herbs and lemon, making it perfectly aromatic. Add the sugar mixture to the flour, and stir until combined. Cut the butter into chunks, and combine it with the flour/sugar mixture with a fork or a pastry knife, blending until you’ve got a beautiful soft dough.

Gently press the dough into a 9×9 baking dish or a 9-inch pie plate. Sprinkle the remaining teaspoon of sugar over the top. Bake until it’s golden brown around the edges. Once you’ve removed it from the oven, carefully cut it into wedges or squares or whatever shape you like while it’s still hot. Allow to cool before separating it. It helps to run the knife along the lines again.

I think this shortbread would make a fantastic base for lemon bars or rhubarb bars or any kind of bar topped with curd. Just saying.

This is a sponsored post. I was given coupons for Straus Dairy products, and all of the opinions below are my own.

Thai Larb // Serious Crust

Thai Larb with Lettuce Wraps

Thai Larb // Serious CrustThai Larb // Serious Crust

A couple of weeks ago, my roommates had a problem. I had gone with them to the climbing gym, and on our way home, we decided to stop at the store to get some food for lunch. We were thinking about what we already had in the house that we could use, and they started talking about how they had too much lettuce. See, they’re more spinach eaters (in salads and scrambles and such) than lettuce eaters, and so had a head of lettuce that they didn’t particularly want to eat or know what to do with. I had an idea: Thai larb.

This Thai larb, a chicken dish with lettuce wraps, immediately popped into my head. I quickly looked up a couple recipes on my phone, and grabbed the ingredients at the store. It was a warm day, and this bright, tart, crunchy dish was perfect. Plus, they were impressed that I made lettuce into something so delectable.

Today it was 85 degrees in Portland, and tomorrow is supposed to be even hotter. In fact, it’s supposed to be beautiful (and hot) until Saturday. My suggestion? Make this Thai larb: it’s so refreshing on a hot day. I’d serve it with maybe a green papaya salad and rice (sticky rice if you can swing it).

Thai Larb with Lettuce Wraps

Serves 4

Ingredients

Dressing

1/3 cup lime juice
1 Tbl fish sauce
2 Tbl light brown sugar
1/2 tsp Sriracha

Chicken

2 lbs skinless boneless chicken breasts, cut into roughly 1-inch pieces
1 large shallot, chopped
1 stalk lemongrass , thinly sliced (see this article for instructions on prepping your lemongrass)
1-2 cloves garlic, thinly sliced
1 red chile, jalapeño, or thai chile, depending on your desired spice level
2 tsp fish sauce
1 tsp kosher salt
3 Tbl vegetable oil
1 head romaine or iceberg lettuce, rinsed
Cilantro for garnish (optional)

Instructions

To make the dressing, stir all of the ingredients in a bowl until well combined. Set aside.

In a food processor, combine the chicken, shallot, lemongrass, garlic, chile pepper, fish sauce, and salt. Add 1 Tbl of oil, and pulse until the chicken is finely chopped, or how you would imagine ground chicken would look. In a large nonstick pan, heat the remaining 2 Tbl of oil over medium-high heat. Once the pan and oil is hot, add the chicken mixture and cook, breaking up into smaller pieces with your wooden spoon, until the chicken starts to turn golden brown and is cooked through.

To eat your larb, spoon some chicken onto a lettuce leaf, and top with the dressing and a little cilantro if you like. Be sure to eat over a plate – I can guarantee there will be dripping.

Meyer & Black Lemon Sorbet // Serious Crust by Annie Fassler

Meyer & Black Lemon Sorbet

Meyer & Black Lemon Sorbet // Serious Crust by Annie Fassler

My mother gave me some spices for Christmas. Three little bags from Oaktown Spice Shop: cinnamon, juniper berries, and ground black lemon (also known as Omani). I was able to find recipes using the cinnamon and juniper berries (still working on making some of my own gin…), but the black lemon was trickier. It’s a traditionally Persian ingredient, and I don’t know a whole lot of Persian cooking resources.

I wrote in to a few places, asked some intelligent minds what I should do with it, and I mostly came away with meat and fish. Rub it on meat and fish, put it in a stew with meat or fish. And even with those suggestions, I couldn’t really find any jumping off points, or recipes to start from or be inspired by. So the ground black lemon had been sitting sadly on my pantry shelf. Until last week, that is.

Last week, Portland had a little heat wave. Like, 93 degrees kind of heat wave. Yeah. I was itching to make ice cream. I have a flavor I’d been brainstorming, but decided, in the end, that instead of buying a bunch of heavy cream I would just buy Meyer lemons instead. So that’s what I did. And I decided to finally try using that lonely looking black lemon. And so today I give you Meyer lemon sorbet with black lemon.

Now, if you don’t have black lemon, don’t worry. You can still make a lovely Meyer lemon sorbet and it will be delicious. But if you are feeling curious, or you magically somehow do have black lemon sitting around, use it. It brings a nice, dare I say it, depth of flavor to this sorbet – something unique and hard to describe. The best words I can think of are that it’s a kind of dark citrus flavor… not necessarily sweet, but more complex than that. It lent a lovely je ne sais quoi to the sorbet. And I love that.

Meyer & Black Lemon Sorbet

Ingredients

1 1/2 cups water
1 1/4 cups granulated sugar
1 1/2 tsp ground black lemon (optional)
1 tsp Meyer lemon zest
1 cup Meyer lemon juice (from about 5 Meyer lemons)

Instructions

In a small saucepan, combine sugar, water, and black lemon if you’re using it. Bring to a boil over medium heat, allowing the sugar to dissolve and the black lemon to steep. While that is cooking, in a heat-proof bowl combine the lemon juice and zest. Place a sieve over the bowl. Once the sugar is dissolved and syrup has become amber in color from the black lemon (again, if you’re using it), pour through the sieve into the lemon juice. Stir to combine, and place over ice bath to cool. Once cool, churn in your ice cream machine according to instructions. I churned mine for about 20-25 minutes. Pour into a container to freeze. Enjoy while sitting in the sunshine. Or with a bunch of friends, in your living room, playing Cards Against Humanity, like I did.

Kale Stem Pesto // Serious Crust by Annie Fassler

Kale Stem Pesto

Kale Stem Pesto // Serious Crust by Annie FasslerKale Stem Pesto // Serious Crust by Annie Fassler

I often find myself frustrated with how much stuff I put in my compost. I guess I should stop right there and say, at least I have a compost, right? The beautiful city of Portland has roadside pickup every week, making it so wonderfully easy to make more environmentally conscious choices. There aren’t a lot of cities that do that. Anyway, I know I could save some bones and carrot tops and onion tops and parsley stems for stock… But I just don’t do it. I mean, I do sometimes… But not as often as I should. And there’s one thing lately that I have always felt guilty after putting it in the compost: kale stems. Jonah and I eat a fair amount of kale – usually sautéed with butter and garlic or something like that, sometimes in a salad. But I always am frustrated at the toughness of the stems, and wish I could do more with them.

After a little research and looking around, I mostly found that people who do use their kale stems either sauté them with their kale, simply adding the stems first so they cook for longer, or put them in smoothies. I wasn’t really into either of these options, so I made myself a third one. With the all-in pesto in mind, and a container of pine nuts whining from my pantry, I got to work making some kale stem pesto. I wasn’t planning on sharing this pesto here, since the recipe is really improvised, but I got so many comments and questions about what it was when I posted pictures on my Instagram and Facebook, that I thought, why not? This pesto is certainly a product of whatever you’ve got around, which is generally my theory about pesto. Herbs are good, parmesan is good, and other than that, you can kind of go crazy. Nearly any kind of nut will work, any greens, and you can really play until you find some flavors that you like. I didn’t do any measuring here – mostly just throwing in handfuls of this or that – but below is an approximation of what I used.

The beautiful thing about pesto is that it can be a complete reflection of your kitchen: if you just went to the market and have some radish greens, use them. If you don’t have any pine nuts but plenty of pistachios or walnuts, use them. If it’s raining and you want something heartier, add more cheese.

We tossed our kale stem pesto with fresh spaghetti (you can find a recipe here) and topped it with sliced grape tomatoes, which added a really nice juicy brightness. I also like to make a thick piece of toast and slather it with fresh pesto.

Kale Stem Pesto

Ingredients

1 bunch of kale stems, plus probably the equivalent of 1 leaf of kale
1 cup spinach
1/4 cup parsley
~ 3/4 cup pine nuts
Parmesan cheese
Garlic
Olive oil
Salt

Instructions

Fill a small pot halfway with water, salt well, and bring to a boil. Roughly chop kale stems into about 1/2 – 1 inch pieces. Add to boiling water, and cook until stems are easily pierced with a knife. Drain and cool.

In the bowl of a food processor (or blender), combine kale stems, a few small chunks of parmesan, about half the pine nuts, 2 cloves of peeled garlic, and a few glugs of olive oil. Pulse to combine. Add spinach, some parsley, and a hefty sprinkling of salt. The key here is to taste and add. If you want a little more spice, add another clove or two of garlic. If you want it creamier, more nuts, and olive oil. If you want it greener, add more spinach and parsley, or some fresh basil or chard if you’ve got some around.

Cinnamon Raisin Bread // Serious Crust by Annie Fassler

Cinnamon Raisin Bread

Cinnamon Raisin Bread // Serious Crust by Annie Fassler

I like being home. Traveling the world is awesome, don’t get me wrong. I will happily go on adventures like the one to Vietnam any time. But there is something about coming home to your own bed, your own shower, and your own kitchen. I feel like I need to give all my kitchen tools little hugs and tell them I’ve missed them. Which, at this point, I’ve basically done, because I’ve been cooking up a storm this week.

Portland, however, is being slightly less welcoming than my kitchen. Mostly just in its weather-related mood swings. Seriously, this whole week has been days of sporadically alternating sunshine and rain. Sometimes each lasts 5 minutes, sometimes an hour. But it’s making it awfully hard to cook. What I’m going to make is always determined by my mood, which is often influenced by the weather. Between the rain and sun breaks, I can’t decide if I should be making spring recipes or winter recipes.

This cinnamon raisin bread is the perfect balance between spring and winter, though I already know I’ll be making it year round. It’s homey and warming thanks to the springy crumb and the way it fills your kitchen with the most comforting smell. But the raisins and cinnamon bring a little fruitiness and fun to the mix, a little surprise if you will. This isn’t just plain ol’ bread, you know. This has a beautiful swirl of cinnamon sugar and beautifully juicy pops of fruit throughout it.

This recipe made two loaves, and I thought for certain I’d freeze one loaf, because my roommates just don’t usually eat that much bread (unless it’s beer bread). But I was wrong. In two days, we are down to half a loaf left. Everyone has been enjoying this bread, toasted, slathered with butter, or raspberry rhubarb jam, or nutella for breakfast and dessert and a snack here and there.

Point is, make this bread and your house will smell like heaven, your friends will love you, and you’ll be perfectly toeing the line between the seasons.

Cinnamon Raisin Bread

Makes 2 loaves

Ingredients

2 1/4 tsps (1 package) dry instant yeast
2 1/4+ cups warm water
3 Tbl and 1/4 cup granulated sugar, divided
1 Tbl salt
3 Tbl butter
6 -7 cups all-purpose flour
1 cup raisins
canola/vegetable oil
1 Tbl cinnamon

Instructions

In the bowl of an electric mixer (or not. If you don’t have one, this can easily be made with the strength of your own two arms.) combine 1/2 cup warm water, the yeast, and 1 Tbl of sugar. Set aside and let sit until it’s foamy. In another bowl, cover the raisins with warm-hot water, at least 2 cups. This step is optional, but it will plump the raisins, making them a bit juicier in the bread. After about 3 minutes, pour 1 3/4 cups of the raisin water off into a measuring cup and discard the rest. Pour the raisin water into the mixing bowl with the yeast, in addition to 2 Tbl sugar, the salt, 2 Tbl melted butter, 3 1/2 cups of flour, and all of the raisins. Mix with the paddle attachment until thoroughly combined, adding up to 3 more cups of flour until the dough is smooth enough to handle, but still moist. Switch from the paddle attachment to the dough hook, and knead for about 7 minutes (10 minutes if you’re kneading by hand). Dump the dough out onto a floured surface, coat the mixing bowl with canola or vegetable oil, and put the dough back into the bowl, turning it to coat, and cover the bowl with a clean dishtowel. Set the bowl in a warm spot (I like to turn on the light over my stove and set it under that) and let it rise for about an hour, or until it’s doubled.

In a small bowl, combine the remaining 1/4 cup sugar and 1 Tbl of cinnamon and mix well. Butter two bread pans. When the dough has doubled, remove it from the bowl onto a floured surface and punch it down, then divide it in half. Roll out one half of the dough into a rectangle that measures roughly 16 by 8 inches. Once rolled out, sprinkle the dough with 1 Tbl of water, and half of the cinnamon sugar mixture. Roll the dough up starting from the short end, and pinch the seam shut. Drop the roll of dough into one of the greased loaf pans. Repeat with the second half of dough. Brush the top of both loaves with the remaining 1 Tbl of melted butter, and cover them again with a clean dishtowel to let them rise for another hour in a warm spot.

About 15 minutes before your bread is done rising, preheat your oven to 425 degrees. Bake the bread for 30 minutes, or until the loaves look beautiful dark brown on top. Remove the loaves from the pans (beware, as cinnamon sugar may have oozed and become rather sticky – aprons are your friend) and set on a cooling rack. I recommend slicing into one of these bad boys when it’s still pretty warm. You can toast it and put a nice layer of cream cheese on top, like I did with my cinnamon raisin bread when I was younger, but a little butter will do nicely as well. Enjoy.

Simple Meringues // Serious Crust by Annie Fassler

Simple Meringues from Leftover Egg Whites

Simple Meringues // Serious Crust by Annie Fassler

I loved meringues when I was a kid – the incredible sweetness, the way they just melt in your mouth, the way they sound kind of like styrofoam (a weird thing to like, I know), and the delicate poofy shapes they came in. I remembered making them once when I was in middle school, and getting the sticky batter all over my shirt and fingers and face.

While I don’t feel as passionately about meringues as I did when I was younger, I still enjoy them. I still love how as soon as you get a crumb on your tongue, it seems to be gone almost as quickly as it came. I love the intense sweet taste, and how it lingers in your mouth. I love the slight nuttiness that comes from the slow caramelization of the sugar.

After I made the mint matcha ice cream, I had a bunch of leftover egg whites. I thought about making macarons, but I simply wasn’t in the mood for something so potentially intense where so much could go wrong. Plus, all my egg whites were in a jar together, so measuring out 3 or however many was going to be tricky. That’s the tough thing about leftover egg whites or yolks – you so often have to find a recipe that uses the exact amount you have leftover. I had seen an article recently on Food 52 about making meringue without a recipe, so I read it, and went ahead. I wouldn’t normally choose to make this much meringue, but it turns out 6 large egg whites yeilds…a lot.

Simple Meringues

Ingredients

1 part egg whites to 2 parts sugar. For example, 1 cup egg whites, 2 cups sugar. To stabilize, you’ll need 1/2 tsp cream of tartar or 2 tsp white vinegar per 1 cup of egg whites. An easy way to remember this, if you’re using vinegar, is that it’s the same amount as the sugar but in teaspoons. So, what I used: 1 cup egg whites (from 6 large eggs), 2 cups sugar, and 2 tsp white vinegar.

Instructions

Bring your egg whites to room temperature, if not a little warmer. You can do this by simply leaving them out in the kitchen for a while, or putting them in a bowl and putting that bowl in another bowl full of hot water.

Preheat your oven to 225 degrees.  Line two pans with parchment paper. In a bowl, combine egg whites and vinegar or cream of tartar. Whip on medium speed with an electric beater or in the bowl of an electric mixer until there are soft peaks when the beater is lifted from the bowl.

Once soft peaks can form, turn the mixer speed to high, and add the sugar by heaping teaspoons. This will take a few minutes (certainly if you’re making as much meringue as I was). Be patient. Once the sugar is mixed in, either pipe the meringue onto the prepared baking sheets, or drop by spoonful. I used a large ziploc, used a spatula to scoop all of the meringue in, and then cut off the tip of one of the corners, and used that for piping. It worked really well.

Bake the meringues for 1 1/2 hours, rotating front to back and top rack to bottom half way through. When time is up, turn off the oven and allow them to cool in the oven. If you have SO MUCH MERINGUE, like I did, you can turn off the oven and allow them to cool partway, remove from oven, and then preheat the oven for the next batch. I left my meringue on the counter while the first batch baked, and while it was noticeably not as fully whipped, it still worked just fine. I recommend crunching into one when it’s still warm, because how often do you get to try a warm meringue? Store the rest in an airtight container, and enjoy whenever you’re in need of a sweet, light treat.

Matcha Mint Ice Cream // Serious Crust by Annie Fassler

Mint Matcha Ice Cream

Mint Matcha Ice Cream // Serious Crust by Annie Fassler

Mint Matcha Ice Cream // Serious Crust by Annie Fassler

When I made the anise ice cream that I posted about last week, it made me realize how truly simple it is to make your own ice cream. I mean, if you’ve got the ice cream attachment for the Kitchen Aid like my roommate does, or some other kind of ice cream churner. I found myself asking why I hadn’t been making my own crazily flavored ice cream for years. And you know what? I didn’t have a good answer.

So I thought I might as well start now. I’ve had some matcha sitting in my drawer since I made these madeleines, and I’d been wanting to try some matcha ice cream. But I didn’t want to make JUST matcha ice cream. After thinking about what flavor combinations might work with matcha – chocolate? lemon? – I decided to go with mint. I liked the idea of the herbaceous, refreshing mint with the earthy, almost savory matcha. So, mint matcha ice cream it is!

I also decided to make this ice cream this week because I thought it might be nice to start doing some holiday-oriented recipes. And while the flavors in this recipe have nothing to do with St. Patrick’s Day, it is green. Definitely green. Especially if you make it the day before you’re planning on eating it.

After a little research, this recipe is adapted from and inspired by David Lebovitz, Kinfolk, and many other ice cream recipes all over the internet.

Mint Matcha Ice Cream

Ingredients

1 cup whole milk
2 cups heavy cream, divided
3/4 cup granulated sugar
a pinch of salt
1 cup fresh mint leaves, rinsed
4 tsp matcha green tea
5 egg yolks

Instructions

In a saucepan over medium heat, combine milk, 1 cup of cream, sugar, salt, and mint leaves. Stir until sugar is dissolved, and once the mixture is hot and steaming, remove the pan from heat, cover, and let it steep for one hour.

Fifteen minutes before your mint is done steeping, get out two mixing bowls. In one, combine the other 1 cup of cream and the matcha. Whisk together until thoroughly combined and no clumps remain. In the other mixing bowl, whisk together the egg yolks.

Once the mint is done steeping in the milk mixture, strain out the mint leaves, pressing them to extract all of the flavor. Re-warm the milk over low heat – you want it to be warm, not too hot – and slowly pour it into the egg yolks and whisk until combined. Pour the mixture back into the saucepan, and cook over medium heat, stirring constantly with a heat-proof spatula, until the custard thickens enough to coat the back of a spatula. Strain the custard into the bowl with the matcha cream, and whisk again to combine. Stir the mixture over an ice bath to cool. Once cooled thoroughly, churn in your ice cream maker according to your machine’s instructions.

Anise Ice Cream // Serious Crust by Annie Fassler

Anise Ice Cream with Cardamom

Anise Ice Cream // Serious Crust by Annie Fassler

Anise Ice Cream // Serious Crust by Annie Fassler

I went to Seattle this past weekend. My aunt was visiting, and I needed to get out of town a bit. It turned out that he was also having this dinner with friends. He has all these friends who cook, and so they’re starting this dinner club kind of thing, like an extremely organized potluck.

It’s really cute – whoever is hosting picks a cuisine or a cookbook, and sends the guests recipes to make. My dad picked the Pok Pok cookbook, and oh my goodness, the meal was incredible. We helped him make the famous chicken wings (which were exactly like the real thing), which was so fun. And for dessert I made this dish I’ve been working on with my baker friend Caitlyn (post coming soon, we still have a bit more testing to do). Wanting something to top it with, I decided to also make some ice cream from David Lebovitz’s The Perfect Scoop. So what goes with a slightly Asian cake, and an incredibly flavorful dinner? I picked the anise ice cream, and decided to add a touch of cardamom.

This ice cream is beautiful – extremely creamy, herbaceous, and perfectly sweet, I could have gladly eaten just a bowl of the ice cream for dessert (or for a snack, which I did the next day). After making (and eating) this ice cream, I proceeded to take pictures of many recipes in The Perfect Scoop so I can make them at home… because unfortunately, I don’t have the book for myself.

Anise Ice Cream with Cardamom

Ingredients

2 tsp anise seeds
2-3 green cardamom pods
2 cups heavy cream
1 cup whole milk
2/3 cup sugar
1 1/2 Tbl good quality honey
pinch of salt
5 egg yolks

Instructions

Toast the anise seeds and cardamom in a small saucepan over medium heat for about 3 minutes, or until fragrant. To the saucepan add 1 cup of the cream, the milk, sugar, honey, and salt. Keep saucepan over heat until the liquid is warm, then cover, remove from heat, and let steep for an hour.

After an hour, re-warm the milk mixture over low heat. Pour the remaining 1 cup of cream into a medium mixing bowl, with a sieve set over the top. In another bowl, whisk together the egg yolks. When the milk mixture is warm, slowly pour it into the bowl of egg yolks, whisking constantly. Then, pour the milk and egg yolk mixture back into the original saucepan and cook over medium heat. Stir it constantly, preferably with a heatproof spatula, until the mixture has thickened and coats the spatula or spoon. Pour this custard through the strainer into the bowl with the cream, and stir it so the cream is fully incorporated. Set this bowl in an ice bath and stir to cool. Refrigerate until cooled through, and then churn based on your machine’s instructions. Enjoy!

Ice Cream Cake // Serious Crust by Annie Fassler

Ice Cream Cake

Ice Cream Cake // Serious Crust by Annie Fassler

Ice Cream Cake // Serious Crust by Annie Fassler

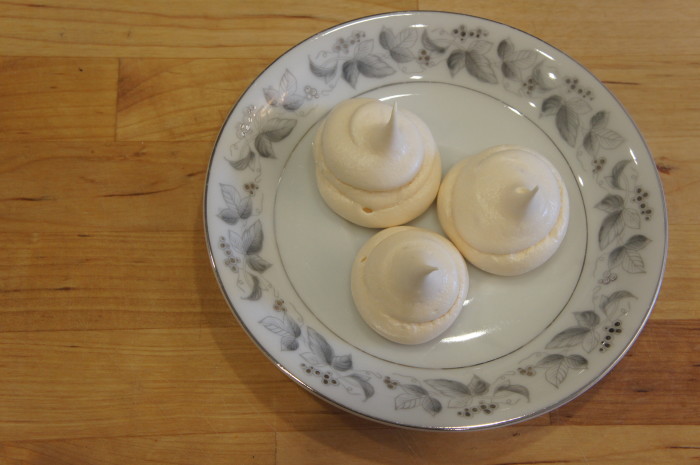
When I asked Carmelle what kind of cake she wanted for her birthday this year, and she replied, “ice cream cake,” I was stumped. I mean, not so stumped. I’ve had ice cream cake before. I understand the concept. But I’ve certainly never made one. In a summer cooking camp I did when I was younger, I made a baked alaska, but I certainly wasn’t going to attempt that. My mom used to make a version of ice cream cake with Ho hos: she would take a big metal bowl, line it with slices of Ho hos, fill the bowl with ice cream, freeze it, and then turn it out, so it looked something like this.

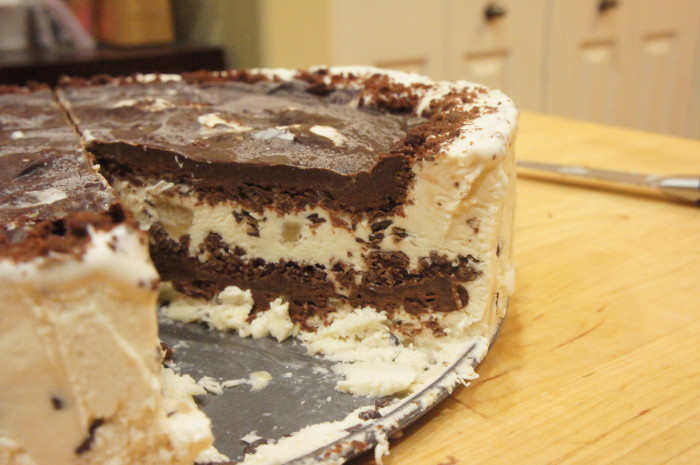
So I suppose it was officially time to learn to make my own ice cream cake. I had a choice to make: do I make the kind with an actual layer of cake in it? Or do I make the kind that just has layers of ice cream and chocolate sauce and magical cookie crumbles?

I decided to go with the latter. If I’d had more time I would’ve made my own ice cream, it turned out it was a crazy weekend (full of Valentine’s Day, a bar mitzvah, work, and an Amos Lee concert), so there wasn’t time for that madness. Still though, ice cream making is on my to-do list.

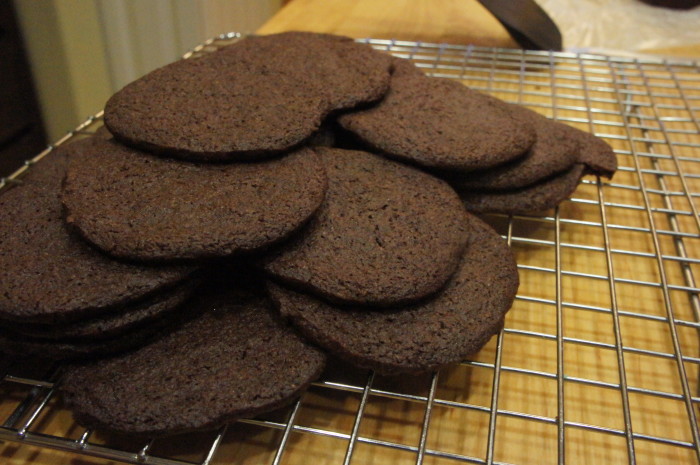
I decided to use a recipe from Not Without Salt (NWS) as a guideline, except I wanted to just buy Oreo crumbs at the store instead of making my own chocolate wafers. At this point, I was thinking more along the lines of cake assembly than actual creation. Don’t judge me. After hitting the grocery store (note to self: NEVER go to Fred Meyer’s on a Sunday again), and not finding Oreo crumbs or any wafers I liked, I decided to make them myself. And because I’ve been eyeing Smitten Kitchen’s chocolate wafers, I decided to go with that recipe. Interestingly, something I noticed after I had already made the wafers was that both Smitten Kitchen and Not Without Salt identify Alice Medrich as the cook behind the recipe for their wafers, though they do differ a bit. What I’m saying is, if you decide to go with NWS’s chocolate wafer recipe, I’m sure it will be just as delicious.

Ice Cream Cake

Note: For your ice cream, I would suggest something smooth like coffee, or with small pieces in it, like mint chocolate chip. Carmelle requested cookie dough ice cream, and while it was certainly delicious to get the chunks of cookie dough, it made it a little trickier to slice and serve.

Ingredients

Chocolate Wafers

1 1/2 cups flour
3/4 cup unsweetened cocoa powder
1 cup + 2 Tbl sugar
1/4 tsp salt
1/4 tsp baking soda
14 Tbl (1 3/4 sticks) butter, softened
3 Tbl milk (higher fat is better, because we’re baking here, people)
1 tsp vanilla extract

Chocolate Fudge Sauce

1 cup heavy cream
1/3 cup  corn syrup (I used dark because I liked the slight molasses smell to it, but light or golden syrup will work)
1/3 cup brown sugar
1/4 cup cocoa powder
1 cup (6 oz) bittersweet chocolate (you can use chopped baking chocolate or chips, whatever is convenient for you)
2 Tbl butter
1/4 tsp salt
1 tsp vanilla extract

1 gallon of ice cream of your choice, or 2 quarts of ice creams of your choice

Instructions

Chocolate Wafers

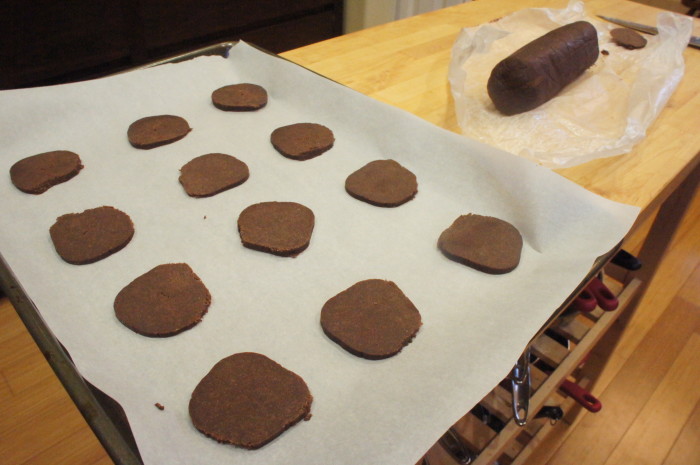
First, let’s make the wafers. In the bowl of your food processor, combine the dry ingredients and pulse to mix. Cut the butter into chunks and add it to the bowl as well, pulsing again until evenly distributed. In a small bowl, combine the milk and vanilla extract, and then add it to the bowl with the food processor running. Transfer the dough to a bowl and knead a few times to bring it together. On a piece of parchment or wax paper, form the dough into a ~14-inch log, wrap it in the parchment or wax paper, and refrigerate for an hour, or freeze for 20-30 minutes, or until firm.

Preheat your oven to 350 degrees, and line baking sheets with parchment paper. Slice the log of dough into ~1/4 inch slices, thinner if you’d like, but keep an eye on baking time. Place them on pans about an inch apart, and bake for 12-15 minutes, rotating halfway through. Allow to cool on the pan for a minute or two, as they’ll break easily. Which, for our purposes isn’t the end of the world, but you will have extras, and maybe you want those to be unbroken.

Chocolate Fudge Sauce

Before making the fudge, I recommend taking your ice cream out of the freezer to soften.

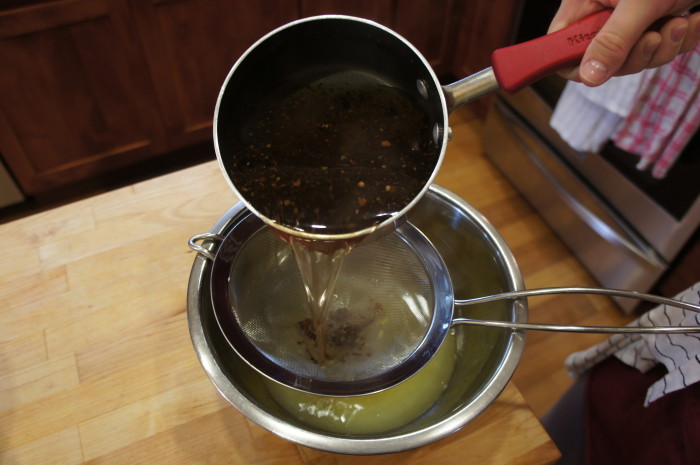
To make the fudge, combine the cream, corn syrup, sugar, and cocoa powder in a pan. Bring this mixture to a boil, then reduce the heat to a steady simmer. Allow it to simmer for 5 minutes, stirring occasionally. After 5 minutes, remove the pan from the heat and stir in the chocolate, butter, salt, and vanilla. Keep stirring so the chocolate and butter melt, and run through a sieve, preferably into a microwave safe bowl, make sure there are no clumps of cocoa powder. My fudge had a little trouble, and decided to separate (super fun!). Jonah had the brilliant idea to just get out the immersion blender, and I would suggest the same should the separation happen to you. But I sincerely hope it doesn’t. Set fudge aside and let it cool down a bit. Because you have to make this cake in layers and freeze between each layer, the microwave safe bowl comes in handy when you need to warm up (and potentially blend) your fudge sauce.

Now let’s assemble the cake. Put about 20-25 of the chocolate wafers in a big ziploc bag, and beat it with a rolling pin, until the cookies are completely crumbled and there are no pieces larger than a pea. In an 8 or 9 inch springform pan, spread 1/2 of your gallon of ice cream, or one of the quarts. Make sure it’s evenly spread, so it’s roughly the same thickness all the way around the pan. Sprinkle half the cookie crumbs on the ice cream, and then drizzle/spread half the hot fudge over the cookie. Put the pan in the freezer for 30-45 minutes to set. After it has firmed up a bit, spread the second half of ice cream over the fudge, then sprinkle over the remaining cookie crumbs and spread over that the remaining fudge. Put the cake in the freezer until you’re ready to serve, at least an hour.

When you’re ready to eat this bad boy, remove from the freezer and run a knife around the edge before un-molding the cake. Serve and enjoy!