Course

Chicken Pot Pie

Chicken Pot Pie

Chicken Pot Pie
Chicken Pot Pie

Chicken Pot Pie

I will tell you that while I write this, we are at Jonah’s office recording a cover of The Counting Crows’ “St. Robinson in his Cadillac Dream.” I discovered today that the band is holding a cover contest and if you place in the top three you win 1) a signed guitar, 2) $600 to Guitar Center, and 3) a spot on an EP that they’re distributing to fans, etc. By the time this is published, we will be long finished, but for now, we’re working away. We discovered the contest about 24 hours before the deadline, so we’ve recruited our singer/musician friend Jon to help us create an a cappella infused cover. It’s currently just after 1 am, and one of us (me or Jonah) has to wake up at quarter to 7 tomorrow morning to drive the kids to school, and then we both have to go on our couch-to-5k run… We may have bitten off more than we can chew, but by golly we’re gonna get something in for this contest!

Now onto the food. Yesterday I wanted to make dinner. I wanted to make a dinner that was delicious and wintery, not too difficult, but a little bit impressive. After browsing a few recipes, I settled on Chicken Pot Pie. Relatively easy, but impressive because, you know, it’s a pie. I didn’t use a particular recipe, and also instead of making it in a pie dish, I made it in two little ramekins, so Jonah and I each had our own little servings. Which was cute. So I’m gonna give you the measurements I used, but I suggest doubling it if you’re looking to feed more than 2 people (though we did have leftovers).

Chicken Pot Pie

Makes 2 personal pies

Ingredients

Pie Dough

2 cups flour
1 tsp salt
1/2 cup cold butter
1/2 cup cold shortening
3-5 Tbl of ice water

Chicken Filling

1 boneless skinless chicken breast
1 cup chicken broth
2 tsp vegetable oil
1 small onion, chopped fine
2 carrots, peeled and sliced 1/4 inch thick
2 stalks of celery, washed and sliced 1/4 inch thick
salt and pepper
2 Tbl butter
1/4 cup all-purpose flour
3/4 cup milk
1/2 tsp dried thyme
1/2 cup frozen peas, thawed

Instructions

Pie Dough

Start by making the pie dough, which you can find a recipe for here.

Chicken Filling

Start by putting the chicken and broth in a saucepan and bringing it to a nice simmer. Cook it until the chicken is tender and cooked through. Transfer the chicken to a mixing bowl, and strain the broth into a measuring cup or some other vessel. Don’t bother washing the pot, you’ll reuse it a bunch of times. Heat your oven to 400 degrees.

Heat the oil in the pot and when it’s nice and hot add the onion, carrots, celery, and about 1/8 tsp each of salt and pepper. Cook the veggies till they’re mostly softened (covering them while they cook helps with this by adding some steam). While the veggies cook, take a couple forks or a fork and knife and shred the chicken into bite-size pieces. When the vegetables are done cooking, add them to the bowl with the chicken.

Remove your pie dough from the fridge so it can start warming up. In that same dang pot, melt the butter over medium heat. Then add the flour and stir it up. You’ll have some clumps, but don’t worry about it. After cooking your clumps for a little bit, throw in most of the reserved chicken broth (I probably did about half of it, maybe 3/4), the milk, and the thyme. Whisk it up so the clumps dissolve, and cook it until the sauce thickens. Remove from the heat, and stir in the chicken/veggie mixture, the peas, and season it with salt and pepper to taste.

Now you can roll out your dough. Because we were doing the little ramekins, I split each disc of pie two in two and rolled each half out, laying it gently in the dish and making sure there were no pockets of air in the sides or bottom. Once both had their bottom crust in, I split the filling between the two dishes. Then roll out the second disc (again split in two) and cover the pies, trim the excess dough, and form an edge. Put the ramekins on a baking sheet (foil lined if you so wish), and put them in the oven for 30 minutes, or until the crust is golden brown.

Allow them to cool for at least 10 minutes before digging in and enjoying!

Bread, again, but different

Bread

Bread
Bread

Bread

Bread

Jonah and I keep a little white board in our apartment next to our refrigerator where we write all kinds of things: items to get at the grocery store, tasks to do (such as getting a watch so we can time our couch-to-5k runs which we’ve just started), occasionally notes to each other, and there are also little magnets so we can put checks to be deposited and notes from our bosses, etc. It’s really a handy little space near the door to remind us of all the little things we need to do.

Anyway, on Monday, Jonah wrote a little grocery list on the board before he went into work. Upon seeing that bread was on the list and I hadn’t baked anything in a couple days and hadn’t made bread in quite some time, I decided to make some instead of just buying some. I had found this incredibly easy looking recipe over at Joy the Baker and had been waiting to try it. I think it’s my last “super easy” recipe before I try making my own sourdough starter. So keep an eye out. The other great thing about the recipe was that it only called for bread flour, and I’m still trying to use up that giant bag, so it was perfect. You’ll only need 4 ingredients, one of which is water, so really, only 3.

This bread is delicious with just some butter, toasted with butter and jam. Jonah said it also made a delicious PB+J. And I’m about to go try using it for a grilled cheese. This bread was so supremely simple to make, I think everyone should try it. It’s great for a beginner recipe that still has some of that crispy crust. Enjoy!

Simple Bread

Makes 2 loaves

Ingredients

4 cups bread flour
2 tsp salt
2 tsp active dry yeast
1 1/2 cups warm water

Instructions

Put 3 3/4 cups of the flour into a mixing bowl (electric mixer would be nice). Reserve the other 1/4 cup of the flour for kneading/incorporating later. On one side of the pile of flour in your mixing bowl, put the salt, and on the other side, put the yeast. Not sure why this is so important as everything is about to get mixed together, but whatever. Now pour the water over the flour and mix it until it just comes together (I started with the paddle attachment and then switched to the dough hook once the dough had come together).

Once the dough comes together and you switch to a dough hook, put your mixer on a medium speed and let it knead the dough for 2 minutes. The dough should easily clear the sides of the bowl but stick to the bottom a little bit. If you feel the need, you can add a little flour or water depending on the status of your dough, but mine was pretty spot on, so I didn’t want to mess with it. After mixing it for 2 minutes, let it rest for 5 minutes. After the 5 minute rest, mix it again for 3 minutes. At this point you can flour your counter (with that 1/4 cup of bread flour you reserved) and dump the dough out.

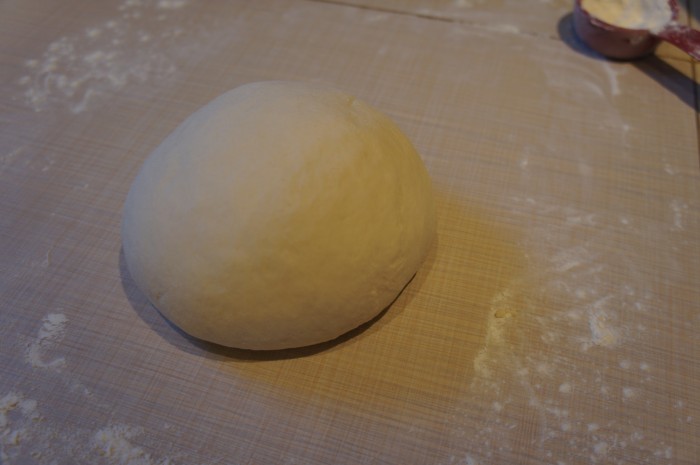
Now you can hand-knead the dough, incorporating the 1/4 cup of the flour reserved. You may not need to incorporate the whole 1/4 cup. I’d say I got about 1/8 cup into the dough, and then stopped. This was the first time in my bread-making experience that I felt like I could tell by the feel of the dough when it was ready. Right when I dumped it onto the counter, it was not as dense as my other doughs have been; instead it was light and easy to work with. I didn’t want to push it, so when it stopped taking the extra flour in, I stopped adding. When the dough seems smooth enough, form it into a ball, lightly oil a bowl (I just used the same mixing bowl) and put the dough in, turning to coat the dough with oil. Cover the bowl with plastic wrap and a dish towel, and let rest for 1 1/2 hours.

After the 1 1/2 hours, the dough should have about doubled in size. Remove the dough from the bowl, punch it down, and reform it into a ball, replace it in the bowl and cover it, letting it rise for another half hour.

After this second shorter rest, remove the dough from the bowl onto a lightly floured surface (I just never cleaned my counter till the bread was in the oven) and cut it into two pieces. Form each lump into a smooth and round ball. The best way to do this is to just keep grabbing the edges of the dough and tucking them underneath. Eventually you’ll have a tight, smooth ball. Cover the two balls of dough with a damp cloth and let them rest on the lightly floured surface (aka counter) for 45 minutes to an hour.

Towards the end of this resting period, you can preheat your oven to 450 degrees. Make sure your rack is in the bottom half of your oven because the bread will rise. And put another rack below it. Put a baking sheet (or baking stone if that’s what you’re using) in the oven while it’s heating so it gets hot. Uncover your balls of dough, and slash the tops with 2-4 slashes to guide the expansion of the bread while it’s baking. When your oven is heated, take out the hot baking sheet and carefully put the dough on it, and put it in the oven.

Now it’s time for the steam. A couple minutes after you put the bread in the oven, you can dump 1/4 cup of water onto the oven floor (if you have an electric oven) and immediately close the door, then repeat in a couple minutes. I wasn’t all about dumping water in my oven for some reason, so I did what I’d read in a previous recipe and put half a cup (so I didn’t have to open the oven again and let the heat escape) of water on another baking sheet and put it on the rack beneath the bread. It also works just fine and creates steam. the steam is what helps make the crust nice and crispy, I think.

Anyway, you’ll want to bake the loaves for 20-25 minutes. They’ll be a beautiful golden brown. It’s smart to throw a thermometer in there too, just to make sure. They should register between 190-210 degrees. Now, transfer them to a wire rack to cool (mine were still making crackling/baking noises for a couple minutes, it was kind of cool). Make sure they are completely cool before taking a slice, spreading on some butter, and enjoying.

Korean Marinated Beef

Korean Marinated Beef

Korean Marinated Beef

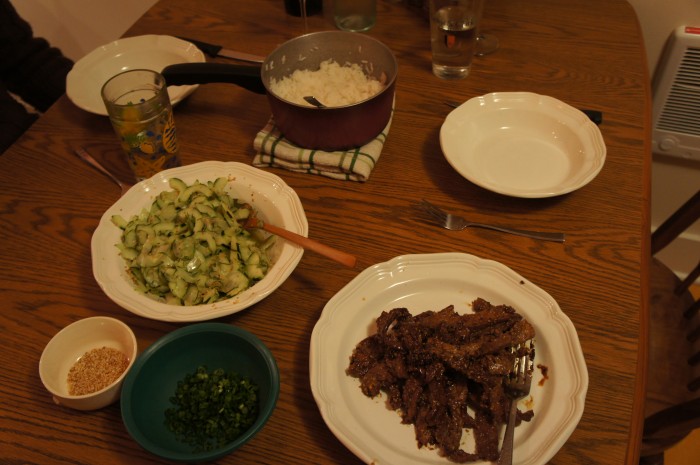
This Korean marinated beef was the second part of our asian dinner the other night. I found this recipe in our Gourmet Today cookbook, which is wonderful. This recipe was crazy good and super quick. The meat was nice and tender and perfectly cooked and the marinade caramelized nicely in the pan. You’re supposed to serve the beef in a lettuce cup with kimchi and rice, but we just served it over rice alongside the Japanese cucumber salad seen in the previous post. Here’s what you’ll need:

Korean Marinated Beef

Ingredients

1/4 cup soy sauce
1 Tbl sugar
2 tsp Asian sesame oil
1 bunch of scallions, minced, with the white and green parts separated
1 Tbl minced garlic
1 Tbl minced peel fresh ginger
3 Tbl sesame seeds, toasted
1 lb flank steak (we did about 3/4 of a pound, just because the cut of meat is a little expensive and the recipe serves 4 people), cut across the grain into very thin slices (the recipe says no more than 1/8 inch thick, but I was like, hell no, so I just sliced it as thin as I could)
1 Tbl vegetable oil for cooking

Instructions

In a medium sized mixing bowl, stir together the soy sauce, sugar, sesame oil, the whites of the scallions, the garlic, ginger, and 2 Tbl of the sesame seeds. Whisk this up until the sugar is dissolved. Now add the steak, toss it around to make sure it’s evenly coated, and let it marinate for 15 minutes.

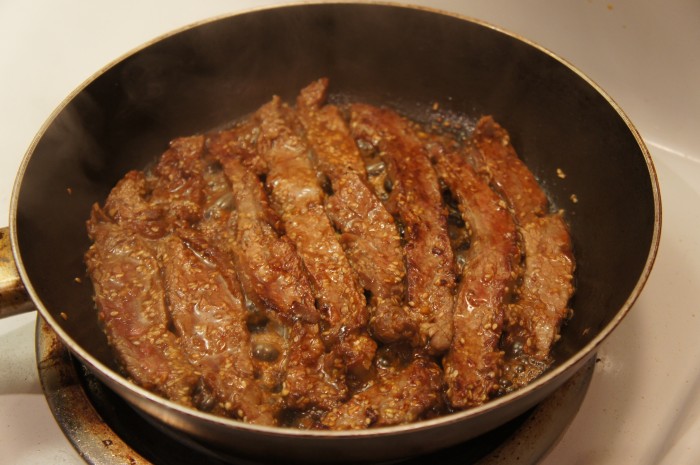
After that 15 minute wait, heat the oil in a pan over high heat. You definitely want the oil to be shimmering, if not smoking. Now add the steak in one layer and cook (ours took 2 batches), turning halfway through. If your heat is high enough, it’ll only take about 4-5 minutes for your meat to be cooked through and even get a nice sear/caramelization from the marinade. When the meat is just cooked through – don’t cook it too long or it will lose some of it’s tenderness – transfer to a plate, sprinkle with the rest of the sesame seeds and the scallion greens. Serve with rice and Japanese cucumber salad (see previous post). Enjoy!

Japanese Cucumber Salad

Japanese Cucumber Salad

Japanese Cucumber Salad

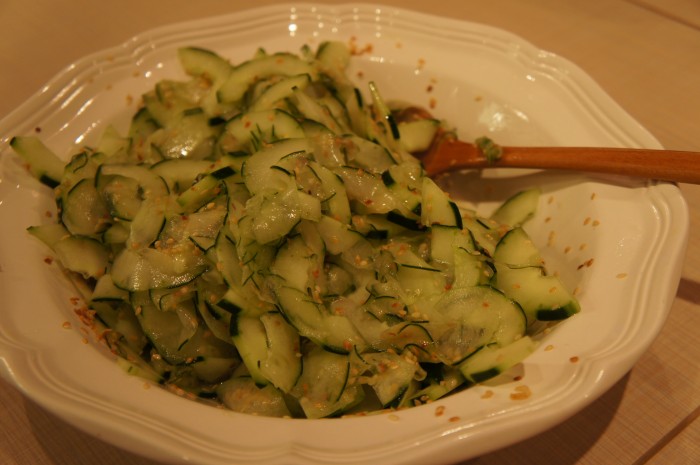
Last week, Jonah and I made a delicious dinner of this Japanese cucumber salad and Korean marinated beef (to be seen in an upcoming post). This salad was so incredibly simple and delicious. It would be perfect for a summer dinner. It’s very refreshing. But we had it in the winter and it was still so crazy good that I couldn’t stop eating it.

Japanese Cucumber Salad

Ingredients

2 medium cucumbers (or 1 large English cucumber)
1/4 cup rice vinegar
1 tsp sugar
1/4 tsp salt
2 Tbl toasted sesame seeds

Instructions

We bought the sesame seeds in the bulk section at our grocery store (we needed a bunch for the beef too, so it made sense) and you can just toast them in a dry pan over medium heat. Keep an eye on them though, because they can burn quickly.

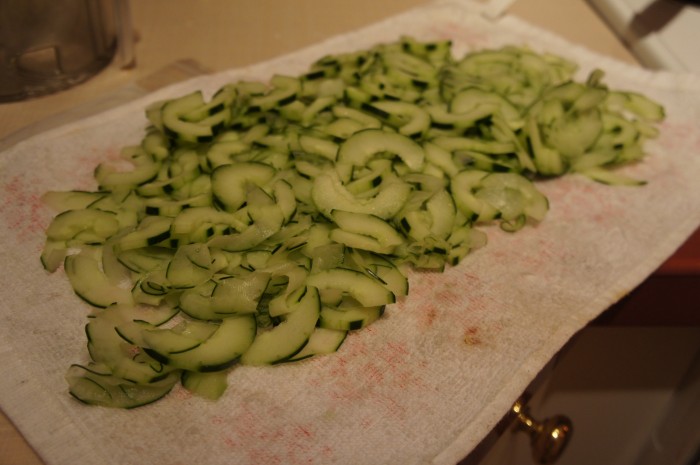
Peel the cucumbers leaving alternating green stripes of the peel. Slice them in half lengthwise and scoop out the seeds. Now, using a food processor, sharp knife, or one of those mandolin things if you’re one of those people, slice your cucumbers into very thing slices. Think paper thin. Lay your cucumber slices out on a double layered paper towel or a dishtowel to absorb some moisture while you whip up the dressing.

Combine the rice vinegar, sugar, and salt in a bowl, making sure to stir it up to dissolve the sugar. When you’re ready to serve, add the sesame seeds and cucumbers, and toss to coat. Serve!