Course

Beer Bread

This recipe is a bit famous in my family. And I wanted to be sure to share it with you while there is still Pumpkin Beer on the shelves because that’s my favorite kind of beer to use. We got this bread recipe from a friend of my sister’s from college, Graham. As soon as Emily introduced me to it, I was hooked. However, it’s not the healthiest (as you will see, you dump a melted stick of butter over the whole thing), so I try not to make it all too often. This specific one I made to take to the first rehearsal of a play I was just cast in. Baked goods always make a good first impression.

Beer Bread

Makes 1 loaf

Ingredients

3 cups of flour
3 tsp baking powder
1 tsp salt
1/4 cup sugar
1 can/bottle of beer (12 oz) – Having made this a few times, here is my take on what beer to use: Nothing too dark or hoppy, it gives the bread kind of a funny aftertaste. Seasonal beers are nice (think pumpkin ale or christmas beers), as are more fruity beers (back when the only beer I liked was apricot hefeweizen, that worked well), and anything on the lighter side. But I would steer clear of IPAs and reds.
1 stick of butter, melted

Instructions

Preheat your oven to 375 degrees. Mix dry ingredients in a bowl. Add beer, stir to combine. Grease a bread pan, and dump the dough into it. Warning: the dough will be sticky. Put the bread pan on a rimmed baking sheet – this is important as you won’t want the butter to seep over and just end up in the bottom of your oven. In a small bowl, melt the stick of butter in the microwave. Pour the melted butter over the dough in the bread pan. Bake for 1 hour, turning halfway through.

Remove the bread from the oven, run a knife around the edge of the pan, and turn out onto a cooling rack to cool. This bread is pretty crumbly, so good luck getting it to stay in one piece when you slice it. But it’s so worth it. Enjoy!

Whole Wheat Chocolate Chip Cookies

Chocolate Chip Cookies

When you have found possibly the best chocolate chip cookie recipe ever, it is hard to find recipes for chocolate chip cookies that still inspire you. You know what I mean? It’s like, well I found the best ones, so why not just make those? I’ll tell you why: while they are delicious, they require buying fancy chocolate (instead of just using the perfectly good chocolate chips you already have in your kitchen) and sifting. I’ll sift for Thomas Keller, but only so often.

So when I wanted to make cookies a while ago but not the fanciest best ones ever, I went to one of my favorite (food) blogs: Orangette. I have used this blog before, but I have re-fallen in love with it since reading the author’s book, A Homemade Life. Now, I feel that Molly Wizenberg and I were meant to be friends, and I am determined to make it happen. If you like reading about food, I definitely suggest it. There are also recipes in it, so if you don’t like the story, you can at least make some delicious food. Anyway, she had this recipe for whole wheat chocolate chip cookies that just looked so simple and divine… So I made them.

Whole Wheat Chocolate Chip Cookies

Ingredients

3 cups whole wheat flour
1 ½ tsp. baking powder
1 tsp. baking soda
1 ½ tsp. kosher salt
2 sticks cold unsalted butter, cut into ½-inch cubes
1 cup lightly packed dark brown sugar
1 cup sugar
2 eggs
1 tsp. vanilla extract
8 oz. bittersweet chocolate, roughly chopped into ¼- and ½-inch pieces, or bittersweet chips

Instructions

Preheat your oven to 350 degrees. Line two baking sheets with parchment paper or just butter them. Mix the flour, baking powder, baking soda, and salt in a bowl. Set aside.

Put the butter and sugars in the bowl of a stand mixer fitted with the paddle attachment (if you’ve got it. If you don’t, I advise bringing your butter to room temperature before you mix it). Bring the mixer up to a lower speed and mix JUST until the butter and sugars are blended (this should take about 2 minutes if your butter is cold). Add the eggs one at a time, beating well after adding each one. Add the vanilla, mix. Now add the flour mixture, and mix on a low speed until it is just mixed (have you noticed a key with this recipe is not over-mixing it? Honestly, that goes for most recipes. But moving on…) Add in your chocolate and mix. This is where it gets tricky, as the dough is fairly dry. Just do the best you can.

Using a spoon, put ~3 Tbl. sized scoops of dough on the cookie sheet, leaving plenty of room between the cookies (I would say at least 2 inches, 3 to be safe). Mine didn’t spread as much as the ones on Orangette, but always better safe than sorry. Bake for 16 to 20 minutes, rotating the sheets halfway through, until the cookies are evenly browned. I have found, when it comes to baking cookies, that I need to take the cookies out of the oven sooner than I think I do… I have a tendency to over-bake. Transfer the cookies to a rack to cool. Enjoy with a nice glass of cold milk.

Butternut Squash Enchiladas

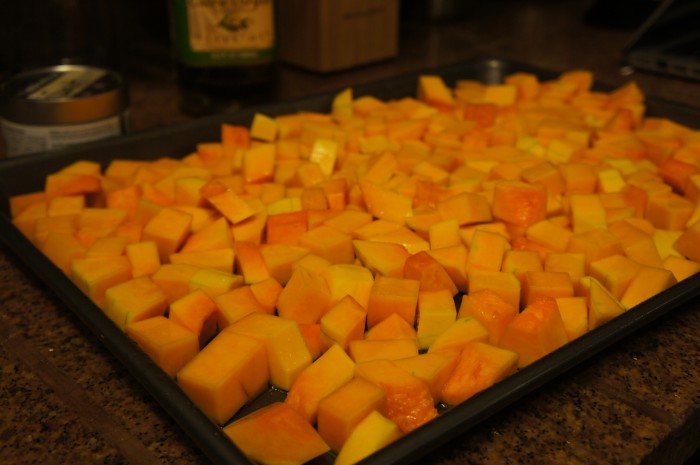
Squash for Enchiladas

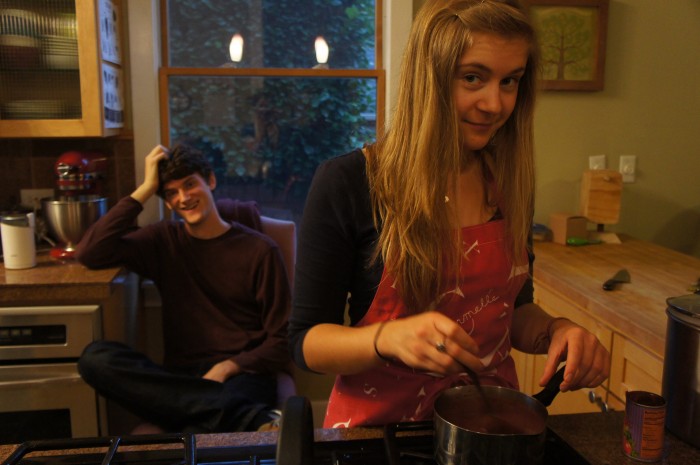
Carmelle makes enchilada sauce
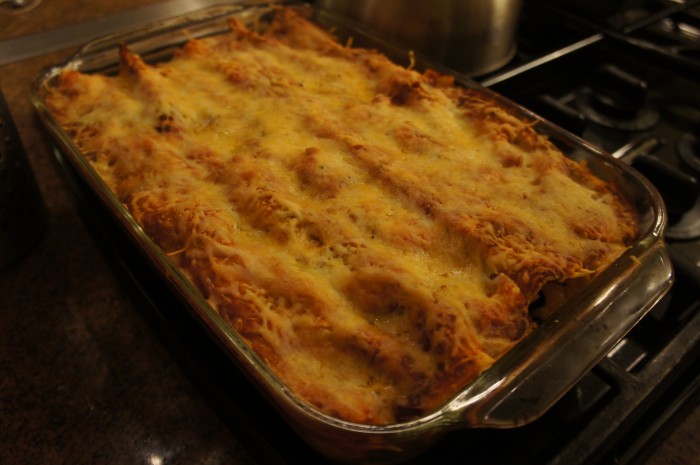
Squash enchiladas pre-cheese

Squash Enchiladas

Fall is a perfect excuse to put squash in, oh, just about everything you make. Squash ravioli? Yes. Squash cake? Absolutely. Squash enchiladas? Of course.

The inspiration for this meal came from 1) the abundance of squash at the grocery store, 2) the fact that I’d had something similar (some kind of squash taco) at a restaurant here in Portland called Oba, 3) there were people coming for dinner, and I wanted to make something easy that was basically a meal in a dish. This was exactly that, a delicious, relatively easy meal in a dish. I’ll also say this: this was loosely based on a squash enchilada recipe I found, but I was quasi-doubling it. Also, I bought too big of a squash because it was pretty. So we had lots of extra filling, which I just threw in a pan, covered with enchilada sauce and cheese, and baked on it’s own, sans tortillas. But I’ll try adjusting amounts below so that you don’t have that same problem.

Butternut Squash Enchiladas

Ingredients

One ~2 lb butternut squash, peeled, seeded, and cubed
Olive oil & salt
1 can black beans, rinsed
1 medium onion, diced
mild green salsa (we used one of those little cans from the grocery store)
12 small corn tortillas
1-2 cans enchilada sauce (Carmelle made our enchilada sauce because she is a Mexican food guru… but I was prepping the filling, so I wasn’t paying attention. Dang!)
1 bag of mexican blend shredded cheese

For serving: sour cream and sliced avocado

Instructions

First, preheat your oven to 400 degrees. Spread your squash on a large baking sheet, toss with olive oil and salt, and bake for 20 minutes, or until squash is tender. Remove from oven and allow to cool for a few minutes before putting into a large mixing bowl. Add the black beans and onion and mix to combine. At this point, you can lower the temperature of your oven to 350 degrees.

Cover the bottom of a large casserole dish with a layer of enchilada sauce and about half the can of salsa. Warm the tortillas a little bit, one by one, in a pan with a little bit of olive oil, just so that they won’t break when you stuff them. Take a warm tortilla, fill it with the squash/bean/onion mixture, a sprinkle of the cheese, and roll it up. The ends don’t need to be all nice and tucked in, but you want the tortilla to overlap enough… Does that make sense? Fill the dish with filled, rolled tortillas, and cover with enchilada sauce, salsa, and the rest of the cheese (or just however much cheese you want).

Throw that dish in the oven (don’t throw it, actually… that would be bad) for 30 minutes, or until the cheese is bubbling and a bit brown. Allow to cool for a few minutes before serving with sour cream and slices of avocado. Enjoy!

Delicious Chocolate Cupcakes (that also happen to be gluten-free)

Roza and cupcakes

Cupcakes
Frosted Cupcakes

If you read the title, let me preface this post by saying that I am not often a baker of gluten-free food… Actually, I’m not ever really a gluten-free (GF) cook, if I have anything to do with it. The GF baked goods that I have had in my life are generally sad, deflated looking little things, and usually don’t taste super. So, I try to avoid it.

As you may know, this past year, Jonah and I were nannying for a family, and they are gluten free. I had baked some things for them before (muffins, breads, even pie) and while they were impressed because it usually was pretty good, I was not. You’re going to tell me that pie dough that I made with potato and coconut flour and butter was better than my usual flour-butter-shortening? I don’t think so. But when Roza’s birthday rolled around (see photo below), I wanted to make her the best GF cupcakes I could find. How could you not with a face like that? And I must say, If you just gave me that cupcake, I would not know that it doesn’t have any sugar or flour in it. It is perfectly fluffy and dense at the same time, perfectly chocolatey without being too sweet… It was good. So yeah, these are, by non-GF standards, good cupcakes.

Now let me tell you a bit about Roza. She is the cutest 4 year old I’ve ever met in my life. With a voice like a cartoon character and an endlessly positive attitude, she always had the ability to make me howl with laughter. She was super into Curious George at the time, and we had been reading her this story where George is home alone and finds all these party favors and decorations and cake ingredients, etc. for a party, so he decorates and makes the cake, and then it turns out the party is for him! So Roza’s mom decided to do the same thing. All week, Roza cleaned the house with her little miniature broom for a party she knew we were having, and then she and I decided to make cupcakes for said party. Then, at dinner on Friday with her parents and me and Jonah, we surprised her with the fact that this all was her own birthday party! It was the most adorable thing ever. Their family doesn’t eat sweets a whole lot, and usually sweets aren’t things like chocolate cupcakes, so she was pretty enthused by the idea of baking sweets like these. While we were making them, we had this conversation about 20 times:

Roza: Annie, do you know what is yummy?
Annie: What’s yummy, Roza.
Roza: Chocolate… (Breaks into giggles).

Have I mentioned how much I love her? I have? Ok. I’ll stop.

Gluten-Free Chocolate Cupcakes

Note: A lot of GF recipes will not use just coconut flour. In fact, when I told Roza’s parents that this recipe only had coconut flour, they didn’t think it would be very successful. But the key is using LOTS of wet ingredients. Coconut flour soaks up moisture like nothing else, so in order to balance it out, the batter will seem pretty wet. But it works, I swear.

Ingredients

Cupcakes

¼ cup coconut flour
¼ cup cocoa powder
¼ tsp sea salt
½ tsp baking soda
3 eggs
¼ cup canola oil (the recipe called for grapeseed, but I used canola because it’s what we had around)
½ cup agave nectar (we did a little bit less than this since their family is into less sweeteners)

Frosting

1 cup chocolate chips (preferably dark)
½ cup canola oil (again, the recipe called for grapeseed, but I still didn’t have any)
2 Tbl agave nectar
1 Tbl vanilla extract
a pinch of salt

Instructions

Cupcakes

Preheat your oven to 375 degrees. In a mixing bowl, combine coconut flour, cacao powder, salt and baking soda and stir. In a larger mixing bowl, blend together the eggs, oil and agave. Then mix the dry into the wet, and stir until thoroughly combined. Line your cupcake tin with liners, and scoop about 1/4 cup of batter into each liner. Bake them for ~20 minutes, or until a toothpick inserted comes out clean.

Frosting

In a small saucepan over very low heat (or in a double boiler, if you’re feeling that it’s necessary), melt chocolate and oil together. Stir in the agave, vanilla, and salt. Then put the frosting in the freezer for 15 minutes to chill and thicken – mine took longer than 15 minutes to thicken up, but then it was a bit difficult to spread because I think I left it in the freezer for too long… I’m sure there’s a happy medium here, I just didn’t quite hit the nail on the head my first try). After removing from the freezer, whip it with a hand blender (or transfer from the pot you used to a standing mixer and use that) until it is fluffed up. Spread over the cupcakes and enjoy! Roza definitely did.