Course

Saffron Risotto with Mushrooms

Saffron Risotto with Mushrooms // Serious Crust by Annie Fassler

I mentioned a couple of weeks ago that Jonah and I recently purchased The Family Meal by Ferran Adria. As soon as we got it in the mail, Jonah proceeded to look at the whole book, page by page, cover to cover. Which was really adorable. He was pretty excited. Anyway, a couple days later, I finally got it out and flipped through it, and I too got really excited. There are so many awesome recipes in this book, and the layout is great. It tells you the timeline of your meal (2 hours before, you can start doing task #1, 1 hour before, you can start doing tasks #2 and 3, 40 minutes before… you get the idea), it tells you how much of each ingredient you will need to make the meal for 2 people, 6 people, 20 people, and 75 people. So we can perfectly cook for just the two of us, or we can cook for us and a bunch of friends. Lastly, the recipe itself is in photograph form, so you know exactly what each step looks like, which is such a big thing for a lot of people. And it has super specific instructions, i.e. instead of saying “cook until lightly browned” it says “cook for 16 minutes.” Which is so nice.

Anyway, while flipping through it for the first time, we marked a bunch of the recipes we wanted to try first, and then went to the store to pick up ingredients for a couple meals this week. The coolest thing was that because we had bought a chicken at the farmers market a couple weeks ago, cut it into pieces, frozen the pieces, and made broth out of the carcass, we had almost all of the ingredients we needed for these meals. First up was saffron risotto with mushrooms. I have never made risotto before, and was a bit nervous about it, because it’s one of those things that seems like it might be easy to mess up – overcook, undercook, underseason, overseason… etc. But because the instructions for these recipes are so specific, I had no fear!

Saffron Risotto with Mushrooms

Serves 2

Ingredients

2 1/2 cups chicken stock (can be replaced with vegetable stock)
1 pinch saffron strands
1 1/2 Tbl olive oil
1/4 white onion, finely chopped
2 Tbl white wine
1 cup risotto rice, also called arborio rice
2-6 white mushrooms (it all depends on how big your mushrooms are and how many you want on your risotto)
1 tsp butter
1/4 cup grated parmesan cheese
1 tsp (maybe more) fresh lemon juice

Instructions

Put all of the stock into a sauce pan, cover, and bring to a simmer.

This is the weird part, where I wish you could see the cookbook so you could see the photos. Make a little envelope out of tinfoil, put the saffron threads in it, and toast them in a pan over medium heat for one minute. Don’t le it burn! Remove from the pan and let it cool.

In a large pan or pot, heat the oil over medium heat, then add the onions. Once they’re soft, but not browned, add the wine and scrape up any browned bits from the bottom of the pan. When most of the wine has cooked off, add the rice and let it cook for 3 minutes, stirring all the while. Add one ladle-full of stock, and cook for 2-3 minutes, stirring often to keep it from sticking. Pour the rest of the stock into the pot. Quickly chop the saffron and add it to the pot. Cook the rice for 16 minutes (what precision!), stirring frequently.

While the rice is cooking away, wipe the mushrooms clean with a paper towel, and slice them as thin as you can. You can use a mandolin if you’ve got one, or just a sharp knife. Put them in a bowl and set aside.

When the rice has absorbed the majority of the liquid and is a little al dente, add the butter, and then the parmesan. Stir until the rice is nice and creamy, and season it with salt, pepper, and lemon juice. Spoon the risotto onto plates and top with mushroom slices, and enjoy!

All-In Pesto

All-in Pesto by Serious Crust

A few weeks ago, my dad and Darla came down to Portland for my cousin Lia’s oral thesis defense. I really wanted to go to the farmer’s market before brunch, and Dad came along. My dad is a lover of produce. I cannot tell you how excited he got about the range of items available at our market (and how decently priced everything was compared to his fancy Seattle market). I’ve never seen someone so excited over nettles before.

Anyway, between the two of us, we bought 3 bunches of radishes. My dad, needing to drive back to Seattle with a large dog in the car, was trying to minimize his load as much as possible, ripped the radishes from the greens, and left the greens to me. A la Tamar, I knew I could use them, I just had to figure out how. And then it hit me: pesto.

I have since made 2 batches of the stuff, and people LOVE it. And you can use greens other than radish tops: kale, kohlrabi greens… anything green and leafy. The other beautiful thing about this recipe is that it’s not really a recipe – it’s more like guidelines. Use whatever you’ve got around (ergo the all-in title: you can put it all in), and put it on anything and everything. We started with pasta and went from there: we used it as a rub for a whole chicken and potatoes that we roasted, ate it with cheese and crackers and charcuterie, and (my favorite) topped some crusty bread with fromage blanc, the pesto, and a soft boiled egg.

All-In Pesto

Ingredients

Radish tops, stems picked off, and rinsed
Basil, rinsed
A hard salty cheese, like pecorino romano or parmesan
Pine nuts or shelled pistachios (or any combination of the two)
Garlic, peeled and roughly chopped
Olive oil
Salt

Instructions

In a food processor combine all ingredients. It’s best to start with all of your greens, but about half of everything else, so that you can adjust flavor and texture to your liking. Pulse until smooth, and enjoy!

Strawberry Rhubarb (and Orange) Crisp

Strawberry Rhubarb Crisp from Serious Crust

Strawberry Rhubarb Crisp from Serious Crust

Well friends, my favorite season is upon us. The season of rhubarb. The time of year when I try to fit in as many strawberry-rhubarb (or just rhubarb) recipes as my taste buds can handle, which is usually not a problem. These days, I buy a large bag of rhubarb every weekend at the farmers market, and then I whip something up late in the week to enjoy over the weekend. Thus far, I’ve made a pie, some compote, rhubarb simple syrup so I can make these, and this strawberry rhubarb crisp.

I found the inspiration for this recipe on a blog I love, and read at least a few times a week called Design Sponge. It’s a beautiful design blog, full of postings about furniture DIYs, beautiful spaces, colors, living in, city guides, recipes, party ideas, women running their own businesses… the list goes on and on. I find so many things on this blog that inspire me, and so many of their pictures make me wish I could be wherever the photo was taken. Seriously, I recommend it.

Anyway, I thought this recipe would be especially nice because of the addition of the sweet citrus of orange to the usual strawberry-rhubarb-ness. It’s always nice to try a little twist to shake things up, no? I made the filling (based on the recipe I found on the website), and my roommate Carmelle made the topping (and did not follow a recipe at all – she’s like that), so while mine had a different topping, I’ll give you the topping they have on Design Sponge. I also doubled the amount of filling, mostly because I had a ton of strawberries and rhubarb to use up, but I’ll give you the smaller portions, and you can double if you’d like.

Strawberry Rhubarb Crisp

Ingredients

Strawberry Rhubarb Filling

2 cups fresh rhubarb, diced (about 3 stalks)
2 cups fresh strawberries, hulled and sliced into large pieces
3/8 cup sugar
1 teaspoon orange zest
1/2 tablespoon cornstarch (depending on how juicy your strawberries are, you may want more)
1/4 cup orange juice (preferably fresh-squeezed, as per usual)

Crisp Topping

3/8 cup sugar
1/2 cup light brown sugar, lightly packed
3/4 cup all-purpose flour
1/4 teaspoon kosher salt
3/4 cup quick cooking (not instant) oatmeal
7 tablespoons (about 3/4 stick) cold unsalted butter, diced

Whipped cream or ice cream for serving

Instructions

Strawberry Rhubarb Filling

Preheat your oven to 350 degrees. To make the filling, mix the rhubarb, strawberries, sugar, and orange zest together in a large bowl. In a measuring cup, dissolve the cornstarch in the orange juice and mix it into the rest of the filling. Drain about 1/2 cup of juice from the mixture into a cup and set aside (you will use this later to pour over individual servings). The best way to do this is get an extra person to help you tip the bowl while keeping the fruit in with a wooden spoon. Pour the filling into an 8×8 baking dish and place it on a sheet pan (not a terrible idea to line it with parchment paper or foil).

Crisp Topping

In the bowl of an electric mixer with the paddle attachment, combine the sugars, flour, salt and oatmeal. With the mixer on low speed, add the butter and mix until the dry ingredients are moist and the mixture is in crumbles. You want the butter to stay cold, so if you don’t have a mixer, either work quickly with your hands or use a pastry cutter type thing. Sprinkle the topping over the filling, covering it completely, and bake for about 45 minutes, until the filling is bubbling and the topping is golden brown.

Allow to cool, and once it has you can pour that drained juice from earlier over the top of each serving (Or, if you’re lazy, you can pour it over the whole dish). Serve warm with fresh whipped cream (or vanilla ice cream, if that’s how you roll).

Fried Baby Artichokes

Fried Baby ArtichokesFried Baby Artichokes

We have been hitting up our local farmers market like crazy. If you live in Portland and you don’t go to the PSU Farmers Market on Saturdays, you are seriously missing out. Especially when the weather is beautiful and there is SO MUCH PRODUCE everywhere to be found. It’s really incredible.

Lately, Jonah and I have bought chanterelles, fennel, fiddlehead ferns, rhubarb (so much rhubarb), strawberries, a chicken, radishes, leeks, lamb steaks, sunchokes, spring onions, cheese… the list goes on. There is so much delicious local food to be found, it’s like being in heaven. And these mounds of food and people walking around in sundresses and shorts with bouquets of flowers are all so beautiful.

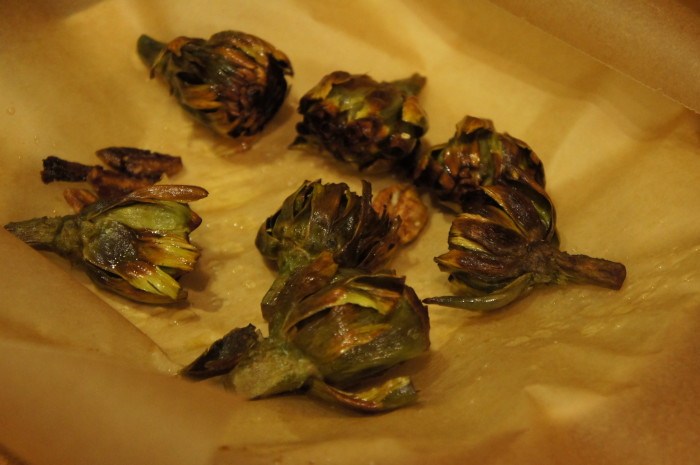
Anyway, one of my favorite things we’ve found at the market is baby artichokes. Have you ever had fried baby artichokes at a restaurant? It’s a common Italian dish. The leaves get crispy and a little burnt and it’s really yummy. So when we brought these home, we knew we wanted to make that dish. We found a simple recipe on Martha Stewart’s website, and Jonah took over the making of these little guys. We bought 8 of them to cook, but the recipe is obviously variable depending on how many you want to make.

Fried Baby Artichokes

Ingredients

8-12 baby artichokes
1/2 cup olive oil
1/2 tsp sea salt, plus some for serving
4 cloves garlic (or more, if you want), lightly crushed
lemon for serving

Instructions

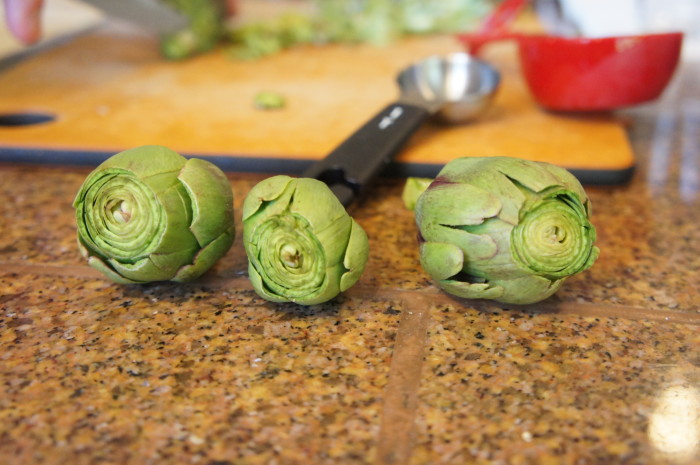
Prepare the artichokes by removing the tough outer leaves, cutting off the top third of the , and peeling the tough dark green layer from the stems with a paring knife. I know, it seems like you’re losing a lot of artichoke here, but you’re really just getting rid of all the really tough parts that would make this whole thing harder and far less pleasant to eat.

Pour the oil and 1/2 cup water into a medium sized, deep, heavy pot and add the artichokes and 1/2 tsp of sea salt. Turn the heat on to medium-high, and let them cook, turning them over occasionally (you don’t want them to get burned on one side). Cook them until the water has evaporated and the oil starts to spit, which, trust me, it will. This will take about 8-10 minutes.

When the water has cooked off, add the garlic to the pot and reduce the heat to medium. Cover the pot with a spatter screen or an sieve turned upside down (Nice tip Martha! Sadly our sieve wasn’t big enough for our pot… I’m thinking it’s time to invest in a spatter screen). Continue cooking the artichokes and turning them occasionally, until they’re tender and golden brown all over (should be another ~10 minutes). Now take some tongs and put them upside down (or cut-side down, however you want to think about it) in the pan, pressing them down and wiggling them around to kind of loosen up and separate the leaves. Leave them upside down and let them cook like that for another 5 minutes, until the leaves/edges are dark and crispy. Using your tongs, transfer artichokes and garlic from the pan to a plate covered in paper towels. Put the artichokes cut sides down at first, if you can, so they can drain a little bit.

Sprinkle them with salt, squeeze some lemon over top, and serve!