Mains

Stale Bread Soup // Serious Crust by Annie Fassler

Stale Bread Soup (Ribollita)

Stale Bread Soup // Serious Crust by Annie FasslerStale Bread Soup // Serious Crust by Annie Fassler

I realize that at this point you might be sick and tired of hearing us harp about how great Tamar Adler’s An Everlasting Meal is. But hear me out one more time. Everyone has stale bread. Or at least everyone who has bread at some point and does not eat it all eventually has stale bread lying around. And most of the time it gets thrown away, or responsibly composted. If you are culinarily educated, dear reader, you may already have known of stale bread soup; but as I read Tamar’s book, I was astounded to find out that not only does such a thing exist, but there is a long and ancient tradition of creating soup from leftover bread (Ribollita in Italian).

There are a few things that should be said about stale bread soup. First, it is not a soup in the same way that chicken noodle is a soup; stale bread soup is usually much thicker and feels more like a hearty chili. Second, stale bread soup is more of a general idea and a starting point than a recipe. It is meant to be made with whatever is around, provided you have some stale bread (otherwise, you will be making whatever-is-around soup – which could turn out to be vegetables-in-water “soup” if you don’t have any broth lying around).

The recipe below is adapted slightly from Tamar’s recipe for Ribollita in An Everlasting Meal. In usual Tamar fashion, you will use A LOT of olive oil in this recipe. We have made stale bread soup twice now, so I’ve noted the different things we used.
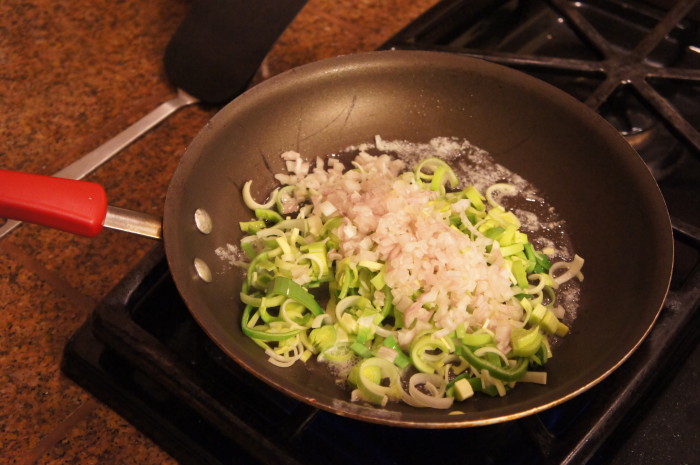
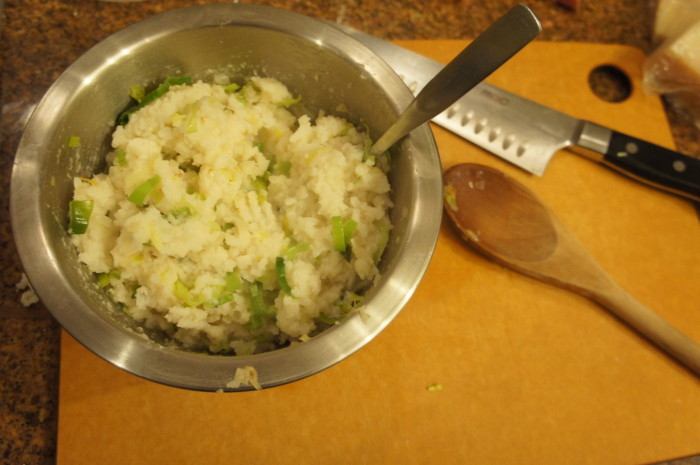
Stale Bread Soup (Ribollita)

Ingredients

Olive oil
1 onion, diced
2 cloves garlic
Celery, if you have it (I did not)
salt
1/2 cup chopped fresh herbs like parsley or rosemary or thyme (if you don’t have fresh, maybe do 1/4 cup dried?)
1/2 teaspoon chile flakes
Tomatoes in some form, if you want (3 peeled fresh tomatoes, or I used 1 can diced. Made it once without tomatoes as well)
1 bunch leafy greens (I used kale once and cauliflower greens once; other ideas are swiss chard, collard greens, radish greens, etc)
1/4 cup water
2 cups cooked beans (I used a can of black beans both times, Tamar suggests chickpeas or cannellini beans)
2 cups broth from beans or chicken/veggie stock or cans of tomatoes (I used a combo of all three, and you can make up any shortfall with water)
1 piece of Parmesan rind (Do this if you can, because it makes the soup soooo tasty and rich. Also, what else are you going to do with your Parmesan rind?)
2 cups stale bread, crusts removed, torn/cut into 1/2-inch pieces

Instructions

Heat 1/4 inch olive oil (this is just the beginning) in a big-ish soup pot. Cook the onion and garlic (and celery if you have it) until they soften. Add the herbs and chile flakes and a little bit of salt. Add the tomatoes and cook for a few minutes over medium heat.

Chop the greens (and remove from the stems) then add to the pot, and add the water. Cover and cook over low heat until the greens are wilted. Put in all your broths/waters/juices and the beans, plus the Parmesan rind.

(If you have a bunch of Parmesan left, make sure to cut the rind from the rest of the Parmesan. Otherwise, just save the Parmesan rind for when you will next make bread soup. Make sure your Parmesan is big enough that you can keep track of it, because you’re going to take it out later.)

Bring to a simmer, then add the bread and more olive oil (Tamar says to add 1/2 cup, but I was not brave enough and probably added about a 1/4 cup at this point). Cover and cook for 1/2 hour on low, stirring occasionally to make sure the bottom doesn’t burn. The bread will soak up the soup and then liquify into it.  Taste it, add more broth or salt or whatever you want, and then take it off the heat.

Add in another 1/2 cup olive oil (Tamar, are you crazy!?!? I probably added 3 tablespoons here) and take out the Parmesan rind. You can grate Parmesan on top and add some pepper to serve.

This soup is perfect for a windy, rainy, cold, or dark winter/fall night.

Fresh Pasta with Breadcrumbs, Leeks, and Pancetta // Serious Crust by Annie Fassler

Fresh Pasta with Pancetta, Leeks, & Breadcrumbs with Porcini Powder

Fresh Pasta with Breadcrumbs, Leeks, and Pancetta // Serious Crust by Annie Fassler

Fresh Pasta with Breadcrumbs, Leeks, and Pancetta // Serious Crust by Annie Fassler

Fresh Pasta with Breadcrumbs, Leeks, and Pancetta // Serious Crust by Annie Fassler

Porcini powder. Porcini powder? Yes. From the farmers market. I was told it was wonderful, and was given a little bag as a gift. But what to do with the stuff, that’s the question. I’m not sure I made the right choice… This pasta dish had so much going on in it that the porcini flavor was hiding. It was hiding behind the sourdough breadcrumbs and butter it had been sprinkled into, and under the pancetta it had been tossed with, and between the fresh pasta noodles it had been swirled around with.

All that being said, this dish was dang good, if I do say so myself. There were a few elements, and it took a few pans to get it all prepped. So no, this is not one of those magical one pot meals. Certainly not.

My dear friend Elsa was staying with us, and my friend Dylan came over for dinner, as well as Elsa’s friend Sarah, so we had help in manning all the pans. Tamar Adler said in The Everlasting Meal that there is value in, when a guest asks “is there anything I can do to help?” being able to say, “yes.” I have found that to be very true.

Think of this recipe as a guideline. Or a lightly painted upon canvas. You can remove, add, flavor, sprinkle, drizzle anything you like. I must say, though, that I used a different pasta recipe this time, and I liked it much better than the one I had been using. There’s something to be said for trying something new.

Fresh Pasta with Pancetta, Leeks, & Breadcrumbs with Porcini Powder

Ingredients

Fresh Pasta

2 cups all-purpose flour
3 eggs

Toppings

Olive oil
1 large or 2 small leek(s), sliced and rinsed
1 small white onion, chopped
2-3 cloves garlic, minced
Pancetta – the amount is up to you. I like the pancetta that is thin, almost like prosciutto, though that isn’t what we used here. I think if we’d used the thinner kind, it would’ve clung to the noodles better.
Fresh breadcrumbs
Butter
Porcini powder
Salt and pepper

Instructions

Fresh Pasta

To make the pasta, pulse the flour alone in a food processor a few times. In a bowl, beat the eggs and then add them to flour, and process until the dough forms a ball. If your dough is dry and looks like little pea sized pieces of dough, you can add water 1/2 tsp at a time. If it sticks to the bowl of the processor, add flour 1 Tbl at a time. When the dough has formed a ball, turn it out onto a floured work surface and knead for 1-2 minutes. Wrap the dough in saran wrap and set it aside for up to 2 hours to relax (at least 15 minutes). Then roll out the pasta as you usually do and cut it as you normally would.

Toppings

In a pan over medium (or medium low), cook your pancetta, then set aside on a plate with a paper towel on it. Once the pancetta is removed, you can use that same pan to sautée the leeks, onion, and garlic, seasoning lightly with salt and pepper. You may want to add a drizzle of olive oil to the pan to help keep things from sticking. But then again, maybe you won’t.

In another pan, melt some butter, then add the breadcrumbs and as much porcini powder as you feel like adding. Toast the breadcrumbs on low heat, stirring frequently to prevent burning.

As things are moving along, get out a big pot, fill it with water and a healthy serving of salt, and bring to a boil. Add the pasta (I like to cook fresh pasta in batches, as it makes it less likely to stick together). If you’re cooking fresh pasta, it really only needs to cook for a few minutes. I like to remove it when all the noodles are floating. Do you have a better method? I’d like to know it. If you’re cooking your pasta in batches, you can remove it with tongs into a colander to keep the water boiling on your stovetop.

Strain the pasta, put it in a bowl, and toss with all the various bits and pieces. Enjoy with a glass of buttery, nutty white wine and friends, around a table, on a sunny evening.

Saffron Risotto with Mushrooms // Serious Crust by Annie Fassler

Saffron Risotto with Mushrooms

Saffron Risotto with Mushrooms // Serious Crust by Annie Fassler

I mentioned a couple of weeks ago that Jonah and I recently purchased The Family Meal by Ferran Adria. As soon as we got it in the mail, Jonah proceeded to look at the whole book, page by page, cover to cover. Which was really adorable. He was pretty excited. Anyway, a couple days later, I finally got it out and flipped through it, and I too got really excited. There are so many awesome recipes in this book, and the layout is great. It tells you the timeline of your meal (2 hours before, you can start doing task #1, 1 hour before, you can start doing tasks #2 and 3, 40 minutes before… you get the idea), it tells you how much of each ingredient you will need to make the meal for 2 people, 6 people, 20 people, and 75 people. So we can perfectly cook for just the two of us, or we can cook for us and a bunch of friends. Lastly, the recipe itself is in photograph form, so you know exactly what each step looks like, which is such a big thing for a lot of people. And it has super specific instructions, i.e. instead of saying “cook until lightly browned” it says “cook for 16 minutes.” Which is so nice.

Anyway, while flipping through it for the first time, we marked a bunch of the recipes we wanted to try first, and then went to the store to pick up ingredients for a couple meals this week. The coolest thing was that because we had bought a chicken at the farmers market a couple weeks ago, cut it into pieces, frozen the pieces, and made broth out of the carcass, we had almost all of the ingredients we needed for these meals. First up was saffron risotto with mushrooms. I have never made risotto before, and was a bit nervous about it, because it’s one of those things that seems like it might be easy to mess up – overcook, undercook, underseason, overseason… etc. But because the instructions for these recipes are so specific, I had no fear!

Saffron Risotto with Mushrooms

Serves 2

Ingredients

2 1/2 cups chicken stock (can be replaced with vegetable stock)
1 pinch saffron strands
1 1/2 Tbl olive oil
1/4 white onion, finely chopped
2 Tbl white wine
1 cup risotto rice, also called arborio rice
2-6 white mushrooms (it all depends on how big your mushrooms are and how many you want on your risotto)
1 tsp butter
1/4 cup grated parmesan cheese
1 tsp (maybe more) fresh lemon juice

Instructions

Put all of the stock into a sauce pan, cover, and bring to a simmer.

This is the weird part, where I wish you could see the cookbook so you could see the photos. Make a little envelope out of tinfoil, put the saffron threads in it, and toast them in a pan over medium heat for one minute. Don’t le it burn! Remove from the pan and let it cool.

In a large pan or pot, heat the oil over medium heat, then add the onions. Once they’re soft, but not browned, add the wine and scrape up any browned bits from the bottom of the pan. When most of the wine has cooked off, add the rice and let it cook for 3 minutes, stirring all the while. Add one ladle-full of stock, and cook for 2-3 minutes, stirring often to keep it from sticking. Pour the rest of the stock into the pot. Quickly chop the saffron and add it to the pot. Cook the rice for 16 minutes (what precision!), stirring frequently.

While the rice is cooking away, wipe the mushrooms clean with a paper towel, and slice them as thin as you can. You can use a mandolin if you’ve got one, or just a sharp knife. Put them in a bowl and set aside.

When the rice has absorbed the majority of the liquid and is a little al dente, add the butter, and then the parmesan. Stir until the rice is nice and creamy, and season it with salt, pepper, and lemon juice. Spoon the risotto onto plates and top with mushroom slices, and enjoy!

Rice Cakes

Rice Cakes (using rice gone wrong)

Rice Cakes
Rice Cakes

Rice Cakes

Sometimes you’re in the kitchen and you have a lot going on and you miss something going wrong. Maybe you accidentally over-salt your pasta or you burn your veggies. There’s a whole (albeit little) chapter in Tamar Adler’s book all about how to save your mistakes. For example, turn those burned veggies into a smoky veggie salad. Or take that over-salted pasta, mix it with some herbs and butter, and make a frittata. The possibilities are endless.

A while ago, Jonah and I made these rice bowls. We doubled the rice recipe, and I must’ve done some math wrong and put in way too much liquid. So, while the rice tasted good, it was definitely a little mushy. After sitting in the fridge sadly for a week, I was thinking of using it to make rice cakes. Jonah reminded me about the “Further Fixes” chapter in An Everlasting Meal, so to the book I went. It kind of told me what I was already thinking of doing, so on I went.

Rice Cakes

Ingredients

roughly 3 cups of overcooked rice
1 large shallot, finely chopped
1/2 leek (if I’d had a whole one, I’d have used it), thinly sliced
salt, pepper
garlic powder
parmesan cheese
olive oil for cooking

Instructions

I heated up the rice in the microwave, drizzling it with water to kind of re-steam it. If your rice won’t stick together (perhaps it’s not quite as mushy as mine was), feel free to stir an egg into the mix. Stir together the rice, shallot, and leek, and add any seasoning you like. I added a few shakes of garlic powder, probably 1/2-1 tsp salt, and probably 1/4 cup grated parmesan. But none of this has to be exact. Put a bunch of stuff you like in there. I bet chopped sage would’ve been good, as would onion and garlic.

Heat some olive oil in a nonstick pan over medium heat, form the rice mixture into patties, and cook on each side until golden brown, roughly 3-5 minutes. Add more oil as you need it. You want them to have a nice crispiness on the outside to add some texture.

We ate them alongside some delicious panko-crusted tilapia and roasted broccoli. They would make a great appetizer for a fancier dinner. Also, they would make a delicious breakfast had I put a fried egg on top. Or melted a slice of cheddar. With some breakfast sausage on the side. See, there are so many uses for botched food! Now go mess up some rice.

beet tart

Beet Tart

beet tart

OK people – I know we read a lot of food books and talk about them all the time, but if there is ONE book you are going to read from our suggestions, let it be An Everlasting Meal by Tamar Adler.  It is amazing book that changed my life, and is sure to make you think and act differently around food.  If you have not read it yet, go read our blog post on her book, and then continue below.

This beet tart is a perfect example of Tamar’s philosophy and grace: if you attacked this beet tart recipe from start to finish in one cooking session alone – it would take most of your day; first you would have to roast the beets (which takes a long time anyway), then make tart dough and chill it for an hour, then bake the tart dough, then put together the filling, bake some more, add the sliced beets, and bake once again.  Sounds daunting! I would never have done this recipe if it wasn’t spread out over many days and incorporated in the general meal preparations for the week.  However, the manner in which it was made made it feel like I was just throwing leftovers together in a very creative way, rather than a labor intensive ordeal.

Here’s what happened: A few days before, Annie and I roasted a whole bunch of veggies for dinner (or was it lunch?).  We filled the whole oven and roasted lots of different veggies with olive oil and salt.  I fit the beets in a small pan with a 1/2 inch of water in the bottom, covered them with foil, and let them roast for a long time (probably too long, I may have forgotten about them).  We ate the other roasted veggies as part of our dinner that night, but we had no intention of eating the beets that day, so we didn’t have to wait around for them to roast.  We let them cool and then peeled them and put them in the fridge before bed.  Now we had roasted beets peeled beets in the fridge.  We had no plan but we had ideas: beet salad, beet pasta, or beet anything; they were simply a nice starting point.

A few days before roasting the veggies, we had made a different veggie tart using the Olive Oil Tart dough recipe that can be found in Tamar’s book, so we had some leftover in the fridge.  A few days later, I looked in the fridge and saw that a perfect storm had brewed for a beet tart.  There, sitting in the fridge waiting to be used, were roasted peeled beets, tart dough, and some leftover ricotta cheese.

If you want to make this recipe from start to finish, more power to you.  However, I would suggest at least making the tart dough a day ahead, and then looking through your fridge to find any vegetables that would work, roast them, and put them on top of the tart in place of beets.

Beet Tart

Note: You’ll want to roast your beets or other vegetables before you make the tart dough.

Ingredients

Olive Oil Tart Dough

2 1/2 cups all-purpose flour
1/3 cup olive oil
1/2 cup ice water
1 teaspoon salt

Beet Tart Filling

1 1/2 cups ricotta (fresh)
1/4 cup olive oil
2 Tb. cream (I think I just used leftover creme fraiche)
1/2 t. salt
2 egg yolks
a pinch of fresh thym or rosemary

Instructions

Olive Oil Tart Dough

Mix all ingredients together in a bowl. If its too dry, add more water, a tablespoon at a time. Divide the dough in half and roll into balls, then put them in the fridge to chill.

Take out one dough ball (you get to save the rest for another day!) and roll it out on a floured counter until its about 1/4 inch thick. Heat the oven to 400 degrees.  Grease the bottom of a 9-inch pie pan and dust with a bit of flour. Lay the crust in the pan and trim the edges. Prick the bottom a few times (this dissuades bubbles from appearing in your tart dough). Cover the crust in aluminum foil and put some dried beans or pie weights in to fill the tart and hold down the dough. Bake for 20 minutes.

Beet Tart Filling

Whisk together filling ingredients. Pour into the pre-baked tart dough (remember to take out the dried beans and aluminum foil!) and bake at 400 degrees for 15 minutes.  Now lay your beet slices (I cut mine into half-moons) on top of the ricotta filling in a single layer and bake for another 10 minutes.  Let it cool and eat at room temperature.

It is very filling and great for lunch the next day and many days after!

Soba Noodles with Mango and Eggplant

Soba noodles, eggplant, onion, mango, cilantro, basil, and dressing all tossed into a bowl.

Jonah slices and dices all the colorful ingredients for the soba noodles.
It feels very weird to spread a pile of noodles on a dish towel to dry... But I'll do pretty much anything Ottolenghi tell me to.

As I mentioned in an earlier post, Jonah and I made dinner for my mom and her boyfriend back in December. Now I believe I have told you of my love for Yotam Ottolenghi’s cookbook “Plenty,” yes? This meal was no exception. The meal was all vegetarian, and 2/3 dishes were from that cookbook. The meal was light, refreshing, and packed with flavor. Not to mention the great company.

I fear that I am reaching a point where I cannot keep posting variations of these recipes, I just need to tell you to please, please, please go buy this cookbook. Even if vegetarian food isn’t your thing, even if the photos don’t make your stomach growl, even if the lists of ingredients leave you with questions swirling around in your hear. I beg you. Just go buy it. And then, please proceed to make everything in it, even if it doesn’t jump off the page. Every single dish I have made from this book (as well as his other book, “Jerusalem”) has been so lovely and flavorful that I wish I had tripled them all so I could enjoy the leftovers or share with a bunch of my friends.

Back to the dinner. These room temperature soba noodles are one of the few recipes in the book that did jump off the page for me. But somehow, I still hadn’t made it. While it’s a little prep-heavy, trust me, it’s worth it. Packing a lot of flavor and lots of little bites with different tastes (onion, eggplant, peppers, mango, the list goes on…), this recipe is bound to be a crowd pleaser. I can see it being especially good for kids. What kids don’t love noodles and mango? That’s what I thought: none.

Soba Noodles with Mango and Eggplant

Ingredients

1/2 cup rice vinegar
3 Tbl sugar
1/2 tsp salt
2 crushed garlic cloves
1/2 of a red chile, finely chopped
1 tsp sesame oil
zest and juice of a lime
1 cup sunflower oil (we used canola)
2 eggplants, cut into ~1 inch cubes
a bag of soba noodles
1 large ripe mango (let’s be honest, more than one probably couldn’t hurt…), cut into ~3/4 inch cubes or thin strips
1 2/3 cups fresh basil leaves, roughly chopped
2 cups cilantro leaves, roughly chopped
1/2 red onion, thinly sliced (think paper thin, if you can)

Instructions

In small pot, warm the vinegar, sugar, and salt until the sugar just dissolves. Remove from heat, then add the garlic, chile, and sesame oil, and, once it’s cool, the lime zest and juice.

In a large saute pan, heat the oil and fry up the eggplant. You’ll probably need to do this in a few batches. But you want the eggplant to be nice and golden brown. After all the eggplant is cooked, put it in a colander in the sink, sprinkle (“liberally”) with salt, and leave to drain.

While cooking the eggplant, bring a large pot of salted water to a boil. Cook the soba noodles in the boiling water – you want them to be soft, but still a little al dente. Drain the noodles and rinse them under cold water to stop them cooking. Spread them on a dish towel to dry.

Now the fun part: throw the noodles, dressing, mango, eggplant, onion, and half the basil and cilantro in a bowl and toss to coat/combine everything. You can make this a couple hours ahead of serving, and stop here, letting it sit to absorb flavors and come to room temperature. When you’re ready to serve it, add the rest of the herbs. Enjoy!

Mom's dinner prep activities: playing tug-of-war with Lulu while Jonah and I chopped and sauteed in the kitchen a few feet away.

Lamb & Love

Look! We did it! The lamb out of the oven, ready for a little rest.

Yes, this is what arrived to my office. It was very exciting and bizarre.
Prepping the baking dish while the lamb gets rolled

Clockwise starting at the top: brussels sprouts cooked in lamb fat/oil, salad, fingerling potatoes gremolata, and the star of the meal, the roasted lamb!

Did you know that February is Lamb Lover’s Month? Neither did I, until I was contacted by the American Lamb Board to participate in a lamb cooking contest (you can vote here, starting February 14th: www.lambloversmonth.com). Yes, that’s right folks. How could I possibly say no? So I filled out my registration, and got a boneless leg of lamb in the mail last Friday.

I immediately started researching lamb cooking techniques, and ended up kind of combining a few recipes. Because lamb is often used in Greek/Mediterranean cuisine, most recipes have lots of rosemary, lemon, mint, and even some yogurt sauces. I didn’t want to get too fancy because I wanted it to be something that we all could easily pull off. I wanted to do some kind of spice rub or marinade where I could leave the lamb overnight to really absorb the flavors of whatever I ended up going with.

So after some research, I decided to go with an adapted version of a recipe from The Herbfarm Cookbook. I used varied amounts of all of the ingredients to go for a little more of the taste I wanted (more lavender, thyme, adding lemon, etc.) and was very happy with the result: a strongly herb-flavored (but not overpowering), perfectly cooked piece of lamb.

For our sides, we cooked brussels sprouts in a combination of melted lamb fat and oil: slice each sprout, top to bottom, into 3-4 pieces, heat the fat/oil, toss in a layer of sprouts (careful, it will spit and it will hurt – long sleeves are your friend), and sprinkle with salt. Cook until the bottoms are nice and dark, tossing occasionally if desired. We also made a rough version of fingerling potatoes gremolata: slice up your potatoes, toss in oil and salt, sprinkle with some chopped garlic, roast them until tender, and then when you’ve removed them, top them with some melted butter and chopped parsley. And salad. We had salad too. If you like this recipe, the blog post, even just the pictures, head over to www.lambloversmonth.com to vote for our little blog to win the Lamb Lover’s Month cooking contest! It would be super awesome, and maybe I’d even invite you over to enjoy some free lamb…

Hope you all have a lovely Valentine’s day, featuring some kind of delicious food! (A latte with your loved one? A sexy seafood dinner? Roasted lamb? The possibilities are endless – get out there and try something new and adventurous!)

Herb Rubbed Lamb

Ingredients

Lamb

1/2 cup fresh rosemary pines
4 tsp fresh or 2 1/2 tsp dried lavender buds
4 tsp fresh thyme leaves
6 cloves garlic, peeled
1 Tbl Dijon mustard
1 tsp salt
1 tsp freshly ground pepper
zest of one meyer lemon
6 Tbl olive oil
1 boneless leg of lamb (about 3 pounds, though more also definitely works)
6 woody branches of rosemary
1 meyer lemon, sliced into thin rounds (and seeded, if necessary)
optional: a few more cloves of garlic, number is dependent on your passion for the garlic

Sauce

1/4 cup red wine
1 tsp dijon mustard
1 tsp balsamic vinegar

Instructions

Lamb

Start by processing all the herb paste ingredients except for the olive oil in a food processor until the herbs (particularly the rosemary leaves) are chopped. Now, with the machine running, slowly pour in the oil. Most machines have a spout type thing at the top you can remove so that you can pour ingredients in while blending. Continue to blend until it has reached a thick sauce consistency, scraping down the sides when necessary. There will still be little chunks of rosemary and garlic, you can’t make a complete paste out of it, but do the best you can.

If the lamb is tied, untie it. Spread the lamb out, and with a sharp knife, trim as much fat as you can from both sides of the meat. Think that fat is gross and that you’re going to toss it in the trash? Don’t! Fat can be used for lots of things. Melt it down and use it to cook veggies in or make a broth (I think? I’m not sure how well that would actually work if you haven’t got ANY meat attached, but it’s worth a shot.) Find a baking dish where the lamb will fit snugly. Rub the top of the lamb with about half of the herb paste, flip it over, and rub the other side. Set it in the dish, cover with plastic wrap, and stick it in the fridge for 8-24 hours (the longer the better). Now, I am not particularly a fan of recipes where you have to refrigerate anything for more than an hour – planning ahead is not my forte. But you know what I’m learning? It’s so worth it. When you let anything (particularly meat) absorb the flavors of your marinade or rub for a long time, it makes such a big, flavorful difference.

Preheat your oven to 425 degrees. Remove your lamb from the dish and, attempting to remove as little of the herb rub as possible, roll the lamb back into it’s original shape. If this seems relatively impossible (as it did for Jonah when he was rolling it), just roll it into whatever shape makes sense – you just want it to be kind of spiraled and uniform in size. Hopefully that makes sense. We also took some whole cloves of garlic and stuck them in little crevices in the lamb before rolling it up. They got gently cooked, and made for a nice look when the lamb was sliced for serving. Take a few pieces of kitchen twine and tie the lamb snugly in three places (or more, whatever you need to do to make it work – just as few as possible, mostly). Put the rosemary branches and lemon slices in the bottom of the baking dish and gently set the lamb on top. Roast the lamb at 425 for 10 minutes before reducing the heat to 350 degrees. Roast for about an hour and a half, or until an instant read thermometer inserted into the center registers 130-135 degrees. Note: ours DID NOT take an hour and a half. It was done a little over an hour at 350. Take the temperature in a few places and use the lowest . Remove the roast from the oven, transfer it to a board (preferably one with those grooves around the edges as it will be releasing lots of juices), cover it loosely with foil, and let it rest for about 10 minutes.

Sauce

While the meat is resting, whip up the sauce. Take the rosemary branches and lemon slices out of the baking dish, and tilt the dish so the drippings all run into one corner. Skim off as much fat as you can, transfer the remaining juices to a little saucepan. Add the wine and put it over low heat. Use a whisk to stir in the mustard and vinegar, and season to taste with salt and pepper if you’d like. Remove the strings from the meat and slice it thinly. Arrange on a platter (or just throw a couple slices on each plate) and pour the sauce over. Voila! A delicious dinner.

Delicata Squash and Tofu with Miso & Molasses | Serious Crust by Annie Fassler

Delicata Squash and Tofu with Miso & Molasses

Delicata Squash and Tofu with Miso & Molasses | Serious Crust by Annie Fassler

Update October 2017: I made this recipe again for dinner last night, after seeing squash at the store and wanting to EAT IT ALL. One of the things about the re-design that happened about a year ago on this blog, and about having a blog that has been going for about six years now, is that I look at old pictures and old writing and I just cringe. So I took new pictures, gave the post a little love, and am sharing it again with the world. This is one of my absolute favorite fall dishes: it uses lots of Asian ingredients (miso, soy sauce, sriracha), delicata squash (my personal favorite), and greens (which means it’s healthy, right?).

When Jonah and I returned from Thanksgiving, we were in the mood for something wintery, but a little on the healthier side. Let’s just say that the weekend was full of heavy food and indulgences, as Thanksgiving is supposed to be. I found a dish on 101 Cookbooks a while back that I’d always wanted to make, so we pulled up the recipe, made a quick run to the grocery store, and whipped up this squash and tofu cooked with miso and molasses. It can be served with rice, but I recommend some roughly chopped arugula, like the recipe says.

Continue reading “Delicata Squash and Tofu with Miso & Molasses”

Shakshuka

Shakshuka for breakfast! Looks amazing.

I have discovered possibly the best Israeli-inspired brunch dish of all time. You think that’s a really specific category? It’s not. I know this because I now have two whole cookbooks from chef Yotam Ottolenghi (“Plenty” and “Jerusalem”). Born and raised in, guess where, Jerusalem, Ottolenghi moved to London in 1998 where he has a deli chain and a restaurant (or two… I’m not positive). Anyway, last year, my mom gave Jonah “Plenty” for his birthday, and while the pictures are absolutely beautiful and the food looks delicious, the recipes are a little intimidating. Lots of kind of obscure ingredients like muscovado sugar and tamarind paste and harissa. So we made maybe one or two things from it. But in the last year, we have grown much more ambitious in the kitchen, so when I was in Berkeley visiting my sister and I saw “Jerusalem” (and it’s latke recipe, which I will sharing with you shortly) I wanted it. Badly. And guess what. I got it. For my birthday. From my sister. Because my family is awesome and gifts each other beautiful cookbooks and kitchen appliances.

Anyway, when I was home for Thanksgiving, my dad made the shakshuka out of “Plenty” for brunch one morning. (Let it be noted that there is ALSO a shakshuka recipe in “Jerusalem” and that they are, indeed, different.) Now, as one who has only recently grown to love bell peppers, I was skeptical about liking this dish. It is, afterall, mostly bell peppers. But oh my gosh you guys. Go make this NOW. It’s so amazing. Really complex flavors (thanks saffron and muscovado sugar), brilliant colors, and delicious leftovers. Best enjoyed with some crusty bread (think rye or a French batard or something like that).

Shakshuka

Serves 4 generously

Ingredients

1/2 tsp cumin seeds
3/4 cup olive oil or vegetable oil (I would maybe do a little less than this, but try it and see what you think)
2 large onions, sliced
2 red bell peppers, sliced into 3/4-inch slices
2 yellow bell peppers, same preparation
4 tsp muscovado sugar (yes, it’s an obscure ingredient, but now I want to put it in everything)
2 bay leaves
6 sprigs worth of thyme leaves, roughly chopped
2 Tbl chopped parsley
2 Tbl chopped cilantro, plus extra for garnish
6 ripe tomatoes, roughly chopped (if it’s not tomato season, 2 small cans of canned tomatoes will work perfectly, but I would recommend draining most if not all of the juice first.)
1/2 tsp saffron threads
pinch of cayenne
salt and pepper
up to 1 1/8 cups water
4-8 eggs

Instructions

In a very large pan (seriously, probably the biggest pan you’ve got is a good idea), dry roast the cumin seeds on high heat for a couple of minutes. Add the oil and onions, and saute for about 5 minutes. Then add the peppers, sugar, bay leaves, thyme, parsley, and cilantro, and keep cooking it on high heat for 5-10 minutes, until everything is starting to get some nice color to it.

Now add the tomatoes, saffron, cayenne, and a bit of salt and pepper. Bring the heat down to low and cook for 15 minutes. If you aren’t using canned tomatoes, keep adding water during this time so that the mix has kind of a chunky spaghetti sauce consistency. Because the canned tomatoes were pretty juice and I didn’t drain them completely, I found no need to add water. Give the mixture a taste, and adjust the seasoning as you see fit. More salt? More pepper? More muscovado sugar? Go nuts.

After 15 minutes on low heat, go ahead and remove the bay leaves. Now Ottolenghi has you divide the mixture among 4 little frying pans, but let’s face it, I’m not going to unnecessarily dirty 4 extra dishes. If it’s a fancy breakfast and you’ve got those adorable mini cast-iron skillets, maybe that’s your thing. But I just kept it all in the same one big pan for this part. Make some gaps in the pepper mix, and break one egg into each gap. (I surveyed my crowd to see how many eggs we each wanted, so I did 6.) Sprinkle with some salt and cover the pan with a lid (or tightly with some foil, if your pan doesn’t have a lid). Cook on “a very (!) gentle heat” for 10-12 minutes, or until the eggs are just set. A runny yolk is preferable. Sprinkle with cilantro and serve with some crusty bread. Enjoy! I promise, once you make this, you’ll come up with a million excuses/occasions to repeat it. It’s so delicious. And as I said, it makes great leftovers because the flavors just get to deepen even more.

Brussels Sprouts and Tofu

brussels sprouts
brussels sprouts and tofu

brussels sprouts, tofu, and rice.

I hated Brussels sprouts as a kid, as most kids do.  I remember my mom making them on occasion, usually steamed with butter melted on them.  She was the only one who ate them.

(Also, “Brussels sprouts??” I was under the impression until about 2 weeks ago that it was “Brussel sprouts.”)

Now that I am a so-called “adult,” I have only become slightly more receptive to these small green balls of vegetable. However, this recipe from Plenty by Yotam Ottolenghi has me almost craving them.  The best part about it is the way they are fried: with lots of oil and salt, face down on hight heat for a couple of minutes.  One side gets black and crispy, one side is still green.

Also, with the addition of tofu, this recipe makes a meal in one bowl!

Brussels Sprouts and Tofu

Ingredients

2 Tbs sweet chile sauce (the most common brand is Mae Ploy, we had a bottle in the fridge that was “borrowed” from our cafeteria back in college)
1 1/2 Tbs soy sauce
3 Tbs toasted sesame oil (don’t skip this! It makes the dish)
1 tsp rice vinegar
1 Tbs maple syrup
5 oz firm tofu
1 lb Brussels sprouts
about 3/4 cup canola oil
salt
1 cup sliced green onions
1/2 small fresh red chile, deseeded and minced (we used a jalapeño, so it was green.  Whoops.)
1 1/2 cups shiitake mushrooms, halved or quarted
1 cup cilantro leaves
1 Tbs toasted sesame seeds (optional, for garnish)

Rice for serving

Instructions

Find a medium bowl and in it, whisk together the sweet chile and soy sauces, 2 Tbs of the sesame oil, the vinegar and maple syrup. Cut the tofu into 3/8-inch-thick slices and then each slice into two squarish pieces.  Stir the tofu into the marinade and set aside.

Trim the bottoms off the Brussels sprouts and cut each into three slices from the top down.  Find a large frying pan, add 4 Tbs of canola oil, and heat up well.  Throw in half the Brussels spouts, or less than depending on the size of your pan (when I did this the oil spit like crazy, so watch out!).  You want most the sprouts in the pan to have at least one side touching the pan, so no sprouts are stacked on top of one another.  Sprinkle some salt on them and cook on high heat for about 2 minutes.  Don’t stir to much, but shake it around if necessary.  You want the sprouts to be almost burnt on one side. Remove to a bowl and add the rest of the sprouts to the pan with more canola oil.  Add more salt, and 2 minutes later, transfer the rest to the bowl as well.

Add 2 more Tbs of canola oil to the pan and sauté the green onions, minced chili, and mushrooms for 1-2 minutes.  Transfer to the bowl that the sprouts are in.

Leave the pan on high heat and use tongs to lift half of the tofu pieces from the marinade to the pan (again, oil spits!) (don’t throw away marinade!). Space them apart and leave in one layer so that they can fry properly.  Reduce to medium heat and cook for 2 minutes on each side.  Transfer to the sprouts bowl and repeat with the rest of the tofu.

Remove the pan from the heat and return all the cooked ingredients from the spouts bowl back to the pan.  Add the leftover tofu marinade and half of the cilantro leaves.  Toss everything together, and let the pan cool down a bit.  Then taste and add salt if needed.  Stir in the remaining Tbs of sesame oil and serve warm, garnished with sesame seeds and/or the rest of the cilantro.  Eat with rice or by itself.

Butternut Squash Enchiladas

Squash for Enchiladas

Carmelle makes enchilada sauce
Squash enchiladas pre-cheese

Squash Enchiladas

Fall is a perfect excuse to put squash in, oh, just about everything you make. Squash ravioli? Yes. Squash cake? Absolutely. Squash enchiladas? Of course.

The inspiration for this meal came from 1) the abundance of squash at the grocery store, 2) the fact that I’d had something similar (some kind of squash taco) at a restaurant here in Portland called Oba, 3) there were people coming for dinner, and I wanted to make something easy that was basically a meal in a dish. This was exactly that, a delicious, relatively easy meal in a dish. I’ll also say this: this was loosely based on a squash enchilada recipe I found, but I was quasi-doubling it. Also, I bought too big of a squash because it was pretty. So we had lots of extra filling, which I just threw in a pan, covered with enchilada sauce and cheese, and baked on it’s own, sans tortillas. But I’ll try adjusting amounts below so that you don’t have that same problem.

Butternut Squash Enchiladas

Ingredients

One ~2 lb butternut squash, peeled, seeded, and cubed
Olive oil & salt
1 can black beans, rinsed
1 medium onion, diced
mild green salsa (we used one of those little cans from the grocery store)
12 small corn tortillas
1-2 cans enchilada sauce (Carmelle made our enchilada sauce because she is a Mexican food guru… but I was prepping the filling, so I wasn’t paying attention. Dang!)
1 bag of mexican blend shredded cheese

For serving: sour cream and sliced avocado

Instructions

First, preheat your oven to 400 degrees. Spread your squash on a large baking sheet, toss with olive oil and salt, and bake for 20 minutes, or until squash is tender. Remove from oven and allow to cool for a few minutes before putting into a large mixing bowl. Add the black beans and onion and mix to combine. At this point, you can lower the temperature of your oven to 350 degrees.

Cover the bottom of a large casserole dish with a layer of enchilada sauce and about half the can of salsa. Warm the tortillas a little bit, one by one, in a pan with a little bit of olive oil, just so that they won’t break when you stuff them. Take a warm tortilla, fill it with the squash/bean/onion mixture, a sprinkle of the cheese, and roll it up. The ends don’t need to be all nice and tucked in, but you want the tortilla to overlap enough… Does that make sense? Fill the dish with filled, rolled tortillas, and cover with enchilada sauce, salsa, and the rest of the cheese (or just however much cheese you want).

Throw that dish in the oven (don’t throw it, actually… that would be bad) for 30 minutes, or until the cheese is bubbling and a bit brown. Allow to cool for a few minutes before serving with sour cream and slices of avocado. Enjoy!

The Greatest Fish Tacos!

Filling for Fish Tacos

Fish Tacos

Hello all. Summer is tip-toeing out these days. And, while I’m sad that the warmth and long days are leaving, I must admit I’m excited to start wearing sweaters and scarves and boots – my fall uniform. The other nice thing about the very gradual transition this year – the temperature is slowly going from a high of 90 to a high of 72, and that’s great – is that it’s a gentle reminder to make all my favorite summer dishes I haven’t made yet.

These fish tacos are easily in my top 5 summer meals. They’re relatively easy and refreshing. I suppose they could be made year round, but to me they just seem to go with sunshine and shorts. I like to make some roasted corn for a side dish and wash it all down with a light summer ale.

Fish Tacos

Ingredients

Lime-Cumin-Dijon vinaigrette

2 Tbl fresh lime juice
2 tsp dijon mustard
3/4 tsp ground cumin
1/4 tsp salt
1/8 tsp freshly ground black pepper
6 Tbl olive oil

Fish Tacos

2-2 1/2 cups roughly flaked cooked halibut (about 12 oz)
3 Tbl mayonnaise
1 scallion, white and light green parts only, minced
1/2 cup minced celery leaves and stalks
1/4 cup chopped green olives (optional… I don’t usually include these. Another option is to prep them and not add them to the mixture, but to serve as a garnish/possible topping)
1 cup arugula, roughly chopped (or other “peppery green”)
1 cup cilantro leaves, roughly chopped
6 small corn tortillas (the 4 inch ones)
other serving options:  yogurt or sour cream, goat cheese, slices of avocado, and lime wedges

Instructions

To make the vinaigrette, put the lime juice, mustard, cumin, salt, and pepper in a small bowl. Whisk together, and while whisking, add the olive oil in a slow steady stream. Whisk until the dressing is well combined.

Now onto the filling. In a mixing bowl, combine the fish, 2 Tbl of the vinaigrette you just made, the mayonnaise, scallion, and celery and mix gently. You want to be sure to be gentle because you don’t want to break up the fish too much. If you’re using the olives, mix them in as well. In a separate bowl (I know, another bowl!) toss the arugula and cilantro with just enough of the vinaigrette so that it is lightly and evenly coated. Now the recipe leaves the fish and the greens separate, which you totally can, but for the sake of not having a thousand dishes on the table, I usually just lightly fold the greens in to the fish so it’s all one big mixture.

When you’re ready to eat, heat the tortillas however you’d like (the recipe recommends over a gas flame, but that sounds a little frightening to me, so I am a fan of a dry pan or, if need be, a microwave). Put the tortillas on plates, put on a layer of the fish and a layer of greens (if you’ve left them separate; if not, just heap it all on there). Then top your tacos with whatever garnishes you choose, and enjoy! Be sure there are napkins around, because there are juicy little buggers.