Dessert

Cinnamon Sugar Crackers

Cinnamon Sugar Crackers

Cinnamon Sugar Crackers

I recently found this recipe for cinnamon sugar crackers. The pictures looked like cheez-its, except no cheese, just a lovely dusting of cinnamon sugar. They’re like cookies but smaller and crunchier. A nice way to have something sweet but smaller servings and more snack-esque than cookies. They’re like a mix between a Snickerdoodle and Cinnamon Toast Crunch.

Cinnamon Sugar Crackers

Ingredients

4 tablespoons unsalted butter, softened
3/4 cup all-purpose flour
5 Tbl sugar, divided
2 tsp ground cinnamon, divided
2 Tbl milk or half and half (I used 2%)

Instructions

Preheat your oven to 350 degrees. In a food processor, combine the butter, flour, 4 Tbl of the sugar and 1 tsp of the cinnamon. Pulse until the mixture forms coarse crumbs. Now add the milk or half and half and process again until the dough comes together and forms a ball. In a small bowl, combine the remaining sugar and cinnamon in a bowl and set aside.

Dump out the dough onto a floured surface and, using a floured rolling pin, roll the dough out. You want it to be as much of a rectangle as you can and about 1/16 inch thick. With a pizza cutter wheel or a sharp knife, trim the sides off and cut the dough into 1 inch x 1 inch squares.

Carefully transfer the crackers to a baking sheet (preferably lined or greased). I needed to use my knife to help get the dough off the counter. Once on the baking sheet, take the blunt end of a skewer (or the end of a paintbrush because you don’t have any skewers around) and make a hole in the center of each cracker. This ensures that the crackers don’t puff up too much while they’re baking. Sprinkle the cinnamon sugar over the crackers before baking them for 11-15 minutes. I baked mine for 11 minutes, turning them halfway through. You want the edges to be golden brown. After removing them from the oven, transfer the crackers to a rack to cool. Enjoy!

Lemon Rosemary Palmiers

Lemon Rosemary Palmiers

Lemon Rosemary Palmiers

Lemon Rosemary Palmiers

When I say palmiers, doesn’t something incredibly fancy and impossible to make come into your mind? It does for me. If the name is so French that Jonah can’t say it, it’s gotta be tricky. (Every time I told him I was going to make these, Jonah asked “What’s a palmier again?”) But that is so not true. Especially when you’re just going to use your leftover puff pastry from that beet tart you made… Seriously. So easy.

I found these on Joy the Baker and have been dying to make them. They’ve been calling my name from my Pinterest food board. I adapted the recipe and the method a teensy bit.

Lemon Rosemary Palmiers

Ingredients

1 package puff pastry
3/4 cup of sugar
zest of 1 large lemon
1 teaspoon finely chopped rosemary (fresh is better, but dried will do just fine)

Instructions

Finely chop the rosemary and set aside.  On a clean, flat surface rub lemon zest into the sugar using a bench knife (if you have one) or the back of a spoon (that’s more like it).  Put the sugar in a bowl and set aside. Unfold the thawed puff pastry onto a lightly (very lightly) floured surface and roll it out a little bit. You don’t need it too much bigger, just like an inch on each side is good. Move the puff pastry somewhere else, sprinkle the surface with about 1/3 of the lemon sugar, and then put the puff pastry back on top of it, pressing it down a bit to get the sugar to stick. Once the puff pastry is down, spread the rest of the sugar and the rosemary over the surface.

Now tis time to roll. Roll the long side in towards the middle. Then roll in the other long side to the middle. Gently press the sides together so they stick a little bit (though the outside will be covered with lemon sugar, so mine didn’t stick crazy well). Wrap this in plastic wrap and refrigerate it for about an hour, or until it’s cold and relatively firm.

Preheat your oven to 400 degrees. Remove dough from the fridge and slice in about 1/2-inch thick slices.  Place on lined baking sheet (think silpat or parchment paper – I used foil and buttered/floured it, which work well).  Bake for 10 to 15 minutes of until golden brown.  You’ll probably want to rotate the baking sheet halfway through baking.  Keep a close eye on the cookies after about 11 minutes.  They might burn quickly because of all the sugar. Actually, because of the burning sugar, I replace the foil between each batch so it didn’t smoke. Remove the palmiers from the pan pretty much immediately after baking, and put them on a wire rack to cool. Once they’re cool, dig in and enjoy!

Chocolate Crinkle Cookies

Chocolate Crinkle Cookies

Chocolate Crinkle Cookies

You’ll notice that this is my second chocolate cookie recipe within a week. I know, I know, why Annie? Why do you tempt yourself with these delicious chocolatey cookies? First, I can’t help it. Sometimes I just want something fudgy and gooey and crisp around the edges. Second, I don’t eat all of them myself. The first cookies (the salted chocolate cookies) were mostly consumed by a bunch of friends we had over, and the second cookies (the ones I’m about to tell you about) I brought to Jonah’s boss. We’ve started a little tradition that whenever I make cookies, Jonah takes some into work so that we don’t eat them all, and his coworkers are loving it. Jonah works at a great start-up company in Portland that does internet radio, and we may be hitting the airwaves ourselves soon with a food/cooking show. We’ll see what happens, but we’re talking about it. Thoughts?

Anyway, now onto some chocolate crinkle cookies. I wanted to make something that did not require me to buy anything since we have so much baking stuff in our apartment. So after some searching, I found this recipe on 17 and baking for these. Easy, delicious, and pretty. I halved the recipe because, well it supposedly yields 7 DOZEN COOKIES and let’s face it, we really didn’t need that many. So I’ll give you my miniature version.

Chocolate Crinkle Cookies

Makes 3 dozen cookies

Ingredients

1/2 cup unsweetened cocoa powder
1 cups granulated sugar
1/4 cup vegetable oil
2 eggs
1 tsp vanilla extract
1 cup all-purpose flour
1 tsp baking powder
1/4 tsp salt
1/4-1/3 cup confectioners’ sugar

Instructions

In a bowl (or in the bowl of your electric mixer, if you’re using one) combine the cocoa powder, sugar, and oil. Scrape down the sides, and add the eggs one at a time, mixing well between each addition. Add the vanilla. Now throw in the flour, baking powder, and salt and mix to combine. Cover the bowl and refrigerate for at least 4 hours. I let mine sit in the fridge overnight because I didn’t feel like starting the baking process at 11 p.m.

When you’re ready to bake the suckers, preheat your oven to 350 degrees, line a baking sheet with parchment paper, and pull out the cookie dough. Put the powdered sugar into a shallow bowl, and roll the dough into balls about 1 inch in diameter or about a rounded teaspoon. You’ll want to lightly oil your hands so the dough doesn’t stick to your palms when you’r rolling it. After making the balls of dough, roll them in powdered sugar to coat evenly, dusting off any extra, and put them on the cookie sheet at least an inch apart.

Now put them in the oven and bake for 10-12 minutes (mine were perfect at 11). Let them cool on the cookie sheet for a minute before moving them to a rack to cool completely. These cookies look like cookies you see in the magazine. They cracked beautifully and looked so pretty with the contrast of the white powdered sugar and the dark chocolate insides. Enjoy these treats with a glass of milk!

Salted Chocolate Cookies

Salted Chocolate Cookies

Salted Chocolate Cookies

Salted Chocolate Cookies

If you are into salt, and want to venture into the world of fancy salt, a good start is Maldon. This salt is the saltiest, crunchiest salt I’ve tasted, and made from the sea! Anyway, as I’ve mentioned before, there are members of my family who are in love with salt. So when my dad came across a recipe for salted chocolate cookies, we decided we had to make them the next time we were together, which happened to be this past weekend. I mean, come on, the recipe even calls for Maldon.

Another wonderful thing that comes from this recipe is the discovery of the wonderful blog Orangette. I knew I would like this blog immediately for 2 reasons: 1) the salted chocolate cookies you will see below. 2) it is written by Molly Wizenberg, one of the founders of Delancey in Seattle. If you live in Seattle, I recommend that you immediately stop reading this blog, get in your car, and go to Delancey. Delicious salads, delicate and scrumptious pizzas, and lovely desserts. It’s ok, the blog will be here when you get back. Just go.

Now that you’re back, let’s continue. So these cookies are rich and light at the same time, and I am recently of the impression that salt makes everything better, so it’s a good sign that they’re decorated with fancy salt. Right?

Salted Chocolate Cookies

Makes 5 dozen cookies

Ingredients

8 ounces bittersweet chocolate, coarsely chopped
1 ¼ cups all-purpose flour
½ cup plus 2 Tbl unsweetened cocoa powder
2 tsp baking powder
8 Tbl (1 stick) unsalted butter, at room temperature
1 cup plus 2 Tbl sugar, plus more for rolling the logs
2 large eggs
¼ tsp table salt
1 tsp vanilla extract
1/3 cup whole milk
Maldon salt, for finishing

Instructions

First thing you’ll need to do is melt your chocolate. After you’ve cut it up, put it in a heatproof bowl that will fit securely on a small saucepan you’ve got. Put about 2 inches of water in the saucepan, bring it to a simmer, and put the bowl of chocolate on the pan. The bowl shouldn’t be touching the water, just getting the steam. You also want to make sure that no moisture gets into the chocolate as this will make it seize, which isn’t really good for anyone. Anyway, heat the chocolate and stir it occasionally until it is melty and smooth. Remove it from the heat (carefully, the bowl will be hot) and set it aside to cool.

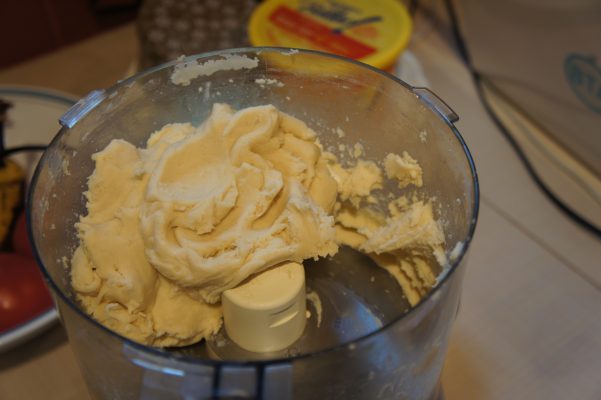
Now, in a medium mixing bowl (not your electric mixer, mind you, if you’re planning on using one), combine the flour, cocoa, and baking powder. Set aside. In your electric mixer, beat the butter on a medium speed until it’s nice and creamy. Slowly pour in the sugar (perhaps even while the mixer is going, just be careful not to get sugar everywhere), and continue to mix until the butter/sugar mixture is smooth and soft. Now add the eggs one at a time, mixing well to incorporate after each one. Add the salt and vanilla, and, making sure it’s cool (you don’t want it to cook the eggs), the melted chocolate. Beat to incorporate all of these things into one beautiful mixture.

Now beat in the milk, and lastly, the flour mixture. Beat on low speed until it’s just incorporated. Here’s a little note about electric mixers: sometimes I turn mine up higher to fling off the stuff stuck on the paddle or whisk and get it mixed in. I should not do this unless the recipe I’m following specifically tells me to turn the mixer up high. Why? Because by doing this, I’m adding air to the dough/batter, which can make the cookies (or whatever I’m making) a different texture than they were intended to be. So now you know.

Now comes a fun/weird part. Dampen a counter and lay out a big piece of plastic wrap (dampening it – wiping it with a wet sponge – will help keep the plastic wrap in place while you work) and dump 1/2 or 1/3 of your dough onto it. Now you’re going to have to mush and mold and roll the dough using the plastic wrap to shape a log. The size of the log totally depends on how big you want your cookies to be. Mine was probably about 1 1/2 inches in diameter. Anyway, after you’ve smooshed it into a good log, you can wrap it up in the plastic wrap, twist up the ends, and stick it in your fridge to chill overnight.

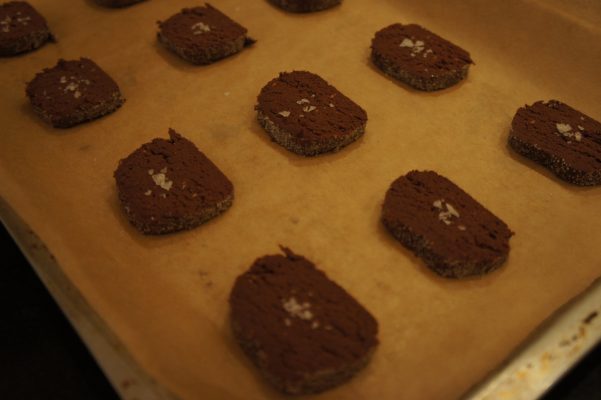
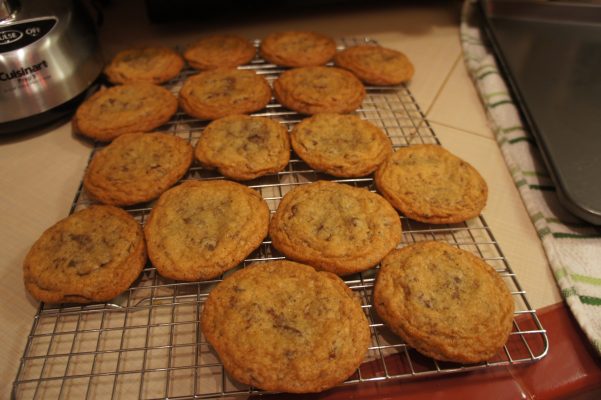
When you’re ready to make some freaking cookies, preheat your oven to 350 degrees, and line a baking sheet with parchment paper. Also, remove your dough from the fridge. You’ll need that. Now, the recipe says to put parchment paper on your work surface, make a pile of sugar on it, and roll the dough in it. That did not work for me, though I did try. It probably would have worked better to put a cup of sugar in a shallow bowl and dunk the logs in that, but because I already had sugar all over my work surface (I also just used a cutting board instead of more parchment paper), I just decided to sprinkle sugar over the logs. Anyway, however you do it, coat your dough logs with sugar, and then slice them with a sharp knife into 1/4-1/3 inch slices. Put the cookies on the cookie sheet about an inch apart, and sprinkle each cookie with some Maldon salt. Note: the amount of salt we put on the cookies increased with each batch because we love the stuff so much.

Bake the cookies for about 10 minutes. The cookies should still feel soft to the touch, but look set. After allowing them to cool on the sheet for a minute, transfer them to a wire rack to cool. This recipe made SO MANY COOKIES. Seriously. Like… 5 or 6 dozen. And they are hard to stop eating, so be warned. Make them for a party or a gathering or something.

Key Lime Meltaways

Key Lime Meltaways

Key Lime Meltaways
Key Lime Meltaways

Key Lime Meltaways

So, I had gone over a week without baking. OVER A WEEK. That’s a long time for me. Seeing as we’re trying to cut down on our sweets intake, I was trying to be good and, for the most part, succeeding. But the time came when all I wanted to do was to try out a new cookie recipe and I just couldn’t help myself. I had been stalking this recipe for Key Lime Meltaways from Smitten Kitchen for quite some time, and I finally decided to make it. We had everything except the limes, so I just popped over to the store and grabbed a couple (we were going anyway to get ingredients for a delicious dinner that will be posted shortly). The recipe recommends key limes, but I didn’t want to buy an entire bag of them, so I just bought a couple of small limes (and ended up only using one actually). I used bread flour because I’m still trying to work my way through that giant bag Jonah bought me. I also halved the recipe, but I’ll give you the full recipe because…well…sometimes more is just better.

These cookies were so good, sweet at first and then sour, and the zest were these little crunchy bits from being baked… Yum! We made a half a batch which yielded 2 dozen cookies, and they were gone quickly. A little too quickly for my liking. But what can you do. Enjoy!

Key Lime Meltaways

Makes 2 dozen cookies

Ingredients

1 1/2 sticks unsalted butter, room temperature
1 cup confectioners’ sugar
Grated 2 (small) limes
2 tablespoons freshly squeezed lime juice (I added a little extra because I like sour stuff)
1 tablespoon vanilla extract
1 3/4 cup plus 2 Tablespoons all-purpose flour
2 tablespoons cornstarch
1/4 teaspoon salt

Instructions

Put the butter and 1/3 cup of the powdered sugar into the bowl of an electric mixer and cream until it’s nice and fluffy. Then add the lime zest, juice, and vanilla and beat it until fluffy again. For me, the mixture wasn’t absorbing all the liquid (the lime juice and vanilla), so I just continued on my merry way without worrying about it.

In another bowl, mix together the flour, cornstarch, and salt. Add the dry ingredients to the butter/sugar mixture and mix until combined. Now, the recipe says to roll the dough into two 1 1/4-inch-diameter logs between two pieces of parchment paper. I didn’t have any parchment paper, so I wrapped the dough in plastic wrap and rolled it out in that, which worked just fine. Now, throw the logs in the fridge for an hour to chill.

When you pull out the logs, start heating your oven to 350 degrees. Either grease your cookie sheet a little bit or line it with parchment paper. Put the rest of the powdered sugar (2/3 cup) in a ziploc or other resealable bag. Take the plastic wrap or parchment paper off the logs and slice them into 1/4 inch thick slices. Put the rounds on your baking sheet about 1 inch apart and bake them for about 15 minutes (I turned mine part way through baking because the back right corner of my oven is hotter and I wanted them to be evenly cooked).

Take them out of the oven and transfer them to a wire rack to cool. After cooling for a few minutes, but while they’re still warm, put cookies in the ziploc baggie of sugar 3 or 4 at a time. Seal up the bag, and toss the cookies around to coat them in the sugar. Remove the cookies from the bag and put them on a plate to serve!

Matcha Green Tea Cookies

Matcha Green Tea Cookies

Matcha Green Tea Cookies

Matcha Green Tea Cookies

A little while ago it was my dear friend Rosie’s birthday. She and I met in college and immediately became close friends. Perhaps one of our favorite things to do together was to go downtown to the Tea Zone in the pearl district and get Green Tea Lattes. They were amazing, so creamy and delicious and this beautiful green color. When Rosie studied abroad, I knew she had missed them and brought her a green tea latte when I went to pick her up at the airport.

So like I said, it was Rosie’s birthday, and a few days beforehand I happened to be surfing some food blogs and stumbled across this recipe for matcha green tea cookies. The timing could not have been better. I immediately knew that I had to make these for her. I walked down the street to Tea Chai Te (another wonderful tea shop in Portland) and picked up a couple ounces of matcha (I wanted extra to send to her along with the cookies) and started baking away.

Matcha Green Tea Cookies

A note about your matcha: the better the quality, the greener it will be! I hope yours is as vividly green as mine was. I’ve never called cookie dough beautiful before. But it was suitable for cookies for Rosie. 

Ingredients

3/4 cup confectioner’s sugar
1 1/2 tbsps matcha green tea powder
10 tbsps unsalted butter, room temperature
1 3/4 cup flour
3 egg yolks
1 cup granulated sugar (to roll the cookies in pre-baking)

Instructions

First, mix together the confectioner’s sugar and the matcha powder. Then add in the butter, and mix thoroughly to cream it.

Now, add in the flour and mix just until is it combined. The thing with shortbread-type cookies is the less you handle them, the better. Now toss in the egg yolks and mix until the dough comes together. It will look a wee bit like play dough, but instead of those obnoxious neon colors it will be a beautiful forest green.

Now you can dump the dough out onto a clean surface (aka counter) and make it into a ball, wrap it in plastic wrap, and refrigerate for at least 30 minutes. When you remove the dough, start preheating your oven to 350 degrees, and dump the sugar into a shallow bowl.

Roll out your dough until it’s about 1/2 an inch thick. Using a cookie cutter that’s about two inches wide, cut out some cookies! This is totally the fun part. Feel free to mash up scraps and re-roll the dough as many times as you wish. The dough actually comes back together really nicely, unlike some other cookies. Anyway, after you’ve cut them out, you can dunk them in sugar and put them on a baking sheet. (If you don’t have awesome baking sheets that everything slides right off of, I might suggest putting parchment paper down.)

Bake them for 12-15 minutes, or until they just start to turn golden at the edges. Transfer them to a wire rack to cool, and then enjoy! (The website also warns to store them in the shade as the color will fade with exposure to the sun…)

Flip-flopping Brown Sugar Cookies

Brown Sugar Cookies

Brown Sugar Cookies

The other night, it was late, and Jonah and I decided on a whim to make some cookies. We figured we’d just make something we’d already made before, so we got out the recipe for the nutmeg maple butter cookies because they were so good. After we started creaming the butter and sugar for half the recipe (we didn’t want that many cookies) we realized “OH NO these cookies are supposed to refrigerate for 2 hours!” At this point it was already about 10:30 and we were not up for that. So we pulled up another recipe that I’d been looking at: Brown Sugar Cookies from Joy the Baker. So what were once nutmeg maple butter cookies became brown sugar cookies, with 1/2 cup of brown sugar replaced by granulated sugar. Jonah said we should call them flip-flopping cookies (he also inserted the name of a certain GOP candidate, but I’m not about to start getting political on my blog). Oh well. You can’t win them all. The cookies were still good. Not amazing, but a good solid cookie. The little bits of ground ginger and cinnamon add a nice touch. I’m going to give you the correct recipe instead of our version.

Brown Sugar Cookies

Ingredients

1 1/2 sticks (6 ounces) unsalted butter, softened
1 1/4 cups dark brown sugar
2 cups all-purpose flour
2 teaspoons baking soda
1/2 teaspoon salt
1/2 teaspoon ground cinnamon
1/2 teaspoon ground ginger
1 teaspoon pure vanilla extract
1 large egg

Instructions

In the bowl of your mixer, cream the butter and sugar until fluffy. While that’s happening, combine the dry ingredients – flour, baking soda, salt, cinnamon, and ginger – in another bowl, mix thoroughly, and set aside. When the butter and sugar are nice and creamy, add the egg and vanilla and mix them in well. Now add the dry ingredients all at once to the butter/sugar mixture. Mix on a low speed until it’s well combined. Now the recipe says to cover and refrigerate for half an hour. We didn’t do that. Maybe we should have. Whatever.

Preheat your oven to 350 degrees (while you’re “refrigerating your dough”… ha). Grease your cookie sheet or line with parchment paper, and drop the cookie dough by the Tablespoon onto the sheet. Bake the cookies for 10-12 minutes or until they’re just starting to brown around the edges. Take them out of the oven and allow them to cool for a few minutes on the hot cookie sheet before removing them to a cooling rack.

Thomas Keller’s Chocolate Chip Cookies

Thomas Keller's Chocolate Chip Cookies

Thomas Keller's Chocolate Chip Cookies

Thomas Keller's Chocolate Chip Cookies

You know how everyone is always on the hunt for the best chocolate chip cookie? When I was younger, our family friend Anita was known for making the best chocolate chip cookies around. Whenever we went over to her house we (my sisters and I) were excited because we knew we would get those delicious cookies. Despite staying close to her family, I do not have her cookie recipe… Odd.

Anyway, the other day I felt like baking (strange, huh?) and Jonah requested classic chocolate chip. I wanted to do a variation, like those thyme and sea salt chocolate chunk cookies I made a while back. But after having no luck finding anything before heading to the store, I remembered Thomas Keller having a recipe for chocolate chip cookies in the Ad Hoc cookbook. I figured, “Hey, that guy kind of knows what he’s doing,” so I pulled out the recipe and went to the store.

I will tell you now that these are possibly the best chocolate chip cookies I’ve ever had (besides Anita’s). You know the great debate: Crunchy or chewy? These are perfectly both. They are crispy on the edges (thanks to our old friend, butter) and chewy and soft in the middle. Oh my goodness. And they spread out when they bake, so they’re pretty big, which makes you feel like you’re really getting a good portion of cookie when you eat one. And if one seems large enough to be satisfying, you would think it’d be easier to not eat like 10 of them. But it’s not. You just get more full.

Side note: Jonah bought me these wonderful baking sheets for Christmas. The brand is Chicago Metallic; they came in a package with two pans and a cooling rack. These pans need no liner or greasing. Nothing EVER sticks to them (knock on wood). They are heavy duty with a wire around the edge so they don’t warp, and industrial-kitchen sized. I love them. I highly recommend them if you’re looking for new pans.

Thomas Keller’s Chocolate Chip Cookies

Ingredients

2 1/3 cups plus 1 Tbl all-purpose flour
3/4 tsp baking soda
1 tsp kosher salt
5 oz. semi-sweet chocolate (think 55%), cut into chip sized pieces (about 1 1/4 cups)
5 oz. dark chocolate (think 70-72%), cut into chip sized pieces (about 1 1/4 cups)
2 sticks cold unsalted butter
1 cup brown sugar (preferably dark)
3/4 cup granulated sugar
2 eggs

Instructions

Preheat your oven to 350 degrees. Line 2 baking sheets with parchment paper (or just grease them a little bit).

Ok, sorry. Now, sift the flour and baking soda into a medium bowl, and stir in the salt. Usually if a recipe says to sift flour, I ignore it, but I had a lot of time on my hands, and hey, I’m not gonna ignore Thomas Keller. I would say that it made a difference. Put the chips of chocolate you’ve cut in a fine mesh basket strainer to get out all the “chocolate dust.”

Using an electric mixer with the paddle attachment, beat half of the butter (1 stick that has been cut up into small pieces) until it’s smooth and creamy. Now add the sugars and the rest of the butter (also cut into small pieces) and beat until well combined and creamy. Add the eggs, one at a time, mixing well between them. Be sure during all of this to be scraping down the sides of the bowl to get everything well-incorporated. Now add the dry ingredients and mix them in.

Thoroughly fold in the chocolate chips. It’s a little tricky because the dough is really thick, but stick with it, it’s worth it. You wouldn’t want those cookies from the bottom of the bowl to not have any chocolate in them, would you? No. No you would not. At this point you can wrap the dough up and refrigerate it for up to 5 days or freeze it for 2 weeks. But I just don’t understand, you’ve gotten this far, why would you not just make the damn cookies at this point?

If you’re continuing on, take about 2 tablespoons of dough, roll into a ball, and place it on the cookie sheet. You only want to put about 8 on a sheet because these suckers need their space. They spread out for real. Leave 2 inches between each ball of dough. Bake for 12 minutes, turning the cookie sheet halfway through baking. Let the cookies cool on the pan for a couple minutes before removing them to a cooling rack to cool the rest of the way (if you can wait that long). Enjoy with a glass of cold milk.

Red Velvet Cupcakes

Red Velvet Cupcakes

Red Velvet Cupcakes

Red Velvet Cupcakes
Red Velvet Cupcakes

The other day I was hanging out with my dear friend Erica. She was craving some red velvet cupcakes, and so, like a good friend, I told her I’d make her some. That’s right. That’s what friends do for each other. We make cupcakes.

I had never made red velvet cupcakes before, or really thought about what’s in a red velvet cupcake, so I was a little surprised when I started doing research. Cocoa powder, LOTS of red food coloring, buttermilk and white distilled vinegar? Uh… ok. I found a wonderful recipe on a great blog called Ming Makes Cupcakes. I’d made cupcakes from this site before and the pictures are so pretty. I really can’t wait to try more. I ended up doubling the recipe (I wanted to make more than 12 cupcakes!) except the food coloring, which I didn’t double because I didn’t have anymore and one little bottle seemed like enough. However I didn’t double the frosting because it seemed like it’d be enough, and it was!

Anyway, I packed them up and took them to rehearsal (for the show I’m in with that friend, Erica) and they were a huge hit! Nice and moist, good frosting to cupcake ratio, and perfectly red. They were a little bit oily for me, so I think next time I might try bringing down the amount of oil. Also, I wouldn’t have minded if they had been a teensy bit chocolatier. Oh well, some things to play with for next time. They were still incredibly delicious. Enjoy!

Red Velvet Cupcakes

Ingredients

Cupcakes

2 1/2 cups flour
1 1/2 cups sugar
1 tsp baking soda
1 tsp salt
2 Tbl cocoa powder
1 1/2 cups vegetable oil
1 cup buttermilk
2 eggs
1 Tbl red food coloring
1 tsp white vinegar
2 tsp vanilla

Frosting

1 stick butter, room temperature
2 1/2 cups confectioner’s sugar
1/4 cup milk
1/2 tsp vanilla

Instructions

Cupcakes

Preheat your oven to 350 degrees. In a bowl, combine the flour, sugar, baking soda, salt, and cocoa powder. In an electric mixer, combine the dry ingredients: oil, buttermilk, eggs, food coloring, vinegar, and vanilla. Now, slowly add the dry mixture to the wet mixture. I did it in batches, just to make sure it was getting thoroughly blended with no clumps!

Put cupcake liners in your cupcake pan and fill them up with batter. I found that you could actually fill them pretty full. These cupcakes don’t rise a ton, so I filled them up probably 3/4 of the way. Now bake them for 25 minutes, or until a toothpick inserted comes out clean.

Frosting

While the cupcakes are cooling, clean out your mixer bowl, put it back together, and beat the butter until it’s light and fluffy. Add the sugar, milk, and vanilla, and beat until the consistency looks like frosting. If it’s too dry, add a little more milk. If it’s too wet, add a little more sugar.

Time to frost them. I started out not using too much frosting because I wanted to make sure there was enough for all of them, but there was plenty to go around. I love icing cupcakes, making the tops look like they would at a little bakery… So fun.

Dad’s Cheesecake

Dad's Cheesecake

Dad's Cheesecake

This past Friday was Jonah’s birthday. A while back he told me that he really likes cheesecake, and I immediately thought of my dad’s insanely delicious cheesecake recipe. He has made this cheesecake for some big events over the years (I seem to remember him making like 7 for my older sister’s bat mitzvah). I swear it is the creamiest cheesecake I’ve ever had. I had never made it myself before, so I was a little nervous. I just wanted to do everything right!

Also, you should know that in our family, this recipe is pretty top secret. When I told my dad I was putting it on the blog, he may have been a little hesitant. He said “No! We have to make people beg for it! Pine after it!” So the fact that I’m just giving it to you for free is a sign of how much I love you. And that it’s so good that I want to share it with the world. It’s so good that if everyone ate it, it may bring us world peace.

Cheesecake

Ingredients

Graham Cracker Crust

1 7/8 cups graham cracker crumbs
5 Tbl sugar
1/2 cup butter, melted

Cheesecake Filling and Assembly

2 ½ pounds cream cheese
1 ½ cups sugar
2 Tbl flour
1/8 tsp salt
5 whole eggs + 2 extra egg yolks
½ cup heavy cream
1 tsp vanilla extract

Instructions

Graham Cracker Crust

Ok, let’s start with the crust. I just picked up a box of graham cracker crumbs and got the recipe off the side of the box. In my family we like a bit of a thicker crust, so I multiplied the recipe by 1.5. Preheat the oven to 350 degrees. Combine sugar and crumbs in a bowl, add the melted butter. Mix in the butter thoroughly. Pack the mixture into a spring form pan, pressing firmly into the bottom and up the sides. Bake for 8 minutes, and allow to cool before filling.

Cheesecake Filling and Assembly

Once the crust is out of the oven, turn up the heat to 475 degrees. Have the cheese at room temperature. Beat it in an electric mixer until soft and creamy. Now add in the sugar, flour, salt, and the 5 eggs, one at a time. Beat in the egg yolks, cream, and vanilla until very smooth.

Pour the cheese mixture into the spring form pan slowly. Bake in a preheated 475 oven for 10 minutes. Reduce heat to 225 and bake 1 hour longer. Turn off the heat, crack open the oven door and let cake settle in oven for 15 minutes (or longer… I did probably about 30 minutes just because I was running around doing other stuff). When you crack the oven open, run a knife around the edge of the cheesecake, between the crust and pan, so that when you remove the sides of the spring form it’s easier.

Remove from the oven and cool for at least 4 hours before removing sides of spring form. It’s best to put it in the fridge so it can really settle. If you’re going to leave it overnight (like I did), be sure to cover it so it doesn’t get dried out or anything like that. The crust crumbled a lot when serving, but it’s all good because this stuff is so delicious that no one will care. It’s moist and creamy and very rich. Bon appetit!

Revisiting Pie Dough

Pie Dough
Pie Dough
Pie Dough
Pie Dough
Pie Dough
Pie Dough

I know I’ve already posted my pie dough recipe, but I recently made another batch and took more pictures. I thought this might be helpful for first-timers so they have a better idea of what each stage looks like. Hopefully this is helpful!

Pie Dough

Ingredients

2 cups flour
1 tsp salt
1/2 cup shortening (I like to use vegetable, Crisco)
1/2 cup (1 stick) butter
3-5 Tbl ice water

Instructions

In a food processor, combine flour and salt. Then add shortening all at once, but in pieces, pulse. Do the same with the butter (cut it into pieces, add, and pulse). After pulsing in the butter and shortening, your mixture should have the appearance of rough sand. Drizzle the ice water, 2 tablespoons at a time, over the mixture and pulse. Stop adding water when your dough comes together in the processor and looks something like this. Dump the dough out onto a floured surface.

Dump the dough onto a lightly floured surface and form it into a large ball. Cut it in half. The less you handle the dough in these next couple steps, the better. Less handling means more flakiness. Gently form each chunk of dough into a disc, about 1 inch thick (roughly, it doesn’t really matter). Wrap the discs in saran wrap (or wax paper) and refrigerate for at least 30 minutes.

After the dough has been refrigerated, you can remove it and roll it out. Like I said before, I like to roll it out on the saran wrap it was wrapped in so that I can use that to help flip it into the pie dish. As you can see, this recipe makes enough dough for one covered pie or two uncovered pies. Enjoy!

Kolacky Cookies

Kolacky Cookies

For Christmas, Jonah and I went to Salem (where his Grandma Patty lives) with his parents. It was my first real Christmas and Jonah’s family made it so wonderful. They pulled out all the stops, and even though we’re adults we still left cookies and milk for Santa and carrots for his reindeer. And it was all worth it because he left us a thank you note!

Anyway, the day before Christmas was full of baking: I made cookies (the chocolate peppermint cookies I made with Carmelle), Susan (Jonah’s mom) made pies, and she also made these wonderful cookies called Kolacky cookies. Pronounced ko-lach-key, these are Slovak cookies from Randy’s (Jonah’s dad) aunt. They’re yeast cookies, so they rise and get kind of flaky like bread, and are filled in the center with jam.

Kolacky Cookies

Ingredients

3 cups flour
2 sticks butter, room temperature
1/4 cup sugar
1 teaspoon salt
1 package active dry yeast
1/4 cup warm water
1 cup sour cream
1 egg
Jam (we used the homemade raspberry jam that Jonah and I had made Susan for Christmas)
Powdered sugar

Instructions

Mix butter with flour, sugar, and salt using a mixer (or pastry blender). In a small bowl, dissolve the yeast in the water. Add the yeast mixture, sour cream, and egg to the flour mixture, combine well. If the dough is too dry , add a little bit of milk. If it’s too wet, add a little bit of flour. Ball the dough up, wrap it in buttered or greased wax paper, and refrigerate for at least 3 hours or overnight.

After removing the dough from the fridge, roll it out on a floured surface until thin. Fold it in thirds and re-roll it. Then do that again (the “fold it in thirds and re-roll it” part). The last time you roll it out, you want to get it to be about 1/4-inch thick. Now cut it with cookie cutters into round/square/diamond shapes, just nothing too crazy. Imprint the cookies with your thumb and fill the imprint with about 1/2 – 1 teaspoon of jam. Now let them rise for 1 hour. (During this time you can preheat your oven to 375 degrees. Back them for 15 minutes. After removing from the oven, sprinkle with powdered sugar.

These cookies were a nice change from a lot of the goodies we’d been eating because they weren’t so sugary sweet. But I liked the touch of fruitiness from the jam and that the cookies were a little more scone or bread-like. And they were a big hit with the family, as you can see from the photo below.

Kolacky Cookies