Dessert

Simple Brownies

Simple Brownies with Almond

Simple Brownies

Simple Brownies

My co-worker Kelly, who I’ve written about before, has a commune dinner every Monday night. He lives near a bunch of his friends and all of them and their kids (and their pets) all convene for dinner every week. A few weeks ago, Jonah and started joining in. It’s really nice to have that sense of community, which I think can be hard to find when you’re in your 20s and you don’t live near your family.

Going over to Kelly’s on Mondays is so calming. Every member of this group is so kind and funny. They have been having these meals for I’m not sure how many years, but they weren’t even phased when Jonah and I started showing up every week, and have been so incredibly welcoming, pulling up chairs to the table and always making sure we have a drink in our hand. It immediately feels like we’re a part of this family, with the two little boys running around the house and the dogs barking outside. And they feed us delicious food, so I can’t complain.

The first night we went, instead of just grabbing a bottle of wine and heading over (which I was later scolded for not doing), I decided to whip up a batch of brownies. There’s a relatively quick recipe in An Everlasting Meal, so I pulled it out and made a couple of adjustments (mainly replacing half a teaspoon of the vanilla extract with almond extract), and they turned out to be a huge hit. The almond was a really nice and unique flavor with the chocolate.
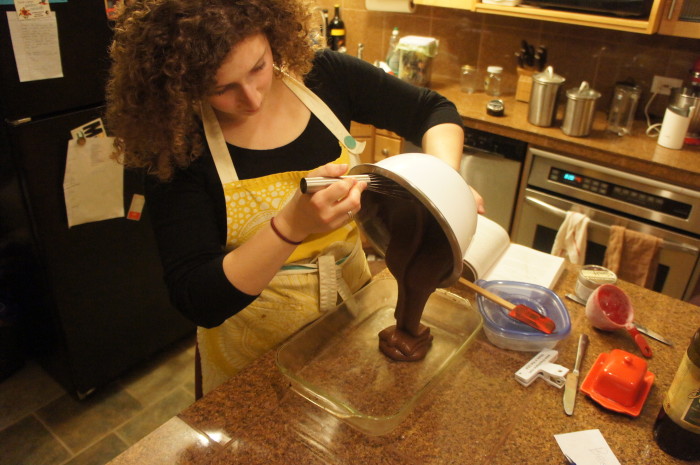
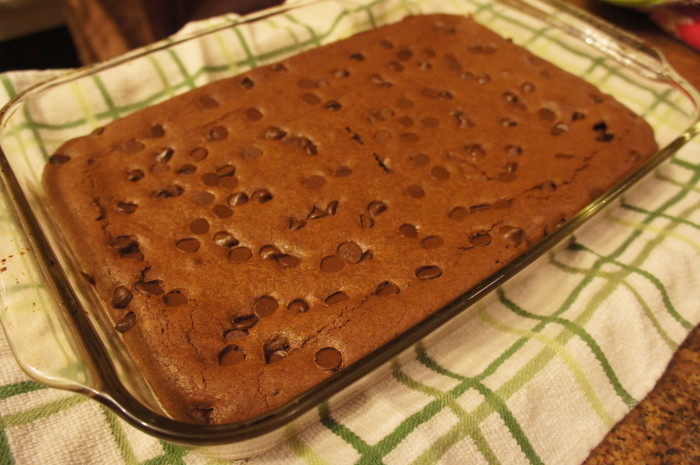
Simple Almond Brownies

Ingredients

4 oz unsweetened chocolate
2 sticks butter
3 eggs
2 cups sugar
1 1/2 tsp vanilla extract
1/2 tsp almond extract
1 cup flour
a handful (or 2) of chocolate chips, or walnuts

Instructions

Preheat your oven to 350 degrees and grease a 13×9 inch baking dish or pan. In a double boiler on the stove (or a heat proof bowl or a pot over a pot of simmering water), melt the chocolate and butter together, stirring so it’s all nice and smooth. Remove the bowl or pot from heat and let it cool. Once it is cool, add the eggs, beating after each addition. Add the sugar, vanilla, and almond, stir, and then add the flouring, stirring until combined. Pour the batter into the pan and sprinkle the chocolate chips (or walnuts, if you’re using them) on top. You can put on as many as you like or as few. Bake for about 30 minutes, but do the clean knife/toothpick check at 20. Mine took roughly 35 minutes. Enjoy!

Rhubarb Thyme Hand Pies

Rhubarb Thyme Hand Pies

Rhubarb Thyme Hand Pies

Rhubarb Thyme Hand Pies

It’s early spring. Do you know what that means? It means rhubarb. Yep. I couldn’t be more excited. Jonah and I went to the farmer’s market and I picked up about two pounds of the it and I decided to make Rhubarb Thyme Hand Pies. Now, I have only made hand pies once before, and they were delicious. I followed a recipe from the Dahlia Bakery cookbook, so the dough was specifically for hand pies, as was the filling. But I didn’t really have a recipe for these, so I decided to wing it.

Part of my concern with kind of winging it was that the dough would be too delicate and flaky to hold up as a handpie. Second, I worried that the filling, being mostly rhubarb which falls apart as soon as it’s cooked, would be too liquidy, not enough solid. So I did a little research, and while I wasn’t completely happy, it was certainly a first step. I think I made the pies a bit too big. I didn’t really want to do the 3.5 inch circular cookie cutter route (cutout two circles, run milk around the edge of the bottom one, fill inside the milk edge with filling, put another circle on top and seal the edges), so instead I divided my dough into 8 pieces and rolled each one out until it was about 1/4 inch thick. I like the way these are shaped better, a little more rustic seeming, but I do think that they might’ve held up better if I had gone the cookie cutter route. The dough was, as I was concerned about, a little too delicate and started to crumble when you picked it up. And I certainly could’ve put more filling in each pie (the leftover filling is in a tupperware at home, and I’m looking forward to stirring it in with some Greek yogurt for a snack later).

All that being said, they were definitely tasty, and I would recommend them! But hopefully I’ll be trying another batch here soon with a few changes. I’ll let you know how it goes.

Rhubarb Thyme Hand Pies

Ingredients

Pie Crust

2 cups flour
1 cup butter (2 sticks), cold, cut into cubes
1 tsp salt
up to 1/4 cup water

Rhubarb Filling

4 cups rhubarb, in a half inch dice
3/4 cup sugar
1/2 – 1 tsp fresh thyme
Milk for sealing

Instructions

Pie Crust

In a mixer or a food processor, combine the flour, butter, and salt. If the dough is not coming together, add water, 2 Tbl at a time, until it does. Form dough into two discs, wrap in saran wrap, and refrigerate for at least 1 hour.

Rhubarb Filling

While the dough is refrigerating, put cubed rhubarb, sugar, and thyme into a small saucepan. Over medium heat, cook the rhubarb until it breaks down and simmers for a couple minutes. Allow the filling to cool while the dough finishes up in the fridge.

Preheat your oven to 375 degrees. Divide each disc into 6 even pieces (I only did 4 and the hand pies were too big, in my opinion). On a floured surface, roll each piece of dough into as circular a shape as you can. You’re going to be folding them in half, so even if they’re not so round, symmetrically misshapen is best. Line a baking sheet with parchment paper, and assemble the pies on the baking sheet. What does assembling them entail? Well, dunk your fingers in milk and wet the edge of your circle of dough. Fill half of that circle, inside the milk line, with the rhubarb filling, and fold the opposite side of dough over the filling. Press around the edges, allowing the milk to seal the two sides of the dough together. With a fork, press around the edges, and use a knife to cut three little slits in the top for steam (this way the pies are less likely to explode). I was able to fit 4 on a pan, but because yours will probably be smaller, you may be able to fit 6. Bake for 20-35 minutes or until the dough looks cooked and the edges are golden brown. Allow to cool for about an hour before digging in.

Jonah’s Birthday: Mint Chocolate Chip Cake

I wasn't able to catch it before it was thoroughly enjoyed by our house, but hey, it still looks delicious!

Jonah’s birthday was a little over a month ago, but I am just now getting around to posting about his birthday cake. It has been a little busy around here! We are finishing up the recording of Jonah’s first solo full length album – I was in the studio Friday afternoon, Saturday afternoon, and am going back today. Let me tell you guys, it sounds amazing. I’ll tell you all more about it when we get closer to the release. But big cool things happening, I promise.

Anyway, for Jonah’s birthday, my roommate Carmelle and I made him a mint chocolate chip cake, a recipe I’ve been eyeing for quite some time. And let me say, of our birthday treats, this one has been my favorite. This chocolate cake recipe was definitely one of the more perfect ones I’ve made. It was perfectly chocolatey, light, and moist. In the future, I will use this cake as a base for many exciting things, I can tell. The frosting was wonderfully minty, but not overpowering. Overall, the flavors were really nice, and it’s definitely a good occasion cake because it’s unique.

Mint Chocolate Chip Cake

Ingredients

Cake

9 Tbl unsweetened cocoa powder
1 1/2 cups cake flour (If you don’t have cake flour and don’t want to buy a whole bag for 1 1/2 cups, use plain flour and replace 3 tbsp with cornstarch)
1 1/2 tsp salt
1 tsp baking soda
1/4 tsp baking powder
1 stick unsalted butter, at room temperature
1 1/2 cups sugar
2 large eggs
1/2 cup coffee
1/2 cup milk

Frosting

2 1/2 sticks unsalted butter
~4 cups powdered sugar
2-3 tsp peppermint extract (plus some for taste)
Milk, if necessary
150g dark chocolate, very finely chopped
green food coloring

Instructions

Cake

Butter and line with parchment paper two 9-inch cake pans and preheat oven to 350 degrees. In a medium bowl, sift together the cocoa, flour, salt, baking soda, and baking powder. In an electric mixer, beat the butter and sugar fora  few minutes until it’s smooth. Add the eggs, mixing after each addition until fully combined.

In a cup, mix the milk and coffee together and set aside. Add half of the dry ingredients and the coffee/milk mixture to the butter mixture, and stir. Add the second half of the dry ingredients and mix until smooth. Split the batter into the prepared cake pans, and bake for about 25 minutes, or until you’ve had a successful toothpick test. Remove from the oven and allow the cakes to cool for about 5 minutes in their pans, then remove them onto a wire cooling rack and allow them to cool completely before icing them.

Frosting

Now it’s time for the icing. I will give full disclosure: Carmelle and Mac made the icing, iced the cake, and decorated while I was out… doing something… I can’t quite remember at the time. I advise rinsing out the bowl of your electric mixer and using that again. Cut the butter into smaller pieces and put them in the mixing bowl. Beat until it’s fluffy. Now add the powdered sugar one cup at a time (or 1/2 cup at a time once you’re getting closer to the right consistency), beating between each addition until combined. If it gets too stiff, you can add a little bit of milk (think 1 Tbl at a time) to get it back to the right consistency. Add the peppermint extract and enough green food coloring to get it to that pretty mint green color. Slowly add the chocolate pieces until it looks the way you’d like and, more importantly, there’s a good amount of chocolate.

Put the first cake on whatever you’re going to use to serve: a cake stand, a plate, etc. Using about 1/4 of the icing,  frost the top of the first layer. Place second cake one top of the first, and cover the whole dang thing with the rest of the icing. Carmelle pointed out that one of the beauties of this cake was that if little crumbs came off the cake and got in the icing, it didn’t really matter, because there were already little brown bits of chocolate in it. Mac used the extra chopped chocolate to make a lovely little design op top. Serve with candles and a glass of milk!

Lemon Tart with Rosemary Crust


When planning this year’s Thanksgiving menu – which, believe me, took over a month – my father and I went back and forth quite a bit on what recipes to include. We wanted to go with some less traditional recipes. For instance, instead of a regular stuffing, we stuffed onions; there were no sweet potatoes or mashed potatoes at our dinner, instead we had twice cooked stuffed delicata squash (I’m working on getting you that recipe…); our brussel sprouts were glazed with balsamic, tossed with pancetta, and sprinkled with breadcrumbs. It was heavenly. Dessert, for some odd reason, turned out a little lackluster. You know how you wait all year for those pies? Those perfectly creamy pumpkin pies, those apple pies so full of apples you don’t know if they’ll all fit in the pie dish, and the pecan pie with the perfect ratio of nut to candy-like filling? Yeah… we didn’t really get those this year. Probably because we went with the whole “let’s try new recipes!” idea. And hey, I’m glad we did. What’s the fun in cooking if you’re using the same recipes over and over, right?

In addition to the traditional pumpkin/apple/pecan pies, we also decided to add a lighter dessert to the menu. You know Pinterest, right? Well I had found this recipe for a lemon tart with rosemary crust, and without really reading the whole thing, recommended it as a light, fruity dessert. Only upon arriving in Seattle and reviewing all of the recipes did I realize that the crust was a spelt crust. Now, I don’t hate gluten-free things, but I am a little…doubtful, one might say, of their deliciousness when compared with regular gluten-filled things. So I was wary. But I made it anyway. And what I loved about this tart is that the crusty is really rosemary-y, unlike all those recipes where you add a little bit of whatever herb and can barely taste it. I also loved how tart the filling was. My family loves sour anything, so the filling (not as much the crust, but whatever) was a big hit. If I were to make it again, I would probably 1.5 times the filling and just add some fresh rosemary to my own pie dough for the crust.

Lemon Tart with Rosemary Crust

Ingredients

Rosemary Spelt Crust

1 1/3 cup spelt flour
3 Tbl sugar
1 Tbl fresh rosemary, chopped
pinch of salt
1/3 cup cold butter, cubed
1-2 Tbl ice water

Lemon Filling

1 cup plain Greek yogurt (I wouldn’t recommend non-fat, as you’ll lose some of the richness, but if that’s what you’re into, go for it.)
1/2 cup sugar
2 eggs
1/2 cup freshly squeezed lemon juice
1 teaspoon lemon zest

Instructions

Rosemary Spelt Crust

Preheat your oven to 350 degrees. Butter a 9-inch tart pan and set aside.

In a food processor, pulse the flour, sugar, rosemary, and salt a few times. Add the butter and pulse until crumbs start to form. Add the ice water, 1 Tbl at a time, pulsing in between. When the dough holds together when pinched between your fingers, it is done. Don’t add any more water than is absolutely necessary.  It will seem crumbly, but trust me, it’s fine.

Dump the dough into the prepared tart pan. Press the dough into the pan, starting in the center and working your way outwards and up the sides (evenly!). Pierce the crust with a fork a few times and bake for 15 minutes. Allow to cool at least 5 minutes before you pour in the filling.

Lemon Filling

While the crust is baking, you can prep the filling. In a mixing bowl, whisk together the yogurt and sugar. Add the eggs one at a time, then the lemon juice and zest. Whisk until the mixture is smooth and well combined. Pour the filling into the (at least slightly cooled) crust and bake for 25-30 minutes or until the center is set and jiggles only slightly when shaken. It is weird to me that shaking things and their jiggling is in a recipe, but hey, that’s how it goes sometimes.

Allow the tart to cool completely, and then stick it in the fridge to chill for at least 1 hour before serving. If you’re feeling fancy, serve it with fresh whipped cream.

Chewy Gingersnaps, Perfect for the Holidays

Gingersnaps

Gingersnaps
Gingersnaps

These are possibly the best gingersnaps I’ve ever had. Or maybe they should be called Gingerchews, because they don’t snap. Instead, these cookies are perfectly chewy in the center and crispy on the edges.

For my birthday, my co-workers – who know me incredibly well – bought me this Real Simple magazine/cookbook thing. It looks like a magazine, but is just full of fall and winter recipes. Jonah and I have enjoyed more than a few of the recipes from it, but it being gingersnap season and all, I wanted to share this one with you sooner rather than later.

Chewy Gingersnaps

Ingredients

2 cups flour
2 tsp ground ginger
1 1/2 tsp baking soda
1/2 tsp cinnamon
1/2 tsp salt
1/4 tsp black pepper
1/4 tsp nutmeg
1/8 clove
3/4 cup vegetable shortening
2/3 cup packed (light) brown sugar
1 egg
1/2 cup molasses
1 tsp vanilla extract
1/4 cup granulated sugar, plus some for sprinkling

Instructions

Preheat your oven to 350 degrees. Line a baking sheet with parchment paper (if you have 2 baking sheets, line 2 – these take a little prep time on the pan, so it’s nice to have time to get them ready while there’s a batch in the oven). In a bowl, mix together the flour, ginger, baking soda, cinnamon, salt, pepper, nutmeg, and cloves; put aside.

In the bowl of an electric mixer, beat the shortening and brown sugar until fluffy: you’ll want to use at least a medium speed for about 3 minutes. Turn the speed down to low, and mix in the egg, molasses, and vanilla. Slowly add the flour mixture and mix until combined.

Put the granulated sugar on a plate or in a shallow bowl. Take about a heaping tablespoon of dough, roll it into a ball, and roll it in the sugar to coat. Put the balls on the baking sheet at least 2 inches apart, and then, using the bottom of a glass, press the balls till they’re a little less than 1/2 inch thick. Sprinkle them with a tad more sugar and bake for 10-12 minutes, rotating the pan halfway through. Enjoy these gingernsaps by your holiday decorations (tree? menorah?) of choice with a glass of cold milk.

Whole Wheat Chocolate Chip Cookies

Chocolate Chip Cookies

When you have found possibly the best chocolate chip cookie recipe ever, it is hard to find recipes for chocolate chip cookies that still inspire you. You know what I mean? It’s like, well I found the best ones, so why not just make those? I’ll tell you why: while they are delicious, they require buying fancy chocolate (instead of just using the perfectly good chocolate chips you already have in your kitchen) and sifting. I’ll sift for Thomas Keller, but only so often.

So when I wanted to make cookies a while ago but not the fanciest best ones ever, I went to one of my favorite (food) blogs: Orangette. I have used this blog before, but I have re-fallen in love with it since reading the author’s book, A Homemade Life. Now, I feel that Molly Wizenberg and I were meant to be friends, and I am determined to make it happen. If you like reading about food, I definitely suggest it. There are also recipes in it, so if you don’t like the story, you can at least make some delicious food. Anyway, she had this recipe for whole wheat chocolate chip cookies that just looked so simple and divine… So I made them.

Whole Wheat Chocolate Chip Cookies

Ingredients

3 cups whole wheat flour
1 ½ tsp. baking powder
1 tsp. baking soda
1 ½ tsp. kosher salt
2 sticks cold unsalted butter, cut into ½-inch cubes
1 cup lightly packed dark brown sugar
1 cup sugar
2 eggs
1 tsp. vanilla extract
8 oz. bittersweet chocolate, roughly chopped into ¼- and ½-inch pieces, or bittersweet chips

Instructions

Preheat your oven to 350 degrees. Line two baking sheets with parchment paper or just butter them. Mix the flour, baking powder, baking soda, and salt in a bowl. Set aside.

Put the butter and sugars in the bowl of a stand mixer fitted with the paddle attachment (if you’ve got it. If you don’t, I advise bringing your butter to room temperature before you mix it). Bring the mixer up to a lower speed and mix JUST until the butter and sugars are blended (this should take about 2 minutes if your butter is cold). Add the eggs one at a time, beating well after adding each one. Add the vanilla, mix. Now add the flour mixture, and mix on a low speed until it is just mixed (have you noticed a key with this recipe is not over-mixing it? Honestly, that goes for most recipes. But moving on…) Add in your chocolate and mix. This is where it gets tricky, as the dough is fairly dry. Just do the best you can.

Using a spoon, put ~3 Tbl. sized scoops of dough on the cookie sheet, leaving plenty of room between the cookies (I would say at least 2 inches, 3 to be safe). Mine didn’t spread as much as the ones on Orangette, but always better safe than sorry. Bake for 16 to 20 minutes, rotating the sheets halfway through, until the cookies are evenly browned. I have found, when it comes to baking cookies, that I need to take the cookies out of the oven sooner than I think I do… I have a tendency to over-bake. Transfer the cookies to a rack to cool. Enjoy with a nice glass of cold milk.

Delicious Chocolate Cupcakes (that also happen to be gluten-free)

Roza and cupcakes

Cupcakes
Frosted Cupcakes

If you read the title, let me preface this post by saying that I am not often a baker of gluten-free food… Actually, I’m not ever really a gluten-free (GF) cook, if I have anything to do with it. The GF baked goods that I have had in my life are generally sad, deflated looking little things, and usually don’t taste super. So, I try to avoid it.

As you may know, this past year, Jonah and I were nannying for a family, and they are gluten free. I had baked some things for them before (muffins, breads, even pie) and while they were impressed because it usually was pretty good, I was not. You’re going to tell me that pie dough that I made with potato and coconut flour and butter was better than my usual flour-butter-shortening? I don’t think so. But when Roza’s birthday rolled around (see photo below), I wanted to make her the best GF cupcakes I could find. How could you not with a face like that? And I must say, If you just gave me that cupcake, I would not know that it doesn’t have any sugar or flour in it. It is perfectly fluffy and dense at the same time, perfectly chocolatey without being too sweet… It was good. So yeah, these are, by non-GF standards, good cupcakes.

Now let me tell you a bit about Roza. She is the cutest 4 year old I’ve ever met in my life. With a voice like a cartoon character and an endlessly positive attitude, she always had the ability to make me howl with laughter. She was super into Curious George at the time, and we had been reading her this story where George is home alone and finds all these party favors and decorations and cake ingredients, etc. for a party, so he decorates and makes the cake, and then it turns out the party is for him! So Roza’s mom decided to do the same thing. All week, Roza cleaned the house with her little miniature broom for a party she knew we were having, and then she and I decided to make cupcakes for said party. Then, at dinner on Friday with her parents and me and Jonah, we surprised her with the fact that this all was her own birthday party! It was the most adorable thing ever. Their family doesn’t eat sweets a whole lot, and usually sweets aren’t things like chocolate cupcakes, so she was pretty enthused by the idea of baking sweets like these. While we were making them, we had this conversation about 20 times:

Roza: Annie, do you know what is yummy?
Annie: What’s yummy, Roza.
Roza: Chocolate… (Breaks into giggles).

Have I mentioned how much I love her? I have? Ok. I’ll stop.

Gluten-Free Chocolate Cupcakes

Note: A lot of GF recipes will not use just coconut flour. In fact, when I told Roza’s parents that this recipe only had coconut flour, they didn’t think it would be very successful. But the key is using LOTS of wet ingredients. Coconut flour soaks up moisture like nothing else, so in order to balance it out, the batter will seem pretty wet. But it works, I swear.

Ingredients

Cupcakes

¼ cup coconut flour
¼ cup cocoa powder
¼ tsp sea salt
½ tsp baking soda
3 eggs
¼ cup canola oil (the recipe called for grapeseed, but I used canola because it’s what we had around)
½ cup agave nectar (we did a little bit less than this since their family is into less sweeteners)

Frosting

1 cup chocolate chips (preferably dark)
½ cup canola oil (again, the recipe called for grapeseed, but I still didn’t have any)
2 Tbl agave nectar
1 Tbl vanilla extract
a pinch of salt

Instructions

Cupcakes

Preheat your oven to 375 degrees. In a mixing bowl, combine coconut flour, cacao powder, salt and baking soda and stir. In a larger mixing bowl, blend together the eggs, oil and agave. Then mix the dry into the wet, and stir until thoroughly combined. Line your cupcake tin with liners, and scoop about 1/4 cup of batter into each liner. Bake them for ~20 minutes, or until a toothpick inserted comes out clean.

Frosting

In a small saucepan over very low heat (or in a double boiler, if you’re feeling that it’s necessary), melt chocolate and oil together. Stir in the agave, vanilla, and salt. Then put the frosting in the freezer for 15 minutes to chill and thicken – mine took longer than 15 minutes to thicken up, but then it was a bit difficult to spread because I think I left it in the freezer for too long… I’m sure there’s a happy medium here, I just didn’t quite hit the nail on the head my first try). After removing from the freezer, whip it with a hand blender (or transfer from the pot you used to a standing mixer and use that) until it is fluffed up. Spread over the cupcakes and enjoy! Roza definitely did.

Old Fashioned Strawberry Shortcake

Shortcake
Shortcake

A perfect scene for eating shortcake

Wow you guys. This is the longest I have gone without posting here. I’m going to do my best to get back on the horse, but I can’t make any promises. Here are a few reasons August was a little rough:

1) We travelled quite a bit. To Seattle twice: once for a farewell party for my sister (who just moved to Berkeley, CA to pursue her dreams), once for a wedding (congrats to Johnny and Sophie!), and then to Minnesota for Jonah’s family reunion.

2) I was nannying AND working at Pagatim. It was… a lot.

3) We moved! It’s official! We now live in a beautiful grown up house with friends. I can’t tell you how refreshing it is to have doors between rooms (for example, there is not only a door between our bedroom and kitchen, but an entire floor/ceiling, which means Jonah can no longer wake me up in the morning by eating his cereal), a full sized kitchen (with a dishwasher!), big windows and lots of light, a patio out back… the list goes on.

But really, I know there is no excuse to leave you hanging like that, so my hope is to not let that happen again. One of the times I went to Seattle this summer, we went to see a viewing of The Princess Bride at the Mural Amphitheater right under the Space Needle. It was so fun, and we packed a wonderful picnic to bring along. I made these shortcakes for dessert, and they were so delicious.

Strawberry Shortcake

Makes 8 shortcakes

Ingredients

Shortcake

2 1/2 cups all-purpose flour
2 1/2 tsp baking powder
1/2 cup yellow cornmeal
2/3 cup granulated sugar, plus 1/3 cup to top shortcakes
1 tsp fine sea salt
1 1/2 cups heavy cream
4 tsp lemon zest
1/4 cup unsalted butter, melted

Strawberry Filling

2 pints ripe strawberries, hulled and sliced (I think we used raspberries instead)
2 Tbl granulated sugar
2-3 tsp freshly squeezed lemon juice
We also added a few roughly chopped mint and lemon verbena leaves

Whipped cream for serving, preferably homemade

Instructions

Shortcake

Preheat the oven to 350 degrees and butter a baking sheet. Mix together the flour, baking powder, cornmeal, sugar, and salt in a bowl. Then stir in the cream and lemon zest. Turn the dough onto a floured surface and form it into a ball, then knead about 12 times, or until the dough holds its shape (careful not to overwork it!). Cut the dough into 8 equal portions and form the portions into balls. Dip each ball into the melted butter, and then dip half of the ball into the (1/3 cup) sugar. Place each ball onto the baking sheet, sugared side up. Bake for 20-25 minutes until golden brown on edges and baked through. Cool on a wire rack.

Strawberry Filling

While the shortcake is baking, you can get started on the fruit. Now, I didn’t follow the recipe when it came to the fruit. I combined the berries, sugar, lemon, and herbs in a pot and put it over low heat. Let it cook, stirring frequently, until the sugar is absorbed and the berries start to soften, then remove from heat. (You can also prepare the whipped cream while the shortcakes are baking.)

To serve, slice the shortcakes in half horizontally, spoon a heaping serving of the fruit over the bottom half, then put on as much whipped cream as you’d like, and put the top on. These are a lovely end-of-summer dessert, simple but really delicious. Enjoy!

Rhubarb Curd Shortbread

Rhubarb shortbread.
Rhubarb shortbread

Rhubarb shortbread

Ok you guys. It has been too long. Again. But I promise I have good reasons: 3 jobs, a show (The Sound of Music!), and sunlight. I’ve been nannying part time, working at the office part time, and doing social media an hour a day, then going to many many hours of rehearsal in a suburb or Portland. So no time for cooking OR blogging. But here I am, backstage at the show, and I decided, I HAVE to do this.

You’ll have to excuse the iPhone photos for the next couple of posts (or Instagram, whichever I had the energy to use). Along with leaving my 8×8 pan at the cabin in the woods (which it turns out I needed for this recipe), I also left my camera charger… so my camera was sitting, dead and useless, for quite a while. So I know the pictures aren’t as good of quality as usual, but just bear with me until I get my camera up and running again!

I found this recipe on Food52 while looking for shortbread recipes to eat with a fruit compote. I love rhubarb, and am always looking for different and unique recipes, so I thought this would be a fun one to try. Warning: it is labor intensive and dish heavy. Read through this recipe all the way before you start. Please. You’ve been warned. Here’s what you’ll need:

Rhubarb Curd Shortbread

Ingredients

Rhubarb Curd

3/4 lb rhubarb (about 6 stalks)
4 Tbl water
1/4 cup sugar
4 egg yolks
1/3 cup plus 1/8 cup sugar
1 tsp lemon zest
2 tsp lemon juice
3 Tbl butter, cut into chunks

Shortbread Crust

12 Tbl butter, cut into chunks
1/4 cup powdered sugar
1/2 tsp salt
1 1/2 cups flour
1/4 tsp ground ginger
1/4 tsp ground cinnamon
1 pinch ground clove

Instructions

Rhubarb Curd

First, cut the rhubarb into one inch pieces. Heat the rhubarb, 1/4 cup of sugar, and water in a saucepan over medium heat. Cook it until the rhubarb is falling apart and there are no whole pieces left (you can help it along by mashing with your mixing tool, a wooden spoon works great). It you have an immersion blender or a regular blender, puree the mixture. If you don’t have either of those, push the mixture through a strainer. I advise one of the blender methods.

If you have a double boiler, put a couple inches of water in the pot of it and set it over medium heat. If you don’t have a double boiler, find two pots that are about the same diameter, so that one can be set atop the other without going into whatever is in the bottom pot. Put egg yolks, butter, remaining sugar, lemon zest, and lemon juice in the top pot and set over the simmering bottom pot, and whisk to combine. When the sugar dissolves, add the rhubarb puree by the spoonful (to temper the eggs). When all the rhubarb is added, put the pot over the boil again. Stir for about 5 minutes, until the mixture is warm and slightly thickened, then remove from heat. Press the mixture through a strainer – this is an important step! It’ll give the curd a smooth texture.

Shortbread Crust

Preheat your oven to 350 degrees while you make the shortbread: blend all the ingredients for the shortbread in a stand mixer or food processor. Now, the recipe says to wrap the dough in plastic and refrigerate it, but I didn’t and it was just fine. The recipe also says to roll it into an 8X8 square and put it into an 8X8 pan… but I just dumped the dough into a pie dish and pushed it outwards until it was spread out. Bake the shortbread for 30 minutes until golden brown. Set to cool on a rack.

Use a spatula to spread the curd evenly over the shortbread. Put it in the oven for another 10 minutes, remove, and allow to cool on a rack. Then refrigerate for another 20 minutes. It’ll be nice and firm enough to slice cleanly. Enjoy! (If you want to wait another couple minutes, you can dust with powdered sugar… I couldn’t wait.)

Gingered Rhubarb Crisp

Rhubarb
Rhubarb

Rhubarb

You know what has started? Our neighborhood farmer’s market! I couldn’t be more excited. Jonah and I walked over for the first time and bought some sweet little carrots and some of the most beautiful rhubarb I had ever seen in my life. Seriously.

Now, for those who know me, you are award I have an obsession with rhubarb. If you don’t know me, well…now you know that much more. Strawberry rhubarb is my dad’s favorite kind of pie, and he and I spent one summer searching for the perfect recipe. We made probably a pie every other week. And we found what is, in my opinion, the best recipe. I still haven’t decided if I’m going to give you the filling recipe, but if I do it will be later. I’ve already given you the pie dough recipe.

This recipe, however, is one that my older sister discovered a few summers ago. It’s perfect for a) not having any strawberries, but having lots of rhubarb and b) wanting rhubarb dessert but not having enough time to make a pie. That shit’s time consuming. It’s so delicious: the ginger really brings out the tartness of the rhubarb, and I love the nuts in the topping. I halved the recipe because we all know what happens when there’s extra dessert lying around (hint: it ends up in my belly).

Gingered Rhubarb Crisp

Ingredients

Rhubarb Filling

Vegetable oil spray or butter wrapper (see instructions)
3 pounds rhubarb, cut into ½-inch chunks
¼ cup plus 1 tablespoon flour
½ cup sugar
½ teaspoon ground ginger

Crumble Topping

¾ cup all-purpose flour
¾ cup old-fashioned oats
¾ cup packed light brown sugar
¾ cup chopped walnuts
¾ teaspoon ground ginger
6 Tablespoons unsalted butter, melted

Vanilla ice cream, whipped cream, or plain Greek yogurt for serving (I wish we’d had Greek yogurt… sounds so good).

Instructions

Rhubarb Filling

Preheat your oven to 375 degrees and spray an 8- by 8-inch baking pan lightly with the vegetable oil spray and set aside. If you don’t have vegetable oil spray, take the wrapper from the butter you use in the recipe and just rub the pan with that. Jonah and I keep a stash of butter wrappers in our fridge for this exact reason.

Stir the rest of the filling ingredients (rhubarb, flour, sugar, and 1/2 tsp ground ginger) in a mixing bowl until the fruit is nicely coated with the flour. Spread the rhubarb evenly in the pan and bake it in the middle of the oven for 20 minutes.

Crumble Topping

While the fruit is baking, make the crisp topping (you can use the same bowl you used for the fruit – I’m all for fewer dishes): Mix all the topping ingredients except the butter together in the bowl. Pour the melted butter over the dry ingredients, and mix thoroughly until all the ingredients are evenly moistened. With the melted butter. That’s right.

Take the pan of rhubarb out of the oven and spread the topping in an even layer over the fruit. It’s probably a good idea to put the pan on a baking sheet (maybe even lined with foil) to catch any drips. Or just do it in a bigger pan. That’s up to you I guess. Anyway, bake it for another 30 minutes or until the topping is golden brown and the filling is bubbling. Serve warm with ice cream, whipped cream, or Greek yogurt.

Pistachio Butter Cups

Pistachio Butter Cups

Pistachio Butter Cups

Another recipe brought to you by food52. The same day I made that scallops dinner for Jonah, I also made him these pistachio chocolates (think Reeses cups but with pistachio filling). What can I say, I was feeling loving and ambitious. This was the first time I’ve ever made a candy/chocolate thing, so I was a little scared and often felt like “am I doing this right?” but it all worked out. And actually, now that I’ve done it, I can confidently say that it was pretty easy! But I would definitely advise reading through the whole recipe before you get started (I actually always advise that, but especially in this case).

Pistachio Butter Cups

Ingredients

1 cup shelled pistachios
1/4 cup butter
1/2 cup powdered sugar
1/4 tsp salt
12 oz. dark chocolate, chopped

Special equipment: mini muffin liners

Instructions

I found I needed a little more chocolate than the recipe called for, but I think I used too much in the first step, which you’ll see below, and because of that the chocolate overwhelmed the pistachio filling a little bit.

Melt the chocolate in the microwave, stirring every 30 seconds until 75% of chunks are melted, and just stir to melt the rest. Set 24 mini muffin liners out (I did it on a baking sheet so they’d be easier to move and such. Add a spoonful (think maybe 1 1/2 – 2 teaspoons) of chocolate to each liner. Use the back of the spoon to push the chocolate up the sides of the liner. I pushed it up almost all the way to the top (see picture). Put the liners in the fridge for half an hour to cool until they’re solid.

While the chocolate is cooling, put the pistachios, salt, and butter into a food processor and process until smooth. Add the powdered sugar and 1-2 Tbl of water until you have a thick frosting consistency. Remove the chocolate-filled liners from the fridge. You’ll see that because you’ve pushed the chocolate up the sides, you’ve got a nice mini chocolate bowl. Add about 1/2 Tbl to each liner. How to go about this is tricky. I had to use my fingers to kind of smooth out the filling, as I wanted it to be flat (like a Reeses would be), but it stuck more to my fingers than to the chocolate. But I figured it out and it worked just fine.

Reheat the remaining chocolate (as you did above) and spoon it over the pistachio mixture until it’s thoroughly covered. You want the top layer of chocolate to meet the chocolate that was pushed up the sides of the liner so that the pistachio filling is encased in it. Allow to cool and enjoy!

World Peace Cookies (or Extremely Chocolate Cookies)

Chocolate Cookies

Chocolate Cookies
Chocolate Cookies

One of my favorite care packages that I got in college was from my dad. It arrived the week before finals, and included all kinds of stuff to help get me through the very stressful time: chocolate covered coffee beans to help with the all nighters, delicious tea to help me fight off illness, dried fruit and other healthy snacks to keep me going during the long days, etc. It made me feel so much better about all the work I had to do, and made it feel like he was there, pushing me to get everything done and do the best I could.

Anyway, so I was thinking about my baby sister, who is about to enter finals week. And she’s had a bit of a rough semester, with some health issues (she may have to haver her tonsils out this summer, ouch) and all kinds of yuck-o stuff. And I thought, you know what would make her feel better? A care package full of funny and delicious things to help her get through the toughest part of the school year. Plus, let’s face it, I’ll take any excuse I can get to make cookies. I’d been eyeing this recipe from Smitten Kitchen for these chocolate cookies called “World Peace Cookies.” Apparently the title is based on the idea that if everyone in the world had these cookies, there would be peace. And they are pretty dang good.

World Peace Cookies

Ingredients

1 1/4 cups all-purpose flour
1/3 cup unsweetened cocoa powder
1/2 tsp baking soda
1 stick plus 3 Tbl unsalted butter, at room temperature
2/3 cup (packed) light brown sugar
1/4 cup granulated sugar
1/2 tsp fleur de sel or 1/4 tsp fine sea salt
1 tsp vanilla extract
5 ounces bittersweet chocolate, chopped into chips, or a generous 3/4 cup store-bought mini chocolate chips

Instructions

Sift the flour, cocoa and baking soda together into a bowl. Set aside. In an electric mixer with the paddle attachment, beat the butter on medium speed until soft and creamy. Add both the brown and granulated sugars, the salt, and the vanilla extract before beating for another couple of minutes.

Turn off the mixer. Pour in the flour/cocoa mixture and pulse the mixer at low speed about 5 times, a second or two each time. (A nice trick when pulsing flour and or cocoa: cover the bowl with a dishtowel, draped over the mixer, to protect yourself from inhaling the ingredients and to protect your kitchen from a total mess.) If, after a few pulses, there is still a lot of flour on the surface of the dough, pulse a couple of times more. After everything is all mixed in, continue mixing on a low speed for about 30 seconds more, just until the flour disappears into the dough. As with anything with lots of butter, you want to work the dough as little as possible. Don’t worry, the dough will be crumbly. Toss in the chocolate pieces and mix to incorporate.

Dump the dough out onto a work surface, gather it together and divide it in half. One half at a time, shape the dough into logs about an inch and a half in diameter. Wrap them in plastic wrap and stick them in the fridge for at least 3 hours. Towards the end of the three hours, you can preheat your oven to 325 degrees. Line your baking sheets with parchment, silpats, or just grease them lightly like I did.

Pull the logs out of the fridge, unwrap, and with a sharp knife, slice them into 1/2-inch thick rounds. They may crumble: don’t worry, just squeeze the bits back together. Put the rounds on a baking sheet, leaving about an inch in between them. Bake for about 12 minutes. They won’t look that done, but they are. I promise. Allow to cool on the sheet for at least a couple minutes before transferring them to a cooling rack. Good luck letting them cool all the way before munching on a few accompanied by a glass of cold milk. Yum.