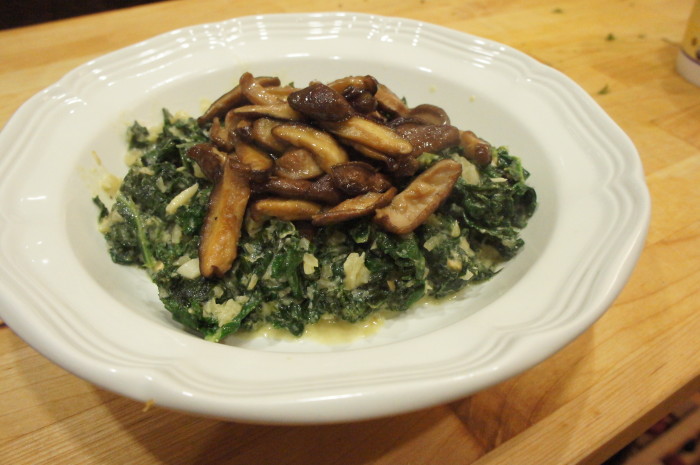
I’ve posted about this miso creamed kale before, in a Weekend Finds post back in October. This recipe was recommended to me by a foodie friend, whose tastebuds I respect. So I was excited when I finally got around to making it. Easy, super flavorful, and wintry (most creamed veggie dishes are, in my opinion).
Miso Creamed Kale

Ingredients
3 Tbl unsalted butter (divided)

1 large shallot

2 cloves garlic

Salt and pepper

1 bunch lacinato kale, stems removed, roughly chopped

1/2 cup shimeji mushrooms with stems or shiitake mushroom tops, sliced into strips

1 Tbl soy sauce

1/4 cup dry vermouth

1/2 cup heavy cream or half & half

1/4 cup white miso paste


Instructions
In a large pan or skillet, melt 2 Tbl of butter over medium heat. Thinly slice the shallot and garlic, and add them to the pan, along with a sprinkle of salt and pepper. Turn heat to low, and let the garlic and shallot cook for a few minutes until they’ve got a bit of color. Add the kale, and cook until it’s wilted.
While you’re cooking the kale, in another pan, melt the remaining 1 Tbl of butter over medium high heat. Toss in the mushrooms (whichever kind you’re using), and cook until… well until they’re cooked through and soft. Add the soy sauce to the mushrooms, cook for another minute, and remove from heat.
Increase the heat under the kale to medium high, and add the vermouth. Cook until it is just evaporated, then add the cream/half & half and the miso. You’ll have to do a fair amount of stirring to break up the miso and make sure everything is evenly distributed and combined. Turn your heat down to medium and cook for a couple more minutes, until the sauce is slightly reduced and thickens up a little bit. Top with mushrooms, and serve.
When I was getting ready to make this Asian pulled pork, I knew I wanted to write about it. I didn’t intend to write about it so soon – I knew I had a few posts to be written, the pictures sitting in their appropriate folders on my desktop – but things changed.
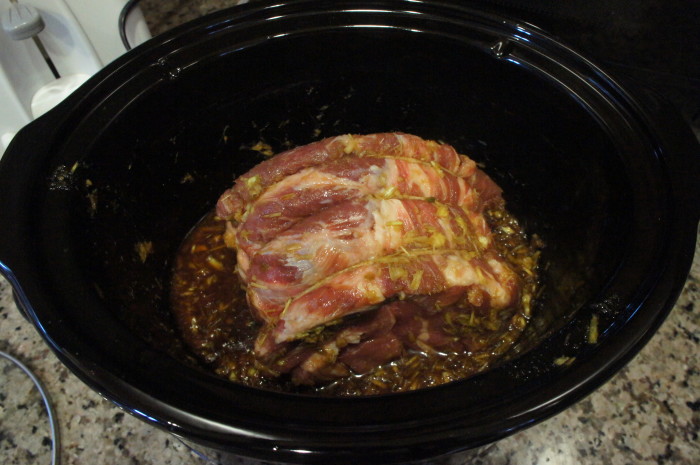
As I was putting all of these ingredients together on Monday, the kitchen already started to smell good. The fragrance of the lemongrass and ginger, combined with the rice vinegar and soy sauce, had begun to permeate the kitchen, and when my friend Elsa stopped by while I was making the pickles, she asked, “What smells so good?” as soon as she opened the door. When I left for work a few hours later, the slow cooker was on, the pickles were in the fridge, and mostly I just couldn’t wait to get home and eat the stuff.
After work, I had a message from my mom, asking me to call her. My phone was nearly dead (a morning on the phone with various auto insurance agents will do that to you), so I decided to wait till I could get home and plug my phone in to call. I opened the front door, and I was surrounded by this smell. The Asian flavors swirling around, making my stomach grumble. And then I looked at Jonah, sitting at the kitchen table, and he asked me, “Have you called your mom?” No. “Herby died,” he said.
I immediately called my mom, who was on the other line with my Nana, and said she’d call me back shortly. Herby, or Poppa Herb, is my grandfather. Herby had been sick for a long long time, and I had known for a while that his time was coming to a close. We all knew. And yet, as I said to Jonah moments after he told me, knowing it’s coming doesn’t seem to make it any less sad. Herby suffered for a long time, and so did Nana, really. He was unwell and hard to care for, and he was very ready to go. So after some tears, we couldn’t do much but continue to get dinner ready. The lid came off the slow cooker, and the scrumptious aroma wafted into the air, perfuming our meal. Before we actually sat down to eat, I got to talk to my mom, who let me know that one of the last meals Herb enjoyed was 5 (count them, 5) slices of her french toast. Thank goodness he ate well until the end. And then we ate.
As I started to think about writing this post, I haven’t been able to think about this dish without thinking of Poppa. And while the association could be sad, it really isn’t. It makes me a little more thoughtful, but mostly happy. Happy that I got to have this wonderful extra grandfather, who loved me like I was his own flesh and blood, who believed in me, who used to do little funny dances around the kitchen, who wore all those silly sweatshirts we made for him when we were little, and who made it possible for my family to see each other every year on the Oregon coast. And while I certainly don’t want this recipe to make you sad, I do hope that this post can make you think a little bit more about doing and eating the things we enjoy, and who we enjoy them with.
Slow Cooker Asian Pulled Pork Tacos
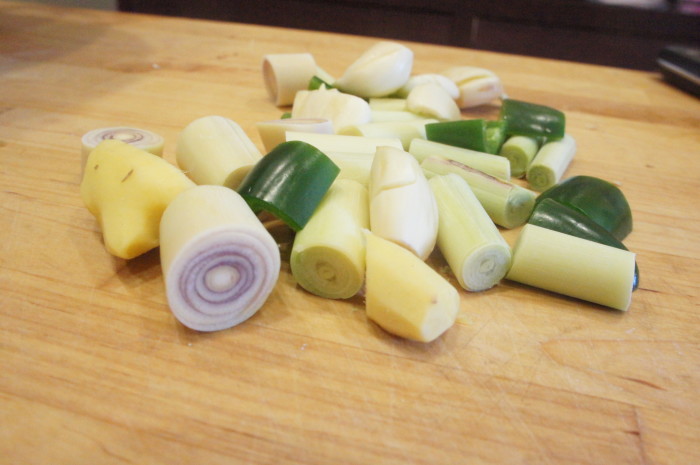
Note: You’ll see in my pictures that I minced up the lemongrass with the garlic, ginger, and jalapeño, as recommended in the Garden Betty recipe. I would suggest cutting it into coins or large chunks instead – the stalks were too hard for my food processor, and so I ended up with some sharp/pokey pieces of lemongrass amongst the meat.
Ingredients
Pulled Pork
2 inch piece of ginger
1 jalapeño
5 large cloves of garlic, or 6 smaller cloves
2 stalks of lemongrass
1/2 cup brown sugar
1/2 cup soy sauce
1/4 cup rice vinegar
1 1/2 Tbl fish sauce
2 1/2 lbs pork shoulder roast
4-5 large portobello mushrooms (optional, but recommended)
Quick Pickled Daikon and Carrots
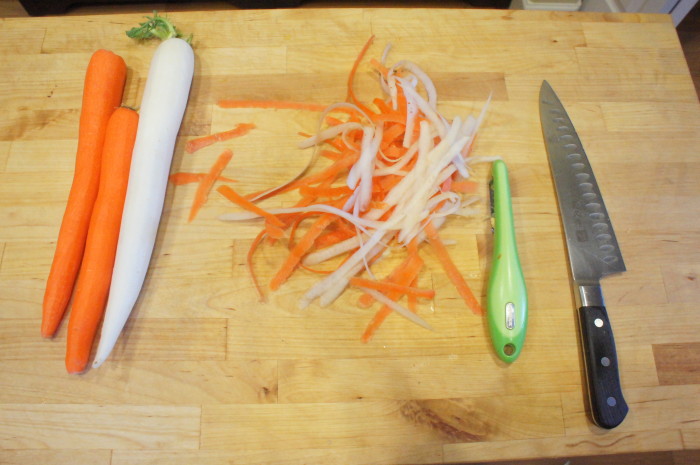
2 large carrots
1-2 large daikon
1 tsp salt
2 tsp sugar plus 1/2 cup
3/4 cup rice vinegar
1/2 cup distilled white vinegar
1 cup lukewarm water
Tacos
Small corn tortillas
Lime wedges
Cilantro
Slices of jalapeño (if you like heat)
Sauces: sweet chili sauce, Sriracha, plum sauce…
Instructions
Pulled Pork
To prepare the meat, mince the garlic, ginger, jalapeño, and lemongrass (I did mine in the food processor; see note). Combine those four ingredients, as well as the brown sugar, soy sauce, rice vinegar, and fish sauce in a small pot over low heat. Cook until the brown sugar is dissolved, then pour into your slow cooker. Place the pork shoulder in the sauce, turning to coat, and then cook for 8-14 hours (I did mine for 8… but it definitely could’ve been softer and more fall-apart-tender, so I suggest going for longer). If you are opting to use the portobello mushrooms (which you really should), cut them into large slices and add them to the slow cooker 4 hours before the meat is done.
Quick Pickled Daikon and Carrots
Once the meat is nestled in the slow cooker, ready for the long haul, you can prepare your pickles. Peel and julienne the daikon and carrots, and put them in a bowl. Sprinkle them with the salt and 2 tsp of sugar, and then gently massage/knead them for 3 minutes. When the daikon is very bendy, and a little pool of water has collected at the bottom of the bowl, rinse the vegetables in cold water, and pat or press them dry with paper towels. Put them into a jar (or jars, depending on how big your jars are and how big your carrots and daikon were). Now make the brine by combining the 1/2 cup sugar, rice vinegar, white vinegar, and lukewarm water in a bowl and stirring until the sugar is dissolved. Pour the brine over the vegetables in the jar, and allow to sit for at least 1 hour. In a jar, these will last for about 4 weeks in the fridge.
Tacos
When the meat is cooked, remove the strings, and pull it apart with two forks. Leave the slow cooker on warm while you warm you tortillas, slice your cucumbers and jalapeño, and pick your cilantro. Then, enjoy!
P.S. The meat and sauce and toppings make great leftovers when heaped atop a bowl of fresh rice or soba noodles.
Poppa Herb and I at the Oregon coast, many years ago.
Over Christmas, my sister Emily was raving about this tomato sauce on Smitten Kitchen that I’d seen several times. For some reason, it never really stuck out to me. It’s almost too easy.
But for New Year’s Eve we were having some friends over, and I decided to make fresh pasta with homemade sauce. Knowing full well that I wouldn’t be able to find incredible fresh tomatoes, I decided to give the recipe a shot. And you know what? It was awesome.
I did a few things differently. Firstly, I doubled the recipe. I probably could have still only used one onion, but I used two. Instead of just mashing the tomatoes against the side of the pan, after removing the onion I used an immersion blender to slightly puree the sauce. I’m not a huge fan of chunks in my tomato sauce, so it was a personal taste thing. I also added some chili flakes for a bit of heat.
Easy Year-Round Tomato Sauce

Ingredients
1 28-oz can of whole, peeled tomatoes, preferably San Marzano (yes, you can taste the difference)

5 Tbl unsalted butter

1 medium yellow onion, peeled and halved

Red chili flakes

Salt


Instructions
In a heavy bottomed saucepan, combine butter, tomatoes, onion, and a pinch of red chili flakes. Choose a pan bigger than you might think. The onions can be a little unwieldy while stirring as they’re in such big chunks. Over medium heat, bring the sauce to a simmer, then reduce heat to maintain that simmer. Cook for 45 minutes, stirring every once in a while, and smashing the tomatoes against the sides of the pot (be careful not to squirt all over yourself here). Remove onions from sauce, turn off heat, and, if you’d like, use an immersion blender to lightly purée the sauce. If not, that’s ok too. Season to taste. Use sauce to dress your favorite pasta (homemade or otherwise), or in a lasagna or on pizza.
First, let me apologize for disappearing for a little while. I was laid up in bed with a really terrible cold for most of this week. There was lots of tea, cough drops, movies, tom kha soup, and knitting. But now that I’m back from the land of the ill, let’s talk about granola a little bit.
For a while now, I’ve been making the recipe from Orangette or another friend’s secret granola recipe. And every time I’ve tried to go rogue (aka not exactly following a recipe), my granola ends up too dry, or not sweet enough, or not as crispy as I like it. And I’m not the kind to make the same recipe a thousand times trying to add a teaspoon more of this or up the temperature 13 degrees. It’s not going to happen.
So when I happened upon a granola equation, on Buzzfeed of all places, I immediately wrote it down on a little notepad I’ve started carrying with me wherever I go (can’t recommend that enough). And I’ve used it many times. I’ve made a couple adjustments, and I have a couple of suggestions in terms of which way to lean on some of their more vague instructions, and I want to share it with you.
The Perfect Granola Equation

Ingredients
Dry Ingredients
3 1/2 cups grain This is where most people use oats. I use oats. I guess if you want to use barley or whatever, you can.
1 – 1 1/2 cups nuts I’ve been using mostly a mix of whatever I have around. I like half pecans, half sliced almonds, but I’ve also used walnuts.
1 tsp salt
1 – 2 cups seeds I would suggest leaning towards one cup instead of two. Otherwise it can quickly start to feel like you’re eating birdseed. I’ve been mostly using pumpkin seeds and sunflower seeds (old habits and all that), but I’m itching to try sesame seeds too.
1 cup coconut If you really dislike coconut, you can go without, but it adds a lovely nutty toasty flavor to the granola that I adore.
Spices You can really add as many as you like, but don’t get too crazy. A teaspoon of cinnamon is always a good place to start, and after that, maybe add a quarter teaspoon of one or two other things. I always use a quarter teaspoon of cardamom, and because it’s the holiday season and I associate nutmeg with the holidays, I’ve been adding a quarter teaspoon of that as well.
1 cup dried fruit I’m personally not a fan of dried fruit in my granola – I’d rather cut in a banana or peach or some berries – but if you are, you can add it after baking. If you’re adding something big like dried apricot or figs (as opposed to something small like dried cranberries or cherries), cut it into a rough dice before tossing it in with the granola.
Wet Ingredients
1/2 – 3/4 cup sweetener I like to do mostly maple syrup, though it can get a little pricy. Sometimes I’ll do half syrup and half honey. Agave is another good option.
1/4 – 1/2 cup oil I used to use solely olive oil – I liked the kind of savory-ness it brought to the granola – but I’ve started doing half olive oil and half coconut oil, and I am a big big fan.
1 tsp vanilla


Instructions
Preheat your oven to 300 degrees. Mix dry ingredients in a large mixing bowl. Add wet ingredients, stir until thoroughly combined and coated. Line a rimmed baking sheet with parchment paper, and spread the granola on the parchment. Bake for 45 minutes, stirring every 15 minutes (unless you like clumpier granola, in which case stir once halfway through). Remove from oven, allow to cool, and enjoy.
Make this. Tonight. Now. I don’t care when. But make it. The sooner the better.
I’m not sure when I discovered this recipe on 101 Cookbooks, but it has quickly become a favorite. I imagine you could roast any winter vegetables with miso and harissa and they would be just as wonderful as the potatoes and squash I made. I haven’t tried the full on recipe with the kale yet, but I’m sure I will soon enough. Once I get over these vegetables. My goodness. This recipe is incredibly flavorful, the miso gets beautifully caramelized, and the harissa adds a perfect hint of spice. It’s so comforting but not boring or familiar at all. So make it.
Roasted Winter Vegetables with Miso and Harissa
Note: I bet this would work beautifully with lots of winter vegetables. Sweet potatoes? Turnips? Broccoli? Fennel? Parsnips? Winter squash? Let me know what you try.
Note 2: If you think miso and harissa are some of those ingredients that you’ll use once and never again, you couldn’t be more wrong. The other night Jonah made me this incredible clam miso soup from The Family Meal, and this squash and tofu with miso and molasses is one of my favorites. As for harissa, try adding it to anything for a little heat, especially shakshuka.

Ingredients
1/2 pound fingerling potatoes

3/4 pound delicata squash

1/4 cup olive oil

1/4 cup white miso paste

1 1/2 tsp harissa paste (more if you like spice)


Instructions
Preheat your oven to 400 degrees. If your potatoes are larger, quarter them, half them, or cut them as you choose. You want the pieces to be about the size of your thumb. Half and seed the squash, and slice into 1/2 inch half-moons. Set aside.
In a bowl, whisk together the olive oil, miso, and harissa. Add the vegetables and toss to coat evenly. Spread on a baking sheet, and roast for 25-30 minutes. You want everything to be nicely browned and tender – I recommend tossing the veggies halfway through.
Remove from oven, allow to cool for a few minutes. Good luck not devouring these within minutes.
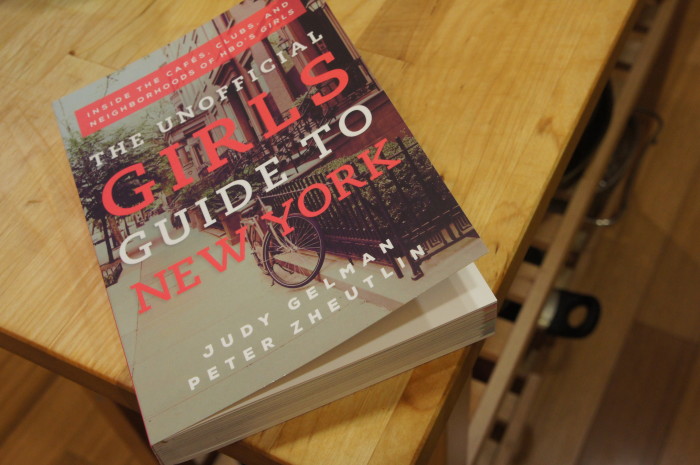
Welp, it’s officially time to start making holiday treats and going gift shopping. Last night Jonah and I went to the Holiday Ale Fest, and it really got me into the holiday spirit. In thinking of holiday gifts, I want to tell you about this little book that I think would make a great present: The Unofficial GIRLS Guide to New York.
Now, before we jump in here, let me clarify that this book is the GIRLS guide, as in the TV show. Which I love. The past 2 seasons, my friend Erica has come over every week to watch it with us. The characters are fantastic (I think Shoshana is my favorite), the storyline is ever-entertaining, and it certainly captures certain aspects of being a twenty-something in a big city and not having any idea of what you’re doing with your life. Which I may or may not be able to relate to.
So when my aunt and uncle (of Unofficial Mad Men Cookbook fame) told me they were writing a GIRLS book, I was incredibly excited. Jonah and I rattled off interviews they could do, recipes, etc. But they had already thought of everything. This book is half fan-girl material, half guidebook, with some great recipes sprinkled throughout. Since receiving it in the mail, I’ve loved flipping through it, reading the stories of all the locations – not only because they make up the backdrop for this great show, but also because it’s New York, and there are so many interesting tidbits about all of these places. I’m just sad the book wasn’t out in time for our trip to New York!
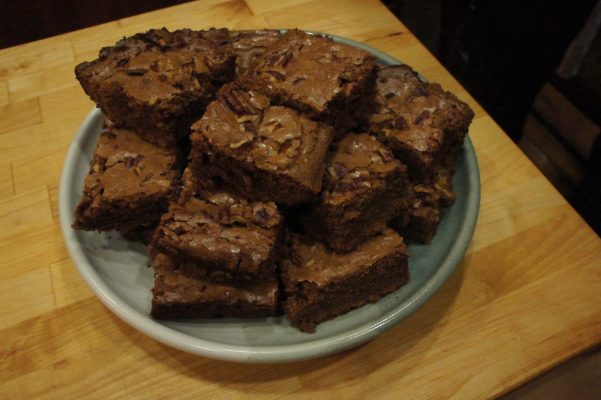
I wanted to give you a little sneak preview by letting you in on one of the recipes. I decided to whip up “Agave’s Chipotle Pecan Brownies” a couple weeks ago, and dang were they good. More cake-y and less fudgy, the chipotle brings a really nice smoky and spicy flavor to these sweets. These would be a great unique treat to whip up for a holiday party! The recipe comes from Oberlin’s Agave Burrito Bar & Tequileria (Oberlin is where Marnie, Hannah, Jessa, and Elijah went to college, and where Marnie meets Charlie at the Oberlin College Galactic Safe Sex Ball 2007, which you can read more about in the book). I made half the recipe, and still had a 9×13 pan full of these bad boys, so I’ll give you the halved version, plus the full amounts in parentheses.
Chipotle Pecan Brownies
Ingredients
6 oz semisweet chocolate (12 oz)
1 cup plus 2 Tbl unsalted butter, room temperature (2 1/4 cups)
1 3/4 cups sugar (3 1/2 cups)
1 1/2 tsp vanilla extract (1 Tbl)
4 eggs (8 eggs)
1 1/4 cups flour (2 1/2 cups)
3/4 tsp cinnamon (1 1/2 tsp)
3/4 tsp chipotle powder (1 1/2 tsp)
4 oz pecans, crumbled to your desired consistency (8 oz)
Instructions
Preheat your oven to 375 degrees. Grease a 9×13 baking dish/pan (or 2 if you’re using the amounts in parentheses).
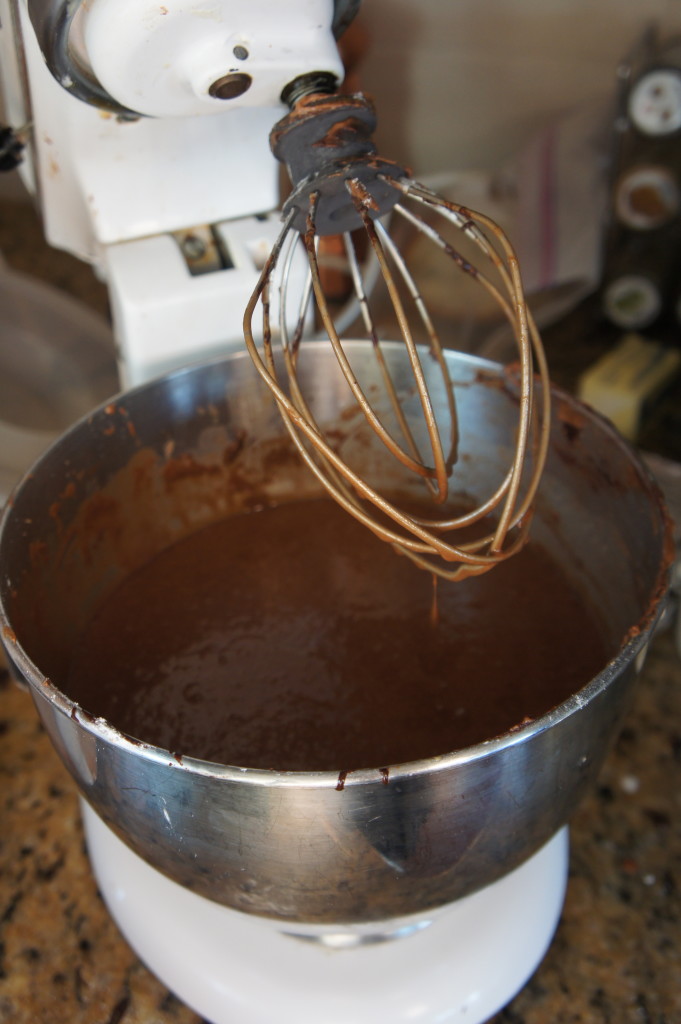
In a double boiler, melt the chocolate, stirring frequently. While the chocolate is melting, cream the butter and sugar together in an electric mixer on medium speed. Add the vanilla, mix again, and then add the eggs. Mix to combine – it should be “creamy and lemon colored.” With the mixer on low speed, slowly pour in a little bit of the chocolate. Let the mixer stir this small amount in, then slowly pour in the rest of the chocolate and mix until it’s just incorporated.
In a separate bowl, sift together the flour, cinnamon, and chipotle powder, then stir to combine. Remove the bowl of chocolate from your mixer base, and gently fold the dry ingredients into the chocolate batter until thoroughly combined.
Pour the batter into your prepared pan, and scatter the pecans over the top. Bake for 25 minutes, rotate the pan 180 degrees, and bake for another 10-15 minutes. The brownies should be just set in the center of the pan. Remove from oven, and allow to cool for an hour before cutting. Serve them up and enjoy!
At the end of October, we took a trip to Mexico. My mom rented a house in Sayulita for a couple of weeks (we were only there for 1 week), and we spent our days swimming in the ocean, reading, swimming in the pool, and eating a lot of incredibly delicious Mexican food. Perhaps my favorite thing about our trip was all of the seafood, particularly shrimp. I am a big fan of shrimp, especially when they’re cooked to perfection and slathered in butter and garlic. Another amazing preparation that we ate (at least 3 times in a week) was chile relleno stuffed with shrimp.
Knowing that I love to cook, my mom asked one of the housekeepers from the complex to come over one night to do a kind of cooking lesson with us. Maria was fantastic – funny, smart, and an incredible cook. I think she was surprised that we a) wanted to help so much with the cooking and b) that, amongst us, we knew a fair amount of Spanish! She said that many of people she cooks for say they want to practice their Spanish, but don’t actually end up talking with her that much. But Jonah is fluent in Spanish, and my mom and sister aren’t half bad either.
Maria showed up to our house at 5 o’clock, and immediately got to work boiling tomatoes and peppers, roasting poblanos, and chopping away. I’m going to focus on the recipe for Chile Relleno stuffed with shrimp, but she also made us Mahi Mahi with garlic, 3 different salsas (one mild, one hot, and one pico de gallo, or salsa Mexicana, as she called it), beans, rice, guacamole, tortillas, and flan.
And thankfully, after cooking for us in the very hot kitchen, she joined us at the table. Maria made 6 peppers, so I’ll give you roughly that recipe. She didn’t measure a single thing, so a lot of this is my own guess work.
Chile Relleno with Shrimp
Ingredients
1 poblano pepper per person you’re feeding. 6 people? 6 peppers.
1/4 lb shrimp per pepper
~3/4 cup all purpose flour (for coating the peppers)
4 eggs, separated
Vegetable oil
Salt
Instructions
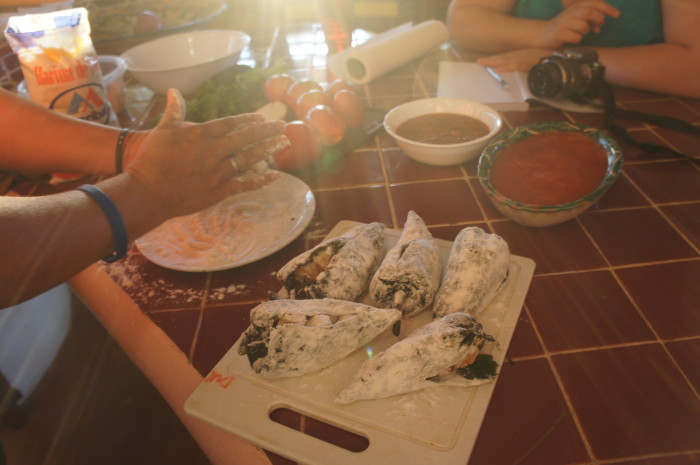
First things first. Roast the peppers. If you’ve got a gas stove, you can do this right on top of the burner. If you don’t have a gas stove, turn on your broiler, and put the peppers on a pan in the oven. Keep a close eye on them. Either way, you’ll want to turn them (with tongs) every minute or so. You want the skin to char and blister. Once they’re charred, you can either put them in a bowl and cover it, or use Maria’s fantastic technique: tie them up in a plastic bag. You want the peppers to steam up, which will help soften them and loosen the charred skin. After allowing them to sit for about 10 minutes, peel and seed the peppers. Seed them by making a lengthwise cut along one side, and cutting out the seeds with a small knife. You want to leave the stem in tact.
Meanwhile, bring a pot of salted water to a boil. Add the shrimp, and boil until pink, but still tender. Drain and sprinkle with salt. Gently stuff the peppers with the shrimp. Put the flour on a large plate, and coat each pepper in flour. Set aside.
In a bowl, whip egg whites until foamy, but not quite till peaks form. Add the yolks, whip some more. Heat 1/2 inch of vegetable oil in a (preferably non-stick) pan over medium heat. You’re going to cook your peppers one at a time, so it may not be a bad idea to set your oven to 200 degrees and put a pan in there to put the finished peppers on, so they’ll still be warm. When the oil is hot, coat a pepper in egg mixture, and place it in the pan. Now you’re going to kind of baste the pepper with oil. Using a spoon or a spatula, gently splash the hot oil up onto the pepper, so that even the part not touching the oil cooks a bit. Continue to turn the pepper and “baste” until the egg is nice and browned. Place in the oven, and repeat with the rest of the peppers.
My dear friend Elsa and I were hanging out quite a bit when she finally got back from her worldly travels this summer, as she was job hunting, so had her days free, just like I do. She came over one afternoon, and we decided to bake something. I started looking for recipes, and suggested rosemary shortbread, thyme/sea salt/chocolate chunk cookies, or these earl grey madeleines from Baking a Moment. She looked at me and said “Are we only allowed to make things that involve weird flavor combinations?”
She’s right. I like trying new flavor combinations. Why have chocolate chip cookies when you can add thyme? Or plain shortbread when you can add rosemary? Why not spice it up a bit? Plus, combinations like this are becoming rather mainstream. I think I’ve got her on the weird flavor combo train at this point, but she still teases me all the time. Anyway, on that afternoon, I convinced her to make earl grey madeleines with me. And dang, were they good.
For the record, Elsa made me zucchini, jalapeno, lime cookies for my birthday.
Earl Grey Madeleines

Ingredients
6 Tbl unsalted butter

3 bags earl grey tea

2 tsp light brown sugar

2 tsp honey

2 eggs

1/4 cup granulated sugar

1/3 cup all-purpose flour

1/2 tsp baking powder

1/4 tsp kosher salt


Instructions
Preheat your oven to 350 degrees.
In a small pot on the stove, melt the butter. While the butter is melting, cut open the tea bags, and then stir the loose tea into the melted butter. Allow to steep over low heat for about 5 minutes, then remove from the heat and allow it to steep for another 5 minutes. Strain the tea butter. I used a mesh sieve that I overlayed with the tea bags (which I had cut to make sheets). If you have cheesecloth, you can use that.
Stir the brown sugar and honey into the tea butter. They may stay kind of separated, and you can slightly reheat to try to combine them better. Ours wouldn’t really combine no matter how much we reheated them, and everything worked out just fine. So don’t stress about it.
Here’s another weird step. In a (preferably metal) mixing bowl, combine the eggs and granulated sugar. Fill another bowl with very hot water, and put the bowl of eggs/sugar into the bowl of hot water. Mix this with your fingers (I know, I know) until the eggs feel slightly warm and the sugar has dissolved and is no longer grainy. When you’ve reached that point, you can remove the bowl from the water and whip the eggs/sugar on high until it has tripled in volume.
In another bowl (I know, it’s a bowl heavy recipe), sift together the flour, baking powder, and salt. Gently fold the egg mixture in in two additions. Pour a little bit of this batter into the tea butter, stir it up, and then pour the tea butter into the batter. Again, gently fold until thoroughly combined.
Spoon the batter into a buttered and floured madeleine pan. You only need to fill up the molds about 2/3 of the way. Bake for 8-10 minutes, or until they’re golden-brown around the edges. Remove the madeleines from the pan immediately and allow them to cool on a wire rack. Enjoy with a glass of milk, a nice coffee, or tea!
My Mom’s birthday was a month ago today, so it seems appropriate that I’m sitting in a tea shop, writing this post, looking at pictures of her with the birthday cake I made for her.
My mother is a pretty damn incredible woman. I don’t know if I’ve told you about her before, but let me. When we were growing up, she was always encouraging us to play. I don’t just mean my sisters and I playing with each other, or playing with dolls, or playing with crafts, but in the larger sense too. She encouraged us to be adventurous, boisterous, and reach for the stars.
If we wanted to make cookies, she was there to help. If we wanted to go out for the basketball team (a mistake I made only once, trust me), she was there at every game. If we wanted to be in plays (which we did… a lot) she drove us to auditions, sat with us while we waited nervously, drove us to rehearsals, helped create costumes, and was always in the front row on opening night, grinning from ear to ear, and often mouthing the words to the songs along with us. She pushed my creativity, she pushed me to try really hard, to do anything I wanted to do. That’s an incredible woman.
When I went off to college and my parents split up, my mom and I had a rough time. It’s been a hard few years of rebuilding, getting to know each other again, and finding the foundation that we had built when I was younger. But it seems since her birthday, my mother’s true unbridled joy and adventure and creativity has reappeared. It has been slowly creeping back for the past couple of years, especially since she has found David, but in the past month, it seems like she’s here to stay.
This year was my mom’s 60th birthday (hopefully she doesn’t kill me for writing that…) and we went big. Rather, David went big with many many surprises, and we all helped scheme and plan. She was surprised four separate times: by the arrival of me, my older sister, and Jonah on Friday afternoon; the arrival of her mother, sister, brother-in-law, brother, and sister-in-law on Friday night; by my little sister’s arrival on Saturday morning; and by a surprise party with all of her friends and a live band on Saturday afternoon.
It was the most pure joy I’ve ever seen her exude. It was a beautifully sunny weekend, and on Sunday we all made dinner together, like families do. When I asked my mom what birthday cake she wanted, she said “That buttermilk devil’s food cake I used to make you guys for your birthdays.” Emily, my older sister, immediately remembered this cake, but it took me a while. My mom dug around in her recipe box and pulled out this magazine page from 1985. Under the title it says “Makes 10 servings at $0.88 each.”
I didn’t remember this cake until I smelled the frosting, and then it came rushing back, which seems appropriate. The cake, and that weekend, reinforced the woman that my mother is and always has been. It’s rich, deep chocolate with an unexpected but welcome twist from the buttermilk and sour cream, perfect for a birthday, but especially perfect for my mother.
Buttermilk Devil’s Food Cake

Ingredients
Devil’s Chocolate Cake
Unsweetened cocoa powder (for dusting the pans)

2 1/4 cups sifted cake flour

2 tsp baking soda

1/2 tsp salt

1/2 cup (1 stick) butter

2 1/2 cups light brown sugar

3 eggs

3 1/2 squares (1 oz. each) unsweetened chocolate, melted

1/2 cup buttermilk

1 cup boiling water

2 1/4 tsp vanilla
Sour Cream Chocolate Frosting
15 squares (1 oz. each) semisweet chocolate

1 1/2 cups sour cream

1 1/2 tsp vanilla

a pinch of salt


Instructions
Devil’s Chocolate Cake
Preheat your oven to 375 degrees. Butter 3 9-inch round cake pans. Line the pans with parchment paper, and butter the paper. Dust the bottoms and sides of the pans with cocoa powder.
Sift together the flour, baking soda, and salt into a bowl. Set aside.
Using an electric mixer (or whatever) beat the butter until it’s light and fluffy. Beat in the sugar until it’s light and fluffy too. Add the eggs one at a time, beating after each addition. Blend in the melted chocolate. My aunt (the cookbook author) had a great tip for this. Anytime I mix warm ingredients (like melted chocolate) into eggs, I get nervous that the eggs are going to cook. Her tip was to start with a little bit, blend it, and then add the rest of it. It makes a big difference. To me anyway.
Alternate adding the flour and buttermilk to the butter mixture, beginning and ending with the flour, until it’s well combined. Stir in the boiling water and the vanilla and divide the batter equally into the 3 prepared cake pans. Bake for 25-30 minutes, or until a knife or toothpick inserted comes out clean. Cool them in their pans for 5-10 minutes, then turn them out onto cooling racks and remove the parchment paper to cool the rest of the way.
Sour Cream Chocolate Frosting
To make the frosting, melt the chocolate in a double boiler over barely simmering water. Remove from the heat, and beat in the sour cream, vanilla, and salt. Beat until it’s creamy and holds it’s shape. Be warned though, once this frosting cools, it hardens because of the chocolate. So frost your cake while the frosting is still soft and warm.
You may want/have to trim your cakes. I didn’t and it work ok. Put a layer on whatever plate you’re using to serve, and spread evenly with some of the frosting. Repeat with the remaining layers, and then frost the sides.
Enjoy with a glass of cold milk, family, and lots of laughs.
Sometimes you need to make those meals that yield a million servings so you can eat it all week. The week before the CD release concert we had for Jonah’s new album was absolutely one of those weeks.
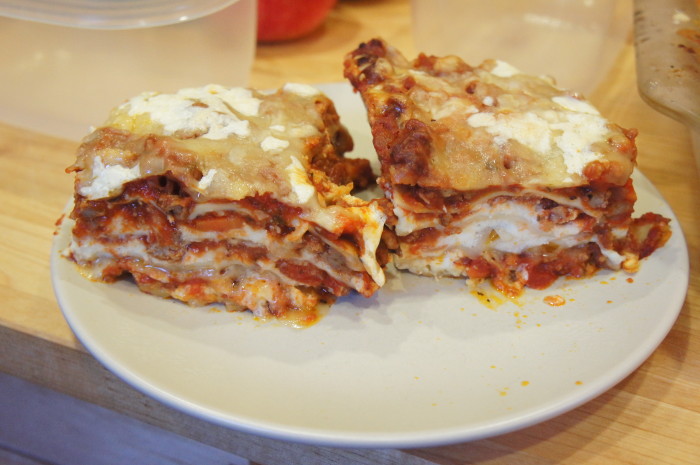
We had a few guests staying with us, band practice almost every night, and I had work on the nights I wasn’t rehearsing. It was a busy time, to say the least. So the night of our Kickstarter team meeting, to discuss merch and social media, etc. I made this lasagna, so that we could eat it throughout the week. It was high up on the list of best lasagna I’ve ever made. What made it so good? The homemade sauce, the homemade noodles, and some absurd amounts of cheese.
I’ll admit, however, that this uses a lot of dishes, and has a fair amount of ingredients. But when you’ve got some time and you’re making a meal that will carry you through the week, it’s worth it. I like to think of it as an entire week’s worth of mess (and cleanup).
Cheesy Meat Lasagna
Note: I used a 13×9 inch baking dish, and filled it right up to the brim. I put a baking sheet underneath it to catch any overflow (which was minimal), but still, if you’ve got a slightly bigger baking dish, it might be a good idea to use it.
Ingredients
Noodles
3 eggs
2 cups flour
Meat Sauce
Olive oil
1 medium white onion, chopped
1 carrot, peeled and chopped
3/4 lb ground beef
3/4 lb ground italian sausage
2 cloves garlic, minced
salt, pepper, other Italian seasoning (parsley, basil, oregano, to your liking)
1 12 oz can tomato paste
1 28 oz can crushed (or diced) San Marzano tomatoes (yes, these are expensive, but I found it to be terribly worth it, and they weren’t THAT MUCH more than the other brands)
In the bowl of an electric mixer, or using a bowl and whisk, or a bowl and fork, mix up the eggs and flour into a dough. If it’s too wet, add more flour 1 tsp at a time. If it’s too dry, add water 1 tsp at a time. Dump the dough out onto floured surface, knead a few times, and wrap in plastic (or put in a bowl and cover with dishtowel) and allow to rest for 30 minutes.
Meat Sauce
In a large pot, heat 2 Tbl olive oil over medium heat, and add the onion and carrot. Cook until starting to soften. Add the garlic, beef, and Italian sausage, and cook until the meat has browned. Add 1 tsp of salt, 1/2 tsp ground pepper, and whatever other spices you’d like (I did 1/2 tsp dried basil and 1/2 tsp dried parsley). Add the tomato paste and canned tomatoes to the pot (no need to drain them!) and stir to combine. Turn the heat to low and cover, letting it simmer for ~30 minutes.
Ricotta Filling
While your dough is resting and your sauce is simmering you can whip up the ricotta filling. In a bowl, combine the ricotta, eggs, pepper, and 1/2 cup of both the grated mozzarella and parmesan. Store in the fridge until you’re ready to assemble your lasagna.
Roll out your pasta into sheets for lasagna and set aside, covering so that the noodles don’t dry out. Preheat your oven to 375 degrees and lightly coat your baking dish with oil. Spread ~1 cup sauce in the bottom of the dish. Here’s how you’re going to do this: noodles, ricotta, sauce, cheese. That’s your order. On top of the sauce in the bottom of the dish, arrange a layer of noodles; spread 1/3 of the ricotta mixture on top, then 1 cup sauce, and sprinkle with cheese (a mixture of the mozzarella and parmesan). Do that twice (now we’ve got sauce, noodles, ricotta, sauce, cheese, noodles, ricotta, sauce, cheese), and in the next layer, leave out the cheese (so just noodles, ricotta, sauce). Put another layer of noodles on top, spread the rest of the sauce on top, and sprinkle with the rest of the cheese. Phew! If you don’t feel like following my layering instructions, just do whatever you want. It’ll probably work, and you’ve probably eaten enough lasagna in your life to figure out how it works.
Bake the lasagna for 30-40 minutes, rotating it half way through, until the cheese on top is melted and turning golden brown. Remove from the oven and allow to cool/set for 10 minutes before serving. Enjoy!
On Rosh Hashanah, I did something really un-Jewish and un-Kosher by making shrimp for dinner. But I kind of half made up for it by making fig, olive oil, and sea salt challah from the Smitten Kitchen cookbook. And that makes things kind of ok, right? (Let’s not even talk about the fact that there was no fasting or breaking of fast on Yom Kippur as I had band practice and work, both of which require much sustenance. Don’t tell my Bubbe.)
This challah has been on my “to make” list for so long. I was waiting for figs to be in season (only to realize after I went to the store and bought fresh figs that the recipe calls for dried figs… oops… way to follow your own rules, Annie) AND I’d never made challah before. TERRIBLE JEW, I know. But you know, bread is mildly scary to me, and braided bread that’s supposed to look all shiny and pretty? That much scarier. But a holiday is a good enough reason to man up and do anything, so I went for it. And man oh man, it was good. This recipe is pretty much straight from Smitten Kitchen.
Fig and Olive Oil Challah
Ingredients
Bread
2 1/4 tsp active dry yeast (1 packet)
1/4 cup plus 1 tsp honey
1/3 cup olive oil, plus some for the bowl
2 eggs
2 tsp flaky sea salt (such as Maldon, which you really should have around because you should be putting it on everything because it is awesome)
4 cups all-purpose flour
Fig Filling
1 cup dried figs, stemmed and roughly chopped
1/8 tsp orange zest (I eyeballed this, because you know, who has an 1/8 tsp measure)
1/2 cup water
1/4 cup orange juice
1/8 tsp sea salt
freshly ground black pepper (you’ll only need a few grinds)
Egg Wash
1 egg
flaky sea salt
Instructions
Bread
In a small bowl, combine the yeast and 1 tsp of honey with 2/3 cup of warm water. Stir it up, and let it sit for a few minutes until it gets foamy. In the bowl of your mixer with the paddle attachment (or you know, with a wooden spoon and a bowl if that’s your jam), combine the yeast mixture with the rest of the honey, the olive oil, and the eggs. Then add the flour and salt, and mix it until the dough starts to come together. Once it comes together, switch to the dough hook and let it run on low for 5-8 minutes. Put the dough on the counter for a moment while you coat the bowl in olive oil, put the dough back in the bowl, and cover with saran wrap for an hour, or until the dough doubles in size.
Fig Filling
While the dough is rising, it’s fig paste time. Put the figs, zest, water, juice, salt, and a few grinds of black pepper in a saucepan and bring to a simmer over medium heat. Cook this fig mixture until the pieces of fig are soft, having absorbed the water and juice, stirring occasionally (should take about 10 minutes). Turn off the heat, and allow to cool for a while before putting it in a food processor and processing until it resembles a paste, like a relatively smooth jam. Set it aside to cool the rest of the way.
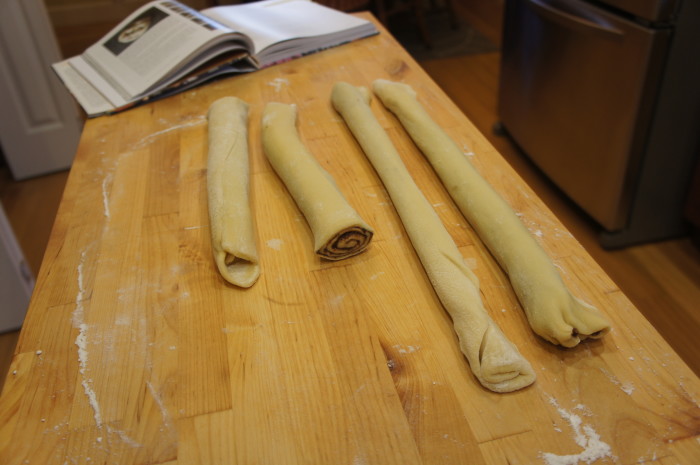
Once your dough has roughly doubled, turn it out onto a floured surface and divide it in half. Roll the first half out into “an imperfect rectangle,” spread half of the fig filling over the dough, and roll it up into a long log, trapping the filling within. You’ll want to be careful when you roll out your dough that it still has some thickness to it, as I had a few tears in mine which made everything a little tricky for me. Roll out/stretch the log as long as you can without breaking or tearing it, and then divide it in half. Repeat this whole process with the second half of the dough. You should have four fig-filled ropes of dough.
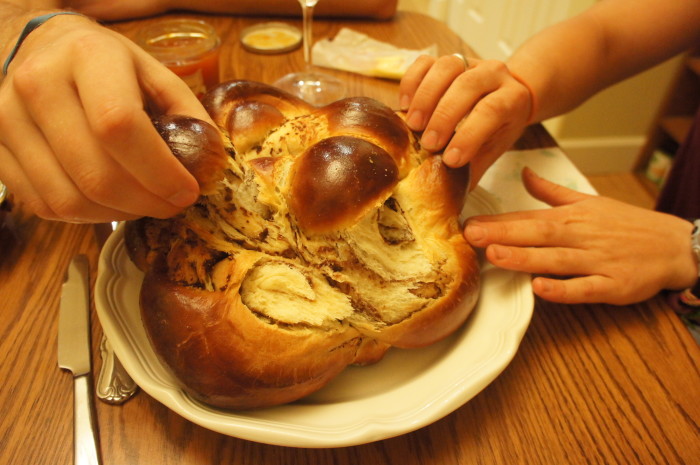
Next comes the weaving, which I’m not even going to try to explain. Instead, you should head to over to Smitten Kitchen to look at the pictures and read her instructions. I never could have woven it without those pictures. Oy. Once woven up into a beautiful mound of deliciousness, transfer the dough to a baking sheet prepped with parchment paper (or silpat, I suppose).
Egg Wash
In a small bowl, beat the egg for the wash, and brush it over the challah. Let it rise for another hour, but start heating your oven to 375 degrees about halfway into the rise. Before putting it in the oven, brush the challah again with the egg wash, and bake it in the middle of your oven for 35-40 minutes. If it starts to get dark (like mine did), you can cover it with foil for the rest of the bake (like I didn’t). Remove from oven and allow to cool before serving. Tear off pieces with loved ones, and add a dab of butter and jam, if you like. Enjoy.
I do hope I’m getting you this blackberry coffeecake recipe before it’s absolutely impossible to find blackberries. Please don’t hate me if I’m not.
I’m feeling really torn about summer’s departure and fall’s arrival. I know earlier I said I was excited, but now that it’s happening, and there’s that chill in the air, and there have been a few days of drizzle, I find myself kind of having to mentally prepare myself for the gray that comes and stays for months and months and months. I like the chill, and I can’t wait to wear sweaters and drink tea and cook the food that comes with fall… but I don’t know. It doesn’t have that same carefreeness that summer has.
But I’ll live. This recipe came from my having leftover blackberries, and just really wanting to make coffeecake. I woke up one morning, Jonah was still in bed, the roommates were out of town, and I snuck downstairs and made a coffeecake (adapted from Tide and Thyme) on a Sunday morning. It was a lovely peaceful way to spend the morning. And everyone likes coffeecake. Everyone.
Blackberry Coffeecake

Ingredients
Crumb Topping
½ cup all-purpose flour

1/3 cup brown sugar

1/2 tsp lemon zest

4 tbsp. (2 oz.) unsalted butter, melted and cooled slightly

1/2 cup sliced almonds
Blackberry Cake
1 3/4 cups all-purpose flour

1 cup sugar

2 tsp. baking powder

¼ tsp. baking soda

¼ tsp. salt

3 eggs

1 cup sour cream

1 tsp. vanilla extract

2 cups fresh blackberries


Instructions
Crumb Topping
Preheat your oven to 350 degrees. Butter and flour a 10-inch springform pan (which, by the way, I’m convinced might be the greatest things ever, if you grease it enough). Make the crumb topping by combining all of the ingredients except the almonds in a bowl and mixing it up to combine. It should be kind of crumbly. You can also add some oats if you’d like. Set the topping aside.
Blackberry Cake
In a large mixing bowl (perhaps maybe the bowl of an electric mixer), combine the flour, sugar, baking powder and soda, and salt. In a separate mixing bowl, use a whisk to mix together the eggs, sour cream, and vanilla. Make kind of a well in the middle of the dry ingredients, pour in the wet, and stir it up just until it’s evenly combined and there are no flour patches or streaks. Pour the batter into the prepared springform pan and make sure it’s evenly distributed. Place the blackberries gently on top, making sure they are evenly distributed (wow, can’t get enough of that phrase, huh?) and covering the top of the batter. Now sprinkle the crumb topping on top of the blackberries, and then top with the sliced almonds.
Bake the coffeecake until the top looks all perfectly golden brown, and it passes the clean toothpick/knife test, 40-50 minutes. Put the pan on a cooling rack, and let it cool for ~20 minutes, or as long as you can wait. Run a knife around the edge before removing the sides of the springform. Slice it up and serve with coffee or tea, and maybe a bowl of fruit.