Vegetarian

Summer Vegetable Tacos with Mariam Foods Lentil Dip // Serious Crust

Summer Vegetable Tacos

Summer Vegetable Tacos with Mariam Foods Lentil Dip // Serious Crust

I love tacos. I really do. They’re easy to throw together. You can eat one for a snack or three for dinner (or four or five). You can put whatever you want in them, which I think is pretty great. You can make almost a variation from almost any cuisine. When my friend Elaine, who does marketing here in Portland, asked me to do some recipe development for her client Mariam Foods, my first idea was: summer vegetable tacos.

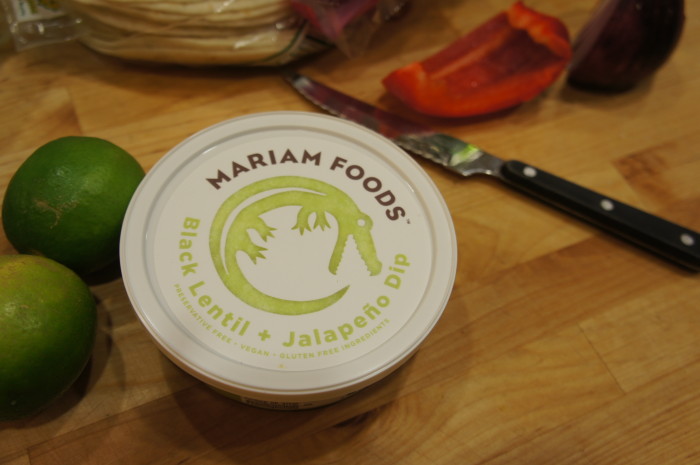
Mariam Foods makes these delicious lentil dips. I know what you’re thinking, because I thought it too. At first mention, lentil dip sounds anything but delicious. I am an adventurous eater, by no means picky, but I do not like lentils. Or didn’t, I suppose. I tend to not really like their texture, and while I know they’re great for protein and budget cooking, I can’t get myself to use them. But Elaine invited me over to taste Mariam’s lentil dips, and I was pleasantly surprised. They are similar to the consistency of refried beans, with maybe the occasional whole lentil. And the flavors she was asking me to use, black lentil with jalapeño and black lentil and curry, were really nicely flavored. I started to get excited about the ways I could play with these flavors. While the dips are Ethiopian inspired, I knew I could sneak these dips into other cuisines.

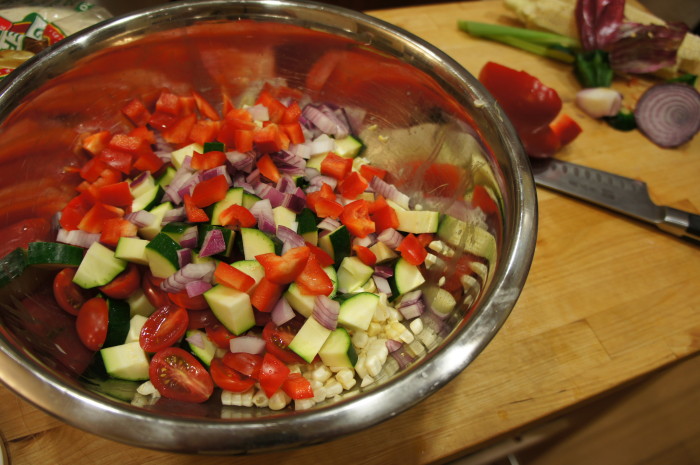
I decided to start with tacos using the most scrumptious of summer produce: zucchini, tomatoes, and corn. Toss them with some Mexican inspired spices and roast them. While they were in the oven, I decided to whip up a cilantro-sour cream with lime. Then, to assemble the tacos, I started with a spoonful of the lentil dip smeared down the center of my tortilla, topped with warm vegetables, topped with the cilantro-sour cream, and another squeeze of lime for good measure. These tacos were so delicious, and really easy to make, and they made truly awesome leftovers. I ate them at least twice more throughout the week.

A little bird also told me that Mariam Foods has two new flavors coming out early this fall: brown lentil and sesame (with garlic and ginger) and brown lentil and sriracha. I know Jonah will love the sriracha, but I’m really excited about the sesame flavor! Mariam lentil dips were created by the Andemariam family, inspired by Afiza, a lentil salad that their Ethiopian and Eritrean grandmothers used to make. They source their ingredients as locally as possible, which I like. The dips can be found at various New Seasons, Whole Foods, and other markets and co-ops in the greater Portland area.

Summer Vegetable Tacos

Ingredients

Roasted Vegetables

2 ears corn, kernels sliced from the cob
2 small zucchini, diced into ½ inch pieces
1 cup grape tomatoes, sliced in half
½ medium-sized red onion, diced
1 red bell pepper, diced
2-3 tablespoons olive oil
½ teaspoons salt
1 ½ teaspoons ground cumin
2 garlic cloves, minced

Cilantro Cream

1 cup sour cream
¼ – 1/4 cup chopped cilantro
juice of ½ lime

Taco Assembly

Mariam Black Lentil and Jalapeño Dip
Small tortillas (corn or flour)
Optional: grated cheddar cheese, queso fresco, salsa, additional cilantro, lime wedges

Instructions

Roasted Vegetables

Preheat your oven to 400 degrees F. In a large mixing bowl, combine the corn, zucchini, grape tomatoes, red onion, bell pepper, olive oil, salt, cumin, and garlic. Toss until all of the vegetables are evenly coated with the spices and oil. Line a rimmed baking sheet with parchment paper or a silpat. Spread vegetables on the baking sheet, and roast for 20 minutes. Toss, and roast for another 15-20 minutes, until the vegetables are soft and starting to brown.

Cilantro Cream

While the vegetables are in the oven, make the cilantro cream. Combine sour cream, cilantro, and lime juice in a bowl, stir well. Feel free to add more cilantro, lime juice, salt, or pepper to your taste.

Taco Assembly

To assemble the tacos, spread a spoonful of Mariam’s Black Lentil and Jalapeño Dip down the center of a tortilla. Top with roasted vegetables, and a dollop of cilantro cream. Enjoy!

This is a sponsored post. All of the opinions below are my own.

Soba Noodles with Summer Squash and Mango // Serious Crust

Soba Noodles with Summer Squash and Mango

Soba Noodles with Summer Squash and Mango // Serious Crust

Soba noodles have become a staple in my kitchen. I have always liked them, but as the weather has been slowly getting warmer, and there’s lovely produce all around, they have been appearing more often in my kitchen. I love them with a light sauce made of rice vinegar and lime juice. But the true beauty of soba noodles, to me, is that they are delicious cold. The day after you make them, and they’ve been sitting in whatever sauce you’ve tossed them with, they become ultra flavorful and refreshing. I am a big fan. And I think you should be too.

Jonah came home this week, on Monday actually, and I had a feeling that cooking might not be exactly what he wanted to do the moment he stepped of the plane. So on Sunday night I made a big batch of soba noodles tossed with roasted zucchini, fresh mango, and a light citrus-y sauce. I ate a small bowl, and threw the rest in the fridge, knowing that it would be delicious the next day for dinner with some roasted green beens (also in the fridge).

I love how colorful this dish is, how summery it is, and how packed with flavor. I think it’d make a great cold side dish for a summer party (4th of July, anyone?), and it makes great leftovers to take to the office for lunch. You can add some seared tofu, or maybe even some grilled chicken.

Soba Noodles with Summer Squash and Mango

Ingredients

2 zucchini, julienned
2 summer squash, julienned
olive oil
salt
1 9-oz package buckwheat soba noodles
3/4 cup rice vinegar
1/4 cup sugar
3/4 tsp salt
2-3 cloves garlic, finely chopped
1 jalapeño, finely chopped (and seeded, if you’re not feeling the heat)
juice and zest of 1 lime
1 Tbl sesame oil
1 ripe mango, peeled and julienned
~1/4 cup fresh basil, chopped
~1/4 cup fresh mint, chopped
optional but recommended: chopped peanuts to top (I used about 1/4 cup), lime wedges

Instructions

Preheat your oven to 400 degrees. Toss the julienned zucchini and squash with olive oil and salt. Spread on a parchment lined baking sheet. Roast for 20-30 minutes, until lightly browned, tossing halfway through. Set aside to cool.

Cook the soba noodles as instructed on the package. Usually, this means boil them for about 4 minutes, drain them, rinse them with cold water, drain them, and spread them out on a dish towel to try.

While boiling the water for the noodles, combine the rice vinegar, sugar, and salt in a small pot over medium heat, stirring until the sugar dissolves. Remove from heat and add garlic and jalapeño. Allow to cool, then add the lime juice and zest as well as the sesame oil. Whisk to combine. Put the soba noodles in a bowl, and toss with the dressing. Add the squash, mango, herbs, and nuts to the noodles, tossing to combine. Garnish with a sprinkle more of chopped peanuts and a lime wedge. Enjoy with a light beer on a hot day.

Shaved Asparagus Salad // Serious Crust

Shaved Asparagus Salad

Shaved Asparagus Salad // Serious Crust

Sometimes,  you make a meal, thinking one dish will be the star. Especially when you lay down a hefty chunk of change on a cut of meat. But things happen – you run out of time and you don’t season the meat properly or sear it the way you’d like, and then maybe you leave it in the slow cooker a little bit longer than you should have. And when that happens, there are side dishes that sneak up and surprise you. Like this shaved asparagus salad did.

Don’t get me wrong, I knew this salad would be good. I love asparagus, and there are seemingly a million shaved asparagus salad recipes out there (like this one, and this one, and this one). And yeah, they’re all relatively the same. But man, something about the freshness of this salad – crunchy, sour, salty – just got me. It was exactly what I needed after a long day of work. And it certainly was better than an underseasoned, overcooked (only slightly) piece of meat.

Shaved Asparagus Salad

Serves 4

Ingredients

1 bunch of asparagus
juice from half of a lemon
olive oil
salt (course is good, if you’ve got it)
freshly ground pepper
1/4 cup, roughly, of toasted pine nuts, sliced and toasted almonds, or shelled pistachios
parmesan cheese, though crumbled feta would work nicely too

Instructions

Don’t snap the tough ends off your asparagus just yet! Leave them on and use them as a handle. Lay the asparagus on a cutting board, and use a peeler to shave off wide strips, shaving away from you. You’ll have some thick pieces at the end, but do the best you can. Apparently the consensus is that y-shaped peelers are better for this, but I don’t have one of those. Make do with what you’ve got. Discard the woody ends. Put the peeled pieces into a bowl or on a platter or whatever you’re planning on serving on/in. Pour the lemon juice over top of the asparagus, and drizzle with olive oil. I can’t tell you how much olive oil, because I didn’t measure. A good glug should suffice. Sprinkle some salt and pepper over the top, as well as the toasted nuts. Rinse your peeler and use it to shave some thin pieces of parmesan to top the salad (or use a fork and crumble the feta over top). We’re big cheese fans, so we did more cheese instead of less.

Enjoy on a spring or summer day, preferably with a glass of refreshing white or rosé wine. I think this salad would be perfect alongside some grilled fish or chicken for a summer soirée.

Shanghai Stir-Fried Rice Cakes // Serious Crust by Annie Fassler

Shanghai Stir-Fried Rice Cakes

Shanghai Stir-Fried Rice Cakes // Serious Crust by Annie Fassler

There’s this dumpling house near my mom’s old apartment in Bellevue called Din Tai Fung. It’s a chain, but it’s ok because the dumplings are awesome. We always entrusted our ordering to my little sister, who is the guru of Asian cuisine, and she always ordered the best dishes. If you go, I highly recommend the juicy pork dumplings that are filled with pork and a hot broth, the shrimp and pork shao mai, and some variation of the Shanghai rice cake. These rice cakes are small, oval cakes that I assume are made out of ground rice. They’re delicate and chewy at the same time, and they take on the flavor of whatever sauce they’re cooked in.

Recently I went to Fubonn Supermarket, an Asian market in southeast Portland. I love roaming the aisles of international markets, being astounded by some of the things you can find, and excited when you happen upon an ingredient that you love but have never been able to find before.

You can imagine my delight when I happened upon a bag of dried rice cakes, and they were roughly $2 for a pound. So… that’s a thing. I immediately grabbed a bag, and it sat on our shelf for a few days while I tried to figure out what to do with them. (Then they sat on the shelf a couple days longer when I forgot to start soaking them the night before we wanted to make them, so we had to whip up something else for dinner instead.)

I believe you can also get frozen and fresh rice cakes, but with my dried ones, I soaked them overnight before I made them. But they were easy to use, and delicious, and I recommend getting your hands on some as soon as you can to start experimenting! I stir fried mine with some bok choy and shiitakes, and it was delicious.

Shanghai Stir-Fried Rice Cakes

Ingredients

3 Tbl canola oil
5 cloves garlic, chopped
1 inch piece of ginger, peeled and chopped
8 oz rice cakes, soaked overnight if dried, thawed if frozen
2 heads baby bok choy, rinsed
8 oz fresh shiitake mushrooms, sliced into 1/3-inch strips
1/4 cup soy sauce
1-3 tsp Sriracha
1-3 tsp brown sugar

Ingredients

More optional additions: bean sprouts, napa cabbage, other mushrooms, fish sauce, pork, beef, shrimp.

In a large wok or nonstick pan, heat oil over medium heat. Add ginger and garlic, and sauté until fragrant and starting to brown, about one minute. Add the rice cakes, bok choy, and mushrooms and cook until the bok choy is wilted. If your rice cakes aren’t quite soft enough (remember though, you want them to be a little chewy), add about 1/4 cup water to the pan and cover for a few minutes to steam a bit. Once the mushrooms are cooked through and the bok choy is wilted, add the soy sauce, sriracha, and brown sugar to taste. Start with less sriracha and brown sugar, and taste a lot! I found that I wanted a larger amount of brown sugar because of the saltiness of the soy sauce, and Jonah wanted more Sriracha (obviously). Cook, stirring, until all the rice cakes and vegetables are thoroughly coated and the liquid of the soy sauce has cooked off. Enjoy with teriyaki salmon or Korean short ribs (like we did).

Mushroom Risotto with Pancetta and Sage // Serious Crust with Annie Fassler

Mushroom Risotto with Pancetta and Sage

Mushroom Risotto with Pancetta and Sage // Serious Crust with Annie FasslerMushroom Risotto with Pancetta and Sage // Serious Crust with Annie Fassler

A couple weeks ago, when Jonah and I made the cleanse chicken, we decided to use the carcass to make some chicken broth. Let me say this: if you own a slow-cooker, and are not using your leftover bones/carcasses to make broth, you are seriously missing out. If you’re going to make chicken breasts, just buy bone in chicken breasts, cook them how you normally would, and then after dinner, throw the bones and scraps into the slow cooker with some onions, carrots, salt, cover it all with water, and cook it on low overnight. You’ll immediately have the beginning of a delicious chicken soup, or in this case, mushroom risotto.

(My roommates made some delicious pork ribs last week, and once they finished eating, Jonah and I told them they should make some broth with the roasted bones. They did, and had about 6-8 cups of broth, and used it to make 2 different dinners post-ribs. Talk about using your ingredients to the fullest!)

Anyway, I knew I had some arborio rice in the cabinet, and was feeling nice and wintry, so I decided to make mushroom risotto. But as I was looking through my cookbooks, I came across a variation on mushroom risotto that included sage and pancetta. I was sold.

Mushroom Risotto with Pancetta and Sage

The Best New Recipe | Serves 4 as a main course

Note: Porcini mushrooms are expensive. If you want to try using some other mushrooms instead, and also using mushroom broth rather than chicken broth to add some of that earthy umami flavor, go for it. You can also easily make this recipe vegetarian by replacing the chicken broth with mushroom broth, and eliminating the pancetta.

Note 2: My camera was dead when I cooked this, so I only have some mediocre iPhone photos. I’m sorry.

Ingredients

2 bay leaves
4 sprigs fresh thyme
3 sprigs fresh parsley
1/2 oz dried porcini mushrooms, rinsed in a strainer under running water
3 cups chicken broth
1 1/2 tsp soy sauce
2 3/4 cup water
4 Tbl butter
1 1/4 lbs cremini mushrooms, cleaned, stems removed, and cut into quarters (or sixths, if larger)
1 large onion, finely chopped
2 garlic cloves
2-3 oz pancetta (I went with 3, because I like pancetta)
1 3/4 cups arborio rice
3/4 cup dry white wine or dry vermouth
3/4 cup grated parmesan cheese
1 tsp fresh sage leaves

Instructions

With kitchen twine, tie together the bay leaves, thyme sprigs, and parsley sprigs. Put this bouquet in a pot with the porcini mushrooms, broth, soy sauce, and 2 1/2 cups water, and bring it to a boil over medium-high heat. Reduce heat to medium-low and simmer for about 15 minutes, or until the mushrooms are fully hydrated. Strain the broth, discard the herb bouquet, and set mushrooms aside. Put the broth back into the pot and keep warm over low heat. Mince the porcini mushrooms, and set aside.

In a non-stick pan over medium-high heat, melt 2 Tbl of butter. After the butter stops foaming, add the cremini mushrooms, half of the onion, and 1/2 tsp salt. Cook for about 7 minutes, until the liquid from the mushrooms has cooked off and the mushrooms are browned, and add the garlic, cooking for a minute until fragrant. Put the cooked mushrooms into a bowl and set aside. Add the remaining 1/4 cup of water to the pan to scrape up any browned bits stuck to the bottom of the pan, then pour this liquid into the pot with the broth.

In a large saucepan over medium heat, cook the pancetta and 1 Tbl of butter for about 5 minutes, until the pancetta has rendered most of its fat. Add the rest of the chopped onions, and cook until the onions have softened and are translucent. Add the rice and cook, stirring frequently, for about 4 minutes, or until the edges of the rice are transparent. Add the wine or vermouth to the pan, and stir, cooking until the liquid has been absorbed. Add the porcini mushrooms and roughly 2 cups of broth (or about 2 ladles full) and cook, stirring every couple of minutes, until the broth is absorbed. Add 1/2 cup or a ladle full of broth every 2-3 minutes, stirring occasionally, and adding more broth when the previous broth has been absorbed. The risotto is ready when the rice is cooked but has some bite to it at the center of the grain. You may not end up using all of the broth, so be sure to taste frequently for doneness. When the risotto is cooked to your liking, add the cremini mushrooms, the remaining 1 Tbl of butter, the parmesan, and chopped sage. Season to taste with salt and pepper, and enjoy with a nice glass of wine.

The leftovers are great as they are, but if you’re interested in a little revamp, form little cakes with the leftovers, and fry in some oil over medium heat. Top with a fried or poached egg for best result.

Miso Creamed Kale from Wafu // Serious Crust by Annie Fassler

Miso Creamed Kale

Miso Creamed Kale from Wafu // Serious Crust by Annie Fassler

I’ve posted about this miso creamed kale before, in a Weekend Finds post back in October. This recipe was recommended to me by a foodie friend, whose tastebuds I respect. So I was excited when I finally got around to making it. Easy, super flavorful, and wintry (most creamed veggie dishes are, in my opinion).

Miso Creamed Kale

Ingredients

3 Tbl unsalted butter (divided)
1 large shallot
2 cloves garlic
Salt and pepper
1 bunch lacinato kale, stems removed, roughly chopped
1/2 cup shimeji mushrooms with stems or shiitake mushroom tops, sliced into strips
1 Tbl soy sauce
1/4 cup dry vermouth
1/2 cup heavy cream or half & half
1/4 cup white miso paste

Instructions

In a large pan or skillet, melt 2 Tbl of butter over medium heat. Thinly slice the shallot and garlic, and add them to the pan, along with a sprinkle of salt and pepper. Turn heat to low, and let the garlic and shallot cook for a few minutes until they’ve got a bit of color. Add the kale, and cook until it’s wilted.

While you’re cooking the kale, in another pan, melt the remaining 1 Tbl of butter over medium high heat. Toss in the mushrooms (whichever kind you’re using), and cook until… well until they’re cooked through and soft. Add the soy sauce to the mushrooms, cook for another minute, and remove from heat.

Increase the heat under the kale to medium high, and add the vermouth. Cook until it is just evaporated, then add the cream/half & half and the miso. You’ll have to do a fair amount of stirring to break up the miso and make sure everything is evenly distributed and combined. Turn your heat down to medium and cook for a couple more minutes, until the sauce is slightly reduced and thickens up a little bit. Top with mushrooms, and serve.

Easy Year-Round Tomato Sauce // Serious Crust by Annie Fassler

Easy Year-Round Tomato Sauce

Easy Year-Round Tomato Sauce // Serious Crust by Annie FasslerEasy Year-Round Tomato Sauce // Serious Crust by Annie Fassler

Over Christmas, my sister Emily was raving about this tomato sauce on Smitten Kitchen that I’d seen several times. For some reason, it never really stuck out to me. It’s almost too easy.

But for New Year’s Eve we were having some friends over, and I decided to make fresh pasta with homemade sauce. Knowing full well that I wouldn’t be able to find incredible fresh tomatoes, I decided to give the recipe a shot. And you know what? It was awesome.

I did a few things differently. Firstly, I doubled the recipe. I probably could have still only used one onion, but I used two. Instead of just mashing the tomatoes against the side of the pan, after removing the onion I used an immersion blender to slightly puree the sauce. I’m not a huge fan of chunks in my tomato sauce, so it was a personal taste thing. I also added some chili flakes for a bit of heat.

Easy Year-Round Tomato Sauce

Ingredients

1 28-oz can of whole, peeled tomatoes, preferably San Marzano (yes, you can taste the difference)
5 Tbl unsalted butter
1 medium yellow onion, peeled and halved
Red chili flakes
Salt

Instructions

In a heavy bottomed saucepan, combine butter, tomatoes, onion, and a pinch of red chili flakes. Choose a pan bigger than you might think. The onions can be a little unwieldy while stirring as they’re in such big chunks. Over medium heat, bring the sauce to a simmer, then reduce heat to maintain that simmer. Cook for 45 minutes, stirring every once in a while, and smashing the tomatoes against the sides of the pot (be careful not to squirt all over yourself here). Remove onions from sauce, turn off heat, and, if you’d like, use an immersion blender to lightly purée the sauce. If not, that’s ok too. Season to taste. Use sauce to dress your favorite pasta (homemade or otherwise), or in a lasagna or on pizza.

Roasted Winter Vegetables with Miso and Harissa // Serious Crust by Annie Fassler

Roasted Winter Vegetables with Miso and Harissa

Roasted Winter Vegetables with Miso and Harissa // Serious Crust by Annie Fassler

Make this. Tonight. Now. I don’t care when. But make it. The sooner the better.

I’m not sure when I discovered this recipe on 101 Cookbooks, but it has quickly become a favorite. I imagine you could roast any winter vegetables with miso and harissa and they would be just as wonderful as the potatoes and squash I made. I haven’t tried the full on recipe with the kale yet, but I’m sure I will soon enough. Once I get over these vegetables. My goodness. This recipe is incredibly flavorful, the miso gets beautifully caramelized, and the harissa adds a perfect hint of spice. It’s so comforting but not boring or familiar at all. So make it.

Roasted Winter Vegetables with Miso and Harissa

Note: I bet this would work beautifully with lots of winter vegetables. Sweet potatoes? Turnips? Broccoli? Fennel? Parsnips? Winter squash? Let me know what you try.

Note 2: If you think miso and harissa are some of those ingredients that you’ll use once and never again, you couldn’t be more wrong. The other night Jonah made me this incredible clam miso soup from The Family Meal, and this squash and tofu with miso and molasses is one of my favorites. As for harissa, try adding it to anything for a little heat, especially shakshuka.

Ingredients

1/2 pound fingerling potatoes
3/4 pound delicata squash
1/4 cup olive oil
1/4 cup white miso paste
1 1/2 tsp harissa paste (more if you like spice)

Instructions

Preheat your oven to 400 degrees. If your potatoes are larger, quarter them, half them, or cut them as you choose. You want the pieces to be about the size of your thumb. Half and seed the squash, and slice into 1/2 inch half-moons. Set aside.

In a bowl, whisk together the olive oil, miso, and harissa. Add the vegetables and toss to coat evenly. Spread on a baking sheet, and roast for 25-30 minutes. You want everything to be nicely browned and tender – I recommend tossing the veggies halfway through.

Remove from oven, allow to cool for a few minutes. Good luck not devouring these within minutes.

Corn Salad // Serious Crust by Annie Fassler

Corn Salad

Corn Salad // Serious Crust by Annie FasslerCorn Salad // Serious Crust by Annie Fassler

Guys, it’s September, and I have a few summer recipes, like this corn salad, to get to you before the season slips from our fingers. At this point, it feels like summer might never end in Portland – it cooled off a bit last week, and this week hit a high of about 98 degrees (get it? like the band? ok. I’ll stop.). But this weekend, it’s supposed to rain, and the temperature is supposed to drop, and I am feeling strangely ready for that to happen.

I usually mourn the end of summer, but lately I have been craving heartier dishes and squash, specifically butternut and acorn. I’ll take peaches and tomatoes, but the hankering for those fall dishes is starting to nag at me.

But while it’s hot and there are still things like corn and nectarines, you should eat things like this corn salad. Inspired by a few different recipes, this is one of those dishes that uses corn as a base, but you can really toss in whatever you have around. Quickly cube and cook up some zucchini and throw it in, or add in some chopped tomatoes (seed them first), or chop up some basil. Here’s what I used.

Corn Salad

Serves 4

Ingredients

3 ears corn, lightly cooked (boiled), and kernels cut from the cob
2 nectarines, cubed
1 bell pepper, cubed
1 jalapeño, seeded, chopped
1-2 limes, juiced (start with one, see how you like it)
1/2 cup crumbled feta cheese
Salt and pepper

Instructions

Combine ingredients in a bowl, stir it up, add more of anything you like, and eat with friends as the hot day starts to cool off, preferably accompanied by grilled chicken or fish or something like that, as well as some cold beers.

Risotto with Fava Beans and Corn // Serious Crust by Annie Fassler

Risotto with Fava Beans and Corn

Fresh corn and fava beans ready to go into the risotto // Serious Crust by Annie FasslerRisotto with Fava Beans and Corn // Serious Crust by Annie Fassler

Wowee! What a whirlwind it has been lately. A few weeks ago, Jonah and I were in Chicago for the 4th of July holiday, and it seems like from there, things got crazy. The night we left for Chicago, we applied to rent a house, and the night we got back we found out we got it! We are now living in NE Portland, within walking distance to Porque No?, Tasty n’ Sons, and countless other places. Mississippi and Alberta neighborhoods are a stone’s throw away, and I’m discovering a part of the city of which I had only scratched the surface. It’s pretty sweet. Be on the lookout for reviews of some spots in our new hood.

It has been a while since I gave you guys a recipe. This is one I made a while back, but it is just as perfect for right now. This past weekend, we went out to Sauvie Island to go berry picking – we have blueberries coming out of our ears! As well as raspberries, peaches, and a few ears of corn. The corn reminded me that I STILL hadn’t posted this risotto recipe! I’ve discovered that risotto is such an easy meal to make and you can really throw in anything you have around. Saffron? Sure. Squash? Yup. Mushrooms? Why not. But this was a great spring & summer risotto with fava beans and fresh corn.

Risotto with Fava Beans and Corn

Ingredients

1 1/2 lbs of fava beans, shelled and shelled again (to learn more about shelling favas, go here)
2-3 ears of sweet corn, the kernels cut from the cob
~4 cups of chicken broth (can easily be replaced with vegetable broth to be made a vegetarian dish)
1/2 cup white wine (Alice Waters told me (in her book) that if you don’t have any white wine, you can also use a light beer – I didn’t have any wine or nice beer around, so I used PBR… it worked just fine)
2 Tbl olive oil
1 small white onion, diced
3 cloves garlic, diced
1/2 tsp salt
1 cup arborio rice
1/2 cup shredded parmesan cheese
salt and pepper

Instructions

In a saucepan over medium-high heat, bring the broth to a simmer. Reduce heat to medium-low.

In a separate saucepan over medium-high heat, heat the olive oil, then add the onion, garlic, and salt. Cook them until the onions are soft but not browned, about three minutes. Add the arborio rice and stir to coat it in olive oil. Add the wine (or in my case, beer, because I’m classy like that) and cook until the liquid has been absorbed and evaporated, stirring constantly.

Now add the broth, one cup at a time (or one ladle full at a time). Stir the rice frequently after each addition, and only add more broth when the previous broth has been absorbed. When you have added half the broth (after about 15 minutes), add the fava beans and corn. Continue adding broth and letting the rice cook and absorb, until the rice is tender but still has some bite to it. You may not need all of the broth. When the texture seems good to you, add about 1/4 cup of broth, remove the pot from the heat, and stir in the parmesan, and salt and pepper to taste. Enjoy!

Stale Bread Soup // Serious Crust by Annie Fassler

Stale Bread Soup (Ribollita)

Stale Bread Soup // Serious Crust by Annie FasslerStale Bread Soup // Serious Crust by Annie Fassler

I realize that at this point you might be sick and tired of hearing us harp about how great Tamar Adler’s An Everlasting Meal is. But hear me out one more time. Everyone has stale bread. Or at least everyone who has bread at some point and does not eat it all eventually has stale bread lying around. And most of the time it gets thrown away, or responsibly composted. If you are culinarily educated, dear reader, you may already have known of stale bread soup; but as I read Tamar’s book, I was astounded to find out that not only does such a thing exist, but there is a long and ancient tradition of creating soup from leftover bread (Ribollita in Italian).

There are a few things that should be said about stale bread soup. First, it is not a soup in the same way that chicken noodle is a soup; stale bread soup is usually much thicker and feels more like a hearty chili. Second, stale bread soup is more of a general idea and a starting point than a recipe. It is meant to be made with whatever is around, provided you have some stale bread (otherwise, you will be making whatever-is-around soup – which could turn out to be vegetables-in-water “soup” if you don’t have any broth lying around).

The recipe below is adapted slightly from Tamar’s recipe for Ribollita in An Everlasting Meal. In usual Tamar fashion, you will use A LOT of olive oil in this recipe. We have made stale bread soup twice now, so I’ve noted the different things we used.

Stale Bread Soup (Ribollita)

Ingredients

Olive oil
1 onion, diced
2 cloves garlic
Celery, if you have it (I did not)
salt
1/2 cup chopped fresh herbs like parsley or rosemary or thyme (if you don’t have fresh, maybe do 1/4 cup dried?)
1/2 teaspoon chile flakes
Tomatoes in some form, if you want (3 peeled fresh tomatoes, or I used 1 can diced. Made it once without tomatoes as well)
1 bunch leafy greens (I used kale once and cauliflower greens once; other ideas are swiss chard, collard greens, radish greens, etc)
1/4 cup water
2 cups cooked beans (I used a can of black beans both times, Tamar suggests chickpeas or cannellini beans)
2 cups broth from beans or chicken/veggie stock or cans of tomatoes (I used a combo of all three, and you can make up any shortfall with water)
1 piece of Parmesan rind (Do this if you can, because it makes the soup soooo tasty and rich. Also, what else are you going to do with your Parmesan rind?)
2 cups stale bread, crusts removed, torn/cut into 1/2-inch pieces

Instructions

Heat 1/4 inch olive oil (this is just the beginning) in a big-ish soup pot. Cook the onion and garlic (and celery if you have it) until they soften. Add the herbs and chile flakes and a little bit of salt. Add the tomatoes and cook for a few minutes over medium heat.

Chop the greens (and remove from the stems) then add to the pot, and add the water. Cover and cook over low heat until the greens are wilted. Put in all your broths/waters/juices and the beans, plus the Parmesan rind.

(If you have a bunch of Parmesan left, make sure to cut the rind from the rest of the Parmesan. Otherwise, just save the Parmesan rind for when you will next make bread soup. Make sure your Parmesan is big enough that you can keep track of it, because you’re going to take it out later.)

Bring to a simmer, then add the bread and more olive oil (Tamar says to add 1/2 cup, but I was not brave enough and probably added about a 1/4 cup at this point). Cover and cook for 1/2 hour on low, stirring occasionally to make sure the bottom doesn’t burn. The bread will soak up the soup and then liquify into it.  Taste it, add more broth or salt or whatever you want, and then take it off the heat.

Add in another 1/2 cup olive oil (Tamar, are you crazy!?!? I probably added 3 tablespoons here) and take out the Parmesan rind. You can grate Parmesan on top and add some pepper to serve.

This soup is perfect for a windy, rainy, cold, or dark winter/fall night.

Saffron Risotto with Mushrooms // Serious Crust by Annie Fassler

Saffron Risotto with Mushrooms

Saffron Risotto with Mushrooms // Serious Crust by Annie Fassler

I mentioned a couple of weeks ago that Jonah and I recently purchased The Family Meal by Ferran Adria. As soon as we got it in the mail, Jonah proceeded to look at the whole book, page by page, cover to cover. Which was really adorable. He was pretty excited. Anyway, a couple days later, I finally got it out and flipped through it, and I too got really excited. There are so many awesome recipes in this book, and the layout is great. It tells you the timeline of your meal (2 hours before, you can start doing task #1, 1 hour before, you can start doing tasks #2 and 3, 40 minutes before… you get the idea), it tells you how much of each ingredient you will need to make the meal for 2 people, 6 people, 20 people, and 75 people. So we can perfectly cook for just the two of us, or we can cook for us and a bunch of friends. Lastly, the recipe itself is in photograph form, so you know exactly what each step looks like, which is such a big thing for a lot of people. And it has super specific instructions, i.e. instead of saying “cook until lightly browned” it says “cook for 16 minutes.” Which is so nice.

Anyway, while flipping through it for the first time, we marked a bunch of the recipes we wanted to try first, and then went to the store to pick up ingredients for a couple meals this week. The coolest thing was that because we had bought a chicken at the farmers market a couple weeks ago, cut it into pieces, frozen the pieces, and made broth out of the carcass, we had almost all of the ingredients we needed for these meals. First up was saffron risotto with mushrooms. I have never made risotto before, and was a bit nervous about it, because it’s one of those things that seems like it might be easy to mess up – overcook, undercook, underseason, overseason… etc. But because the instructions for these recipes are so specific, I had no fear!

Saffron Risotto with Mushrooms

Serves 2

Ingredients

2 1/2 cups chicken stock (can be replaced with vegetable stock)
1 pinch saffron strands
1 1/2 Tbl olive oil
1/4 white onion, finely chopped
2 Tbl white wine
1 cup risotto rice, also called arborio rice
2-6 white mushrooms (it all depends on how big your mushrooms are and how many you want on your risotto)
1 tsp butter
1/4 cup grated parmesan cheese
1 tsp (maybe more) fresh lemon juice

Instructions

Put all of the stock into a sauce pan, cover, and bring to a simmer.

This is the weird part, where I wish you could see the cookbook so you could see the photos. Make a little envelope out of tinfoil, put the saffron threads in it, and toast them in a pan over medium heat for one minute. Don’t le it burn! Remove from the pan and let it cool.

In a large pan or pot, heat the oil over medium heat, then add the onions. Once they’re soft, but not browned, add the wine and scrape up any browned bits from the bottom of the pan. When most of the wine has cooked off, add the rice and let it cook for 3 minutes, stirring all the while. Add one ladle-full of stock, and cook for 2-3 minutes, stirring often to keep it from sticking. Pour the rest of the stock into the pot. Quickly chop the saffron and add it to the pot. Cook the rice for 16 minutes (what precision!), stirring frequently.

While the rice is cooking away, wipe the mushrooms clean with a paper towel, and slice them as thin as you can. You can use a mandolin if you’ve got one, or just a sharp knife. Put them in a bowl and set aside.

When the rice has absorbed the majority of the liquid and is a little al dente, add the butter, and then the parmesan. Stir until the rice is nice and creamy, and season it with salt, pepper, and lemon juice. Spoon the risotto onto plates and top with mushroom slices, and enjoy!