Tag: Thyme

Weekend Finds 1:5:14

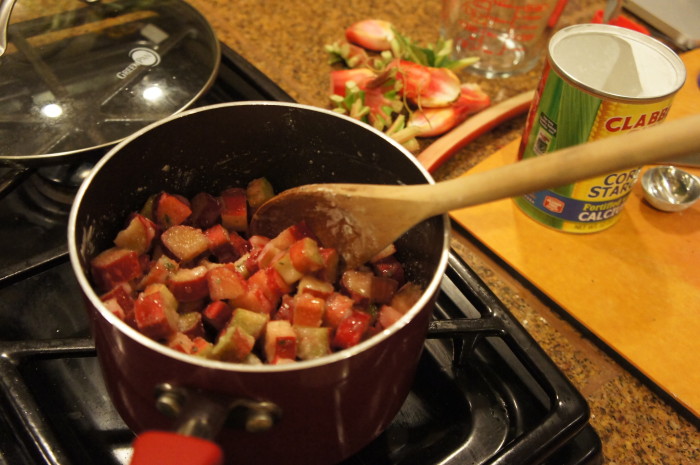
Wow, I had trouble writing that date. I think around New Year’s my brain has trouble figuring things out, and reverts back to whatever year it was two years ago. In this case 2012. Oof. Weekend Finds! This week, free of holiday treats for the first time in a long time.

1. Galette Des Rois

Galette Des Rois from David Lebovitz on Weekend Finds // Serious Crust by Annie Fassler
Galette Des Rois from David Lebovitz

Jonah’s birthday is tomorrow (!!!) and I thought it might be fun to try this traditional French Epiphany dessert for him (our plans also include dinner at Apizza Scholls with friends, then hopping across the street to Sapphire Hotel for drinks). Plus, it doesn’t even look that hard. And David Lebovitz is a genius.

2. SE Asia here we come!

Southeast Asia on Weekend Finds // Serious Crust by Annie Fassler
Southeast Asia trip planning

It has been confirmed, we are going to SE Asia at the end of March/beginning of April. I think we’ve decided what region we’re going to, but I’m going to wait to tell you. I wouldn’t want to jinx or spoil it! More details to come!

3. The Importance of Acid

The Importance of Acid on Weekend Finds // Serious Crust by Annie Fassler
The Importance of Acid

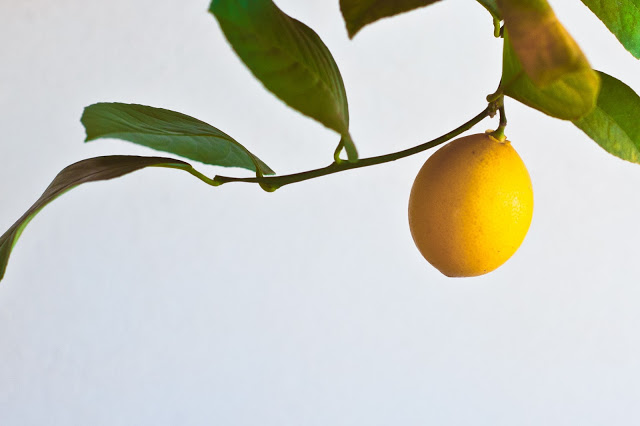
Whenever I am asked to taste a dish and see if it needs anything (by my parents, Jonah, roommates…), my answer is almost ALWAYS acid (second most popular response is salt). It is really incredible what difference a squeeze of lemon can make, which is why I like to always have a few laying around the kitchen.

4. Getting thyme off the stem

Thyme Tips from the Kitchn on Weekend Finds // Serious Crust by Annie Fassler
Thyme Tips from the Kitchn

I recently made  more of the sea salt, thyme, chocolate chunk cookies (for a cookie exchange at work before the holidays), and while I love love LOVE those damn cookies, taking the thyme leaves off the stem is such a royal pain in the patootie. And I generally feel this way about thyme. I love the flavor of it, I love using it, but it’s so annoying. So I was pretty excited when I came across this little tip to make it easier to use thyme.

5. New Years Resolutions

New Year's Resolutions on Weekend Finds // Serious Crust by Annie Fassler
What are you New Year’s Resolutions? Watch more fireworks?

I have a few. 1) Cook more new things! 2) Drink more green smoothies, they’re delicious and healthy. 3) Start painting again. 4) Learn more about my readers. Who are you? Where are you from? What do you like to cook? Is there something you’d like to see more of on my blog?

Rhubarb Thyme Hand Pies

Rhubarb Thyme Hand Pies

Rhubarb Thyme Hand Pies

It’s early spring. Do you know what that means? It means rhubarb. Yep. I couldn’t be more excited. Jonah and I went to the farmer’s market and I picked up about two pounds of the it and I decided to make Rhubarb Thyme Hand Pies. Now, I have only made hand pies once before, and they were delicious. I followed a recipe from the Dahlia Bakery cookbook, so the dough was specifically for hand pies, as was the filling. But I didn’t really have a recipe for these, so I decided to wing it.

Part of my concern with kind of winging it was that the dough would be too delicate and flaky to hold up as a handpie. Second, I worried that the filling, being mostly rhubarb which falls apart as soon as it’s cooked, would be too liquidy, not enough solid. So I did a little research, and while I wasn’t completely happy, it was certainly a first step. I think I made the pies a bit too big. I didn’t really want to do the 3.5 inch circular cookie cutter route (cutout two circles, run milk around the edge of the bottom one, fill inside the milk edge with filling, put another circle on top and seal the edges), so instead I divided my dough into 8 pieces and rolled each one out until it was about 1/4 inch thick. I like the way these are shaped better, a little more rustic seeming, but I do think that they might’ve held up better if I had gone the cookie cutter route. The dough was, as I was concerned about, a little too delicate and started to crumble when you picked it up. And I certainly could’ve put more filling in each pie (the leftover filling is in a tupperware at home, and I’m looking forward to stirring it in with some Greek yogurt for a snack later).

All that being said, they were definitely tasty, and I would recommend them! But hopefully I’ll be trying another batch here soon with a few changes. I’ll let you know how it goes.

Rhubarb Thyme Hand Pies

Ingredients

Pie Crust

2 cups flour
1 cup butter (2 sticks), cold, cut into cubes
1 tsp salt
up to 1/4 cup water

Rhubarb Filling

4 cups rhubarb, in a half inch dice
3/4 cup sugar
1/2 – 1 tsp fresh thyme
Milk for sealing

Instructions

Pie Crust

In a mixer or a food processor, combine the flour, butter, and salt. If the dough is not coming together, add water, 2 Tbl at a time, until it does. Form dough into two discs, wrap in saran wrap, and refrigerate for at least 1 hour.

Rhubarb Filling

While the dough is refrigerating, put cubed rhubarb, sugar, and thyme into a small saucepan. Over medium heat, cook the rhubarb until it breaks down and simmers for a couple minutes. Allow the filling to cool while the dough finishes up in the fridge.

Preheat your oven to 375 degrees. Divide each disc into 6 even pieces (I only did 4 and the hand pies were too big, in my opinion). On a floured surface, roll each piece of dough into as circular a shape as you can. You’re going to be folding them in half, so even if they’re not so round, symmetrically misshapen is best. Line a baking sheet with parchment paper, and assemble the pies on the baking sheet. What does assembling them entail? Well, dunk your fingers in milk and wet the edge of your circle of dough. Fill half of that circle, inside the milk line, with the rhubarb filling, and fold the opposite side of dough over the filling. Press around the edges, allowing the milk to seal the two sides of the dough together. With a fork, press around the edges, and use a knife to cut three little slits in the top for steam (this way the pies are less likely to explode). I was able to fit 4 on a pan, but because yours will probably be smaller, you may be able to fit 6. Bake for 20-35 minutes or until the dough looks cooked and the edges are golden brown. Allow to cool for about an hour before digging in.

Sea Salt and Thyme Chocolate Chunk Cookies

Sea Salt and Thyme Chocolate Chunk Cookies

Sea Salt and Thyme Chocolate Chunk Cookies

Sea Salt and Thyme Chocolate Chunk Cookies

Sea Salt and Thyme Chocolate Chunk Cookies

Last weekend when I was in Seattle for my dad’s birthday, he informed me that he had been wanting some cookies or something sweet around the house. My sister and I were a bit dumbfounded because my dad always hated having sweets around the house when we were younger. Of course I told him I’d take care of it. So I pulled up a recipe I had saved on my pinterest for sea salt and thyme chocolate chunk cookies. This recipe is adapted from Desserts for Breakfast, a blog I discovered about 2 weeks ago, and it looks so lovely, so I couldn’t wait to try something from it.

These cookies were so delicious. After baking, the thyme becomes really aromatic. I was a little worried you wouldn’t taste it, but you definitely do. It’s not too strong though, so don’t worry. And the salt and chocolate is a perfect combination. These are just a really lovely grown-up version of a chocolate chip cookie. Enjoy!

Sea Salt and Thyme Chocolate Chunk Cookies

Ingredients

1 1/2 cups unbleached bread flour
1 2/3 cups all purpose flour
3/4 tsp baking soda
1 tsp coarse salt
2 Tbl fresh thyme leaves
2 sticks butter, room temperature
1 cup dark brown sugar
2/3 cup white sugar
1 Tbl molasses
2 eggs
1 cup semisweet chocolate chunks, more or less if you like
1 cup dark chocolate chunks, more or less if you like
sea salt

Instructions

Preheat your oven to 350 degrees. Grease your cookie sheets. In a large bowl, combine the dry ingredients: bread flour, all purpose flour, baking soda, salt, and thyme. Set aside. In your mixer, cream the butter, then add brown sugar, white sugar, and molasses. Beat until the mixture is light and fluffy. Add the eggs, mixing well after each addition. Then, slowly add the dry ingredients (think a few batches). Combine well! Now fold in the chocolate chunks.

Now, form the cookies using about 2 Tbl of dough, rolling it into a ball, putting it on the pan, and pressing down slightly. These guys spread a bit, so make sure they aren’t too close together. Now sprinkle a little bit of sea salt on each cookie.

Pop them in the oven for 12 minutes or until the edges are just turning brown, rotating the pan halfway through. When you remove the pan from the oven, let the cookies cool on the pan for 2 minutes and then move them to a plate or cooling rack to cool completely.