Tag: Honey

Brown Butter Buckwheat Madeleines

Brown Butter Buckwheat Madeleines | Serious CrustBrown Butter Buckwheat Madeleines | Serious Crust

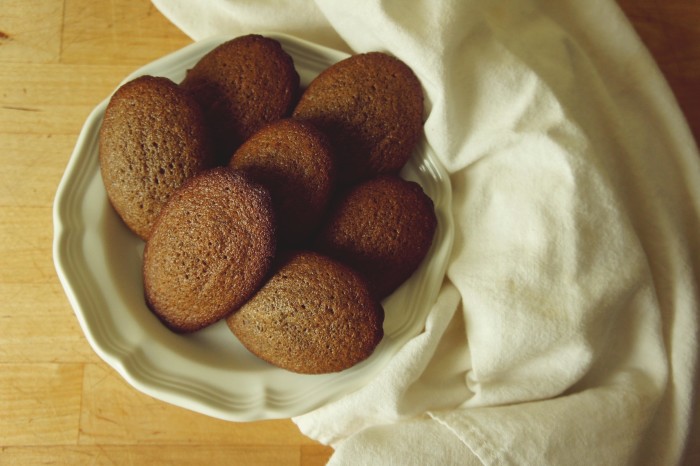
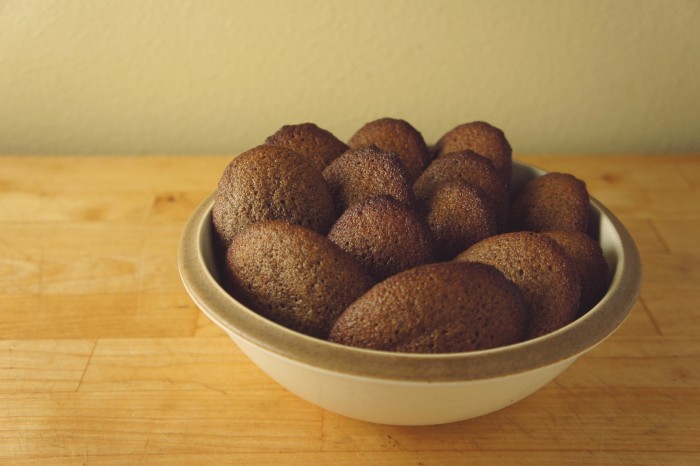
I don’t know that I’ve ever seen a batch of baked goods disappear so quickly. I just wanted to warn you right off the bat. Whether you’re making these buckwheat madeleines for you and your honey at home or to take to a fête, you should know either way that they won’t be around for long. I think it’s because they dance on the edge of sweetness and toe the line between a soft, cakey middle and crunchy browned edges. The outside is a tiny bit sticky from a spoonful of honey, and so when you finish eating one you have to lick your fingers, which only reminds you of the comforting flavors swirling around your tastebuds.

I spotted the recipe for these madeleines in my dad’s copy of My Paris Kitchen, which, yes I’ve been pining over and no I don’t have yet (but I may have just ordered). David Lebovitz has long had a home in my kitchen. I believe his lemon curd was the first one I ever made, and I’ve churned plenty of his ice cream recipes. When my dad got his cookbook, he almost immediately sent me the recipe for the leeks with mustard-bacon vinaigrette, which are delicious and you should definitely make them. I think I love his writing so much because I used to dream of packing up my life and moving to Paris, where I would use my 6 years of French lessons to make French friends and shop at French markets and cook French meals and it would all be so perfectly French.

But sometimes that isn’t quite how real life goes. You do sensible things like go to college and have roommates and get a job (or a few) instead of living the dream life in Paris. But that doesn’t mean you can’t have French inspired food and toss little French phrases around with other French speakers. And it certainly doesn’t mean you can’t brown butter in your kitchen so the house smells like nutty, toasty heaven, whisk that brown butter in with buckwheat flour and honey, and fill the molds of a madeleine pan with the batter. And it doesn’t mean you can’t break one of the madeleines in two while it’s still warm, the inside springy and spongey and the edges perfectly crispy. And it definitely doesn’t mean you can’t eat three (or four…) in the span of 10 minutes.

Brown Butter Buckwheat Madeleines

Ingredients

8 tablespoons (1 stick) unsalted butter, cubed
2/3 cup buckwheat flour
1/3 cup all-purpose flour
3/4 cup granulated sugar
1 1/2 tsp baking powder
1/2 tsp salt
4 egg whites, equaling about 1/2 cup (hint: keep the remaining yolks to make a citrus curd later)
1 tbsp honey
3 tbsp cocoa nibs (optional – I didn’t use these)

Instructions

In a pan over medium heat, cook the butter until it’s the color of a perfectly cooked marshmallow or toast. The butter will foam and spit, don’t be afraid. When it’s brown, pour into a heat proof bowl and set aside.

Preheat your oven to 400°F. In a medium bowl whisk together the flours, sugar, baking powder and salt. Add the egg whites and honey and whisk until combined. Add about a third of the brown butter, and mix until combined, then slowly add the rest of the butter while mixing. If you’re using the cocoa nibs, add them now and mix until they’re evenly distributed.

Brush your madeleine pan with butter, and fill the molds about 3/4 of the way full with batter – about one tablespoon. Bake for 8-10 minutes, until the madeleines spring back lightly when you touch them in the middle. Thanks to the buckwheat flour, you can’t really rely on color here too much, but you’ll kind of be able to tell when the edges are looking a little on the golden side. Allow to cool in the pan for about a minute before popping them out onto a cooling rack. I recommend eating them warm (or at least the same day) with a cup of coffee or tea.

Weekend Finds 1:25:14

Well, friends, it has been a long week. An emotionally tiring, physically exhausting week, full of phone calls and to-do lists. But it’s finally the weekend, which means weekend finds.

1. Toast and more at Trouble Coffee

Trouble Coffee in the Bay on Weekend Finds // Serious Crust by Annie Fassler
Not only does Trouble Coffee serve toast. It also serves coconuts.

This article starts out about the new toast crazy (funny, I read it while enjoying a large piece of toast slathered in lemon curd at The Sugar Cube), but then winds its way into a story about community. I really like the story of this coffee shop and it’s owner, Giulietta Carrelli. Also, I like that she has freckles tattooed on her cheeks.

2. Gougères

Gougères on Weekend Finds // Serious Crust by Annie Fassler
Little perfect light bites of cheese.

All I want to do is make gougères. And I have everything in my fridge to make them. So, you ask, why am I writing this and not currently stirring together large amounts of butter and cheese? I ask you the same thing.

3. The Salted Peach

The Salted Peach on Weekend Finds // Serious Crust by Annie Fassler
I love how Dylan caught the flour in the air as Caitlyn was flouring her dough.

I don’t know if I’ve told you about my friend Caitlyn before, but I find her to be rather impressive. She went to culinary school for baking and pastry, and now works around Portland. She has this blog, the Salted Peach, and I love her writing – it is guaranteed to make me smile. Her most recent post for a S’more Tart has some of the most gorgeous pictures (which her boyfriend Dylan takes). I told them if they ever want to get me a  present, they can give me a print of the picture above.

4. To remove or not to remove garlic germ?

On removing garlic germ from David Lebovitz on Weekend Finds // Serious Crust by Annie Fassler
While we still may not have a certain answer, we’re a little closer.

I have always wondered whether or not you should remove the green garlic germ from garlic. And while you can really do whatever you want, this post from David Lebovitz seems to get us a little closer to at least understanding what that green germ does for our mouths.

5. Salted Rose and Honey Pie

Rose and Honey Pie from Adventures in Cooking on Weekend Finds // Serious Crust by Annie Fassler
Tell me that doesn’t look so delicious.

I still can’t get over this blog. And this recipe is not helping. I love a gentle rose flavor in some dishes (my dad made a rose water and harissa fish dish once that was incredible), and this pie looks so beautiful and sweet.

The Perfect Equation (for Granola, anyway)

The perfect granola equations // Serious Crust by Annie Fassler

First, let me apologize for disappearing for a little while. I was laid up in bed with a really terrible cold for most of this week. There was lots of tea, cough drops, movies, tom kha soup, and knitting. But now that I’m back from the land of the ill, let’s talk about granola a little bit.

For a while now, I’ve been making the recipe from Orangette or another friend’s secret granola recipe. And every time I’ve tried to go rogue (aka not exactly following a recipe), my granola ends up too dry, or not sweet enough, or not as crispy as I like it. And I’m not the kind to make the same recipe a thousand times trying to add a teaspoon more of this or up the temperature 13 degrees. It’s not going to happen.

So when I happened upon a granola equation, on Buzzfeed of all places, I immediately wrote it down on a little notepad I’ve started carrying with me wherever I go (can’t recommend that enough). And I’ve used it many times. I’ve made a couple adjustments, and I have a couple of suggestions in terms of which way to lean on some of their more vague instructions, and I want to share it with you.

The Perfect Granola Equation

Ingredients

Dry Ingredients

3 1/2 cups grain This is where most people use oats. I use oats. I guess if you want to use barley or whatever, you can.

1 – 1 1/2 cups nuts I’ve been using mostly a mix of whatever I have around. I like half pecans, half sliced almonds, but I’ve also used walnuts.

1 tsp salt

1 – 2 cups seeds I would suggest leaning towards one cup instead of two. Otherwise it can quickly start to feel like you’re eating birdseed. I’ve been mostly using pumpkin seeds and sunflower seeds (old habits and all that), but I’m itching to try sesame seeds too.

1 cup coconut If you really dislike coconut, you can go without, but it adds a lovely nutty toasty flavor to the granola that I adore.

Spices You can really add as many as you like, but don’t get too crazy. A teaspoon of cinnamon is always a good place to start, and after that, maybe add a quarter teaspoon of one or two other things. I always use a quarter teaspoon of cardamom, and because it’s the holiday season and I associate nutmeg with the holidays, I’ve been adding a quarter teaspoon of that as well.

1 cup dried fruit I’m personally not a fan of dried fruit in my granola – I’d rather cut in a banana or peach or some berries – but if you are, you can add it after baking. If you’re adding something big like dried apricot or figs (as opposed to something small like dried cranberries or cherries), cut it into a rough dice before tossing it in with the granola.

Wet Ingredients

1/2 – 3/4 cup sweetener I like to do mostly maple syrup, though it can get a little pricy. Sometimes I’ll do half syrup and half honey. Agave is another good option.

1/4 – 1/2 cup oil I used to use solely olive oil – I liked the kind of savory-ness it brought to the granola – but I’ve started doing half olive oil and half coconut oil, and I am a big big fan.

1 tsp vanilla

Instructions

Preheat your oven to 300 degrees. Mix dry ingredients in a large mixing bowl. Add wet ingredients, stir until thoroughly combined and coated. Line a rimmed baking sheet with parchment paper, and spread the granola on the parchment. Bake for 45 minutes, stirring every 15 minutes (unless you like clumpier granola, in which case stir once halfway through). Remove from oven, allow to cool, and enjoy.

Honeyed Broiled Apricots

Honeyed Broiled Apricots // Serious Crust by Annie Fassler

Dear friends, I would like to share with you perhaps my favorite recipe of the summer season (thus far, anyways). I don’t know about you, but I am a big fan of apricots.

I love them in pies, tarts, crisps, and fresh as a perfect afternoon snack. I love how little and manageable they are, I love the color, and I love the tangy flavor. Most other summer fruits are incredibly juicy (peaches, nectarines, melons, berries), but I kind of like that, even at their ripest, apricots have a funny little dryness to them.

Anyway, I had this bag of apricots in the fridge a few weeks ago, and decided, after a little searching here and there for a quick apricot dessert, to make one of the world’s easiest and most delicious desserts. I kid you not.

You could eat them with a fork, but I recommend getting your fingers a little sticky and just picking them up. These are a few bites of heavenly goodness. The warm fruit with the cold creamy yogurt is a dream, sweetened by the broiled honey. Enjoy!

Honeyed Broiled Apricots

Ingredients

Apricots (think 1 per person)
Honey
Greek yogurt (sour cream, whipped cream, or regular plain yogurt will also work, but I like greek yogurt the best)
Pistachios (shelled and chopped)

Instructions

Heat your broiler. Cut each apricot in half along the seam, and remove the pit. Put the apricots, cut side up, in a baking dish (a brownie pan or a pie dish will work well), and fill each cavity with honey. You don’t want the honey to overflow, but you want the cavity to be full. Put the apricots under the broiler for about 5 minutes, rotating halfway through. You want the honey to be bubbling and the apricots to show some good color.

Allow the apricots to cool a bit (not all the way), then move them to little plates or saucers. Top with a dollop of yogurt and a sprinkle of pistachios.