Tag: garlic

Fried Baby Artichokes

Fried Baby ArtichokesFried Baby Artichokes

We have been hitting up our local farmers market like crazy. If you live in Portland and you don’t go to the PSU Farmers Market on Saturdays, you are seriously missing out. Especially when the weather is beautiful and there is SO MUCH PRODUCE everywhere to be found. It’s really incredible.

Lately, Jonah and I have bought chanterelles, fennel, fiddlehead ferns, rhubarb (so much rhubarb), strawberries, a chicken, radishes, leeks, lamb steaks, sunchokes, spring onions, cheese… the list goes on. There is so much delicious local food to be found, it’s like being in heaven. And these mounds of food and people walking around in sundresses and shorts with bouquets of flowers are all so beautiful.

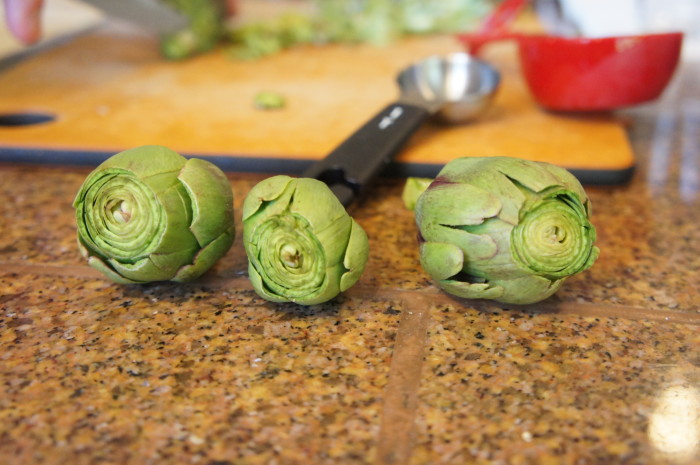
Anyway, one of my favorite things we’ve found at the market is baby artichokes. Have you ever had fried baby artichokes at a restaurant? It’s a common Italian dish. The leaves get crispy and a little burnt and it’s really yummy. So when we brought these home, we knew we wanted to make that dish. We found a simple recipe on Martha Stewart’s website, and Jonah took over the making of these little guys. We bought 8 of them to cook, but the recipe is obviously variable depending on how many you want to make.
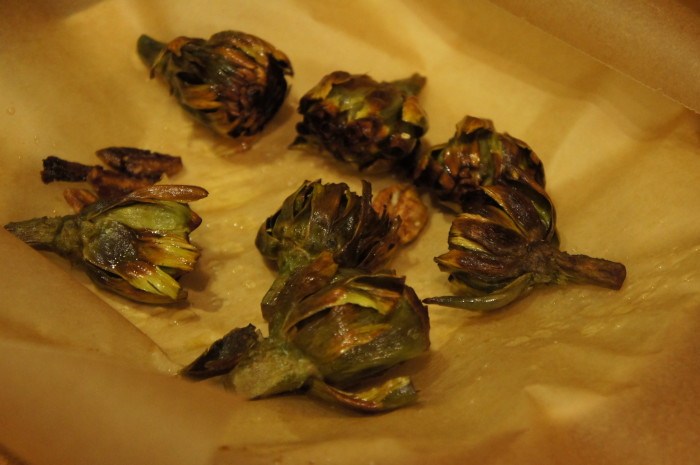
Fried Baby Artichokes

Ingredients

8-12 baby artichokes
1/2 cup olive oil
1/2 tsp sea salt, plus some for serving
4 cloves garlic (or more, if you want), lightly crushed
lemon for serving

Instructions

Prepare the artichokes by removing the tough outer leaves, cutting off the top third of the , and peeling the tough dark green layer from the stems with a paring knife. I know, it seems like you’re losing a lot of artichoke here, but you’re really just getting rid of all the really tough parts that would make this whole thing harder and far less pleasant to eat.

Pour the oil and 1/2 cup water into a medium sized, deep, heavy pot and add the artichokes and 1/2 tsp of sea salt. Turn the heat on to medium-high, and let them cook, turning them over occasionally (you don’t want them to get burned on one side). Cook them until the water has evaporated and the oil starts to spit, which, trust me, it will. This will take about 8-10 minutes.

When the water has cooked off, add the garlic to the pot and reduce the heat to medium. Cover the pot with a spatter screen or an sieve turned upside down (Nice tip Martha! Sadly our sieve wasn’t big enough for our pot… I’m thinking it’s time to invest in a spatter screen). Continue cooking the artichokes and turning them occasionally, until they’re tender and golden brown all over (should be another ~10 minutes). Now take some tongs and put them upside down (or cut-side down, however you want to think about it) in the pan, pressing them down and wiggling them around to kind of loosen up and separate the leaves. Leave them upside down and let them cook like that for another 5 minutes, until the leaves/edges are dark and crispy. Using your tongs, transfer artichokes and garlic from the pan to a plate covered in paper towels. Put the artichokes cut sides down at first, if you can, so they can drain a little bit.

Sprinkle them with salt, squeeze some lemon over top, and serve!

Candy for Grown Ups (or Roasted Tomatoes)

roasted tomatoes

Every summer, I get excited about the produce that will soon be available and all the delicious things I can make with it. I’ve already started with the rhubarb. I am waiting impatiently to go to Sauvie Island and pick strawberries. Soon there will be peaches and nectarines aplenty for me to use for things like salsa, smoothies, pies, etc. The other thing I love? Tomatoes. My little sister worked at a tomato stand at various farmer’s markets in Seattle last summer, and is slowly teaching me the joys of all these different weirdly colored tomatoes. But my favorite thing to do with tomatoes is to season them a little and roast them in the oven forever. And last week I got antsy. I couldn’t wait for the perfectly ripe, soft tomatoes to arrive at the markets. So I went to New Seasons and bought a bag of not-the-ripest roma tomatoes. I left them in our fruit bowl for a few days to soften up, and then I made roasted tomatoes.

Simple Roasted Tomatoes

Ingredients

Tomatoes (any kind will do – I usually go for just regular old vine tomatoes or romas or whatever is prettiest looking)
Olive Oil
Garlic
Salt
Dried basil and/or oregano

Instructions

All of the amounts of the ingredients above are based on your personal taste. If you like garlic, use a bunch. If you are trying to cut back on salt, don’t use it. They’re also great without the basil or oregano.

Preheat your oven to 300 degrees. If you have more time to cook, you can heat your oven to 250 degrees. Drizzle some olive oil into a large baking dish. Slice your tomatoes in half and, if you want, cut out the little stem bit. Rub the tomatoes sliced-side down in the olive oil, then flip them so the sliced-side faces up. Mince the garlic and sprinkle it over the tomatoes. Now sprinkle on some salt and whatever other seasoning you want (this is the time for the basil or oregano if you’re using it). Now here’s the fun part: set it and forget it. Throw the suckers in the oven and let them cook for 3-4 hours. I took these ones out at 4 hours because we were leaving the apartment, but they probably could have gone another 30 minutes. You’ll want to check on them after the 3.5-4 hour mark, as the way they cook will depend on the kind of tomatoes and the temperature of your oven. When they’re caramelized and cooked to your liking, remove them from the oven.

I suggest letting them cool enough to eat one before using them for anything else, just so you can taste heaven. After enjoying one all by itself, the rest is up to you: cut them up and put them on a pizza or in a salad, throw them in your food processor or blender for soup (I suggest looking up a recipe so you know what else to add) or pasta sauce. Also, the oil that is still at the bottom of the pan is delicious, so scrape this into whatever container you’re saving them in so you can use it too. These things are amazing. The kids I nanny for didn’t like tomatoes until I made these; I made a giant dish of roasted tomatoes, and they were almost gone by the time their mom got home from work. That’s how hard it is not to eat these all up.

Mom’s Mac and Cheese

Mom's Mac and Cheese

Mom's Mac and Cheese

Jonah here. Mom, I hope you’re reading this.  Everyone else – let me give you a little background.  This was one of my favorite foods as a kid, not the Kraft Mac and Cheese, but the kind my mom would make from this simple recipe. When I was growing up, we usually had it with broccoli, or a salad.

I asked my mom for this recipe when I went off to college, so she wrote it on an index card and I made it many times throughout my 4 years of school. That index card was magneted to my fridge and now lives in Annie’s recipe box in our kitchen. It’s really easy to make, but really delicious. Thanks Mom, for a childhood of yummy dinners!

Susan’s Mac and Cheese

Ingredients

1 lb. pasta – I use penne
2 Tb. butter
Half of a white or yellow onion, diced
2 Tb. all-purpose flour
1/2 t garlic powder, or more to taste
1/2 t salt
1 cup milk
1 cup grated cheddar cheese, packed in

Instructions

Fill a large pot with water, salt it, and bring it to a boil. Add penne and cook till it’s done; drain.

Meanwhile, melt the butter in a pan. Add the chopped onions and cook until browned and soft.

Add the flour, mix until smooth, then sprinkle in garlic powder and salt (if you don’t have garlic powder, feel free to mince up some garlic and add it with the onion at the beginning). Add milk and let it heat up, then add the cheese and mix in until fully melted.

Return the drained pasta to the pot. Pour in cheese sauce and mix in thoroughly. Serve!

Pao Bread! (Brazilian Cheese Bread)

Pao Bread! (Brazilian Cheese Bread)

Pao Bread! (Brazilian Cheese Bread)

Pao Bread! (Brazilian Cheese Bread)

Last summer, a friend of ours (Courtney, seen in the Bread Pudding post) worked selling pao bread at various farmer’s markets around Portland. I had never heard of pao bread before, but oh my goodness it’s delicious. Little puffy buns of cheesy (gluten free) goodness. I’m always a little wary of gluten free food, but trust me, these are great. Anyway, I was hunting around on pinterest this other day and happened on a recipe for homemade pao bread. I had a free couple hours, so I went to the store and bought some tapioca flour and got cooking!

Pao Bread

Ingredients

1/2 cup olive oil
1/3 cup water
1/3 cup milk
1 tsp salt
2 cups tapioca flour
2 tsp minced garlic
2/3 cup freshly grated parmesan cheese
2 eggs (beaten)

Ingredients

Preheat your oven to 375 degrees. In a large saucepan, combine olive oil, water, milk, and salt (no need to whisk).

Put the saucepan over high heat; when the mixture comes to a boil, remove from the heat immediately and stir in the tapioca flour and and garlic. It’s a bit of a pain to mix (I assume due to the way the tapioca flour absorbs the moisture), but it comes together eventually. Let this mixture sit for 10-15 minutes.

After resting, stir the cheese and eggs into the tapioca mixture until well combined. The recipe said the texture will be chunky like cottage cheese. It also said to now drop rounded, 1/4 cup sized balls of the mixture onto an ungreased baking sheet. I had a few issues with these steps. First of all, cottage cheese…ew. Second of all, how are you supposed to “round” something that is the texture of cottage cheese? That sounds hard to do. Third, 1/4 cup was too big. So here are my instructions, drop 1/8 cup dollops onto an ungreased baking sheet.

Now pop them in your preheated oven for 15-20 minutes. The tops of mine didn’t brown (like the recipe said they would), but I gauged doneness by the brownness of the bottoms. You don’t want them too brown, then they’ll be overcooked. But the edges should be perfectly golden. When they’re done, let them cool on a cooling rack before enjoying.