Thomas Keller’s Chocolate Chip Cookies

Thomas Keller's Chocolate Chip Cookies

Thomas Keller's Chocolate Chip Cookies

Thomas Keller's Chocolate Chip Cookies

You know how everyone is always on the hunt for the best chocolate chip cookie? When I was younger, our family friend Anita was known for making the best chocolate chip cookies around. Whenever we went over to her house we (my sisters and I) were excited because we knew we would get those delicious cookies. Despite staying close to her family, I do not have her cookie recipe… Odd.

Anyway, the other day I felt like baking (strange, huh?) and Jonah requested classic chocolate chip. I wanted to do a variation, like those thyme and sea salt chocolate chunk cookies I made a while back. But after having no luck finding anything before heading to the store, I remembered Thomas Keller having a recipe for chocolate chip cookies in the Ad Hoc cookbook. I figured, “Hey, that guy kind of knows what he’s doing,” so I pulled out the recipe and went to the store.

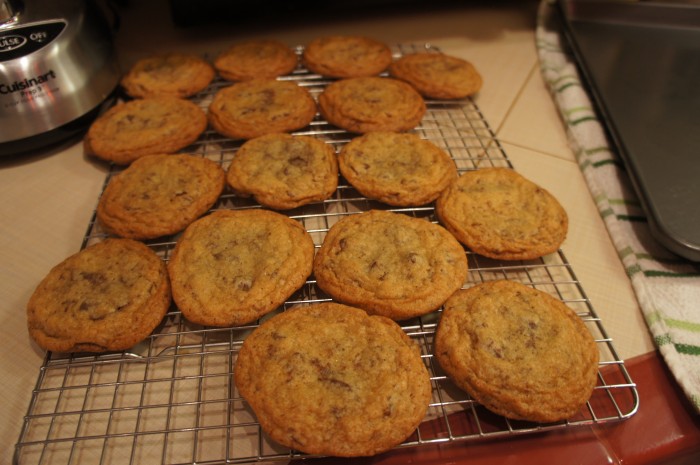
I will tell you now that these are possibly the best chocolate chip cookies I’ve ever had (besides Anita’s). You know the great debate: Crunchy or chewy? These are perfectly both. They are crispy on the edges (thanks to our old friend, butter) and chewy and soft in the middle. Oh my goodness. And they spread out when they bake, so they’re pretty big, which makes you feel like you’re really getting a good portion of cookie when you eat one. And if one seems large enough to be satisfying, you would think it’d be easier to not eat like 10 of them. But it’s not. You just get more full.

Side note: Jonah bought me these wonderful baking sheets for Christmas. The brand is Chicago Metallic; they came in a package with two pans and a cooling rack. These pans need no liner or greasing. Nothing EVER sticks to them (knock on wood). They are heavy duty with a wire around the edge so they don’t warp, and industrial-kitchen sized. I love them. I highly recommend them if you’re looking for new pans.

Thomas Keller’s Chocolate Chip Cookies

Ingredients

2 1/3 cups plus 1 Tbl all-purpose flour
3/4 tsp baking soda
1 tsp kosher salt
5 oz. semi-sweet chocolate (think 55%), cut into chip sized pieces (about 1 1/4 cups)
5 oz. dark chocolate (think 70-72%), cut into chip sized pieces (about 1 1/4 cups)
2 sticks cold unsalted butter
1 cup brown sugar (preferably dark)
3/4 cup granulated sugar
2 eggs

Instructions

Preheat your oven to 350 degrees. Line 2 baking sheets with parchment paper (or just grease them a little bit).

Ok, sorry. Now, sift the flour and baking soda into a medium bowl, and stir in the salt. Usually if a recipe says to sift flour, I ignore it, but I had a lot of time on my hands, and hey, I’m not gonna ignore Thomas Keller. I would say that it made a difference. Put the chips of chocolate you’ve cut in a fine mesh basket strainer to get out all the “chocolate dust.”

Using an electric mixer with the paddle attachment, beat half of the butter (1 stick that has been cut up into small pieces) until it’s smooth and creamy. Now add the sugars and the rest of the butter (also cut into small pieces) and beat until well combined and creamy. Add the eggs, one at a time, mixing well between them. Be sure during all of this to be scraping down the sides of the bowl to get everything well-incorporated. Now add the dry ingredients and mix them in.

Thoroughly fold in the chocolate chips. It’s a little tricky because the dough is really thick, but stick with it, it’s worth it. You wouldn’t want those cookies from the bottom of the bowl to not have any chocolate in them, would you? No. No you would not. At this point you can wrap the dough up and refrigerate it for up to 5 days or freeze it for 2 weeks. But I just don’t understand, you’ve gotten this far, why would you not just make the damn cookies at this point?

If you’re continuing on, take about 2 tablespoons of dough, roll into a ball, and place it on the cookie sheet. You only want to put about 8 on a sheet because these suckers need their space. They spread out for real. Leave 2 inches between each ball of dough. Bake for 12 minutes, turning the cookie sheet halfway through baking. Let the cookies cool on the pan for a couple minutes before removing them to a cooling rack to cool the rest of the way (if you can wait that long). Enjoy with a glass of cold milk.

French Onion Soup

French Onion Soup

French Onion Soup
French Onion Soup

French Onion Soup

Yesterday, I was craving French Onion Soup. I found a recipe on Smitten Kitchen (duh) and luckily, we had most of the ingredients except wine, broth, and swiss cheese. After work, I swung by the grocery store, picked up what I needed, and I was ready to go. I halved the recipe, but I’ll give you the original in case you’re cooking for more than just two people (but half was the perfect amount for me and Jonah).

French Onion Soup

Ingredients

1 1/2 pounds (5 cups) thinly sliced yellow onions
3 tablespoons unsalted butter
1 tablespoon olive oil
1 teaspoon table salt (or less)
1/4 teaspoon granulated sugar
3 tablespoons all-purpose flour
2 quarts beef stock (mushroom stock is a good vegetarian substitute)
1/2 cup dry white wine
Freshly ground black pepper
1 to 2 cups (to taste) grated Swiss or Gruyere cheese
Butter
Crusty bread, sliced into 1 inch thick pieces toasted until hard

Instructions

Melt the butter and oil together in a large saucepan over medium-low heat. Add the onions, tossing to coat them in the butter/oil, and spread them so they cover the bottom of the pot. Reduce the heat and let the onions cook, covered, for 15 minutes. You don’t need to stir them during this step.

After 15 minutes, turn up the heat a little bit and stir in the salt and sugar. Cook them for 30-40 minutes until they have become a lovely golden brown, stirring frequently so they don’t burn. Yes, 30 minutes seems like a long time to stir onions, but allowing them to caramelize well will make for really nice flavor later on and will make the soup taste much more complex and, well, just better.

Once the onions are browned, add the flour, stirring it in well, and cook for another 3 minutes. Now add the wine (all at once) and the stock, a bit at a time, stirring between additions. Add a little salt and pepper. Be sure not to over-salt! The stock is plenty salty and the cheese on the gratinée is plenty salty, so don’t overdo it now. Once the stock is all in, bring the pot to a simmer and let is cook, partially covered, for another 30-40 minutes. And stir in the cognac if you’re using it.

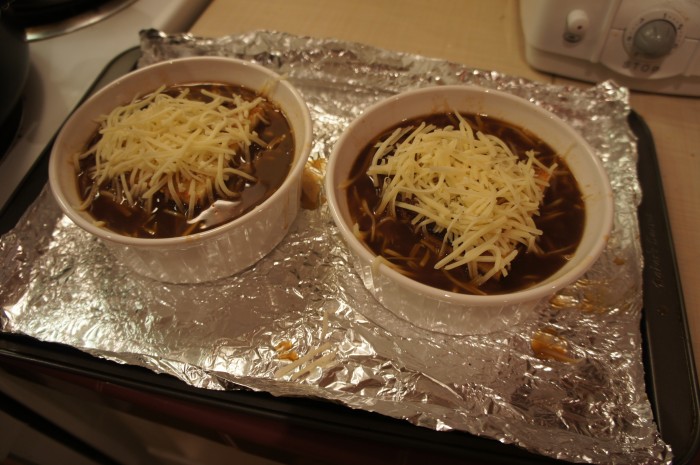
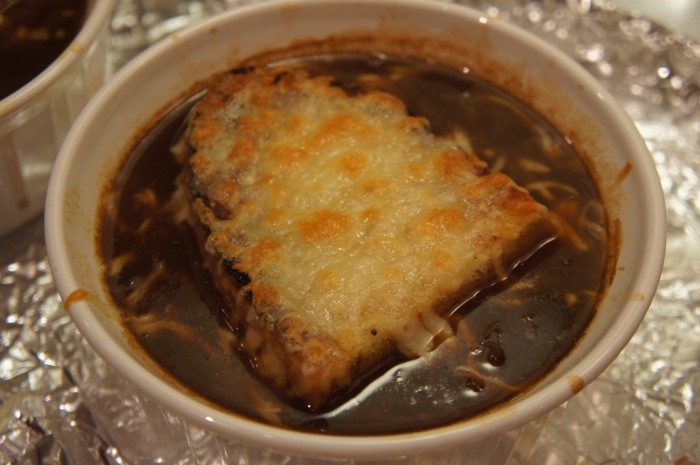
Now for the gratinée. Jonah and I didn’t follow instructions, but rather chose to just try out our own process and see if it worked. It did. Turn on your broiler (we put ours on high). Pour the soup into oven safe bowls, and stir in about 1 Tbl of the cheese. Toast whatever bread your using (we used the bread I made in the previous post) until it’s hard. Butter the toast, and set it afloat on the soup. Now put on as much cheese as your little heart desires. We probably did 1/3 of a cup per bowl of soup. Put the bowls on a foil-lined baking sheet, and pop it in the oven. I watched the soups in the oven, and when the cheese was bubbling and starting to turn golden brown, I pulled them out of the oven. Be careful as the bowls will be HOT. Put them on plates and warn whoever is eating them not to touch the bowl, only the plate. Serve and enjoy!

Country Bread

Country Bread

Country Bread
Country Bread

Country Bread

The reason I started making bread is because I’ve always wanted to make one of those crusty light loaves that you find at Grand Central Bakery or Macrina Bakery or Lovejoy Bakers. I’m getting closer, starting with simple white loaves and now moving on to this Country Bread. One day I know I’ll get to one of those crispy on the outside, light and soft on the inside, perfectly sour sourdoughs.

Anyway, my aunt Judy sent me a cookbook (as well as a book about how to write recipes) when I started this blog. It’s called “Flour” by Joanne Chang, who is the chef at a bakery in Boston (where my aunt lives). I’ll admit, many of the recipes in this cookbook look a little daunting, but when I saw the recipe for this bread I knew I had to try it.

WARNING: This is not a quick bread recipe. You have to make the sponge, let it sit overnight, then make the bread, which also has to sit and rest for many hours. It is relatively easy, but there’s lots of waiting around.

Country Bread

Makes two loaves

Ingredients

Sponge

3/4 cup water
1 1/4 cups unbleached all purpose flour
1/4 teaspoon active dry yeast

Bread

1 1/2 cups water, body temperature
2 cups unbleached all purpose flour, plus some for working and sprinkling
2 cups bread flour
12 oz bread sponge
pinch of active dry yeast
2 tsp kosher salt
1 tsp sugar
a handful of medium-coarse yellow cornmeal for the baking sheet

Instructions

Sponge

Alright, let’s start with the sponge, hm? In a bowl, stir together the water, 1 cup of the flour, and the yeast until well combine. Place in a covered container (I just covered the bowl with a dishtowel) and leave at room temperature for at least 4 hours and up to 8 hours. After 4 hours (or however many), you can stir in the remaining 1/4 cup of flour. The sponge will stiffen up with the addition of the flour into a very loose dough. Re-cover it (this is when I transfered it to a tupperware) and leave it in the fridge overnight.

Bread

*The next morning*

Get out your electric mixer (or a bowl and a wooden spoon) and stir together the water, 2 cups of all purpose flour, and the 2 cups of bread flour for about a minute, or until you have a “shaggy, stiff dough.” I love her writing. Cover the bowl with plastic wrap and let sit for 10 minutes.

After 10 minutes, remove the plastic wrap and add the sponge, yeast, salt, and sugar. Mix for 3-4 minutes or until they are incorporated. Now, according to Chef Chang, the dough should be a little bit sticky but still smooth  and feel “like an earlobe when you grasp a bit between your fingers.” Oh… ok.

If the dough is stiffer than earlobe status, add some water 1 Tbl at a time. If it’s not stiff enough, add all-purpose flour 1 Tbl at a time. I ended up needing to add about 3 Tbl of flour to my dough. Also, I had to stop the mixer a number of times to scrape the dough off the dough hook.

Now, lightly oil a large bowl, and transfer the dough to it. Lightly cover the bowl with an oiled piece of plastic wrap and let it sit in a warm place for 2-3 hours. The dough will rise a little bit and will be loose and relaxed and a little sticky.

After that wait, turn the dough out onto a floured work surface. Divide the dough in half with a knife and shape each half into a ball. The easiest way to do this is to tuck the edges of the dough underneath itself, continuing to tuck until it naturally gathers into a ball with a nice taut surface. Sprinkle the cornmeal on a baking sheet and place the loaves on it, at least 3 inches apart. Cover them lightly and completely in more plastic wrap and let them sit for another 2-3 hours.

Phew. We’re almost done. While the dough is resting (towards the end of the rest), preheat your oven to 500 degrees, with a rack in the center and a rack below that one. When the loaves are done resting, sprinkle the tops with about a teaspoon of flour each, and slash the loaves with a knife. The best way to do this is to use a sharp paring knife that has been dipped in water (to keep it from dragging). You’ll want to use the tip of the knife and use quick, sure movements. You can do whatever design you’d like (I did a square and a line down the middle with lines coming off of it). If you don’t slash the bread, it’ll burst on it’s own, which might also look cool.

Anyway, after you’ve slashed it, put the pan in the oven. On the rack below the bread, put a rimmed baking sheet filled with 2 cups of water (the steam creates a “nice moist atmosphere for your bread to grow”). Bake for 35-40 minutes, or until the loaves are a dark golden brown on top (and make a hollow sound when you thump them on the bottom, but who wants to pick up a 500 degree loaf of bread and knock on it?).

Transfer the loaves to a wire rack and let them cool for at least 1 hour. These store really well just in a plastic or paper bag on the counter. They don’t go stale as quickly as some crusty loaves, which was nice because it’s hard to burn through 2 loaves of bread with just 2 of us in the apartment. The bread was really good. A little sweet and a little tangy, and quite dense. At first, I was actually bummed about how dense it was (I wanted something light with lots of holes but I realized that with all the extra flour I added, that probably wasn’t gonna happen), but after eating a slice with butter, I was really digging it. We also used this bread to make the gratinées for the French Onion Soup we had for dinner last night (which I’ll be posting very soon).

Pasta with Fresh Pesto

Pasta with Fresh Pesto

Pasta with Fresh Pesto

So last week I was in tech and then the run of a show. I had to make really quick dinners because by the time I got done nannying or doing whatever I was doing, I usually had only an hour to cook and eat before heading out to the theater. I pulled out the Alice Waters cookbook and looked for something incredibly quick and delicious. I came across a recipe for fresh pesto (which takes like no time at all to make), and immediately got very excited. Many years ago, a friend of mine named Sierra studied abroad in Italy. When she returned she came over to our house and made us fresh pesto, and man, there is nothing like pasta with fresh pesto. So, with that delicious meal in mind, I set out on my own pesto expedition.

Pasta with Fresh Pesto

Ingredients

1 lb dry pasta
1 garlic clove
salt
1/4 cup lightly toasted pine nuts
1/4 cup (or more) freshly grated parmesan cheese
1 cup lightly packed basil
1/2 cup olive oil

Instructions

First, you’ll want to boil a big old pot of water that has been abundantly salted. While that’s boiling, you can get started on the pesto. Now the cookbook said to use a mortar and pestle but a) who has those anymore and b) why use those when you have a food processor? If you don’t have a food processor, then I suggest you return to the mortar/pestle technique.

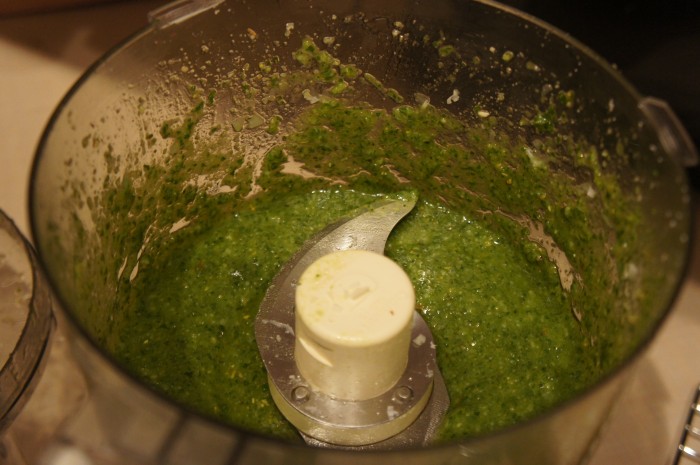
In your food processor, combine garlic and salt, pulse. Then add the pine nuts, pulse again until finely minced. Now add in the cheese, pulse again. Ready for the green? Coursely chop your basil, and add it to the food processor, and… you guessed it… pulse! Now add your olive oil and pulse again.

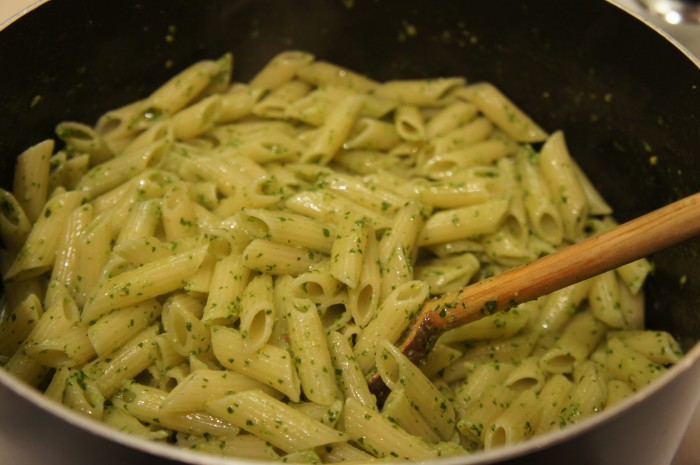
While you’ve been doing all this pesto stuff, hopefully you’ve not forgotten about cooking your pasta. The recipe in the book said to reserve 1 cup of pasta water and add it along with the pesto, but I did not do this… Mostly because I didn’t read the recipe (STUPID ANNIE. You should always ALWAYS read through a recipe completely before you make it). I think I just figured pasta + pesto = delicious, what else could you possibly need to do? Anyway, it all still worked out just fine. As I was saying, cook your pasta, strain it (reserving pasta water if you’d like), and put it back in the pot with the pesto. Mix it up and serve with a light dusting of parmesan cheese.

Pao Bread! (Brazilian Cheese Bread)

Pao Bread! (Brazilian Cheese Bread)

Pao Bread! (Brazilian Cheese Bread)

Pao Bread! (Brazilian Cheese Bread)

Last summer, a friend of ours (Courtney, seen in the Bread Pudding post) worked selling pao bread at various farmer’s markets around Portland. I had never heard of pao bread before, but oh my goodness it’s delicious. Little puffy buns of cheesy (gluten free) goodness. I’m always a little wary of gluten free food, but trust me, these are great. Anyway, I was hunting around on pinterest this other day and happened on a recipe for homemade pao bread. I had a free couple hours, so I went to the store and bought some tapioca flour and got cooking!

Pao Bread

Ingredients

1/2 cup olive oil
1/3 cup water
1/3 cup milk
1 tsp salt
2 cups tapioca flour
2 tsp minced garlic
2/3 cup freshly grated parmesan cheese
2 eggs (beaten)

Ingredients

Preheat your oven to 375 degrees. In a large saucepan, combine olive oil, water, milk, and salt (no need to whisk).

Put the saucepan over high heat; when the mixture comes to a boil, remove from the heat immediately and stir in the tapioca flour and and garlic. It’s a bit of a pain to mix (I assume due to the way the tapioca flour absorbs the moisture), but it comes together eventually. Let this mixture sit for 10-15 minutes.

After resting, stir the cheese and eggs into the tapioca mixture until well combined. The recipe said the texture will be chunky like cottage cheese. It also said to now drop rounded, 1/4 cup sized balls of the mixture onto an ungreased baking sheet. I had a few issues with these steps. First of all, cottage cheese…ew. Second of all, how are you supposed to “round” something that is the texture of cottage cheese? That sounds hard to do. Third, 1/4 cup was too big. So here are my instructions, drop 1/8 cup dollops onto an ungreased baking sheet.

Now pop them in your preheated oven for 15-20 minutes. The tops of mine didn’t brown (like the recipe said they would), but I gauged doneness by the brownness of the bottoms. You don’t want them too brown, then they’ll be overcooked. But the edges should be perfectly golden. When they’re done, let them cool on a cooling rack before enjoying.