Spring

Herb and Lemon Shortbread // Serious Crust

Herb and Lemon Shortbread with Straus Family Butter {Sponsored}

Herb and Lemon Shortbread // Serious Crust

I love butter. Let’s be clear here, I don’t like to grab a stick and eat it like a candy bar, the way my mother used to. Certainly not. But there is something to be said for a good piece of sourdough covered in melty butter. Or a roast chicken that’s been slathered in butter and salt and pepper. You know what I mean?

Recently, Jonah and I have become more interested in buying “good” butter. Butter is butter – it’s good. But we were wanting to buy butter made with milk from grass-fed cows. It started a couple months ago when our roommate’s dad, Bruce, came to visit. Bruce is very knowledgeable about diet and nutrition, and while he was here we had many conversations about foods that people think are bad for you (aka butter) but aren’t really if you eat them well. Good fats are good for you, guys! Things like good olive oil, good butter, even chicken livers (fatty, yes, but full of nutrients), are things we can enjoy without feeling guilty about it.

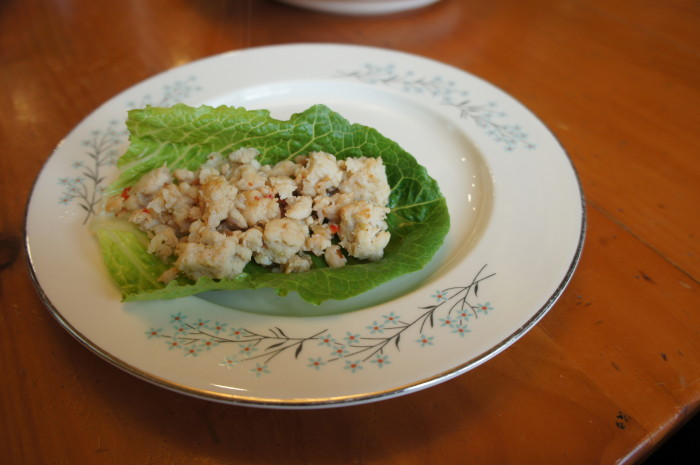
So when I was sent some coupons for Straus Dairy products, I knew immediately I wanted to try their butter. I started with ye old piece of toast. What better way to judge a butter’s character? It was good. It was richer and creamier than your average butter. So I took things to another level. I had bought some chicken livers the day before, so I made some chicken liver paté (Julia Child’s recipe, in case you were interested). And let me tell you, it was some incredibly creamy paté.

Let’s talk for a second about Straus Family Creamery. After spending a fair amount of time on Straus’s website, perhaps one of the things I find the coolest is that they were the first 100% certified organic creamery in the country. For real! Evolving from a family dairy farm, Straus Family Creamery was officially founded in 1994, when Albert Straus saw going organic as a way to differentiate himself and save the state of local family farming. The butter has 85% butterfat content, and is less moist than normal butter. What does this mean for us bakers? It means it’ll brown more evenly and be more flaky. And for the cooks? It doesn’t burn as easily. Now I know, this butter ain’t cheap. But when you’re making butter heavy things like paté or shortbread, I think it’s worth spending the extra few dollars. You don’t skimp on a pork shoulder or buy cheap-o chocolate for your chocolate chip cookies, do you? I thought not.

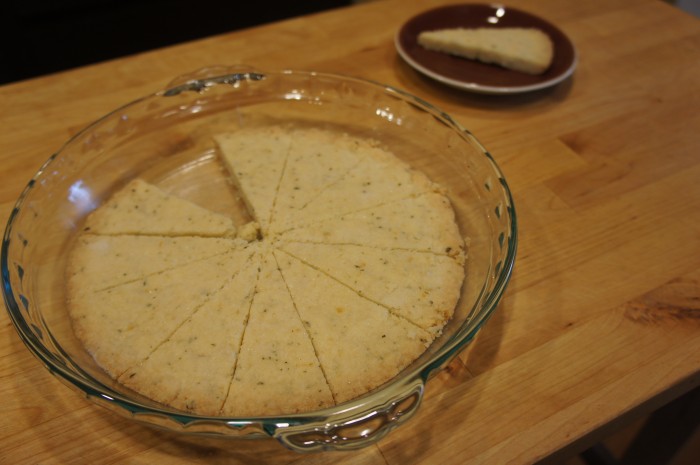
Enough waxing poetic about butter, Annie. Let’s get on to this recipe for herb and lemon shortbread. On our front steps, we have a little pot of herbs that we carried with us from our last home. Our thyme isn’t looking so hot, but the sage is coming back strong this spring. And every time I walk by that pot, I start thinking of things I could do with those herbs. This week, I had an idea for this herb and lemon shortbread. And lo and behold, I had one stick of this beautiful butter left. It was perfect.

Herb and Lemon Shortbread

Note: I used solely sage for this recipe, but any combination of sage, rosemary, and thyme would be great, I think.

Ingredients

1 cup flour
1/4 tsp salt
2 Tbl plus 1 tsp sugar
1-2 tsp freshly chopped herbs (I used 1 tsp of freshly chopped sage, and wish I had used more)
1/2 tsp lemon zest
1 stick (8 oz) Straus Family butter, unsalted, at room temperature

Instructions

Preheat your oven to 350 degrees.

Sift flour and salt together in a medium bowl, set aside. In a small bowl, combine 2 Tbl sugar plus chopped herbs and lemon zest. Rub these ingredients together with your fingers – this will make sure the sugar absorbs the oils from the herbs and lemon, making it perfectly aromatic. Add the sugar mixture to the flour, and stir until combined. Cut the butter into chunks, and combine it with the flour/sugar mixture with a fork or a pastry knife, blending until you’ve got a beautiful soft dough.

Gently press the dough into a 9×9 baking dish or a 9-inch pie plate. Sprinkle the remaining teaspoon of sugar over the top. Bake until it’s golden brown around the edges. Once you’ve removed it from the oven, carefully cut it into wedges or squares or whatever shape you like while it’s still hot. Allow to cool before separating it. It helps to run the knife along the lines again.

I think this shortbread would make a fantastic base for lemon bars or rhubarb bars or any kind of bar topped with curd. Just saying.

This is a sponsored post. I was given coupons for Straus Dairy products, and all of the opinions below are my own.

Rhubarb Poppy Seed Bread | Serious Crust by Annie Fassler

Rhubarb Poppy Seed Bread

Rhubarb Poppy Seed Bread | Serious Crust by Annie FasslerRhubarb Poppy Seed Bread | Serious Crust by Annie Fassler
Rhubarb Poppy Seed Bread | Serious Crust by Annie Fassler

Update: It is spring (nearly summer, really) 2018, and I thought this recipe could use a little love. It is one of the recipes I most frequently make from this here blog, and I think perhaps that may go for some other folks too. You’ll find one new ingredient and some new instructions that help the rhubarb distribute more evenly throughout the loaf instead of floating to the top the way they used to do, but it’s still perfectly moist.

Hi, my name is Annie. I have a problem. The problem is rhubarb. I seemingly can’t stop thinking about it, can’t stop talking about, can’t stop cooking with it. Between the baked rhubarb at Passover, the rhubarb bourbon soursthe rhubarb themed weekend finds post, and now this poppy seed bread sprinkled with rhubarb, I’m starting to worry myself. But oh well. It tastes too good to stop.

A couple weeks ago, I was wanting to make some poppy seed bread, but I wanted it to be not just your normal old poppy seed bread. I prefer almond poppyseed to lemon poppy seed, so I knew I wanted to lean that way. I also knew I wanted to add fruit. And once I thought of the tartness of the rhubarb combined with the nuttiness of the almond and the poppy seeds, I knew I had to try it.

If you’re interested in a sweeter flavor combination, try subbing strawberries for the rhubarb. But really, you should try it at least once with rhubarb. I swear, it’s really really good.

I first made this recipe for a brunch with my roommates, and between the six of us we finished a whole loaf. In one sitting. It wasn’t even hard. The second loaf quickly disappeared over the next two days. The house smelled incredible, even up on the third floor, and even out on the second floor deck. This bread is a perfect quick bread for the spring (and summer) – it’s unique and dotted with fruit. I recommend bringing it to a friend’s house for brunch: it gets it out of your kitchen (yeah, it’s that dangerous), and they will think you are brilliant.

Poppy Seed Bread with Rhubarb

Makes 2 loaves

Ingredients

1/4 and 1 3/4 cups sugar, divided
2 1/2 cups rhubarb, cut into a half inch dice
1.5 cups AP flour
1.5 cups bread flour
1 1/2 tsp salt
1 1/2 tsp baking powder
3 eggs, lightly beaten
1 1/4 cups olive oil
1 1/2 cups milk, preferably 2% or whole
2 tsp almond extract
2 tsp vanilla extract
2 1/2 Tbl poppy seeds
2-3 Tbsp turbinado sugar (optional)

Instructions

Preheat your oven to 350 degrees. Grease and flour two bread pans. In a bowl, toss the rhubarb with 1/4 cup of sugar to coat. Set aside.

Combine the remaining sugar, flour, bread flour, salt, and baking powder in a mixing bowl, whisking to combine. Set aside.

In the bowl of a stand mixer, combine the eggs and olive oil. Mix on medium speed with the whisk until emulsified, 1-2 minutes. Add in the milk and two extracts and mix again until smooth. With the mixer running, add the poppy seeds to the bowl. When they look to be evenly distributed, stop the mixer and scrape down the sides of the bowl, reaching all the way to the bottom – you wouldn’t want any part of the batter to be missing poppy seeds! In two batches, mix in the dry ingredients, mixing until smooth and uniform.

You’re going to pour the batter into the 2 pans in 3 batches, so start by simply pouring enough to heavily cover the bottom of each pan. Leaving any juices in the bowl, split half of the rhubarb between the two pans (so 1/4 of the rhubarb in each pan). Pour more batter on top of this (but not all!), add more rhubarb, then finish by covering all the rhubarb with the rest of the batter. Scatter the turbinado sugar over the batter.

Bake for 60-75 minutes, or until the bread is golden brown on top, and a knife or skewer inserted comes out clean.

Allow to cool for 20 minutes in the pans, then run a knife around the edge of the pan, and gently turn the loaves out onto a cooling rack. Allow to cool completely, 20-30 more minutes. Slice and enjoy.

Thai Larb // Serious Crust

Thai Larb with Lettuce Wraps

Thai Larb // Serious CrustThai Larb // Serious Crust

A couple of weeks ago, my roommates had a problem. I had gone with them to the climbing gym, and on our way home, we decided to stop at the store to get some food for lunch. We were thinking about what we already had in the house that we could use, and they started talking about how they had too much lettuce. See, they’re more spinach eaters (in salads and scrambles and such) than lettuce eaters, and so had a head of lettuce that they didn’t particularly want to eat or know what to do with. I had an idea: Thai larb.

This Thai larb, a chicken dish with lettuce wraps, immediately popped into my head. I quickly looked up a couple recipes on my phone, and grabbed the ingredients at the store. It was a warm day, and this bright, tart, crunchy dish was perfect. Plus, they were impressed that I made lettuce into something so delectable.

Today it was 85 degrees in Portland, and tomorrow is supposed to be even hotter. In fact, it’s supposed to be beautiful (and hot) until Saturday. My suggestion? Make this Thai larb: it’s so refreshing on a hot day. I’d serve it with maybe a green papaya salad and rice (sticky rice if you can swing it).

Thai Larb with Lettuce Wraps

Serves 4

Ingredients

Dressing

1/3 cup lime juice
1 Tbl fish sauce
2 Tbl light brown sugar
1/2 tsp Sriracha

Chicken

2 lbs skinless boneless chicken breasts, cut into roughly 1-inch pieces
1 large shallot, chopped
1 stalk lemongrass , thinly sliced (see this article for instructions on prepping your lemongrass)
1-2 cloves garlic, thinly sliced
1 red chile, jalapeño, or thai chile, depending on your desired spice level
2 tsp fish sauce
1 tsp kosher salt
3 Tbl vegetable oil
1 head romaine or iceberg lettuce, rinsed
Cilantro for garnish (optional)

Instructions

To make the dressing, stir all of the ingredients in a bowl until well combined. Set aside.

In a food processor, combine the chicken, shallot, lemongrass, garlic, chile pepper, fish sauce, and salt. Add 1 Tbl of oil, and pulse until the chicken is finely chopped, or how you would imagine ground chicken would look. In a large nonstick pan, heat the remaining 2 Tbl of oil over medium-high heat. Once the pan and oil is hot, add the chicken mixture and cook, breaking up into smaller pieces with your wooden spoon, until the chicken starts to turn golden brown and is cooked through.

To eat your larb, spoon some chicken onto a lettuce leaf, and top with the dressing and a little cilantro if you like. Be sure to eat over a plate – I can guarantee there will be dripping.

Kale Stem Pesto // Serious Crust by Annie Fassler

Kale Stem Pesto

Kale Stem Pesto // Serious Crust by Annie FasslerKale Stem Pesto // Serious Crust by Annie Fassler

I often find myself frustrated with how much stuff I put in my compost. I guess I should stop right there and say, at least I have a compost, right? The beautiful city of Portland has roadside pickup every week, making it so wonderfully easy to make more environmentally conscious choices. There aren’t a lot of cities that do that. Anyway, I know I could save some bones and carrot tops and onion tops and parsley stems for stock… But I just don’t do it. I mean, I do sometimes… But not as often as I should. And there’s one thing lately that I have always felt guilty after putting it in the compost: kale stems. Jonah and I eat a fair amount of kale – usually sautéed with butter and garlic or something like that, sometimes in a salad. But I always am frustrated at the toughness of the stems, and wish I could do more with them.

After a little research and looking around, I mostly found that people who do use their kale stems either sauté them with their kale, simply adding the stems first so they cook for longer, or put them in smoothies. I wasn’t really into either of these options, so I made myself a third one. With the all-in pesto in mind, and a container of pine nuts whining from my pantry, I got to work making some kale stem pesto. I wasn’t planning on sharing this pesto here, since the recipe is really improvised, but I got so many comments and questions about what it was when I posted pictures on my Instagram and Facebook, that I thought, why not? This pesto is certainly a product of whatever you’ve got around, which is generally my theory about pesto. Herbs are good, parmesan is good, and other than that, you can kind of go crazy. Nearly any kind of nut will work, any greens, and you can really play until you find some flavors that you like. I didn’t do any measuring here – mostly just throwing in handfuls of this or that – but below is an approximation of what I used.

The beautiful thing about pesto is that it can be a complete reflection of your kitchen: if you just went to the market and have some radish greens, use them. If you don’t have any pine nuts but plenty of pistachios or walnuts, use them. If it’s raining and you want something heartier, add more cheese.

We tossed our kale stem pesto with fresh spaghetti (you can find a recipe here) and topped it with sliced grape tomatoes, which added a really nice juicy brightness. I also like to make a thick piece of toast and slather it with fresh pesto.

Kale Stem Pesto

Ingredients

1 bunch of kale stems, plus probably the equivalent of 1 leaf of kale
1 cup spinach
1/4 cup parsley
~ 3/4 cup pine nuts
Parmesan cheese
Garlic
Olive oil
Salt

Instructions

Fill a small pot halfway with water, salt well, and bring to a boil. Roughly chop kale stems into about 1/2 – 1 inch pieces. Add to boiling water, and cook until stems are easily pierced with a knife. Drain and cool.

In the bowl of a food processor (or blender), combine kale stems, a few small chunks of parmesan, about half the pine nuts, 2 cloves of peeled garlic, and a few glugs of olive oil. Pulse to combine. Add spinach, some parsley, and a hefty sprinkling of salt. The key here is to taste and add. If you want a little more spice, add another clove or two of garlic. If you want it creamier, more nuts, and olive oil. If you want it greener, add more spinach and parsley, or some fresh basil or chard if you’ve got some around.

Rhubarb Bourbon Sour // Serious Crust by Annie Fassler

Rhubarb Bourbon Sour

Rhubarb Bourbon Sour // Serious Crust by Annie Fassler

Sometimes you have a week that is hard, but also totally reviving. The beginning of last week was tough, but things quickly got better: good food was made and fun was had and cocktails were made. And an old friend from college came to visit, which always is exciting and soothing at the same time. Isn’t it nice when people who knew you when (“when” being just a few years ago in this case, but still) can kind of ground you and make everything seem ok? That happened. It was nice.

But before she came to visit, and before there was weekend and all that, there was this cocktail. I had finished the actual rhubarb from the dessert I made for Passover, but I had a bunch of this sour syrup left over. And I had bought a bottle of Bulleit bourbon. So, you know, rhubarb bourbon sour time it is. With a little research and a little improv, Jonah and I whipped up this drink. If you don’t have sour rhubarb syrup laying around, you can make it pretty easily by following a rhubarb simple syrup recipe like this one or this one, but I would cut the sugar so that the tang of the rhubarb can really shine.

Rhubarb Bourbon Sour

Makes 1 cocktail

Ingredients

1 shot (1.5 oz) bourbon
juice from 1/2 lemon
1 tsp powdered sugar (or half a shot of simple syrup) – Note: if you are making rhubarb simple syrup from one of the recipes above, you can nix this sweetener part, or add it to taste.
1/2 shot rhubarb syrup
1 egg white

Instructions

Combine all ingredients in a shaker without ice, shake for about 10 seconds. Add ice, shake thoroughly. Pour into glass. Sip and enjoy. Yeah, it’s that easy.

Cinnamon Raisin Bread // Serious Crust by Annie Fassler

Cinnamon Raisin Bread

Cinnamon Raisin Bread // Serious Crust by Annie Fassler

I like being home. Traveling the world is awesome, don’t get me wrong. I will happily go on adventures like the one to Vietnam any time. But there is something about coming home to your own bed, your own shower, and your own kitchen. I feel like I need to give all my kitchen tools little hugs and tell them I’ve missed them. Which, at this point, I’ve basically done, because I’ve been cooking up a storm this week.

Portland, however, is being slightly less welcoming than my kitchen. Mostly just in its weather-related mood swings. Seriously, this whole week has been days of sporadically alternating sunshine and rain. Sometimes each lasts 5 minutes, sometimes an hour. But it’s making it awfully hard to cook. What I’m going to make is always determined by my mood, which is often influenced by the weather. Between the rain and sun breaks, I can’t decide if I should be making spring recipes or winter recipes.

This cinnamon raisin bread is the perfect balance between spring and winter, though I already know I’ll be making it year round. It’s homey and warming thanks to the springy crumb and the way it fills your kitchen with the most comforting smell. But the raisins and cinnamon bring a little fruitiness and fun to the mix, a little surprise if you will. This isn’t just plain ol’ bread, you know. This has a beautiful swirl of cinnamon sugar and beautifully juicy pops of fruit throughout it.

This recipe made two loaves, and I thought for certain I’d freeze one loaf, because my roommates just don’t usually eat that much bread (unless it’s beer bread). But I was wrong. In two days, we are down to half a loaf left. Everyone has been enjoying this bread, toasted, slathered with butter, or raspberry rhubarb jam, or nutella for breakfast and dessert and a snack here and there.

Point is, make this bread and your house will smell like heaven, your friends will love you, and you’ll be perfectly toeing the line between the seasons.

Cinnamon Raisin Bread

Makes 2 loaves

Ingredients

2 1/4 tsps (1 package) dry instant yeast
2 1/4+ cups warm water
3 Tbl and 1/4 cup granulated sugar, divided
1 Tbl salt
3 Tbl butter
6 -7 cups all-purpose flour
1 cup raisins
canola/vegetable oil
1 Tbl cinnamon

Instructions

In the bowl of an electric mixer (or not. If you don’t have one, this can easily be made with the strength of your own two arms.) combine 1/2 cup warm water, the yeast, and 1 Tbl of sugar. Set aside and let sit until it’s foamy. In another bowl, cover the raisins with warm-hot water, at least 2 cups. This step is optional, but it will plump the raisins, making them a bit juicier in the bread. After about 3 minutes, pour 1 3/4 cups of the raisin water off into a measuring cup and discard the rest. Pour the raisin water into the mixing bowl with the yeast, in addition to 2 Tbl sugar, the salt, 2 Tbl melted butter, 3 1/2 cups of flour, and all of the raisins. Mix with the paddle attachment until thoroughly combined, adding up to 3 more cups of flour until the dough is smooth enough to handle, but still moist. Switch from the paddle attachment to the dough hook, and knead for about 7 minutes (10 minutes if you’re kneading by hand). Dump the dough out onto a floured surface, coat the mixing bowl with canola or vegetable oil, and put the dough back into the bowl, turning it to coat, and cover the bowl with a clean dishtowel. Set the bowl in a warm spot (I like to turn on the light over my stove and set it under that) and let it rise for about an hour, or until it’s doubled.

In a small bowl, combine the remaining 1/4 cup sugar and 1 Tbl of cinnamon and mix well. Butter two bread pans. When the dough has doubled, remove it from the bowl onto a floured surface and punch it down, then divide it in half. Roll out one half of the dough into a rectangle that measures roughly 16 by 8 inches. Once rolled out, sprinkle the dough with 1 Tbl of water, and half of the cinnamon sugar mixture. Roll the dough up starting from the short end, and pinch the seam shut. Drop the roll of dough into one of the greased loaf pans. Repeat with the second half of dough. Brush the top of both loaves with the remaining 1 Tbl of melted butter, and cover them again with a clean dishtowel to let them rise for another hour in a warm spot.

About 15 minutes before your bread is done rising, preheat your oven to 425 degrees. Bake the bread for 30 minutes, or until the loaves look beautiful dark brown on top. Remove the loaves from the pans (beware, as cinnamon sugar may have oozed and become rather sticky – aprons are your friend) and set on a cooling rack. I recommend slicing into one of these bad boys when it’s still pretty warm. You can toast it and put a nice layer of cream cheese on top, like I did with my cinnamon raisin bread when I was younger, but a little butter will do nicely as well. Enjoy.

Baked Rhubarb with Lemon and Cardamom // Serious Crust by Annie Fassler

Baked Rhubarb with Lemon and Cardamom

Baked Rhubarb with Lemon and Cardamom // Serious Crust by Annie Fassler

Baked Rhubarb with Lemon and Cardamom // Serious Crust by Annie Fassler

It’s raining in Portland. I know, surprise, surprise. But it wasn’t that long ago that the sun was shining and I even got a sunburn. Seriously! Last weekend, Jonah’s mom and Grandma were in town for the day, and we took them to the PSU Farmer’s Market, which has got to be one of my favorite things about Portland. The sun was shining, I wasn’t even wearing a jacket, and there was beautiful crimson rhubarb everywhere! Rhubarb has got to be one of my favorite ingredients of all time, so I was excited, to say the least.

As I was getting ready for Passover dinner on Tuesday, I decided to nix the matzo crunch in favor of something a little more reminiscent of springtime: some baked rhubarb. After doing a little recipe hunting and finding this recipe on Food52 and this recipe on Orangette, I decided to do a little adapting. This recipe is so easy and delicious – I love the slightly sour flavor of the rhubarb and the hint of lemon, cardamom, and earl grey. I balanced the tartness with some fresh whipped cream, but ice cream, fresh ricotta, or yogurt are also great options.

Baked Rhubarb with Lemon and Cardamom

Ingredients

6 cups rhubarb, cut into 1-inch pieces
1 cup granulated sugar
1 meyer lemon, juiced
1/8 tsp cardamom
3/4 cup steeped and cooled earl grey tea

optional: fresh whipped cream, ice cream, fresh ricotta, or yogurt for serving

Instructions

Preheat your oven to 350 degrees. In a baking dish, combine rhubarb, sugar, lemon juice, cardamom, and tea. Stir to combine. Bake for 15 minutes, stir, and bake for another 15 minutes. Remove from oven, and allow to cool. You can serve the rhubarb warm, room temperature, or chilled, all are wonderful. Yes, that’s it. Can you believe how easy this is?

P.S. The leftovers, if there are any, taste delicious stirred into your yogurt and granola the next morning. Or on top of pancakes. Just saying.

Simple Meringues // Serious Crust by Annie Fassler

Simple Meringues from Leftover Egg Whites

Simple Meringues // Serious Crust by Annie Fassler

I loved meringues when I was a kid – the incredible sweetness, the way they just melt in your mouth, the way they sound kind of like styrofoam (a weird thing to like, I know), and the delicate poofy shapes they came in. I remembered making them once when I was in middle school, and getting the sticky batter all over my shirt and fingers and face.

While I don’t feel as passionately about meringues as I did when I was younger, I still enjoy them. I still love how as soon as you get a crumb on your tongue, it seems to be gone almost as quickly as it came. I love the intense sweet taste, and how it lingers in your mouth. I love the slight nuttiness that comes from the slow caramelization of the sugar.

After I made the mint matcha ice cream, I had a bunch of leftover egg whites. I thought about making macarons, but I simply wasn’t in the mood for something so potentially intense where so much could go wrong. Plus, all my egg whites were in a jar together, so measuring out 3 or however many was going to be tricky. That’s the tough thing about leftover egg whites or yolks – you so often have to find a recipe that uses the exact amount you have leftover. I had seen an article recently on Food 52 about making meringue without a recipe, so I read it, and went ahead. I wouldn’t normally choose to make this much meringue, but it turns out 6 large egg whites yeilds…a lot.

Simple Meringues

Ingredients

1 part egg whites to 2 parts sugar. For example, 1 cup egg whites, 2 cups sugar. To stabilize, you’ll need 1/2 tsp cream of tartar or 2 tsp white vinegar per 1 cup of egg whites. An easy way to remember this, if you’re using vinegar, is that it’s the same amount as the sugar but in teaspoons. So, what I used: 1 cup egg whites (from 6 large eggs), 2 cups sugar, and 2 tsp white vinegar.

Instructions

Bring your egg whites to room temperature, if not a little warmer. You can do this by simply leaving them out in the kitchen for a while, or putting them in a bowl and putting that bowl in another bowl full of hot water.

Preheat your oven to 225 degrees.  Line two pans with parchment paper. In a bowl, combine egg whites and vinegar or cream of tartar. Whip on medium speed with an electric beater or in the bowl of an electric mixer until there are soft peaks when the beater is lifted from the bowl.

Once soft peaks can form, turn the mixer speed to high, and add the sugar by heaping teaspoons. This will take a few minutes (certainly if you’re making as much meringue as I was). Be patient. Once the sugar is mixed in, either pipe the meringue onto the prepared baking sheets, or drop by spoonful. I used a large ziploc, used a spatula to scoop all of the meringue in, and then cut off the tip of one of the corners, and used that for piping. It worked really well.

Bake the meringues for 1 1/2 hours, rotating front to back and top rack to bottom half way through. When time is up, turn off the oven and allow them to cool in the oven. If you have SO MUCH MERINGUE, like I did, you can turn off the oven and allow them to cool partway, remove from oven, and then preheat the oven for the next batch. I left my meringue on the counter while the first batch baked, and while it was noticeably not as fully whipped, it still worked just fine. I recommend crunching into one when it’s still warm, because how often do you get to try a warm meringue? Store the rest in an airtight container, and enjoy whenever you’re in need of a sweet, light treat.

Matcha Mint Ice Cream // Serious Crust by Annie Fassler

Mint Matcha Ice Cream

Mint Matcha Ice Cream // Serious Crust by Annie Fassler

Mint Matcha Ice Cream // Serious Crust by Annie Fassler

When I made the anise ice cream that I posted about last week, it made me realize how truly simple it is to make your own ice cream. I mean, if you’ve got the ice cream attachment for the Kitchen Aid like my roommate does, or some other kind of ice cream churner. I found myself asking why I hadn’t been making my own crazily flavored ice cream for years. And you know what? I didn’t have a good answer.

So I thought I might as well start now. I’ve had some matcha sitting in my drawer since I made these madeleines, and I’d been wanting to try some matcha ice cream. But I didn’t want to make JUST matcha ice cream. After thinking about what flavor combinations might work with matcha – chocolate? lemon? – I decided to go with mint. I liked the idea of the herbaceous, refreshing mint with the earthy, almost savory matcha. So, mint matcha ice cream it is!

I also decided to make this ice cream this week because I thought it might be nice to start doing some holiday-oriented recipes. And while the flavors in this recipe have nothing to do with St. Patrick’s Day, it is green. Definitely green. Especially if you make it the day before you’re planning on eating it.

After a little research, this recipe is adapted from and inspired by David Lebovitz, Kinfolk, and many other ice cream recipes all over the internet.

Mint Matcha Ice Cream

Ingredients

1 cup whole milk
2 cups heavy cream, divided
3/4 cup granulated sugar
a pinch of salt
1 cup fresh mint leaves, rinsed
4 tsp matcha green tea
5 egg yolks

Instructions

In a saucepan over medium heat, combine milk, 1 cup of cream, sugar, salt, and mint leaves. Stir until sugar is dissolved, and once the mixture is hot and steaming, remove the pan from heat, cover, and let it steep for one hour.

Fifteen minutes before your mint is done steeping, get out two mixing bowls. In one, combine the other 1 cup of cream and the matcha. Whisk together until thoroughly combined and no clumps remain. In the other mixing bowl, whisk together the egg yolks.

Once the mint is done steeping in the milk mixture, strain out the mint leaves, pressing them to extract all of the flavor. Re-warm the milk over low heat – you want it to be warm, not too hot – and slowly pour it into the egg yolks and whisk until combined. Pour the mixture back into the saucepan, and cook over medium heat, stirring constantly with a heat-proof spatula, until the custard thickens enough to coat the back of a spatula. Strain the custard into the bowl with the matcha cream, and whisk again to combine. Stir the mixture over an ice bath to cool. Once cooled thoroughly, churn in your ice cream maker according to your machine’s instructions.

Shanghai Stir-Fried Rice Cakes // Serious Crust by Annie Fassler

Shanghai Stir-Fried Rice Cakes

Shanghai Stir-Fried Rice Cakes // Serious Crust by Annie Fassler

There’s this dumpling house near my mom’s old apartment in Bellevue called Din Tai Fung. It’s a chain, but it’s ok because the dumplings are awesome. We always entrusted our ordering to my little sister, who is the guru of Asian cuisine, and she always ordered the best dishes. If you go, I highly recommend the juicy pork dumplings that are filled with pork and a hot broth, the shrimp and pork shao mai, and some variation of the Shanghai rice cake. These rice cakes are small, oval cakes that I assume are made out of ground rice. They’re delicate and chewy at the same time, and they take on the flavor of whatever sauce they’re cooked in.

Recently I went to Fubonn Supermarket, an Asian market in southeast Portland. I love roaming the aisles of international markets, being astounded by some of the things you can find, and excited when you happen upon an ingredient that you love but have never been able to find before.

You can imagine my delight when I happened upon a bag of dried rice cakes, and they were roughly $2 for a pound. So… that’s a thing. I immediately grabbed a bag, and it sat on our shelf for a few days while I tried to figure out what to do with them. (Then they sat on the shelf a couple days longer when I forgot to start soaking them the night before we wanted to make them, so we had to whip up something else for dinner instead.)

I believe you can also get frozen and fresh rice cakes, but with my dried ones, I soaked them overnight before I made them. But they were easy to use, and delicious, and I recommend getting your hands on some as soon as you can to start experimenting! I stir fried mine with some bok choy and shiitakes, and it was delicious.

Shanghai Stir-Fried Rice Cakes

Ingredients

3 Tbl canola oil
5 cloves garlic, chopped
1 inch piece of ginger, peeled and chopped
8 oz rice cakes, soaked overnight if dried, thawed if frozen
2 heads baby bok choy, rinsed
8 oz fresh shiitake mushrooms, sliced into 1/3-inch strips
1/4 cup soy sauce
1-3 tsp Sriracha
1-3 tsp brown sugar

Ingredients

More optional additions: bean sprouts, napa cabbage, other mushrooms, fish sauce, pork, beef, shrimp.

In a large wok or nonstick pan, heat oil over medium heat. Add ginger and garlic, and sauté until fragrant and starting to brown, about one minute. Add the rice cakes, bok choy, and mushrooms and cook until the bok choy is wilted. If your rice cakes aren’t quite soft enough (remember though, you want them to be a little chewy), add about 1/4 cup water to the pan and cover for a few minutes to steam a bit. Once the mushrooms are cooked through and the bok choy is wilted, add the soy sauce, sriracha, and brown sugar to taste. Start with less sriracha and brown sugar, and taste a lot! I found that I wanted a larger amount of brown sugar because of the saltiness of the soy sauce, and Jonah wanted more Sriracha (obviously). Cook, stirring, until all the rice cakes and vegetables are thoroughly coated and the liquid of the soy sauce has cooked off. Enjoy with teriyaki salmon or Korean short ribs (like we did).

Anise Ice Cream // Serious Crust by Annie Fassler

Anise Ice Cream with Cardamom

Anise Ice Cream // Serious Crust by Annie Fassler

Anise Ice Cream // Serious Crust by Annie Fassler

I went to Seattle this past weekend. My aunt was visiting, and I needed to get out of town a bit. It turned out that he was also having this dinner with friends. He has all these friends who cook, and so they’re starting this dinner club kind of thing, like an extremely organized potluck.

It’s really cute – whoever is hosting picks a cuisine or a cookbook, and sends the guests recipes to make. My dad picked the Pok Pok cookbook, and oh my goodness, the meal was incredible. We helped him make the famous chicken wings (which were exactly like the real thing), which was so fun. And for dessert I made this dish I’ve been working on with my baker friend Caitlyn (post coming soon, we still have a bit more testing to do). Wanting something to top it with, I decided to also make some ice cream from David Lebovitz’s The Perfect Scoop. So what goes with a slightly Asian cake, and an incredibly flavorful dinner? I picked the anise ice cream, and decided to add a touch of cardamom.

This ice cream is beautiful – extremely creamy, herbaceous, and perfectly sweet, I could have gladly eaten just a bowl of the ice cream for dessert (or for a snack, which I did the next day). After making (and eating) this ice cream, I proceeded to take pictures of many recipes in The Perfect Scoop so I can make them at home… because unfortunately, I don’t have the book for myself.

Anise Ice Cream with Cardamom

Ingredients

2 tsp anise seeds
2-3 green cardamom pods
2 cups heavy cream
1 cup whole milk
2/3 cup sugar
1 1/2 Tbl good quality honey
pinch of salt
5 egg yolks

Instructions

Toast the anise seeds and cardamom in a small saucepan over medium heat for about 3 minutes, or until fragrant. To the saucepan add 1 cup of the cream, the milk, sugar, honey, and salt. Keep saucepan over heat until the liquid is warm, then cover, remove from heat, and let steep for an hour.

After an hour, re-warm the milk mixture over low heat. Pour the remaining 1 cup of cream into a medium mixing bowl, with a sieve set over the top. In another bowl, whisk together the egg yolks. When the milk mixture is warm, slowly pour it into the bowl of egg yolks, whisking constantly. Then, pour the milk and egg yolk mixture back into the original saucepan and cook over medium heat. Stir it constantly, preferably with a heatproof spatula, until the mixture has thickened and coats the spatula or spoon. Pour this custard through the strainer into the bowl with the cream, and stir it so the cream is fully incorporated. Set this bowl in an ice bath and stir to cool. Refrigerate until cooled through, and then churn based on your machine’s instructions. Enjoy!

Ice Cream Cake // Serious Crust by Annie Fassler

Ice Cream Cake

Ice Cream Cake // Serious Crust by Annie Fassler

Ice Cream Cake // Serious Crust by Annie Fassler

When I asked Carmelle what kind of cake she wanted for her birthday this year, and she replied, “ice cream cake,” I was stumped. I mean, not so stumped. I’ve had ice cream cake before. I understand the concept. But I’ve certainly never made one. In a summer cooking camp I did when I was younger, I made a baked alaska, but I certainly wasn’t going to attempt that. My mom used to make a version of ice cream cake with Ho hos: she would take a big metal bowl, line it with slices of Ho hos, fill the bowl with ice cream, freeze it, and then turn it out, so it looked something like this.

So I suppose it was officially time to learn to make my own ice cream cake. I had a choice to make: do I make the kind with an actual layer of cake in it? Or do I make the kind that just has layers of ice cream and chocolate sauce and magical cookie crumbles?

I decided to go with the latter. If I’d had more time I would’ve made my own ice cream, it turned out it was a crazy weekend (full of Valentine’s Day, a bar mitzvah, work, and an Amos Lee concert), so there wasn’t time for that madness. Still though, ice cream making is on my to-do list.

I decided to use a recipe from Not Without Salt (NWS) as a guideline, except I wanted to just buy Oreo crumbs at the store instead of making my own chocolate wafers. At this point, I was thinking more along the lines of cake assembly than actual creation. Don’t judge me. After hitting the grocery store (note to self: NEVER go to Fred Meyer’s on a Sunday again), and not finding Oreo crumbs or any wafers I liked, I decided to make them myself. And because I’ve been eyeing Smitten Kitchen’s chocolate wafers, I decided to go with that recipe. Interestingly, something I noticed after I had already made the wafers was that both Smitten Kitchen and Not Without Salt identify Alice Medrich as the cook behind the recipe for their wafers, though they do differ a bit. What I’m saying is, if you decide to go with NWS’s chocolate wafer recipe, I’m sure it will be just as delicious.

Ice Cream Cake

Note: For your ice cream, I would suggest something smooth like coffee, or with small pieces in it, like mint chocolate chip. Carmelle requested cookie dough ice cream, and while it was certainly delicious to get the chunks of cookie dough, it made it a little trickier to slice and serve.

Ingredients

Chocolate Wafers

1 1/2 cups flour
3/4 cup unsweetened cocoa powder
1 cup + 2 Tbl sugar
1/4 tsp salt
1/4 tsp baking soda
14 Tbl (1 3/4 sticks) butter, softened
3 Tbl milk (higher fat is better, because we’re baking here, people)
1 tsp vanilla extract

Chocolate Fudge Sauce

1 cup heavy cream
1/3 cup  corn syrup (I used dark because I liked the slight molasses smell to it, but light or golden syrup will work)
1/3 cup brown sugar
1/4 cup cocoa powder
1 cup (6 oz) bittersweet chocolate (you can use chopped baking chocolate or chips, whatever is convenient for you)
2 Tbl butter
1/4 tsp salt
1 tsp vanilla extract

1 gallon of ice cream of your choice, or 2 quarts of ice creams of your choice

Instructions

Chocolate Wafers

First, let’s make the wafers. In the bowl of your food processor, combine the dry ingredients and pulse to mix. Cut the butter into chunks and add it to the bowl as well, pulsing again until evenly distributed. In a small bowl, combine the milk and vanilla extract, and then add it to the bowl with the food processor running. Transfer the dough to a bowl and knead a few times to bring it together. On a piece of parchment or wax paper, form the dough into a ~14-inch log, wrap it in the parchment or wax paper, and refrigerate for an hour, or freeze for 20-30 minutes, or until firm.

Preheat your oven to 350 degrees, and line baking sheets with parchment paper. Slice the log of dough into ~1/4 inch slices, thinner if you’d like, but keep an eye on baking time. Place them on pans about an inch apart, and bake for 12-15 minutes, rotating halfway through. Allow to cool on the pan for a minute or two, as they’ll break easily. Which, for our purposes isn’t the end of the world, but you will have extras, and maybe you want those to be unbroken.

Chocolate Fudge Sauce

Before making the fudge, I recommend taking your ice cream out of the freezer to soften.

To make the fudge, combine the cream, corn syrup, sugar, and cocoa powder in a pan. Bring this mixture to a boil, then reduce the heat to a steady simmer. Allow it to simmer for 5 minutes, stirring occasionally. After 5 minutes, remove the pan from the heat and stir in the chocolate, butter, salt, and vanilla. Keep stirring so the chocolate and butter melt, and run through a sieve, preferably into a microwave safe bowl, make sure there are no clumps of cocoa powder. My fudge had a little trouble, and decided to separate (super fun!). Jonah had the brilliant idea to just get out the immersion blender, and I would suggest the same should the separation happen to you. But I sincerely hope it doesn’t. Set fudge aside and let it cool down a bit. Because you have to make this cake in layers and freeze between each layer, the microwave safe bowl comes in handy when you need to warm up (and potentially blend) your fudge sauce.

Now let’s assemble the cake. Put about 20-25 of the chocolate wafers in a big ziploc bag, and beat it with a rolling pin, until the cookies are completely crumbled and there are no pieces larger than a pea. In an 8 or 9 inch springform pan, spread 1/2 of your gallon of ice cream, or one of the quarts. Make sure it’s evenly spread, so it’s roughly the same thickness all the way around the pan. Sprinkle half the cookie crumbs on the ice cream, and then drizzle/spread half the hot fudge over the cookie. Put the pan in the freezer for 30-45 minutes to set. After it has firmed up a bit, spread the second half of ice cream over the fudge, then sprinkle over the remaining cookie crumbs and spread over that the remaining fudge. Put the cake in the freezer until you’re ready to serve, at least an hour.

When you’re ready to eat this bad boy, remove from the freezer and run a knife around the edge before un-molding the cake. Serve and enjoy!