Course

Earl Grey Madeleines

Earl Grey Madeleines // Serious Crust by Annie FasslerEarl Grey Madeleines // Serious Crust by Annie Fassler

Elsa has discovered my secret.

My dear friend Elsa and I were hanging out quite a bit when she finally got back from her worldly travels this summer, as she was job hunting, so had her days free, just like I do. She came over one afternoon, and we decided to bake something. I started looking for recipes, and suggested rosemary shortbread, thyme/sea salt/chocolate chunk cookies, or these earl grey madeleines from Baking a Moment. She looked at me and said “Are we only allowed to make things that involve weird flavor combinations?”

She’s right. I like trying new flavor combinations. Why have chocolate chip cookies when you can add thyme? Or plain shortbread when you can add rosemary? Why not spice it up a bit? Plus, combinations like this are becoming rather mainstream. I think I’ve got her on the weird flavor combo train at this point, but she still teases me all the time. Anyway, on that afternoon, I convinced her to make earl grey madeleines with me. And dang, were they good.

For the record, Elsa made me zucchini, jalapeno, lime cookies for my birthday.

Earl Grey Madeleines

Ingredients

6 Tbl unsalted butter
3 bags earl grey tea
2 tsp light brown sugar
2 tsp honey
2 eggs
1/4 cup granulated sugar
1/3 cup all-purpose flour
1/2 tsp baking powder
1/4 tsp kosher salt

Instructions

Preheat your oven to 350 degrees.

In a small pot on the stove, melt the butter. While the butter is melting, cut open the tea bags, and then stir the loose tea into the melted butter. Allow to steep over low heat for about 5 minutes, then remove from the heat and allow it to steep for another 5 minutes. Strain the tea butter. I used a mesh sieve that I overlayed with the tea bags (which I had cut to make sheets). If you have cheesecloth, you can use that.

Stir the brown sugar and honey into the tea butter. They may stay kind of separated, and you can slightly reheat to try to combine them better. Ours wouldn’t really combine no matter how much we reheated them, and everything worked out just fine. So don’t stress about it.

Here’s another weird step. In a (preferably metal) mixing bowl, combine the eggs and granulated sugar. Fill another bowl with very hot water, and put the bowl of eggs/sugar into the bowl of hot water. Mix this with your fingers (I know, I know) until the eggs feel slightly warm and the sugar has dissolved and is no longer grainy. When you’ve reached that point, you can remove the bowl from the water and whip the eggs/sugar on high until it has tripled in volume.

In another bowl (I know, it’s a bowl heavy recipe), sift together the flour, baking powder, and salt. Gently fold the egg mixture in in two additions. Pour a little bit of this batter into the tea butter, stir it up, and then pour the tea butter into the batter. Again, gently fold until thoroughly combined.

Spoon the batter into a buttered and floured madeleine pan. You only need to fill up the molds about 2/3 of the way. Bake for 8-10 minutes, or until they’re golden-brown around the edges. Remove the madeleines from the pan immediately and allow them to cool on a wire rack. Enjoy with a glass of milk, a nice coffee, or tea!

Buttermilk Devil’s Food Cake

Buttermilk Devil's Food Cake // Serious Crust by Annie Fassler

Buttermilk Devil's Food Cake // Serious Crust by Annie Fassler

Buttermilk Devil's Food Cake // Serious Crust by Annie Fassler

Buttermilk Devil's Food Cake // Serious Crust by Annie Fassler

My Mom’s birthday was a month ago today, so it seems appropriate that I’m sitting in a tea shop, writing this post, looking at pictures of her with the birthday cake I made for her.

My mother is a pretty damn incredible woman. I don’t know if I’ve told you about her before, but let me. When we were growing up, she was always encouraging us to play. I don’t just mean my sisters and I playing with each other, or playing with dolls, or playing with crafts, but in the larger sense too. She encouraged us to be adventurous, boisterous, and reach for the stars.

If we wanted to make cookies, she was there to help. If we wanted to go out for the basketball team (a mistake I made only once, trust me), she was there at every game. If we wanted to be in plays (which we did… a lot) she drove us to auditions, sat with us while we waited nervously, drove us to rehearsals, helped create costumes, and was always in the front row on opening night, grinning from ear to ear, and often mouthing the words to the songs along with us. She pushed my creativity, she pushed me to try really hard, to do anything I wanted to do. That’s an incredible woman.

When I went off to college and my parents split up, my mom and I had a rough time. It’s been a hard few years of rebuilding, getting to know each other again, and finding the foundation that we had built when I was younger. But it seems since her birthday, my mother’s true unbridled joy and adventure and creativity has reappeared. It has been slowly creeping back for the past couple of years, especially since she has found David, but in the past month, it seems like she’s here to stay.

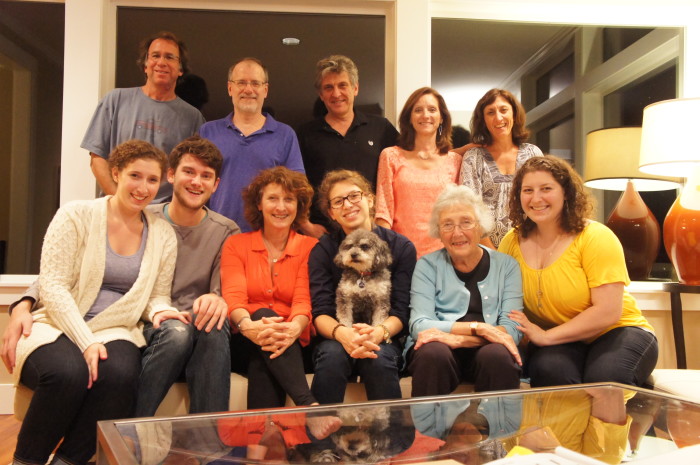
This year was my mom’s 60th birthday (hopefully she doesn’t kill me for writing that…) and we went big. Rather, David went big with many many surprises, and we all helped scheme and plan. She was surprised four separate times: by the arrival of me, my older sister, and Jonah on Friday afternoon; the arrival of her mother, sister, brother-in-law, brother, and sister-in-law on Friday night; by my little sister’s arrival on Saturday morning; and by a surprise party with all of her friends and a live band on Saturday afternoon.

It was the most pure joy I’ve ever seen her exude. It was a beautifully sunny weekend, and on Sunday we all made dinner together, like families do. When I asked my mom what birthday cake she wanted, she said “That buttermilk devil’s food cake I used to make you guys for your birthdays.” Emily, my older sister, immediately remembered this cake, but it took me a while. My mom dug around in her recipe box and pulled out this magazine page from 1985. Under the title it says “Makes 10 servings at $0.88 each.”

I didn’t remember this cake until I smelled the frosting, and then it came rushing back, which seems appropriate. The cake, and that weekend, reinforced the woman that my mother is and always has been. It’s rich, deep chocolate with an unexpected but welcome twist from the buttermilk and sour cream, perfect for a birthday, but especially perfect for my mother.

Buttermilk Devil’s Food Cake

Ingredients

Devil’s Chocolate Cake

Unsweetened cocoa powder (for dusting the pans)
2 1/4 cups sifted cake flour
2 tsp baking soda
1/2 tsp salt
1/2 cup (1 stick) butter
2 1/2 cups light brown sugar
3 eggs
3 1/2 squares (1 oz. each) unsweetened chocolate, melted
1/2 cup buttermilk
1 cup boiling water
2 1/4 tsp vanilla

Sour Cream Chocolate Frosting

15 squares (1 oz. each) semisweet chocolate
1 1/2 cups sour cream
1 1/2 tsp vanilla
a pinch of salt

Instructions

Devil’s Chocolate Cake

Preheat your oven to 375 degrees. Butter 3 9-inch round cake pans. Line the pans with parchment paper, and butter the paper. Dust the bottoms and sides of the pans with cocoa powder.

Sift together the flour, baking soda, and salt into a bowl. Set aside.

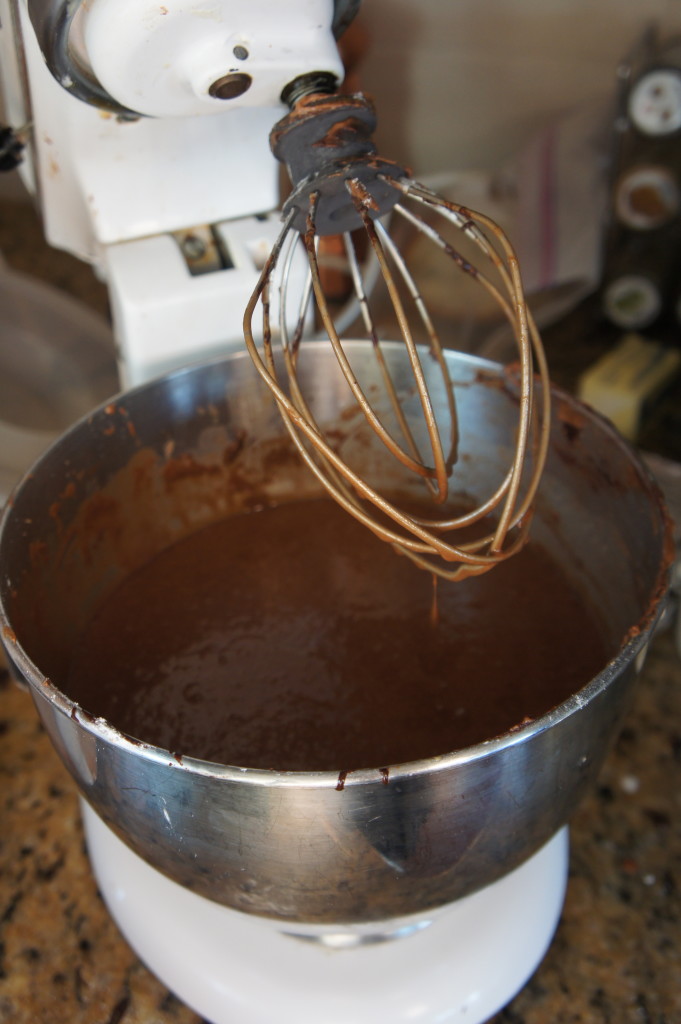
Using an electric mixer (or whatever) beat the butter until it’s light and fluffy. Beat in the sugar until it’s light and fluffy too. Add the eggs one at a time, beating after each addition. Blend in the melted chocolate. My aunt (the cookbook author) had a great tip for this. Anytime I mix warm ingredients (like melted chocolate) into eggs, I get nervous that the eggs are going to cook. Her tip was to start with a little bit, blend it, and then add the rest of it. It makes a big difference. To me anyway.

Alternate adding the flour and buttermilk to the butter mixture, beginning and ending with the flour, until it’s well combined. Stir in the boiling water and the vanilla and divide the batter equally into the 3 prepared cake pans. Bake for 25-30 minutes, or until a knife or toothpick inserted comes out clean. Cool them in their pans for 5-10 minutes, then turn them out onto cooling racks and remove the parchment paper to cool the rest of the way.

Sour Cream Chocolate Frosting

To make the frosting, melt the chocolate in a double boiler over barely simmering water. Remove from the heat, and beat in the sour cream, vanilla, and salt. Beat until it’s creamy and holds it’s shape. Be warned though, once this frosting cools, it hardens because of the chocolate. So frost your cake while the frosting is still soft and warm.

You may want/have to trim your cakes. I didn’t and it work ok. Put a layer on whatever plate you’re using to serve, and spread evenly with some of the frosting. Repeat with the remaining layers, and then frost the sides.

Enjoy with a glass of cold milk, family, and lots of laughs.


Buttermilk Devil's Food Cake // Serious Crust by Annie Fassler

Lasagna, of the cheesiest variety

Lasagna // Serious Crust by Annie Fassler

Lasagna // Serious Crust by Annie Fassler

Sometimes you need to make those meals that yield a million servings so you can eat it all week. The week before the CD release concert we had for Jonah’s new album was absolutely one of those weeks.

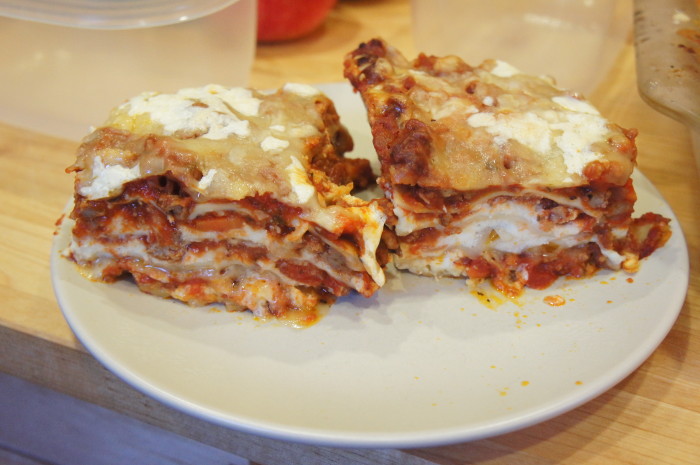
We had a few guests staying with us, band practice almost every night, and I had work on the nights I wasn’t rehearsing. It was a busy time, to say the least. So the night of our Kickstarter team meeting, to discuss merch and social media, etc. I made this lasagna, so that we could eat it throughout the week. It was high up on the list of best lasagna I’ve ever made. What made it so good? The homemade sauce, the homemade noodles, and some absurd amounts of cheese.

I’ll admit, however, that this uses a lot of dishes, and has a fair amount of ingredients. But when you’ve got some time and you’re making a meal that will carry you through the week, it’s worth it. I like to think of it as an entire week’s worth of mess (and cleanup).

Cheesy Meat Lasagna

Note: I used a 13×9 inch baking dish, and filled it right up to the brim. I put a baking sheet underneath it to catch any overflow (which was minimal), but still, if you’ve got a slightly bigger baking dish, it might be a good idea to use it.

Ingredients

Noodles

3 eggs
2 cups flour

Meat Sauce

Olive oil
1 medium white onion, chopped
1 carrot, peeled and chopped
3/4 lb ground beef
3/4 lb ground italian sausage
2 cloves garlic, minced
salt, pepper, other Italian seasoning (parsley, basil, oregano, to your liking)
1 12 oz can tomato paste
1 28 oz can crushed (or diced) San Marzano tomatoes (yes, these are expensive, but I found it to be terribly worth it, and they weren’t THAT MUCH more than the other brands)

Ricotta Filling

3 cups ricotta
2 eggs
1/2 tsp freshly ground pepper

1 cup freshly grated parmesan
2-3 cups (preferably freshly) grated mozzarella

Instructions

Noodles

In the bowl of an electric mixer, or using a bowl and whisk, or a bowl and fork, mix up the eggs and flour into a dough. If it’s too wet, add more flour 1 tsp at a time. If it’s too dry, add water 1 tsp at a time. Dump the dough out onto floured surface, knead a few times, and wrap in plastic (or put in a bowl and cover with dishtowel) and allow to rest for 30 minutes.

Meat Sauce

In a large pot, heat 2 Tbl olive oil over medium heat, and add the onion and carrot. Cook until starting to soften. Add the garlic, beef, and Italian sausage, and cook until the meat has browned. Add 1 tsp of salt, 1/2 tsp ground pepper, and whatever other spices you’d like (I did 1/2 tsp dried basil and 1/2 tsp dried parsley). Add the tomato paste and canned tomatoes to the pot (no need to drain them!) and stir to combine. Turn the heat to low and cover, letting it simmer for ~30 minutes.

Ricotta Filling

While your dough is resting and your sauce is simmering you can whip up the ricotta filling. In a bowl, combine the ricotta, eggs, pepper, and 1/2 cup of both the grated mozzarella and parmesan. Store in the fridge until you’re ready to assemble your lasagna.

Roll out your pasta into sheets for lasagna and set aside, covering so that the noodles don’t dry out. Preheat your oven to 375 degrees and lightly coat your baking dish with oil. Spread ~1 cup sauce in the bottom of the dish. Here’s how you’re going to do this: noodles, ricotta, sauce, cheese. That’s your order. On top of the sauce in the bottom of the dish, arrange a layer of noodles; spread 1/3 of the ricotta mixture on top, then 1 cup sauce, and sprinkle with cheese (a mixture of the mozzarella and parmesan). Do that twice (now we’ve got sauce, noodles, ricotta, sauce, cheese, noodles, ricotta, sauce, cheese), and in the next layer, leave out the cheese (so just noodles, ricotta, sauce). Put another layer of noodles on top, spread the rest of the sauce on top, and sprinkle with the rest of the cheese. Phew! If you don’t feel like following my layering instructions, just do whatever you want. It’ll probably work, and you’ve probably eaten enough lasagna in your life to figure out how it works.

Bake the lasagna for 30-40 minutes, rotating it half way through, until the cheese on top is melted and turning golden brown. Remove from the oven and allow to cool/set for 10 minutes before serving. Enjoy!

Fig and Olive Oil Challah

Fig Challah // Serious Crust by Annie Fassler

Fig Challah // Serious Crust by Annie Fassler

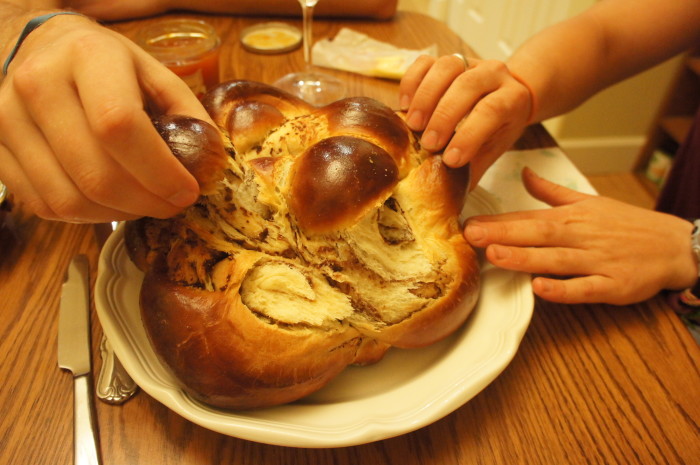
On Rosh Hashanah, I did something really un-Jewish and un-Kosher by making shrimp for dinner. But I kind of half made up for it by making fig, olive oil, and sea salt challah from the Smitten Kitchen cookbook. And that makes things kind of ok, right? (Let’s not even talk about the fact that there was no fasting or breaking of fast on Yom Kippur as I had band practice and work, both of which require much sustenance. Don’t tell my Bubbe.)

This challah has been on my “to make” list for so long. I was waiting for figs to be in season (only to realize after I went to the store and bought fresh figs that the recipe calls for dried figs… oops… way to follow your own rules, Annie) AND I’d never made challah before. TERRIBLE JEW, I know. But you know, bread is mildly scary to me, and braided bread that’s supposed to look all shiny and pretty? That much scarier. But a holiday is a good enough reason to man up and do anything, so I went for it. And man oh man, it was good. This recipe is pretty much straight from Smitten Kitchen.

Fig and Olive Oil Challah

Ingredients

Bread

2 1/4 tsp active dry yeast (1 packet)
1/4 cup plus 1 tsp honey
1/3 cup olive oil, plus some for the bowl
2 eggs
2 tsp flaky sea salt (such as Maldon, which you really should have around because you should be putting it on everything because it is awesome)
4 cups all-purpose flour

Fig Filling

1 cup dried figs, stemmed and roughly chopped
1/8 tsp orange zest (I eyeballed this, because you know, who has an 1/8 tsp measure)
1/2 cup water
1/4 cup orange juice
1/8 tsp sea salt
freshly ground black pepper (you’ll only need a few grinds)

Egg Wash

1 egg
flaky sea salt

Instructions

Bread

In a small bowl, combine the yeast and 1 tsp of honey with 2/3 cup of warm water. Stir it up, and let it sit for a few minutes until it gets foamy. In the bowl of your mixer with the paddle attachment (or you know, with a wooden spoon and a bowl if that’s your jam), combine the yeast mixture with the rest of the honey, the olive oil, and the eggs. Then add the flour and salt, and mix it until the dough starts to come together. Once it comes together, switch to the dough hook and let it run on low for 5-8 minutes. Put the dough on the counter for a moment while you coat the bowl in olive oil, put the dough back in the bowl, and cover with saran wrap for an hour, or until the dough doubles in size.

Fig Filling

While the dough is rising, it’s fig paste time. Put the figs, zest, water, juice, salt, and a few grinds of black pepper in a saucepan and bring to a simmer over medium heat. Cook this fig mixture until the pieces of fig are soft, having absorbed the water and juice, stirring occasionally (should take about 10 minutes). Turn off the heat, and allow to cool for a while before putting it in a food processor and processing until it resembles a paste, like a relatively smooth jam. Set it aside to cool the rest of the way.

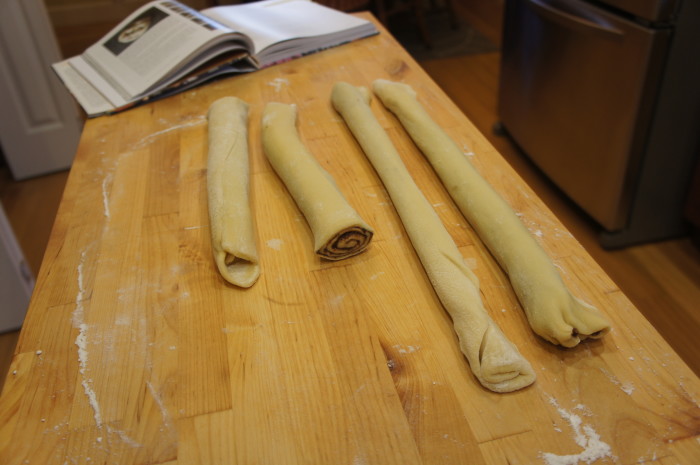
Once your dough has roughly doubled, turn it out onto a floured surface and divide it in half. Roll the first half out into “an imperfect rectangle,” spread half of the fig filling over the dough, and roll it up into a long log, trapping the filling within. You’ll want to be careful when you roll out your dough that it still has some thickness to it, as I had a few tears in mine which made everything a little tricky for me. Roll out/stretch the log as long as you can without breaking or tearing it, and then divide it in half. Repeat this whole process with the second half of the dough. You should have four fig-filled ropes of dough.

Next comes the weaving, which I’m not even going to try to explain. Instead, you should head to over to Smitten Kitchen to look at the pictures and read her instructions. I never could have woven it without those pictures. Oy. Once woven up into a beautiful mound of deliciousness, transfer the dough to a baking sheet prepped with parchment paper (or silpat, I suppose).

Egg Wash

In a small bowl, beat the egg for the wash, and brush it over the challah. Let it rise for another hour, but start heating your oven to 375 degrees about halfway into the rise. Before putting it in the oven, brush the challah again with the egg wash, and bake it in the middle of your oven for 35-40 minutes. If it starts to get dark (like mine did), you can cover it with foil for the rest of the bake (like I didn’t). Remove from oven and allow to cool before serving. Tear off pieces with loved ones, and add a dab of butter and jam, if you like. Enjoy.