Braised Short Ribs

Braised Short Ribs

Braised Short Ribs
Braised Short Ribs

Braised Short Ribs

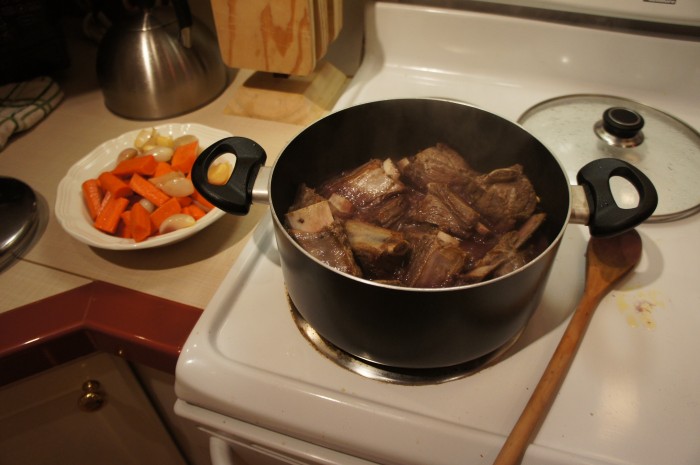
Last Friday Jonah and I were supposed to host a dinner party. We had already gone grocery shopping and planned the menu and everything when Jonah came down with the bug that the family upstairs had earlier in the week. It was not good. So we switched locations, I did all the cooking, and carted it all over to our friend Warren’s house. Jonah ended up feeling better and was able to come. Yay! I made braised short ribs with mashed potatoes and apple pie for dessert (post coming soon). This recipe is adapted from the Gourmet Today cookbook, which is wonderful. It’s really pretty easy.

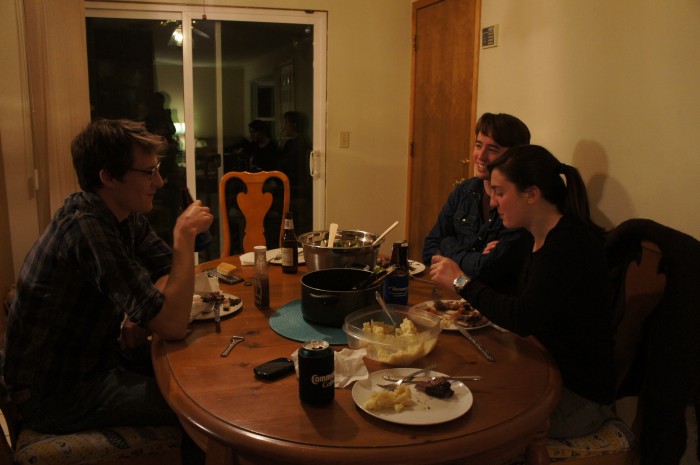
This meal is so freaking good. The meat gets so tender, the sauce is so rich, the carrots soak up all the juices. Oh man. I whipped up some mashed potatoes to serve it with (peel potatoes, boil them, mash them, add some cream, butter, salt, and pepper and stir). The meal was greatly enjoyed by our friends Erica, Corey, and Warren as a little celebration of their having successfully completed a stressful semester.

Braised Short Ribs

Ingredients

1 bottle (750 ml) dry red wine
4 pounds beef short ribs, cut into 2 1/2 inch lengths by butcher
salt and pepper
2 Tbl olive oil
10 shallots, trimmed
4 large carrots, peeled and cut into 1 1/2 inch pieces (or whatever size pieces you like cooked carrots)
3 Tbl Dijon mustard
6 plum tomatoes, halved lengthwise

Instructions

In a saucepan, boil the wine, uncovered, until reduced to about 1 cup. Meanwhile, pat the ribs dry and season them with salt and pepper. Heat the oil in a large pot (5 quart) over medium-high heat. When oil is shimmering, add ribs in two batches, turning occasionally until browned on all sides (about 8 minutes per batch). Move the ribs to a large bowl, set aside.

Reduce heat to medium and add shallots and carrots to fat and oil remaining in the pot. Cook for about 5 minutes, stirring occasionally. Transfer to another bowl, leaving behind as much of the juices as possible. Now add the reduced wine and mustard to the pot and stir. Put the ribs in too, meat side down, cover tightly, and let simmer for 1 1/2 hours. (Now is a good time to make the mashed potatoes if you’re going to make some.)

After all that time waiting, gently stir the shallots, carrots, and tomatoes into the pot (I forgot to add our tomatoes, so that’s why you don’t see them in any pictures). Cover again and simmer until meat is very tender, about another hour.

Now, carefully transfer ribs and veggies to a platter. Skim fat off the cooking liquid. To use the liquid for sauce (which you’ll really want to do), it should coat a spoon (and supposedly measure ~1 cup). If you need, you can boil it to reduce it some more.

Plantains with Cinnamon

Plantains
Plantains

Let me tell you about Jonah’s and my living situation. We live in a family’s basement. Sounds awesome right? Let me tell you more. They refurnished half of their basement into this adorable studio apartment, which is actually pretty big for a studio. And instead of paying rent we work for the family: childcare (nannying 3 children is no easy task, I now feel for the nannies I had when I was younger), cooking, and cleaning. Thus far, it has actually been a really wonderful learning experience for us.

The family is gluten-free and Kosher, as well as having a few other dietary restrictions, so cooking for them can be a little complicated, but also has opened new doors for me. Early on in our time with them, one day the father of the family pulled out a tupperware of plantains he had quickly cooked in just oil and told me, “These are going to go bad soon. See if you can get the kids to eat them?” I told him I’d do my best.

Now, I’d never really encountered plantains before, at least not that I remembered, except for one time this past summer when a friend cooked them for us. I know from Jonah’s time in the Dominican Republic that they’re often fried and kind of bland, and I didn’t want that. So I sauteed them in a little butter and cinnamon, got them all caramelized and warm, and the kids ate them up like they were tootsie pops. They tasted so good! They have plantains at the New Seasons by our house, so sometimes I buy them and do the same thing I did for the kids. Delicious.

Plantains with Cinnamon

Ingredients

A plantain
Some butter
Some cinnamon

Instructions

Sounds difficult, right? Slice up the plantain. Melt some butter in a pan. Sprinkle cinnamon over the butter. Put in the plantains. Sprinkle the other side with cinnamon. Cook on both sides until browned and caramelized.

These are so incredibly easy to make, they taste delicious, and are pretty healthy! And I even got picky children to eat them. So you know they’re good.

A Loaf of Bread

bread
bread

bread

Remember a little while back (in the cheddar and sage biscuits post) when I said I had bought some yeast and wanted to use it to make some bread? So I finally did that. I was more than a little bit frightened, and while all did not go perfectly smoothly, it worked! Very cool!

I hunted online for a while for some beginner bread recipes. While I was tempted to jump in and start with crusty french loaves and sourdoughs and breads with all kinds of stuff in it (think garlic cloves, spices, onions, anything else you can dream of), I thought it best to start simply and try to figure this thing out. I found this recipe for just a basic white loaf which didn’t require me to go to the store and buy anything, so already I was a big fan.

I used my kitchenaid mixer because it makes life easier. But a lot of the recipes I read are like “it’s so easy you don’t even need a mixer!” Whatever.

Sandwich Bread

Makes 1 loaf

Ingredients

1 package of active dry yeast
1 1/2 tablespoons butter, melted
1/4 cup milk
5 teaspoons sugar
1 teaspoon salt
2 – 3 1/2 cups flour
cooking spray or other oil

Instructions

First, warm the bowl by filling it with hot water, then dumping it out. Then dissolve your yeast according to the directions on the packet. Stir until yeast is completely dissolved, with no lumps. I think this is where things started to get wonky for me. I think the recipe assumes your yeast packet will call for 1 cup of warm water, but mine only called for 1/4 cup.

Now add the butter, milk, sugar, and salt to the yeast and stir until it well blended (it will look like a slightly yellow-ish tan liquid). Now add 2 CUPS of flour. No more! Not yet! Mix this very well. If the mixture is still wet, add more flour 1/4 cup at a time, mixing well before adding anymore. Now the recipe I used called for at least 2 1/2 cups of flour, so I mixed in the 2 cups of flour, then pretty quickly added another 1/4 cup thinking it wouldn’t be a big deal. But a big deal it was, my friends. My dough immediately became too dry, crumbling into a million little pieces and it WOULD NOT come together. I was so frustrated! A couple other recipes I had read in my research had said “If your dough is too wet, add more flour. If it is too dry, add more milk/water.” So that’s what I did. I ended up adding probably almost another cup of milk/water. I think the important lesson here is that if you follow the instructions and it’s not perfect, it’s not the end of the world (which I thought it was). Just add a little of this, a little of that, it will all be ok.

Once the dough has come together, you can either let your machine knead it for ten minutes or, if you’re feeling adventurous dump the dough out onto a floured surface and knead it yourself. I did the latter because sometimes it feels better to know you’ve actually put in some physical effort. You know what I mean? There are many different kneading techniques. Some say you should punch the dough down, fold it up, then punch again. Some say you can squish it in your fingers and pull and twist it. I use the good old fashioned push away from you with the base of your palm and fold. Push and fold, push and fold.

I then rinsed out my mixing bowl, coated it in a little oil, put my ball of dough in it, covered it with a dishtowel, and let it rise for an hour in a warm place. Don’t clean up your floured surface, because you’ll need it again. The recipe says that after rising for an hour, your dough should double in size, but not to stress if it’s bigger or smaller than double. This was good news, because mine had not doubled. But it did rise, so we were still on the right track here. Now punch the dough down, and spread it out into a rectangular shape: one side the length of your bread pan, the other side 1 1/2 times the length of your bread pan.  Now roll that bad boy up, tucking the ends of the roll underneath (the bottom being where the seam is). Now drop it into the oiled bread pan.

Now you let it rise again, covered with a dishtowel. The recipe says an hour, but mine hadn’t really done much in that amount of time. Here’s where I thought things were going south again. After an hour of rising in the bread pan and not being where it needed to be, Jonah and I had to leave the house to go record his old a cappella group. I know, right? And then we went out to eat. So the dough sat in the pan rising away for a total of 5 1/2 or 6 hours. So I got home and I expected the bread to have exploded and that there’d be yeasty dough all over the apartment (why I suspected that, I have no idea). But no! It had risen the perfect amount!

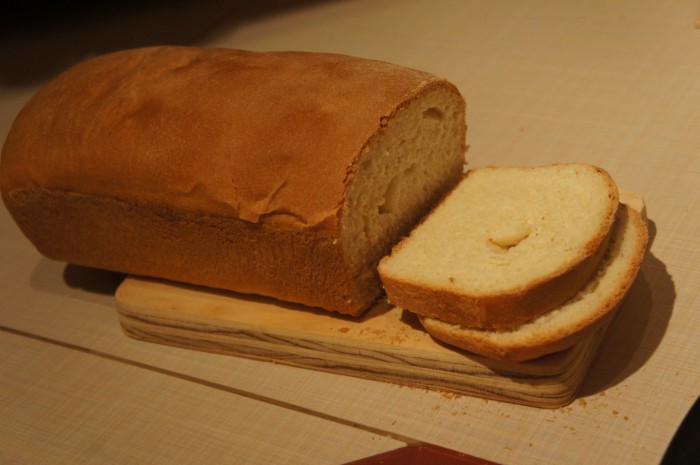
At this point I’m starting to think that maybe I haven’t completely ruined this loaf of bread. I heated the oven to 400 degrees and baked that sucker for 30 minutes. Once you take it out of the oven, immediately remove the bread from the pan so it doesn’t continue cooking. The recipe says to let it cool all the way before eating. And check it out!

After it cooled and Jonah and I each ate a slice, I was so dang proud of myself. After thinking I had ruined it twice, it worked! And not only that, but our apartment smelled so incredibly delicious. Oh my goodness. This bread makes amazing toast, and tastes wonderful with just a little butter spread on it. And now that I’ve done it once, I feel ready to tackle the world of bread. Keep an eye out for more bread recipes coming soon!

Nutmeg Maple Butter Cookies

Nutmeg Maple Butter Cookies

Nutmeg Maple Butter Cookies

Nutmeg Maple Butter Cookies

Last night I was like “It’s COOKIE TIME!!!!” I may or may not have a problem. Last week I was surfing Smitten Kitchen (like you do) and happened upon these delicious looking nutmeg maple butter cookies. If you still haven’t visited her website, Deb (the author of smittenkitchen.com) is pretty hilarious, and writes very informatively about the food she makes. It’s splendid. Check it out. Anyway, I wanted something easy but not so simple as just a sugar cookie, so I pulled up this recipe.

Nutmeg Maple Butter Cookies

Ingredients

1 cup (2 sticks) unsalted butter, at room temperature
1 cup granulated sugar
1/2 cup maple syrup
1 large egg yolk
3 cups all-purpose flour
1/2 teaspoon freshly grated nutmeg or 1/4 teaspoon ground nutmeg (because it packs more tightly)
1 teaspoon table salt

Instructions

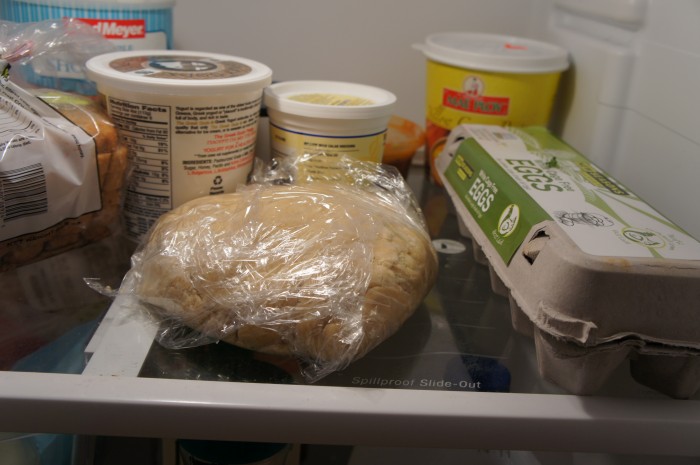
In an electric mixer, combine the butter and sugar, mix together until light and fluffy. With the mixer still mixing, add yolk and slowly drizzle in maple syrup. In a separate bowl, whisk together flour, nutmeg and salt. Add to butter mixture and mix until just combined. The dough will be in loose clumps. Gather them together into a tight packet with a large piece of plastic wrap and chill dough for at least two hours until firm. I’ll say that I had some trouble with this. My dough was moist in parts and really dry in others, and was really crumbly, making it difficult to pack it into a nice package and wrap up. Also, once I took it out of the fridge I had to wait for it to warm up a significant amount before I could roll it out without it crumbling all over the place. So be warned: mix VERY thoroughly.

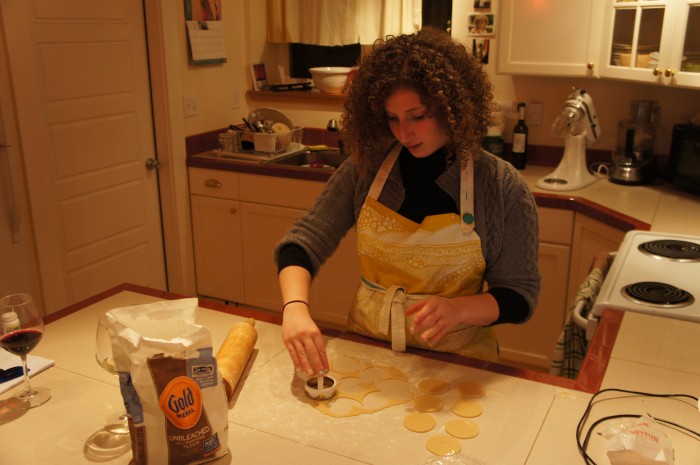
Once you remove the dough from the fridge, preheat oven to 350 degrees and either butter a cookie sheet or cover with parchment paper. Jonah and I save the little papers our butter comes in and keep them in the fridge. They’re great for greasing pans, and they’re free with your butter, unlike parchment paper. Roll out 1/4 of the dough at a time, you’ll have plenty to work with (it’s a lot of dough). Roll to about 1/8 of an inch thick, and cut into whatever shapes you want! I just did circles because…well…I don’t have any other shapes.

Arrange the cookies on baking sheets and bake for 8-11 minutes. They don’t really spread, so they can be pretty close together. Here’s a word about baking time: If you want crunchier edges and harder, chewier cookies, bake closer to 10 or 11 minutes. If you want them a little bit softer and not crunchy edges and bottoms, bake closer to the 8 minute end. I liked them crunchier, Jonah liked them softer, so we did a few batches of each. Transfer to racks or a plate to cool. According to Deb, the cookies keep in an airtight container for a week, or in the freezer till…well, till they aren’t good anymore.

Jonah took some of these into work today, and they were a big hit. I am planning on bringing some to my rehearsal tonight, where I am quickly becoming the cookie lady (or will be after I bring these in). But whatever, everyone in the show is too skinny anyway. They need some butter and sugar.

French Toast (with a secret ingredient)

French Toast

French Toast
French Toast

This past weekend my mom came to town to hang out, and we had her, her boyfriend, and his son over for breakfast on Sunday morning. I thought it would be nice to make the french toast that she used to make for me growing up. Hopefully my mother doesn’t kill me for posting her secret ingredient online for all the world to see.

French Toast

Ingredients

Bread of some kind – we used a baguette cut into thing pieces at a diagonal so they were bigger. If the store had challah, we would’ve used that, but they didn’t.
VANILLA ICE CREAM
Eggs
Cinnamon and whatever other spices you want – we used a pinch of nutmeg.

Instructions

Melt 1 1/2 – 2 scoops of ice cream in a wide, shallow bowl (like the one Jonah is using in the pictures above and below). Wait until the ice cream soup has cooled from melting, and add 2-3 eggs. Whisk together. Add 1/2 tsp cinnamon and a pinch of nutmeg. Soak your bread in egg mixture: we press it down to make sure it gets nice and wet. Melt butter in a pan over medium heat, and add bread. Cook until lightly browned on both sides.

The key, in my opinion, is having the toast perfectly done on the outside but still making sure that all the eggy stuff is cooked on the inside. Sometimes it helps to pop them in the oven on a low temperature: 1) it keeps the toast warm while you’re finishing up the cooking and 2) it helps cook the inside.

We served the french toast with syrup, greek yogurt, and fruit. It was quite delicious, and I think everyone enjoyed it thoroughly. I can also see replacing the ice cream with eggnog for the holiday season (because what isn’t good with eggnog?)!