Chocolate Peppermint Cookies + Happy Holidays!

Chocolate Peppermint Cookies

Chocolate Peppermint Cookies

Chocolate Peppermint Cookies

So many of our friends have left Portland to go home for the holidays. Luckily for us, one of our dear friends, Carmelle, was still in town during the earlier part of this week. And her boyfriend, Mac (one of Jonah’s bestest friends ever), was out of town, so we had her all to ourselves. Carmelle is a baker extraordinaire (I believe I’ve mentioned her a couple times before), and so I thought it’d be fun if she came over and we made something together for the blog.

This recipe for Chocolate Peppermint Cookies is hers, and I just want to warn you all that while I usually have pretty good self control when it comes to not eating sweets that are laying around are kitchen, these cookies have broken my good habits. They are amazing. So incredibly good. So be warned, if you’re not taking them to a party or giving them as Christmas gifts, you will eat them all yourself.

Chocolate Peppermint Cookies

Ingredients

3/4 cup butter, room temperature
1/4 cup white sugar
3/4 cup brown sugar
1 egg
1 1/4 tsp vanilla extract
2 tsp peppermint extract
1 3/4 – 2 cups flour
1/3 cup cocoa powder
1 tsp baking soda
1/4 tsp salt
1 – 2 cups chocolate chips

Instructions

Preheat your oven to 350 degrees. In an electric mixer, cream the butter and sugars together. Then mix in the egg and extracts. Meanwhile, in a separate bowl, combine flour, cocoa powder, baking soda, and salt, mixing well. In batches, add the dry ingredients to the wet ingredients in the mixer.

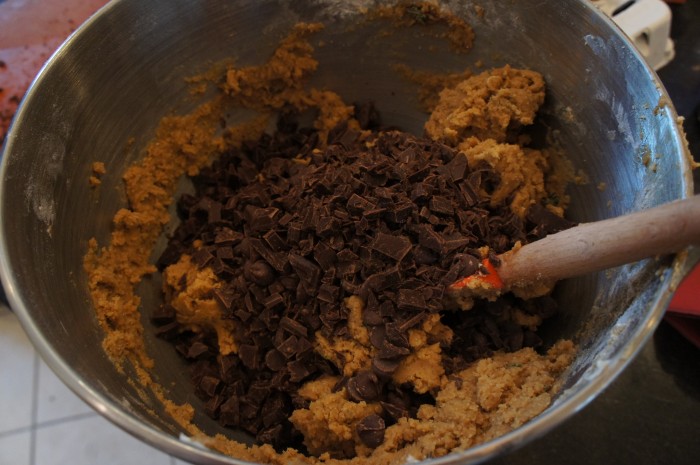
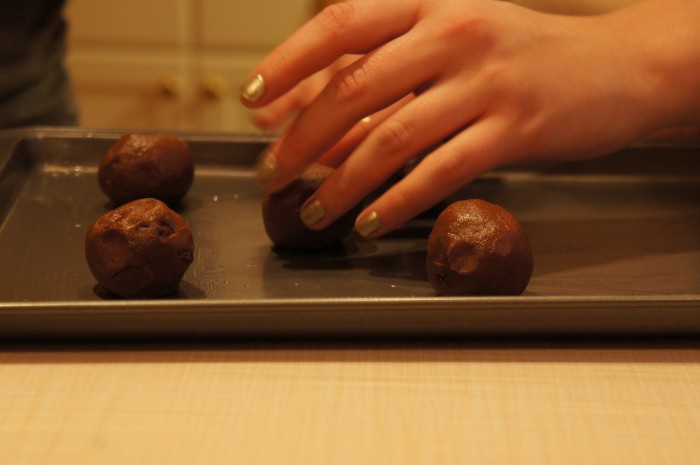
Now fold in the chocolate chips. Grease a cookie sheet, and place balls of the dough (about 1 1/2 – 2 Tbl in size) on the sheet. These guys spread a bit, so leave enough space between them.

Put them in the oven for 7-11 minutes. I think we ended up doing 9 minutes. You want them not to fall apart, but you still want them to be a little gooey and chewy. After removing them from the oven, let them cool a little bit on the pan and then transfer them to a cooling rack. I advise trying one while still pretty warm and the chocolate chips are all melted. Oh lordy, very very good.

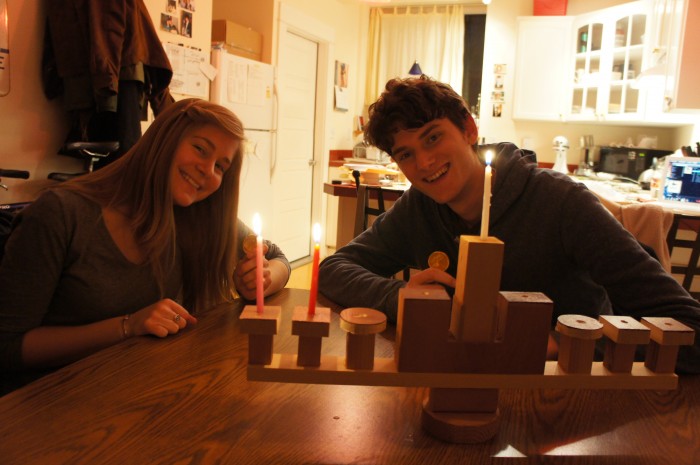
And that’s it! These are, once again, great holiday time cookies. Enjoy with a big ol’ glass of milk. After we had eaten our fill of cookies, we lit the menorah that Jonah made for me and played cards. It was a lovely, relaxing evening. I hope you all have just as lovely holidays!

Chocolate Peppermint Cookies

Roasted Carrots

Roasted Carrots
Roasted Carrots

I love roasting vegetables. It makes them a wonderful texture, a little crispy on the edges, condenses the flavors, often makes them a little sweeter. Oh man, it’s just so good. One of my favorite veggies to roast is carrots. I love to toss them with a little olive oil, honey, and salt. It brings out the sweetness and makes them caramelize a little more.

Roasted Carrots

Ingredients

Carrots
Honey
Oil (preferably olive, but vegetable oil is fine)
Salt

Instructions

Preheat your oven to 375 degrees (or 400, depending on how quickly you want them to cook). Peel and cut your carrots into bite size pieces (see picture below to see about how big I cut mine). Toss them in oil, honey, and sprinkle with salt. Measurements of each kind of depend on how you want them to taste. You want them to be evenly covered in oil. If you think you might want them sweeter, do quite a bit of honey, or not if you don’t. I know it’s kind of vague, but I promise you’ll just be able to tell depending on how many carrots you’re cooking and what you want them to taste like.

How long you cook them for is another guessing game. Firstly, it depends on how crispy/burnt you want them. I like mine to be fairly dark at the edges, so I roast them for about an hour at 375. But sometimes more and sometimes less. Second, it depends on how many carrots you’re roasting. You don’t want them too crowded on the pan otherwise they’ll do more of a steaming kind of thing. Also, you want to toss them about halfway through your cook time.

So this posting was really more of a “carrots tossed in this stuff and roasted are good” than an exact recipe, but it’s worth it just for anyone to discover the joys of this dish. Experiment a little and find the right amounts, temperature, and cook time for you! I promise, it’s worth it.

Sea Salt and Thyme Chocolate Chunk Cookies

Sea Salt and Thyme Chocolate Chunk Cookies

Sea Salt and Thyme Chocolate Chunk Cookies

Sea Salt and Thyme Chocolate Chunk Cookies

Sea Salt and Thyme Chocolate Chunk Cookies

Last weekend when I was in Seattle for my dad’s birthday, he informed me that he had been wanting some cookies or something sweet around the house. My sister and I were a bit dumbfounded because my dad always hated having sweets around the house when we were younger. Of course I told him I’d take care of it. So I pulled up a recipe I had saved on my pinterest for sea salt and thyme chocolate chunk cookies. This recipe is adapted from Desserts for Breakfast, a blog I discovered about 2 weeks ago, and it looks so lovely, so I couldn’t wait to try something from it.

These cookies were so delicious. After baking, the thyme becomes really aromatic. I was a little worried you wouldn’t taste it, but you definitely do. It’s not too strong though, so don’t worry. And the salt and chocolate is a perfect combination. These are just a really lovely grown-up version of a chocolate chip cookie. Enjoy!

Sea Salt and Thyme Chocolate Chunk Cookies

Ingredients

1 1/2 cups unbleached bread flour
1 2/3 cups all purpose flour
3/4 tsp baking soda
1 tsp coarse salt
2 Tbl fresh thyme leaves
2 sticks butter, room temperature
1 cup dark brown sugar
2/3 cup white sugar
1 Tbl molasses
2 eggs
1 cup semisweet chocolate chunks, more or less if you like
1 cup dark chocolate chunks, more or less if you like
sea salt

Instructions

Preheat your oven to 350 degrees. Grease your cookie sheets. In a large bowl, combine the dry ingredients: bread flour, all purpose flour, baking soda, salt, and thyme. Set aside. In your mixer, cream the butter, then add brown sugar, white sugar, and molasses. Beat until the mixture is light and fluffy. Add the eggs, mixing well after each addition. Then, slowly add the dry ingredients (think a few batches). Combine well! Now fold in the chocolate chunks.

Now, form the cookies using about 2 Tbl of dough, rolling it into a ball, putting it on the pan, and pressing down slightly. These guys spread a bit, so make sure they aren’t too close together. Now sprinkle a little bit of sea salt on each cookie.

Pop them in the oven for 12 minutes or until the edges are just turning brown, rotating the pan halfway through. When you remove the pan from the oven, let the cookies cool on the pan for 2 minutes and then move them to a plate or cooling rack to cool completely.

Pie Crust + Apple Pie

Apple Pie

Apple Pie
Apple Pie

Apple Pie

Alright folks. It’s time. Time for what, you ask? Time for me to give to you all the recipe for my pie crust, for which this blog is named.

My father’s favorite kind of pie is strawberry-rhubarb. “Favorite kind of pie” is kind of an understatement. He LOVES anything strawberry-rhubarb, but pie especially. Many years ago, when I was in high school, he and I spent an entire summer finding the perfect strawberry-rhubarb pie recipe. We tried every recipe we could find, and eventually perfected our own recipes for both the crust and the filling.

Last weekend, when Jonah and I had that dinner party (where we made the braised short ribs, the recipe for which you can find here), I made an apple pie for dessert. It seemed like the perfect thing to make, and I hadn’t made a pie in quite a while. Making a pie is, for me, one of the most therapeutic things in the world. Rolling out the dough, stirring up the filling, putting it all in a dish and waiting while the apartment fills with the smell… oh man. I just love it.

This post is dedicated to my friend Peri, who texted me today asking for my pie crust recipe because “they have no frozen pie shells in New Zealand.” First of all, I was disappointed to hear that Peri would ever rely on a frozen pie shell because they are simply horrible compared to a real homemade crust. But also, this recipe is my gift to her because she’s about to head off to New Zealand, where she has a Fulbright Scholarship to study the history of some fault lines (she’s a geologist). I wish her the best and I hope that now she can make delicious pies while she’s there!

Apple Pie

Makes 1 beautiful pie

Ingredients

Pie Dough

2 cups flour
1 teaspoon salt
1/2 cup (1 stick) butter, COLD, cut into chunks
1/2 cup vegetable shortening, ALSO COLD, and also cut into chunks
3-6 Tablespoons ice water

Apple Filling

12 apples (I used 9 granny smith, 3 braeburn because I really like them)
3/4 cup of sugar (plus more for sprinkling if you want)
Zest and juice of 1 lemon
1 1/2 teaspoons cinnamon
1/2 teaspoon nutmeg
1/8 teaspoon ground cloves
2 tablespoons cornstarch
2 tablespoons unsalted butter
1 egg, beaten (optional)

Instructions

Pie Dough

I always use a food processor for this, but I have done it without a food processor or a rolling pin. It is possible. Combine flour and salt in the food processor, pulse. Add butter, pulse again until mixture is slightly course. Add shortening (I like to use the stick form of crisco, it’s so easy to deal with), pulse. Now add water. I like to add the water a couple tablespoons at a time so that I don’t overdo it. You want to add as little as possible. Now, pulse again. When the dough is wet enough, it will come together in a large ball in your food processor. Dump this out onto a lightly floured surface, cut it in half, and form 2 discs. Wrap them in plastic wrap and put them in the fridge for at least 30 minutes. The dough can also be made and refrigerated or frozen for quite some time.

Apple Filling and Assembly

Preheat oven to 375 degrees. Peel, core, and thinly slice those apples (that’s right, all of them). In a large bowl, combine apples, sugar, lemon zest and juice, spices, and cornstarch. Toss well.

Now let’s talk about rolling out your pie dough. What I ALWAYS do is unwrap my discs and use the plastic wrap as a helper/barrier/thing. I lay the two pieces on top of each other so they’re kind of like a plus sign (perpendicular to each other…make sense?). I think sprinkle the plastic wrap generously with flour, plop my disc down, and roll that bad boy out. Be sure that your rolling pin and the surface of the dough are floured well too so that it doesn’t stick and then tear. The beauty of using the plastic wrap this way is that instead of rolling your dough on your rolling pin like many people advise (it never works for me because the dough is too fragile), you can just slip your hand under the plastic wrap, flip it into the dish, and then gently pull it off, leaving the dough perfectly laid in the pie dish. Hopefully all this makes sense.

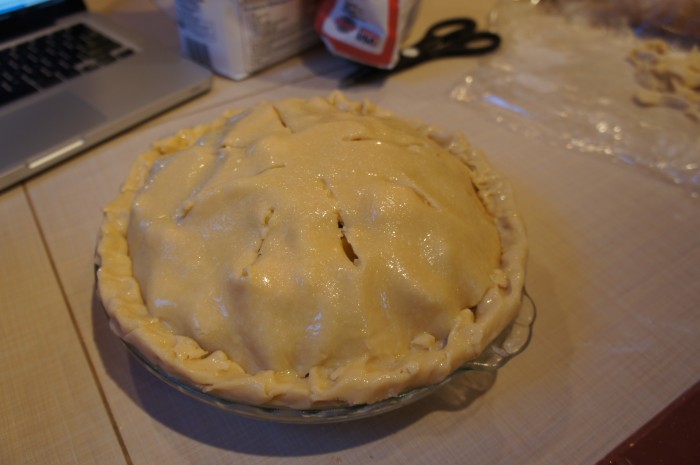
Now, spoon the apples into pie pan. Dot with butter, roll out your other disc of pie dough, and cover the pie. I trim the excess dough off the edges, and then pinch the two layers into a little edge around the pie. Be sure to cut several steam vents across top. If you want, you can brush the top with beaten egg, and sprinkle with additional sugar.

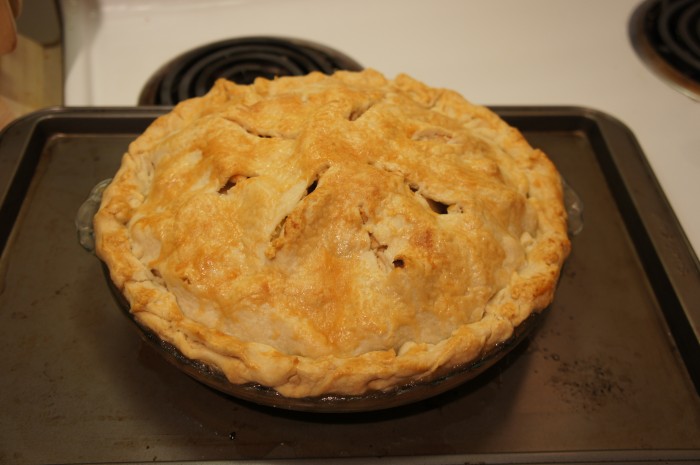
Now pop that sucker in the oven! I always like to put my pies on a cookie sheet when they bake, just incase some of the juices overflow. I hate it when things drip onto the bottom of the oven, and then it burns and gets smoky everytime you bake anything. So, yeah, it helps avoid that. Bake the pie for about an hour, or until the crust is golden brown and the juices are bubbling. I baked this pie for exactly an hour, and the apples still had a little bit of crunch to them, which I really enjoyed. Let the pie cool for a long time so that the filling can cool and congeal, I say at least 6 hours. Serve with vanilla ice cream (if you want, it also tastes really good plain OR with salted caramel ice cream if you can get your hands on some).
Sriracha Salt

Sriracha Salt

Today is my dad’s birthday! In honor of this, I will reveal to you all what I got him for his birthday.

He recently took a trip to New York and went to eat at David Chang’s Momofuku restaurant. He love love loved it, so my sister and I bought him the Momofuku cookbook. It looked beautiful, and I hope that the next time I’m there he and I get to cook something out of it.

Anyway, he and his girlfriend also really like 2 things: salt and spicy food. On my trip up to surprise him for his birthday, they informed me that they’ve been adding hot sauce to their already hot salsa. It’s a little pathetic. Anyway, I found this recipe for sriracha salt on pinterest (it’s actually from the new Sriracha cookbook though) and thought it would make a good little homemade gift.

It’s incredibly simple. You’ll need sriracha and, you guessed it, salt.

Sriracha Salt

Ingredients

5 tsp sriracha
1/2 cup table salt

Ingredients

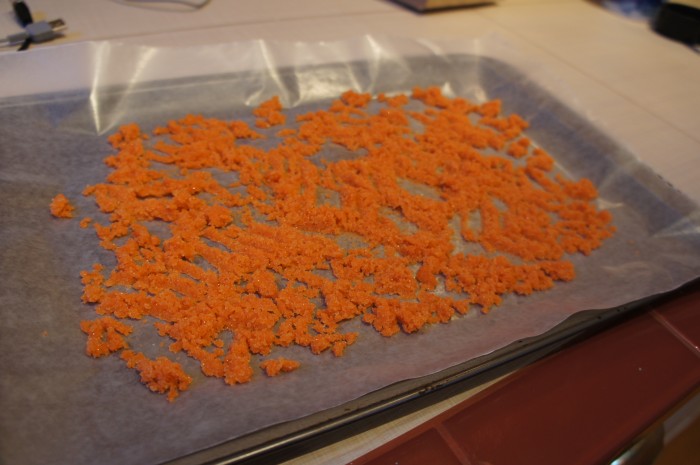
In a bowl, combine sriracha and salt in a bowl and stir well. Spread the mixture out on a sheet of wax paper on a pan. Let it dry for 1-2 days. When it dries, it clumps up, so I broke it up everytime I noticed it getting hard and clumpy. Then I put it into a neat little jar!

I think it’d tasted good on raw vegetables, especially carrots, and also anything that you think needs a little spice and a little salt!