Recipes

Simple Brownies

Simple Brownies with Almond

Simple Brownies

Simple Brownies

My co-worker Kelly, who I’ve written about before, has a commune dinner every Monday night. He lives near a bunch of his friends and all of them and their kids (and their pets) all convene for dinner every week. A few weeks ago, Jonah and started joining in. It’s really nice to have that sense of community, which I think can be hard to find when you’re in your 20s and you don’t live near your family.

Going over to Kelly’s on Mondays is so calming. Every member of this group is so kind and funny. They have been having these meals for I’m not sure how many years, but they weren’t even phased when Jonah and I started showing up every week, and have been so incredibly welcoming, pulling up chairs to the table and always making sure we have a drink in our hand. It immediately feels like we’re a part of this family, with the two little boys running around the house and the dogs barking outside. And they feed us delicious food, so I can’t complain.

The first night we went, instead of just grabbing a bottle of wine and heading over (which I was later scolded for not doing), I decided to whip up a batch of brownies. There’s a relatively quick recipe in An Everlasting Meal, so I pulled it out and made a couple of adjustments (mainly replacing half a teaspoon of the vanilla extract with almond extract), and they turned out to be a huge hit. The almond was a really nice and unique flavor with the chocolate.

Simple Almond Brownies

Ingredients

4 oz unsweetened chocolate
2 sticks butter
3 eggs
2 cups sugar
1 1/2 tsp vanilla extract
1/2 tsp almond extract
1 cup flour
a handful (or 2) of chocolate chips, or walnuts

Instructions

Preheat your oven to 350 degrees and grease a 13×9 inch baking dish or pan. In a double boiler on the stove (or a heat proof bowl or a pot over a pot of simmering water), melt the chocolate and butter together, stirring so it’s all nice and smooth. Remove the bowl or pot from heat and let it cool. Once it is cool, add the eggs, beating after each addition. Add the sugar, vanilla, and almond, stir, and then add the flouring, stirring until combined. Pour the batter into the pan and sprinkle the chocolate chips (or walnuts, if you’re using them) on top. You can put on as many as you like or as few. Bake for about 30 minutes, but do the clean knife/toothpick check at 20. Mine took roughly 35 minutes. Enjoy!

Rice Cakes

Rice Cakes (using rice gone wrong)

Rice Cakes
Rice Cakes

Rice Cakes

Sometimes you’re in the kitchen and you have a lot going on and you miss something going wrong. Maybe you accidentally over-salt your pasta or you burn your veggies. There’s a whole (albeit little) chapter in Tamar Adler’s book all about how to save your mistakes. For example, turn those burned veggies into a smoky veggie salad. Or take that over-salted pasta, mix it with some herbs and butter, and make a frittata. The possibilities are endless.

A while ago, Jonah and I made these rice bowls. We doubled the rice recipe, and I must’ve done some math wrong and put in way too much liquid. So, while the rice tasted good, it was definitely a little mushy. After sitting in the fridge sadly for a week, I was thinking of using it to make rice cakes. Jonah reminded me about the “Further Fixes” chapter in An Everlasting Meal, so to the book I went. It kind of told me what I was already thinking of doing, so on I went.

Rice Cakes

Ingredients

roughly 3 cups of overcooked rice
1 large shallot, finely chopped
1/2 leek (if I’d had a whole one, I’d have used it), thinly sliced
salt, pepper
garlic powder
parmesan cheese
olive oil for cooking

Instructions

I heated up the rice in the microwave, drizzling it with water to kind of re-steam it. If your rice won’t stick together (perhaps it’s not quite as mushy as mine was), feel free to stir an egg into the mix. Stir together the rice, shallot, and leek, and add any seasoning you like. I added a few shakes of garlic powder, probably 1/2-1 tsp salt, and probably 1/4 cup grated parmesan. But none of this has to be exact. Put a bunch of stuff you like in there. I bet chopped sage would’ve been good, as would onion and garlic.

Heat some olive oil in a nonstick pan over medium heat, form the rice mixture into patties, and cook on each side until golden brown, roughly 3-5 minutes. Add more oil as you need it. You want them to have a nice crispiness on the outside to add some texture.

We ate them alongside some delicious panko-crusted tilapia and roasted broccoli. They would make a great appetizer for a fancier dinner. Also, they would make a delicious breakfast had I put a fried egg on top. Or melted a slice of cheddar. With some breakfast sausage on the side. See, there are so many uses for botched food! Now go mess up some rice.

Rhubarb Thyme Hand Pies

Rhubarb Thyme Hand Pies

Rhubarb Thyme Hand Pies

Rhubarb Thyme Hand Pies

It’s early spring. Do you know what that means? It means rhubarb. Yep. I couldn’t be more excited. Jonah and I went to the farmer’s market and I picked up about two pounds of the it and I decided to make Rhubarb Thyme Hand Pies. Now, I have only made hand pies once before, and they were delicious. I followed a recipe from the Dahlia Bakery cookbook, so the dough was specifically for hand pies, as was the filling. But I didn’t really have a recipe for these, so I decided to wing it.

Part of my concern with kind of winging it was that the dough would be too delicate and flaky to hold up as a handpie. Second, I worried that the filling, being mostly rhubarb which falls apart as soon as it’s cooked, would be too liquidy, not enough solid. So I did a little research, and while I wasn’t completely happy, it was certainly a first step. I think I made the pies a bit too big. I didn’t really want to do the 3.5 inch circular cookie cutter route (cutout two circles, run milk around the edge of the bottom one, fill inside the milk edge with filling, put another circle on top and seal the edges), so instead I divided my dough into 8 pieces and rolled each one out until it was about 1/4 inch thick. I like the way these are shaped better, a little more rustic seeming, but I do think that they might’ve held up better if I had gone the cookie cutter route. The dough was, as I was concerned about, a little too delicate and started to crumble when you picked it up. And I certainly could’ve put more filling in each pie (the leftover filling is in a tupperware at home, and I’m looking forward to stirring it in with some Greek yogurt for a snack later).

All that being said, they were definitely tasty, and I would recommend them! But hopefully I’ll be trying another batch here soon with a few changes. I’ll let you know how it goes.

Rhubarb Thyme Hand Pies

Ingredients

Pie Crust

2 cups flour
1 cup butter (2 sticks), cold, cut into cubes
1 tsp salt
up to 1/4 cup water

Rhubarb Filling

4 cups rhubarb, in a half inch dice
3/4 cup sugar
1/2 – 1 tsp fresh thyme
Milk for sealing

Instructions

Pie Crust

In a mixer or a food processor, combine the flour, butter, and salt. If the dough is not coming together, add water, 2 Tbl at a time, until it does. Form dough into two discs, wrap in saran wrap, and refrigerate for at least 1 hour.

Rhubarb Filling

While the dough is refrigerating, put cubed rhubarb, sugar, and thyme into a small saucepan. Over medium heat, cook the rhubarb until it breaks down and simmers for a couple minutes. Allow the filling to cool while the dough finishes up in the fridge.

Preheat your oven to 375 degrees. Divide each disc into 6 even pieces (I only did 4 and the hand pies were too big, in my opinion). On a floured surface, roll each piece of dough into as circular a shape as you can. You’re going to be folding them in half, so even if they’re not so round, symmetrically misshapen is best. Line a baking sheet with parchment paper, and assemble the pies on the baking sheet. What does assembling them entail? Well, dunk your fingers in milk and wet the edge of your circle of dough. Fill half of that circle, inside the milk line, with the rhubarb filling, and fold the opposite side of dough over the filling. Press around the edges, allowing the milk to seal the two sides of the dough together. With a fork, press around the edges, and use a knife to cut three little slits in the top for steam (this way the pies are less likely to explode). I was able to fit 4 on a pan, but because yours will probably be smaller, you may be able to fit 6. Bake for 20-35 minutes or until the dough looks cooked and the edges are golden brown. Allow to cool for about an hour before digging in.

Chicken Liver Pâté

Chicken Liver Pâté

Chicken Liver Pâté

Chicken Liver Pâté

Chicken Liver Pâté
Chicken Liver Pâté

Recently I have discovered my love of liver in pâté form. When I was younger and my parents would eat liver, I would screw up my face and impolitely decline a taste. Now I wonder why I was so against the stuff. It’s rich and creamy and makes a delicious spread for a snack or appetizer.

After seeing a recipe in An Everlasting Meal for chicken liver pâté, I had been wanting to try it. But, like anything I’ve never cooked before, I was a little nervous about it. I didn’t know if it could go wrong, and if it could, how badly. I had been checking the meat counter at my grocery store for a few weeks and hadn’t seen any chicken livers until one day, there they were, slimy and maroon, in all their glory. So I grabbed a pound of them. How much did a pound of chicken livers cost me? $2.73. This stuff is cheap AND delicious? I’m so in.

I got home, pulled out my book, and started cooking.

Chicken Liver Pâté

Ingredients

1 lb chicken livers
salt and pepper
roughly 12 Tbl butter (1 1/2 sticks)
2 Tbl white wine (sherry, bourbon, scotch, cognac, or brandy will also do)
1 shallot, finely chopped
1/2 leek, finely sliced
1 small clove garlic, minced
2 Tbl water
a pinch of cloves
a pinch of cinnamon
1/8 bay leaf, crumbled
1/4 cup fresh thyme leaves, chopped (I didn’t do quite a quarter of a cup)

Instructions

Trim any connective membrane type stuff from the livers and season them with some salt and pepper. Melt 1 Tbl of butter in a nonstick pan. When it’s starting to sizzle, add a batch of livers (depending on how big your pan is, you’ll need to cook the livers in 2-3 batches). Don’t crowd them in the pan; leave some space around each liver. Let each liver brown on one side, then flip and brown on the other side. Put the livers on a plate or in a shallow bowl – they will release some juices. Add 1 Tbl of wine to the pan and scrape the brown bits from the pan. Pour the wine over the cooked livers. Add more butter to the pan, and cook the rest of the livers as you did above, skipping the wine step.

After you’ve cooked all the livers, add the shallot, leek, and garlic to the pan with the remaining 1 Tbl of wine and 2 Tbl of water. This will help the veggies become tender. Cook the veggies over medium heat until they’re tender.

When the veggies are done, add them, the livers and their juice, the cinnamon, clove, thyme, and bay leave to the blender. Don’t blend yet! Cube one stick of butter and add the cubes to the blender too. Blend it up and taste. Season as you see fit (I found myself adding more salt…). When it’s seasoned to your liking, put the pâté in a bowl and allow to cool for 30 minutes before serving. It may seem liquidy, but it will solidify as it cools. If you’ve got leftovers (like we did), melt some butter and spread it over the top of the pate, and allow to cool. You can store it like this (according to Adler) for up to 2 weeks.

We liked our pate with crostini and herbed goat cheese, or nut thins and various cheeses from our grocery store’s scrap bin as well as one from the PSU Farmers Market.

beet tart

Beet Tart

beet tart

OK people – I know we read a lot of food books and talk about them all the time, but if there is ONE book you are going to read from our suggestions, let it be An Everlasting Meal by Tamar Adler.  It is amazing book that changed my life, and is sure to make you think and act differently around food.  If you have not read it yet, go read our blog post on her book, and then continue below.

This beet tart is a perfect example of Tamar’s philosophy and grace: if you attacked this beet tart recipe from start to finish in one cooking session alone – it would take most of your day; first you would have to roast the beets (which takes a long time anyway), then make tart dough and chill it for an hour, then bake the tart dough, then put together the filling, bake some more, add the sliced beets, and bake once again.  Sounds daunting! I would never have done this recipe if it wasn’t spread out over many days and incorporated in the general meal preparations for the week.  However, the manner in which it was made made it feel like I was just throwing leftovers together in a very creative way, rather than a labor intensive ordeal.

Here’s what happened: A few days before, Annie and I roasted a whole bunch of veggies for dinner (or was it lunch?).  We filled the whole oven and roasted lots of different veggies with olive oil and salt.  I fit the beets in a small pan with a 1/2 inch of water in the bottom, covered them with foil, and let them roast for a long time (probably too long, I may have forgotten about them).  We ate the other roasted veggies as part of our dinner that night, but we had no intention of eating the beets that day, so we didn’t have to wait around for them to roast.  We let them cool and then peeled them and put them in the fridge before bed.  Now we had roasted beets peeled beets in the fridge.  We had no plan but we had ideas: beet salad, beet pasta, or beet anything; they were simply a nice starting point.

A few days before roasting the veggies, we had made a different veggie tart using the Olive Oil Tart dough recipe that can be found in Tamar’s book, so we had some leftover in the fridge.  A few days later, I looked in the fridge and saw that a perfect storm had brewed for a beet tart.  There, sitting in the fridge waiting to be used, were roasted peeled beets, tart dough, and some leftover ricotta cheese.

If you want to make this recipe from start to finish, more power to you.  However, I would suggest at least making the tart dough a day ahead, and then looking through your fridge to find any vegetables that would work, roast them, and put them on top of the tart in place of beets.

Beet Tart

Note: You’ll want to roast your beets or other vegetables before you make the tart dough.

Ingredients

Olive Oil Tart Dough

2 1/2 cups all-purpose flour
1/3 cup olive oil
1/2 cup ice water
1 teaspoon salt

Beet Tart Filling

1 1/2 cups ricotta (fresh)
1/4 cup olive oil
2 Tb. cream (I think I just used leftover creme fraiche)
1/2 t. salt
2 egg yolks
a pinch of fresh thym or rosemary

Instructions

Olive Oil Tart Dough

Mix all ingredients together in a bowl. If its too dry, add more water, a tablespoon at a time. Divide the dough in half and roll into balls, then put them in the fridge to chill.

Take out one dough ball (you get to save the rest for another day!) and roll it out on a floured counter until its about 1/4 inch thick. Heat the oven to 400 degrees.  Grease the bottom of a 9-inch pie pan and dust with a bit of flour. Lay the crust in the pan and trim the edges. Prick the bottom a few times (this dissuades bubbles from appearing in your tart dough). Cover the crust in aluminum foil and put some dried beans or pie weights in to fill the tart and hold down the dough. Bake for 20 minutes.

Beet Tart Filling

Whisk together filling ingredients. Pour into the pre-baked tart dough (remember to take out the dried beans and aluminum foil!) and bake at 400 degrees for 15 minutes.  Now lay your beet slices (I cut mine into half-moons) on top of the ricotta filling in a single layer and bake for another 10 minutes.  Let it cool and eat at room temperature.

It is very filling and great for lunch the next day and many days after!

Soba Noodles with Mango and Eggplant

Soba noodles, eggplant, onion, mango, cilantro, basil, and dressing all tossed into a bowl.

Jonah slices and dices all the colorful ingredients for the soba noodles.
It feels very weird to spread a pile of noodles on a dish towel to dry... But I'll do pretty much anything Ottolenghi tell me to.

As I mentioned in an earlier post, Jonah and I made dinner for my mom and her boyfriend back in December. Now I believe I have told you of my love for Yotam Ottolenghi’s cookbook “Plenty,” yes? This meal was no exception. The meal was all vegetarian, and 2/3 dishes were from that cookbook. The meal was light, refreshing, and packed with flavor. Not to mention the great company.

I fear that I am reaching a point where I cannot keep posting variations of these recipes, I just need to tell you to please, please, please go buy this cookbook. Even if vegetarian food isn’t your thing, even if the photos don’t make your stomach growl, even if the lists of ingredients leave you with questions swirling around in your hear. I beg you. Just go buy it. And then, please proceed to make everything in it, even if it doesn’t jump off the page. Every single dish I have made from this book (as well as his other book, “Jerusalem”) has been so lovely and flavorful that I wish I had tripled them all so I could enjoy the leftovers or share with a bunch of my friends.

Back to the dinner. These room temperature soba noodles are one of the few recipes in the book that did jump off the page for me. But somehow, I still hadn’t made it. While it’s a little prep-heavy, trust me, it’s worth it. Packing a lot of flavor and lots of little bites with different tastes (onion, eggplant, peppers, mango, the list goes on…), this recipe is bound to be a crowd pleaser. I can see it being especially good for kids. What kids don’t love noodles and mango? That’s what I thought: none.

Soba Noodles with Mango and Eggplant

Ingredients

1/2 cup rice vinegar
3 Tbl sugar
1/2 tsp salt
2 crushed garlic cloves
1/2 of a red chile, finely chopped
1 tsp sesame oil
zest and juice of a lime
1 cup sunflower oil (we used canola)
2 eggplants, cut into ~1 inch cubes
a bag of soba noodles
1 large ripe mango (let’s be honest, more than one probably couldn’t hurt…), cut into ~3/4 inch cubes or thin strips
1 2/3 cups fresh basil leaves, roughly chopped
2 cups cilantro leaves, roughly chopped
1/2 red onion, thinly sliced (think paper thin, if you can)

Instructions

In small pot, warm the vinegar, sugar, and salt until the sugar just dissolves. Remove from heat, then add the garlic, chile, and sesame oil, and, once it’s cool, the lime zest and juice.

In a large saute pan, heat the oil and fry up the eggplant. You’ll probably need to do this in a few batches. But you want the eggplant to be nice and golden brown. After all the eggplant is cooked, put it in a colander in the sink, sprinkle (“liberally”) with salt, and leave to drain.

While cooking the eggplant, bring a large pot of salted water to a boil. Cook the soba noodles in the boiling water – you want them to be soft, but still a little al dente. Drain the noodles and rinse them under cold water to stop them cooking. Spread them on a dish towel to dry.

Now the fun part: throw the noodles, dressing, mango, eggplant, onion, and half the basil and cilantro in a bowl and toss to coat/combine everything. You can make this a couple hours ahead of serving, and stop here, letting it sit to absorb flavors and come to room temperature. When you’re ready to serve it, add the rest of the herbs. Enjoy!

Mom's dinner prep activities: playing tug-of-war with Lulu while Jonah and I chopped and sauteed in the kitchen a few feet away.

Jonah’s Birthday: Mint Chocolate Chip Cake

I wasn't able to catch it before it was thoroughly enjoyed by our house, but hey, it still looks delicious!

Jonah’s birthday was a little over a month ago, but I am just now getting around to posting about his birthday cake. It has been a little busy around here! We are finishing up the recording of Jonah’s first solo full length album – I was in the studio Friday afternoon, Saturday afternoon, and am going back today. Let me tell you guys, it sounds amazing. I’ll tell you all more about it when we get closer to the release. But big cool things happening, I promise.

Anyway, for Jonah’s birthday, my roommate Carmelle and I made him a mint chocolate chip cake, a recipe I’ve been eyeing for quite some time. And let me say, of our birthday treats, this one has been my favorite. This chocolate cake recipe was definitely one of the more perfect ones I’ve made. It was perfectly chocolatey, light, and moist. In the future, I will use this cake as a base for many exciting things, I can tell. The frosting was wonderfully minty, but not overpowering. Overall, the flavors were really nice, and it’s definitely a good occasion cake because it’s unique.

Mint Chocolate Chip Cake

Ingredients

Cake

9 Tbl unsweetened cocoa powder
1 1/2 cups cake flour (If you don’t have cake flour and don’t want to buy a whole bag for 1 1/2 cups, use plain flour and replace 3 tbsp with cornstarch)
1 1/2 tsp salt
1 tsp baking soda
1/4 tsp baking powder
1 stick unsalted butter, at room temperature
1 1/2 cups sugar
2 large eggs
1/2 cup coffee
1/2 cup milk

Frosting

2 1/2 sticks unsalted butter
~4 cups powdered sugar
2-3 tsp peppermint extract (plus some for taste)
Milk, if necessary
150g dark chocolate, very finely chopped
green food coloring

Instructions

Cake

Butter and line with parchment paper two 9-inch cake pans and preheat oven to 350 degrees. In a medium bowl, sift together the cocoa, flour, salt, baking soda, and baking powder. In an electric mixer, beat the butter and sugar fora  few minutes until it’s smooth. Add the eggs, mixing after each addition until fully combined.

In a cup, mix the milk and coffee together and set aside. Add half of the dry ingredients and the coffee/milk mixture to the butter mixture, and stir. Add the second half of the dry ingredients and mix until smooth. Split the batter into the prepared cake pans, and bake for about 25 minutes, or until you’ve had a successful toothpick test. Remove from the oven and allow the cakes to cool for about 5 minutes in their pans, then remove them onto a wire cooling rack and allow them to cool completely before icing them.

Frosting

Now it’s time for the icing. I will give full disclosure: Carmelle and Mac made the icing, iced the cake, and decorated while I was out… doing something… I can’t quite remember at the time. I advise rinsing out the bowl of your electric mixer and using that again. Cut the butter into smaller pieces and put them in the mixing bowl. Beat until it’s fluffy. Now add the powdered sugar one cup at a time (or 1/2 cup at a time once you’re getting closer to the right consistency), beating between each addition until combined. If it gets too stiff, you can add a little bit of milk (think 1 Tbl at a time) to get it back to the right consistency. Add the peppermint extract and enough green food coloring to get it to that pretty mint green color. Slowly add the chocolate pieces until it looks the way you’d like and, more importantly, there’s a good amount of chocolate.

Put the first cake on whatever you’re going to use to serve: a cake stand, a plate, etc. Using about 1/4 of the icing,  frost the top of the first layer. Place second cake one top of the first, and cover the whole dang thing with the rest of the icing. Carmelle pointed out that one of the beauties of this cake was that if little crumbs came off the cake and got in the icing, it didn’t really matter, because there were already little brown bits of chocolate in it. Mac used the extra chopped chocolate to make a lovely little design op top. Serve with candles and a glass of milk!

Lamb & Love

Look! We did it! The lamb out of the oven, ready for a little rest.

Yes, this is what arrived to my office. It was very exciting and bizarre.
Prepping the baking dish while the lamb gets rolled

Clockwise starting at the top: brussels sprouts cooked in lamb fat/oil, salad, fingerling potatoes gremolata, and the star of the meal, the roasted lamb!

Did you know that February is Lamb Lover’s Month? Neither did I, until I was contacted by the American Lamb Board to participate in a lamb cooking contest (you can vote here, starting February 14th: www.lambloversmonth.com). Yes, that’s right folks. How could I possibly say no? So I filled out my registration, and got a boneless leg of lamb in the mail last Friday.

I immediately started researching lamb cooking techniques, and ended up kind of combining a few recipes. Because lamb is often used in Greek/Mediterranean cuisine, most recipes have lots of rosemary, lemon, mint, and even some yogurt sauces. I didn’t want to get too fancy because I wanted it to be something that we all could easily pull off. I wanted to do some kind of spice rub or marinade where I could leave the lamb overnight to really absorb the flavors of whatever I ended up going with.

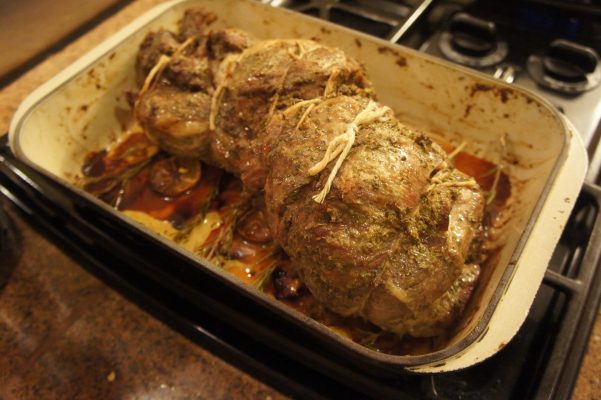
So after some research, I decided to go with an adapted version of a recipe from The Herbfarm Cookbook. I used varied amounts of all of the ingredients to go for a little more of the taste I wanted (more lavender, thyme, adding lemon, etc.) and was very happy with the result: a strongly herb-flavored (but not overpowering), perfectly cooked piece of lamb.

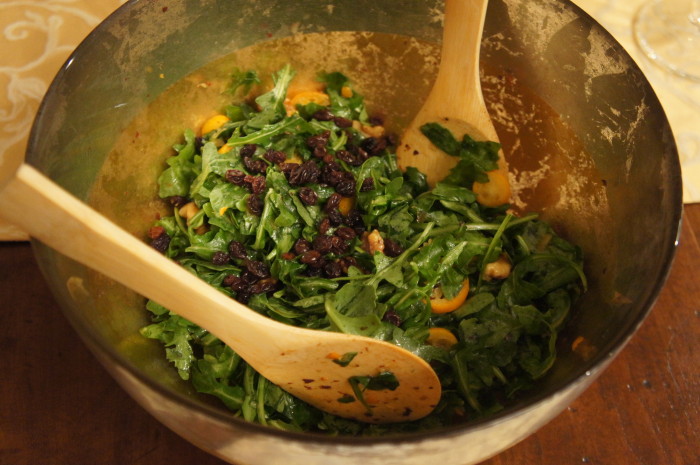
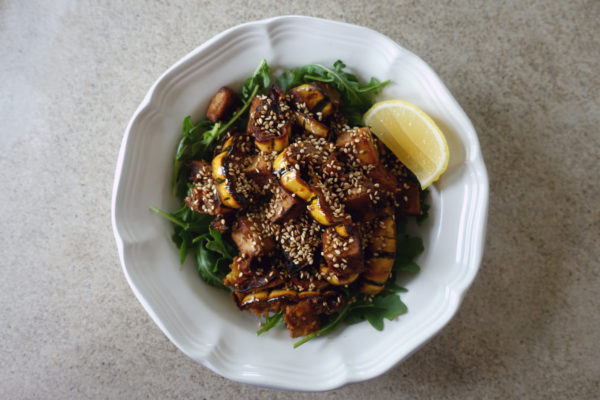
For our sides, we cooked brussels sprouts in a combination of melted lamb fat and oil: slice each sprout, top to bottom, into 3-4 pieces, heat the fat/oil, toss in a layer of sprouts (careful, it will spit and it will hurt – long sleeves are your friend), and sprinkle with salt. Cook until the bottoms are nice and dark, tossing occasionally if desired. We also made a rough version of fingerling potatoes gremolata: slice up your potatoes, toss in oil and salt, sprinkle with some chopped garlic, roast them until tender, and then when you’ve removed them, top them with some melted butter and chopped parsley. And salad. We had salad too. If you like this recipe, the blog post, even just the pictures, head over to www.lambloversmonth.com to vote for our little blog to win the Lamb Lover’s Month cooking contest! It would be super awesome, and maybe I’d even invite you over to enjoy some free lamb…

Hope you all have a lovely Valentine’s day, featuring some kind of delicious food! (A latte with your loved one? A sexy seafood dinner? Roasted lamb? The possibilities are endless – get out there and try something new and adventurous!)

Herb Rubbed Lamb

Ingredients

Lamb

1/2 cup fresh rosemary pines
4 tsp fresh or 2 1/2 tsp dried lavender buds
4 tsp fresh thyme leaves
6 cloves garlic, peeled
1 Tbl Dijon mustard
1 tsp salt
1 tsp freshly ground pepper
zest of one meyer lemon
6 Tbl olive oil
1 boneless leg of lamb (about 3 pounds, though more also definitely works)
6 woody branches of rosemary
1 meyer lemon, sliced into thin rounds (and seeded, if necessary)
optional: a few more cloves of garlic, number is dependent on your passion for the garlic

Sauce

1/4 cup red wine
1 tsp dijon mustard
1 tsp balsamic vinegar

Instructions

Lamb

Start by processing all the herb paste ingredients except for the olive oil in a food processor until the herbs (particularly the rosemary leaves) are chopped. Now, with the machine running, slowly pour in the oil. Most machines have a spout type thing at the top you can remove so that you can pour ingredients in while blending. Continue to blend until it has reached a thick sauce consistency, scraping down the sides when necessary. There will still be little chunks of rosemary and garlic, you can’t make a complete paste out of it, but do the best you can.

If the lamb is tied, untie it. Spread the lamb out, and with a sharp knife, trim as much fat as you can from both sides of the meat. Think that fat is gross and that you’re going to toss it in the trash? Don’t! Fat can be used for lots of things. Melt it down and use it to cook veggies in or make a broth (I think? I’m not sure how well that would actually work if you haven’t got ANY meat attached, but it’s worth a shot.) Find a baking dish where the lamb will fit snugly. Rub the top of the lamb with about half of the herb paste, flip it over, and rub the other side. Set it in the dish, cover with plastic wrap, and stick it in the fridge for 8-24 hours (the longer the better). Now, I am not particularly a fan of recipes where you have to refrigerate anything for more than an hour – planning ahead is not my forte. But you know what I’m learning? It’s so worth it. When you let anything (particularly meat) absorb the flavors of your marinade or rub for a long time, it makes such a big, flavorful difference.

Preheat your oven to 425 degrees. Remove your lamb from the dish and, attempting to remove as little of the herb rub as possible, roll the lamb back into it’s original shape. If this seems relatively impossible (as it did for Jonah when he was rolling it), just roll it into whatever shape makes sense – you just want it to be kind of spiraled and uniform in size. Hopefully that makes sense. We also took some whole cloves of garlic and stuck them in little crevices in the lamb before rolling it up. They got gently cooked, and made for a nice look when the lamb was sliced for serving. Take a few pieces of kitchen twine and tie the lamb snugly in three places (or more, whatever you need to do to make it work – just as few as possible, mostly). Put the rosemary branches and lemon slices in the bottom of the baking dish and gently set the lamb on top. Roast the lamb at 425 for 10 minutes before reducing the heat to 350 degrees. Roast for about an hour and a half, or until an instant read thermometer inserted into the center registers 130-135 degrees. Note: ours DID NOT take an hour and a half. It was done a little over an hour at 350. Take the temperature in a few places and use the lowest . Remove the roast from the oven, transfer it to a board (preferably one with those grooves around the edges as it will be releasing lots of juices), cover it loosely with foil, and let it rest for about 10 minutes.

Sauce

While the meat is resting, whip up the sauce. Take the rosemary branches and lemon slices out of the baking dish, and tilt the dish so the drippings all run into one corner. Skim off as much fat as you can, transfer the remaining juices to a little saucepan. Add the wine and put it over low heat. Use a whisk to stir in the mustard and vinegar, and season to taste with salt and pepper if you’d like. Remove the strings from the meat and slice it thinly. Arrange on a platter (or just throw a couple slices on each plate) and pour the sauce over. Voila! A delicious dinner.

Kumquat Arugula Salad + A new cookbook

Everything all tossed together, ready to eat.

Alright, it’s been a while. Let’s rewind a little bit to the holidays. The holidays were great. Why? I got a white Christmas, lots of good food, time with Jonah’s family, time with my family, and 3 new cookbooks. My sister Emily gave me this beautiful book called “Ripe” by Cheryl Sternman Rule (not to be confused by a cookbook by the same title by the author of “Tender”). Emblazoned with a beautiful peach on the cover, Ripe is perfect for the artistic/visual cook because it is arranged by color. That’s right, color. The first section is reds (tomatoes, rhubarb, strawberries, pomegranate, cranberries, etc.), followed by orange (carrots, butternut squash, clementines, kumquats…), yellow, green, purple and blue, and white. In each color are pages of produce, and for each produce item, one recipe. Yep, only one. I was excited to get this for many reasons: it’s pretty, the recipes look delicious, and because there’s only one recipe per main ingredient, it is forcing me to branch out and try things I haven’t tried before. For example, kumquats.

When I was growing up, my grandfather’s favorite restaurant in Tucson called Caruso’s, was a frequent stop when we went to visit. And because my sisters and cousin and I were all young, we had trouble sitting at a dinner table for an hour or 2, as my family often does. So we would always run around the restaurant. In front of the restaurant and out in the courtyard, there were many kumquat trees; I don’t think I realized that kumquats weren’t just little oranges, but their own entity entirely. We would stand under the trees, reaching up and plucking these little orange gems from the branches, and squealing when we bit into them because they were so sour (we didn’t realize at that age that the fruit just probably wasn’t ripe yet). This memory of kumquats has always been sweet for me, but because especially so when I lost my grandfather a couple years ago. Remembering him reach up into the branches to pick kumquats for his granddaughters and the wonderful meals we had with him at that restaurant will always make me smile. This is possibly my favorite thing about food: the memories that are associated with it, the adventures it takes us on, whether new or past.

Anyway, coming back from memory lane: Jonah and I owed my mom dinner. See, Jonah is making an album, and raised the funds with Kickstarter. My mom chose the option to have us make her dinner in exchange for her donation, and so we decided to use my new cookbook (and an old favorite, Plenty). We picked the kumquat arugula salad with currant-walnut vinaigrette. And it was wonderful. Light and rich at the same time thanks to the walnut oil. The little pieces of kumquat were like little bursts of brightness in this salad.

Kumquat Arugula Salad

Ingredients

1/4 cup dried currants
15 kumquats, divided
3 cups packed baby arugula
1/2 cup walnut halves, toasted
1/3 cup walnut oil
1/4 tsp red wine vinegar (or more. I added quite a bit more.)
salt and pepper

Instructions

Put the currants in a small bowl and cover them with about half a cup of hot water. This will rehydrate them, or “plump” them. Let them sit in the water for about 5 minutes, then drain. Set aside.

Take 10 of the kumquats and slice them thinly, removing any seeds. You will want a nice sharp knife for this, as these little rinds can be tricky. Put the kumquat slices in a salad bowl atop the arugula, and sprinkle over the walnuts and half the currants.

Chop the rest of the kumquats, getting rid of any seeds, and put them in a mini food processor with the remaining currants. If you don’t have a mini food processor, a blender or a regular food processor should work… Pulse to mince. Add the walnut oil, vinegar, 3/4 tsp salt, and 1/8 tsp pepper. Puree until you have an emulsified dressing, or about a minute. There will still be little chunks of fruit, and that’s totally ok. Adjust seasoning to taste (as I said above, I added quite a bit of red wine vinegar as I just really thought it needed more acid. Pour about half of the vinaigrette over the salad and toss gently. You can put the rest of the vinaigrette on the table with the salad.

Latkes (and Belated Happy Hannukah)

These latkes get 2 thumbs up.

Yes, I know. By the time this post gets published, Hannukah and the time for latkes will be over. But if there is anything I’ve learned from the past week, it is that latkes should not be a “once a year” dish. They make a great little side dish, or a base for eggs benedict, or even just a fried egg on a Saturday morning. This is especially true once you’ve found a recipe you really like. And I have. After doing some hunting around and even trying another recipe I found, I made the latkes from “Jerusalem,” a cookbook I have previously written about, by Yotam Ottolenghi.

Now this recipe is what made me really want this cookbook. I thought it was interesting that there weren’t onions in it, and I also had never tried latkes with parsnips, although I know it’s not an uncommon thing. And here’s what I liked about these: Not too salty (an issue with the first recipe I tried this season), I liked having the chive flavor in there (although I halved the chives, because one of the people I was cooking for doesn’t like them), and the parsnip and very dried out potato made it extra crispy. Also, the fact that you fry them in a combination of butter and oil didn’t hurt.

Potato & Parsnip Latkes

Ingredients

5 1/2 cups peeled and grated waxy potatoes, such as Yukon Gold
2 3/4 cups peeled and grated parsnips
2/3 cup finely chopped chives
4 egg whites
2 Tbl corn starch
Butter and oil (preferably canola or sunflower) for frying
salt and pepper
sour cream and applesauce to serve

Instructions

For all of the grating, I recommend the grater attachment for a food processor, but if you haven’t got one, a box grater will work just fine. Then maybe you’ll have done enough physical activity to justify the fried potato goodness you’re about to eat.

Squeeze the grated potato out in a clean dishtowel (make a little satchel, twist the ends, and squeeze!) into the sink. Some recipes reserve the juice, let it separate, and then add the starch back in. This one doesn’t call for it, but if you want to, go for it. After you’ve squeezed out the potato, spread it out on a clean kitchen towel to dry as completely as you have time for. In a large mixing bowl, combine the potato, parsnip, chives, egg whites, corn starch, 1 tsp salt, and as much pepper as you’d like.

Preheat your oven to 250 degrees, and in the oven place a rimmed baking sheet with a cooling rack on it. Also prepare a plate or baking sheet with a couple layers of paper towel.

In a (preferably non-stick) pan, heat enough butter and oil so it’s ~1/4-1/2 inch deep over medium-high heat. To see if your oil is hot enough, drop in a little chunk of your potato mix. It should sizzle and bubble a bit without spitting violently. If it isn’t hot enough, take out the potatoes and keep heating and try again. When it is hot enough use a spoon to scoop about 2 Tbl portions of the potato mixture, squeeze out some of the juices, and shape into patties and carefully drop into the oil. Or, you can use my tried and true method: squeeze out the juices, drop into the oil, and then quickly use your spoon to spread and press the mixture into a patty. Fry for about 3 minutes a side, or until they are as dark/cooked as you like them, then flip and cook the other side. Remove from pan to the paper towels, then keep warm in the oven. Serve with sour cream, applesauce, and holiday cheer 😉 Enjoy!

Delicata Squash and Tofu with Miso & Molasses | Serious Crust by Annie Fassler

Delicata Squash and Tofu with Miso & Molasses

Delicata Squash and Tofu with Miso & Molasses | Serious Crust by Annie Fassler

Update October 2017: I made this recipe again for dinner last night, after seeing squash at the store and wanting to EAT IT ALL. One of the things about the re-design that happened about a year ago on this blog, and about having a blog that has been going for about six years now, is that I look at old pictures and old writing and I just cringe. So I took new pictures, gave the post a little love, and am sharing it again with the world. This is one of my absolute favorite fall dishes: it uses lots of Asian ingredients (miso, soy sauce, sriracha), delicata squash (my personal favorite), and greens (which means it’s healthy, right?).

When Jonah and I returned from Thanksgiving, we were in the mood for something wintery, but a little on the healthier side. Let’s just say that the weekend was full of heavy food and indulgences, as Thanksgiving is supposed to be. I found a dish on 101 Cookbooks a while back that I’d always wanted to make, so we pulled up the recipe, made a quick run to the grocery store, and whipped up this squash and tofu cooked with miso and molasses. It can be served with rice, but I recommend some roughly chopped arugula, like the recipe says.

Continue reading “Delicata Squash and Tofu with Miso & Molasses”

Shakshuka

Shakshuka for breakfast! Looks amazing.

I have discovered possibly the best Israeli-inspired brunch dish of all time. You think that’s a really specific category? It’s not. I know this because I now have two whole cookbooks from chef Yotam Ottolenghi (“Plenty” and “Jerusalem”). Born and raised in, guess where, Jerusalem, Ottolenghi moved to London in 1998 where he has a deli chain and a restaurant (or two… I’m not positive). Anyway, last year, my mom gave Jonah “Plenty” for his birthday, and while the pictures are absolutely beautiful and the food looks delicious, the recipes are a little intimidating. Lots of kind of obscure ingredients like muscovado sugar and tamarind paste and harissa. So we made maybe one or two things from it. But in the last year, we have grown much more ambitious in the kitchen, so when I was in Berkeley visiting my sister and I saw “Jerusalem” (and it’s latke recipe, which I will sharing with you shortly) I wanted it. Badly. And guess what. I got it. For my birthday. From my sister. Because my family is awesome and gifts each other beautiful cookbooks and kitchen appliances.

Anyway, when I was home for Thanksgiving, my dad made the shakshuka out of “Plenty” for brunch one morning. (Let it be noted that there is ALSO a shakshuka recipe in “Jerusalem” and that they are, indeed, different.) Now, as one who has only recently grown to love bell peppers, I was skeptical about liking this dish. It is, afterall, mostly bell peppers. But oh my gosh you guys. Go make this NOW. It’s so amazing. Really complex flavors (thanks saffron and muscovado sugar), brilliant colors, and delicious leftovers. Best enjoyed with some crusty bread (think rye or a French batard or something like that).

Shakshuka

Serves 4 generously

Ingredients

1/2 tsp cumin seeds
3/4 cup olive oil or vegetable oil (I would maybe do a little less than this, but try it and see what you think)
2 large onions, sliced
2 red bell peppers, sliced into 3/4-inch slices
2 yellow bell peppers, same preparation
4 tsp muscovado sugar (yes, it’s an obscure ingredient, but now I want to put it in everything)
2 bay leaves
6 sprigs worth of thyme leaves, roughly chopped
2 Tbl chopped parsley
2 Tbl chopped cilantro, plus extra for garnish
6 ripe tomatoes, roughly chopped (if it’s not tomato season, 2 small cans of canned tomatoes will work perfectly, but I would recommend draining most if not all of the juice first.)
1/2 tsp saffron threads
pinch of cayenne
salt and pepper
up to 1 1/8 cups water
4-8 eggs

Instructions

In a very large pan (seriously, probably the biggest pan you’ve got is a good idea), dry roast the cumin seeds on high heat for a couple of minutes. Add the oil and onions, and saute for about 5 minutes. Then add the peppers, sugar, bay leaves, thyme, parsley, and cilantro, and keep cooking it on high heat for 5-10 minutes, until everything is starting to get some nice color to it.

Now add the tomatoes, saffron, cayenne, and a bit of salt and pepper. Bring the heat down to low and cook for 15 minutes. If you aren’t using canned tomatoes, keep adding water during this time so that the mix has kind of a chunky spaghetti sauce consistency. Because the canned tomatoes were pretty juice and I didn’t drain them completely, I found no need to add water. Give the mixture a taste, and adjust the seasoning as you see fit. More salt? More pepper? More muscovado sugar? Go nuts.

After 15 minutes on low heat, go ahead and remove the bay leaves. Now Ottolenghi has you divide the mixture among 4 little frying pans, but let’s face it, I’m not going to unnecessarily dirty 4 extra dishes. If it’s a fancy breakfast and you’ve got those adorable mini cast-iron skillets, maybe that’s your thing. But I just kept it all in the same one big pan for this part. Make some gaps in the pepper mix, and break one egg into each gap. (I surveyed my crowd to see how many eggs we each wanted, so I did 6.) Sprinkle with some salt and cover the pan with a lid (or tightly with some foil, if your pan doesn’t have a lid). Cook on “a very (!) gentle heat” for 10-12 minutes, or until the eggs are just set. A runny yolk is preferable. Sprinkle with cilantro and serve with some crusty bread. Enjoy! I promise, once you make this, you’ll come up with a million excuses/occasions to repeat it. It’s so delicious. And as I said, it makes great leftovers because the flavors just get to deepen even more.