Course

Quick Pickled Rhubarb

Quick Pickled Rhubarb | Serious Crust by Annie Fassler

A couple weeks ago, Jonah and I went to a Timbers game, and before the game started, it started to rain. It rained on and off for the whole game (which we lost) and when we left the stadium it was really pouring. We quickly decided to wait out the crowds and the downpour by ducking into a bar near the stadium called Shift Drinks. We got some tasty drinks and then decided to get a snack. I have a serious weakness for chicken liver pâté, so when I saw some on the menu, accompanied by pickled rhubarb, I knew I’d be ordering that.

Their pâté was creamy and sweet, and contrasted beautifully with the crunchy, sour rhubarb. I always love finding a new use for rhubarb, especially if it’s savory, so when I had that pickled rhubarb at Shift Drinks I knew I wanted to try making my own (and pairing it with my own chicken liver pâté, for which I use this recipe). This recipe is so ridiculously easy, and it makes a great snack either on it’s own or accompanying meats and cheeses on a homemade charcuterie board.

Quick Pickled Rhubarb

Ingredients

3 large stalks rhubarb
1 cup red wine vinegar
1 cup water
1/2 cup sugar
2 Tbsp salt
1 1/2 tsp fennel seeds
3 mint sprigs

Instructions

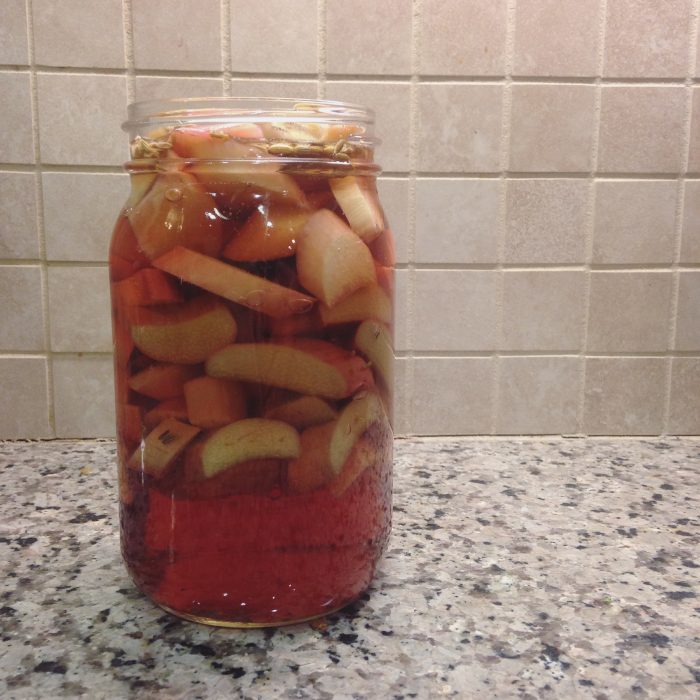
Slice the rhubarb into roughly half inch slices. Put the slices into a heat proof jar or bowl. In a small saucepan, combine the red wine vinegar, water, sugar, salt, fennel seeds, and mint. Bring to a simmer, remove the mint sprigs, and pour the liquid over the rhubarb. Cover and let stand overnight. In the morning, you’ve got quick pickled rhubarb!

What I Wanna Make: Passover 2016

Passover 2016 | Serious Crust by Annie FasslerPassover 2016 | Serious Crust by Annie Fassler

That’s right y’all. It’s about to be Passover. Bring on the matzo ball soup, the flourless desserts, and the brisket! I know, I know, this charoset is not the most photogenic food. And I realized while making it that to most people, it may not even taste that great. But man, does this stuff bring me back to my childhood.

I only buy Maneschewitz wine once a year because, well, it’s awful. But then again, so is most matzo (cardboard anyone?) and we all know that gefilte fish is possibly the least loved dish on the Passover table. But I love it all. And possibly my favorite thing at Passover, and the thing that I somehow made even when I couldn’t go home for the holiday, is charoset: at its simplest, a paste of chopped apples, nuts, wine, and cinnamon. This recipe is one that I found and tinkered with a few years ago, and I like it slathered on a matzo cracker and topped with a heavy dollop of horseradish.

Here’s what else I want to make this year:

Date and Apple Charoset

Ingredients

1 cup pecans
1/2 cup walnuts
2 Granny Smith apples, peeled, and cut into large chunks
1 1/2 cups pitted dates (I like Medjool), about 15
1/3 cup sweet wine (Manischewitz is the only authentic way to go)
1 Tbsp honey
1 tsp ground cinnamon
1/4 tsp salt
1-2 tsp fresh squeezed lemon juice
Horseradish and matzo for serving

Instructions

In the bowl of a food processor, pulse the pecans and walnuts a few times until you’ve got a coarse meal. Add the apples, pulse a few more times, then add the dates, wine, honey, and cinnamon. Blend until mostly smooth. Add salt and lemon to taste. Chill to serve.

Brown Butter Buckwheat Madeleines

Brown Butter Buckwheat Madeleines | Serious CrustBrown Butter Buckwheat Madeleines | Serious Crust

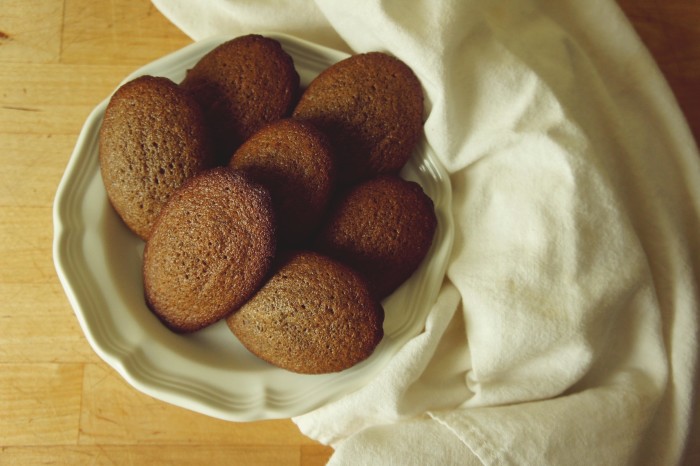
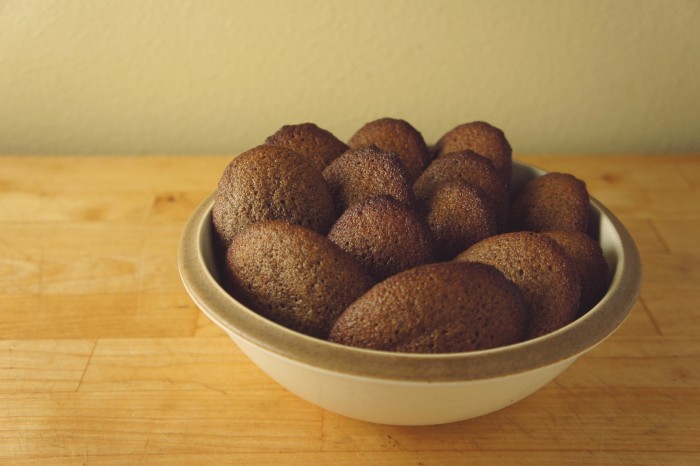
I don’t know that I’ve ever seen a batch of baked goods disappear so quickly. I just wanted to warn you right off the bat. Whether you’re making these buckwheat madeleines for you and your honey at home or to take to a fête, you should know either way that they won’t be around for long. I think it’s because they dance on the edge of sweetness and toe the line between a soft, cakey middle and crunchy browned edges. The outside is a tiny bit sticky from a spoonful of honey, and so when you finish eating one you have to lick your fingers, which only reminds you of the comforting flavors swirling around your tastebuds.

I spotted the recipe for these madeleines in my dad’s copy of My Paris Kitchen, which, yes I’ve been pining over and no I don’t have yet (but I may have just ordered). David Lebovitz has long had a home in my kitchen. I believe his lemon curd was the first one I ever made, and I’ve churned plenty of his ice cream recipes. When my dad got his cookbook, he almost immediately sent me the recipe for the leeks with mustard-bacon vinaigrette, which are delicious and you should definitely make them. I think I love his writing so much because I used to dream of packing up my life and moving to Paris, where I would use my 6 years of French lessons to make French friends and shop at French markets and cook French meals and it would all be so perfectly French.

But sometimes that isn’t quite how real life goes. You do sensible things like go to college and have roommates and get a job (or a few) instead of living the dream life in Paris. But that doesn’t mean you can’t have French inspired food and toss little French phrases around with other French speakers. And it certainly doesn’t mean you can’t brown butter in your kitchen so the house smells like nutty, toasty heaven, whisk that brown butter in with buckwheat flour and honey, and fill the molds of a madeleine pan with the batter. And it doesn’t mean you can’t break one of the madeleines in two while it’s still warm, the inside springy and spongey and the edges perfectly crispy. And it definitely doesn’t mean you can’t eat three (or four…) in the span of 10 minutes.

Brown Butter Buckwheat Madeleines

Ingredients

8 tablespoons (1 stick) unsalted butter, cubed
2/3 cup buckwheat flour
1/3 cup all-purpose flour
3/4 cup granulated sugar
1 1/2 tsp baking powder
1/2 tsp salt
4 egg whites, equaling about 1/2 cup (hint: keep the remaining yolks to make a citrus curd later)
1 tbsp honey
3 tbsp cocoa nibs (optional – I didn’t use these)

Instructions

In a pan over medium heat, cook the butter until it’s the color of a perfectly cooked marshmallow or toast. The butter will foam and spit, don’t be afraid. When it’s brown, pour into a heat proof bowl and set aside.

Preheat your oven to 400°F. In a medium bowl whisk together the flours, sugar, baking powder and salt. Add the egg whites and honey and whisk until combined. Add about a third of the brown butter, and mix until combined, then slowly add the rest of the butter while mixing. If you’re using the cocoa nibs, add them now and mix until they’re evenly distributed.

Brush your madeleine pan with butter, and fill the molds about 3/4 of the way full with batter – about one tablespoon. Bake for 8-10 minutes, until the madeleines spring back lightly when you touch them in the middle. Thanks to the buckwheat flour, you can’t really rely on color here too much, but you’ll kind of be able to tell when the edges are looking a little on the golden side. Allow to cool in the pan for about a minute before popping them out onto a cooling rack. I recommend eating them warm (or at least the same day) with a cup of coffee or tea.

Cheese Crackers

Cheese Crackers | Serious CrustCheese Crackers | Serious Crust

A while back, I went to the Oregon coast, which obviously meant a stop at the Tillamook Cheese Factory for a few trips through the tasting line and being entranced by the packaging of cheese. You wouldn’t think it would be so interesting, but I totally zone out on those machines trimming, wrapping, vacuuming, and sending off a zillion pounds of cheese.

The other great thing about the cheese factory is that not only do they have EVERY kind of Tillamook Cheese you could want, but they also have basically half-priced packages of the little ends and bits that they trim when they’re packaging the cheese. So when I saw a pound of Garlic White Cheddar for cheap, I said, “Yes, please,” and brought it home with me. I used almost all of it for some macaroni and cheese, and the rest went into these very (cheesy) crackers.

I’ve had a weakness for Cheez-its ever since I was a young child (seriously, if you every need to bribe me for any reason, Cheez-its will do the trick), and I love baking my own at home every once in a while. I figured the garlic in this cheese would add a great flavor to these cheese crackers, and it did. If you can, I highly recommend getting your hands on some garlic cheddar for these bad boys, but if you can’t, any sharp (or extra sharp) cheddar will do.

Cheese Crackers

Ingredients

4 Tbsp unsalted butter, at room temperature
4 oz sharp cheddar cheese, finely grated
4 oz Tillamook garlic white cheddar (or any other garlic cheddar), finely grated
1/2 tsp salt
1/4 tsp chili powder, optional (if you’re down to have your crackers on the slightly spicier side, I recommend it)
1/2 tsp smoked paprika
1 cup AP flour
1-4 Tbsp cold milk
salt for dusting

Instructions

In a stand mixer, cream together the butter and grated cheese. While that is mixing, in a small bowl sift together the flour, salt, chili powder, and paprika. Add the dry ingredients to the butter and cheese mixture and mix until combined. Yes, it’ll be crumbly!

A tablespoon at a time, add the milk, mixing after each addition, until the dough comes together. Form the dough into two discs, wrap in plastic, and chill for at least 30 minutes.

Preheat your oven to 400°F. Line a baking sheet with parchment paper. On a floured surface, roll out the dough to 1/8 of an inch (or slightly thinner). Cut into squares, and using the tine of a fork or end of a skewer, make a hole in the center of each square. Sprinkle with salt, and transfer to the baking sheet. Bake for 8-11 minutes, until the edges are just golden brown (they can burn quickly, so if you want to go darker, keep a close eye on them). Transfer to a cooling rack and let cool for 5 minutes before enjoying.