Course

Anise Ice Cream with Cardamom

Anise Ice Cream // Serious Crust by Annie Fassler

Anise Ice Cream // Serious Crust by Annie Fassler

I went to Seattle this past weekend. My aunt was visiting, and I needed to get out of town a bit. It turned out that he was also having this dinner with friends. He has all these friends who cook, and so they’re starting this dinner club kind of thing, like an extremely organized potluck.

It’s really cute – whoever is hosting picks a cuisine or a cookbook, and sends the guests recipes to make. My dad picked the Pok Pok cookbook, and oh my goodness, the meal was incredible. We helped him make the famous chicken wings (which were exactly like the real thing), which was so fun. And for dessert I made this dish I’ve been working on with my baker friend Caitlyn (post coming soon, we still have a bit more testing to do). Wanting something to top it with, I decided to also make some ice cream from David Lebovitz’s The Perfect Scoop. So what goes with a slightly Asian cake, and an incredibly flavorful dinner? I picked the anise ice cream, and decided to add a touch of cardamom.

This ice cream is beautiful – extremely creamy, herbaceous, and perfectly sweet, I could have gladly eaten just a bowl of the ice cream for dessert (or for a snack, which I did the next day). After making (and eating) this ice cream, I proceeded to take pictures of many recipes in The Perfect Scoop so I can make them at home… because unfortunately, I don’t have the book for myself.

Anise Ice Cream with Cardamom

Ingredients

2 tsp anise seeds
2-3 green cardamom pods
2 cups heavy cream
1 cup whole milk
2/3 cup sugar
1 1/2 Tbl good quality honey
pinch of salt
5 egg yolks

Instructions

Toast the anise seeds and cardamom in a small saucepan over medium heat for about 3 minutes, or until fragrant. To the saucepan add 1 cup of the cream, the milk, sugar, honey, and salt. Keep saucepan over heat until the liquid is warm, then cover, remove from heat, and let steep for an hour.

After an hour, re-warm the milk mixture over low heat. Pour the remaining 1 cup of cream into a medium mixing bowl, with a sieve set over the top. In another bowl, whisk together the egg yolks. When the milk mixture is warm, slowly pour it into the bowl of egg yolks, whisking constantly. Then, pour the milk and egg yolk mixture back into the original saucepan and cook over medium heat. Stir it constantly, preferably with a heatproof spatula, until the mixture has thickened and coats the spatula or spoon. Pour this custard through the strainer into the bowl with the cream, and stir it so the cream is fully incorporated. Set this bowl in an ice bath and stir to cool. Refrigerate until cooled through, and then churn based on your machine’s instructions. Enjoy!

Ice Cream Cake

Ice Cream Cake // Serious Crust by Annie Fassler

Ice Cream Cake // Serious Crust by Annie Fassler

When I asked Carmelle what kind of cake she wanted for her birthday this year, and she replied, “ice cream cake,” I was stumped. I mean, not so stumped. I’ve had ice cream cake before. I understand the concept. But I’ve certainly never made one. In a summer cooking camp I did when I was younger, I made a baked alaska, but I certainly wasn’t going to attempt that. My mom used to make a version of ice cream cake with Ho hos: she would take a big metal bowl, line it with slices of Ho hos, fill the bowl with ice cream, freeze it, and then turn it out, so it looked something like this.

So I suppose it was officially time to learn to make my own ice cream cake. I had a choice to make: do I make the kind with an actual layer of cake in it? Or do I make the kind that just has layers of ice cream and chocolate sauce and magical cookie crumbles?

I decided to go with the latter. If I’d had more time I would’ve made my own ice cream, it turned out it was a crazy weekend (full of Valentine’s Day, a bar mitzvah, work, and an Amos Lee concert), so there wasn’t time for that madness. Still though, ice cream making is on my to-do list.

I decided to use a recipe from Not Without Salt (NWS) as a guideline, except I wanted to just buy Oreo crumbs at the store instead of making my own chocolate wafers. At this point, I was thinking more along the lines of cake assembly than actual creation. Don’t judge me. After hitting the grocery store (note to self: NEVER go to Fred Meyer’s on a Sunday again), and not finding Oreo crumbs or any wafers I liked, I decided to make them myself. And because I’ve been eyeing Smitten Kitchen’s chocolate wafers, I decided to go with that recipe. Interestingly, something I noticed after I had already made the wafers was that both Smitten Kitchen and Not Without Salt identify Alice Medrich as the cook behind the recipe for their wafers, though they do differ a bit. What I’m saying is, if you decide to go with NWS’s chocolate wafer recipe, I’m sure it will be just as delicious.

Ice Cream Cake

Note: For your ice cream, I would suggest something smooth like coffee, or with small pieces in it, like mint chocolate chip. Carmelle requested cookie dough ice cream, and while it was certainly delicious to get the chunks of cookie dough, it made it a little trickier to slice and serve.

Ingredients

Chocolate Wafers

1 1/2 cups flour
3/4 cup unsweetened cocoa powder
1 cup + 2 Tbl sugar
1/4 tsp salt
1/4 tsp baking soda
14 Tbl (1 3/4 sticks) butter, softened
3 Tbl milk (higher fat is better, because we’re baking here, people)
1 tsp vanilla extract

Chocolate Fudge Sauce

1 cup heavy cream
1/3 cup  corn syrup (I used dark because I liked the slight molasses smell to it, but light or golden syrup will work)
1/3 cup brown sugar
1/4 cup cocoa powder
1 cup (6 oz) bittersweet chocolate (you can use chopped baking chocolate or chips, whatever is convenient for you)
2 Tbl butter
1/4 tsp salt
1 tsp vanilla extract

1 gallon of ice cream of your choice, or 2 quarts of ice creams of your choice

Instructions

Chocolate Wafers

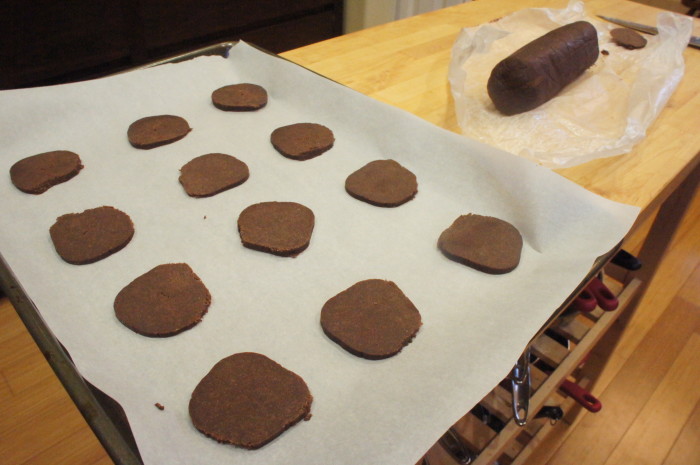
First, let’s make the wafers. In the bowl of your food processor, combine the dry ingredients and pulse to mix. Cut the butter into chunks and add it to the bowl as well, pulsing again until evenly distributed. In a small bowl, combine the milk and vanilla extract, and then add it to the bowl with the food processor running. Transfer the dough to a bowl and knead a few times to bring it together. On a piece of parchment or wax paper, form the dough into a ~14-inch log, wrap it in the parchment or wax paper, and refrigerate for an hour, or freeze for 20-30 minutes, or until firm.

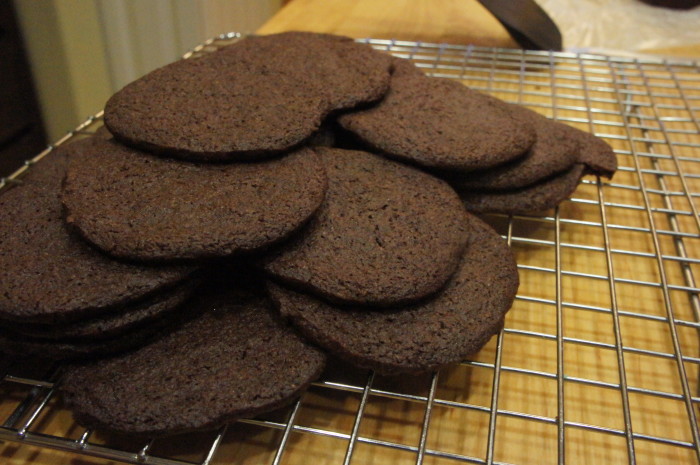
Preheat your oven to 350 degrees, and line baking sheets with parchment paper. Slice the log of dough into ~1/4 inch slices, thinner if you’d like, but keep an eye on baking time. Place them on pans about an inch apart, and bake for 12-15 minutes, rotating halfway through. Allow to cool on the pan for a minute or two, as they’ll break easily. Which, for our purposes isn’t the end of the world, but you will have extras, and maybe you want those to be unbroken.

Chocolate Fudge Sauce

Before making the fudge, I recommend taking your ice cream out of the freezer to soften.

To make the fudge, combine the cream, corn syrup, sugar, and cocoa powder in a pan. Bring this mixture to a boil, then reduce the heat to a steady simmer. Allow it to simmer for 5 minutes, stirring occasionally. After 5 minutes, remove the pan from the heat and stir in the chocolate, butter, salt, and vanilla. Keep stirring so the chocolate and butter melt, and run through a sieve, preferably into a microwave safe bowl, make sure there are no clumps of cocoa powder. My fudge had a little trouble, and decided to separate (super fun!). Jonah had the brilliant idea to just get out the immersion blender, and I would suggest the same should the separation happen to you. But I sincerely hope it doesn’t. Set fudge aside and let it cool down a bit. Because you have to make this cake in layers and freeze between each layer, the microwave safe bowl comes in handy when you need to warm up (and potentially blend) your fudge sauce.

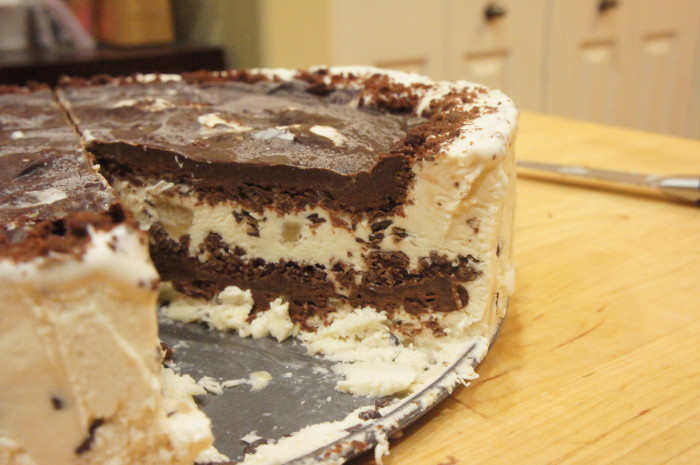
Now let’s assemble the cake. Put about 20-25 of the chocolate wafers in a big ziploc bag, and beat it with a rolling pin, until the cookies are completely crumbled and there are no pieces larger than a pea. In an 8 or 9 inch springform pan, spread 1/2 of your gallon of ice cream, or one of the quarts. Make sure it’s evenly spread, so it’s roughly the same thickness all the way around the pan. Sprinkle half the cookie crumbs on the ice cream, and then drizzle/spread half the hot fudge over the cookie. Put the pan in the freezer for 30-45 minutes to set. After it has firmed up a bit, spread the second half of ice cream over the fudge, then sprinkle over the remaining cookie crumbs and spread over that the remaining fudge. Put the cake in the freezer until you’re ready to serve, at least an hour.

When you’re ready to eat this bad boy, remove from the freezer and run a knife around the edge before un-molding the cake. Serve and enjoy!

Mushroom Risotto with Pancetta and Sage

Mushroom Risotto with Pancetta and Sage // Serious Crust with Annie FasslerMushroom Risotto with Pancetta and Sage // Serious Crust with Annie Fassler

A couple weeks ago, when Jonah and I made the cleanse chicken, we decided to use the carcass to make some chicken broth. Let me say this: if you own a slow-cooker, and are not using your leftover bones/carcasses to make broth, you are seriously missing out. If you’re going to make chicken breasts, just buy bone in chicken breasts, cook them how you normally would, and then after dinner, throw the bones and scraps into the slow cooker with some onions, carrots, salt, cover it all with water, and cook it on low overnight. You’ll immediately have the beginning of a delicious chicken soup, or in this case, mushroom risotto.

(My roommates made some delicious pork ribs last week, and once they finished eating, Jonah and I told them they should make some broth with the roasted bones. They did, and had about 6-8 cups of broth, and used it to make 2 different dinners post-ribs. Talk about using your ingredients to the fullest!)

Anyway, I knew I had some arborio rice in the cabinet, and was feeling nice and wintry, so I decided to make mushroom risotto. But as I was looking through my cookbooks, I came across a variation on mushroom risotto that included sage and pancetta. I was sold.

Mushroom Risotto with Pancetta and Sage

The Best New Recipe | Serves 4 as a main course

Note: Porcini mushrooms are expensive. If you want to try using some other mushrooms instead, and also using mushroom broth rather than chicken broth to add some of that earthy umami flavor, go for it. You can also easily make this recipe vegetarian by replacing the chicken broth with mushroom broth, and eliminating the pancetta.

Note 2: My camera was dead when I cooked this, so I only have some mediocre iPhone photos. I’m sorry.

Ingredients

2 bay leaves
4 sprigs fresh thyme
3 sprigs fresh parsley
1/2 oz dried porcini mushrooms, rinsed in a strainer under running water
3 cups chicken broth
1 1/2 tsp soy sauce
2 3/4 cup water
4 Tbl butter
1 1/4 lbs cremini mushrooms, cleaned, stems removed, and cut into quarters (or sixths, if larger)
1 large onion, finely chopped
2 garlic cloves
2-3 oz pancetta (I went with 3, because I like pancetta)
1 3/4 cups arborio rice
3/4 cup dry white wine or dry vermouth
3/4 cup grated parmesan cheese
1 tsp fresh sage leaves

Instructions

With kitchen twine, tie together the bay leaves, thyme sprigs, and parsley sprigs. Put this bouquet in a pot with the porcini mushrooms, broth, soy sauce, and 2 1/2 cups water, and bring it to a boil over medium-high heat. Reduce heat to medium-low and simmer for about 15 minutes, or until the mushrooms are fully hydrated. Strain the broth, discard the herb bouquet, and set mushrooms aside. Put the broth back into the pot and keep warm over low heat. Mince the porcini mushrooms, and set aside.

In a non-stick pan over medium-high heat, melt 2 Tbl of butter. After the butter stops foaming, add the cremini mushrooms, half of the onion, and 1/2 tsp salt. Cook for about 7 minutes, until the liquid from the mushrooms has cooked off and the mushrooms are browned, and add the garlic, cooking for a minute until fragrant. Put the cooked mushrooms into a bowl and set aside. Add the remaining 1/4 cup of water to the pan to scrape up any browned bits stuck to the bottom of the pan, then pour this liquid into the pot with the broth.

In a large saucepan over medium heat, cook the pancetta and 1 Tbl of butter for about 5 minutes, until the pancetta has rendered most of its fat. Add the rest of the chopped onions, and cook until the onions have softened and are translucent. Add the rice and cook, stirring frequently, for about 4 minutes, or until the edges of the rice are transparent. Add the wine or vermouth to the pan, and stir, cooking until the liquid has been absorbed. Add the porcini mushrooms and roughly 2 cups of broth (or about 2 ladles full) and cook, stirring every couple of minutes, until the broth is absorbed. Add 1/2 cup or a ladle full of broth every 2-3 minutes, stirring occasionally, and adding more broth when the previous broth has been absorbed. The risotto is ready when the rice is cooked but has some bite to it at the center of the grain. You may not end up using all of the broth, so be sure to taste frequently for doneness. When the risotto is cooked to your liking, add the cremini mushrooms, the remaining 1 Tbl of butter, the parmesan, and chopped sage. Season to taste with salt and pepper, and enjoy with a nice glass of wine.

The leftovers are great as they are, but if you’re interested in a little revamp, form little cakes with the leftovers, and fry in some oil over medium heat. Top with a fried or poached egg for best result.

Matcha Green Tea Madeleines

Matcha Green Tea Madeleines // Serious Crust by Annie Fassler

Matcha Green Tea Madeleines // Serious Crust by Annie Fassler

Everything is melting. Meeeeelllllting! It’s like I’m the wicked witch of the west. Or rather that Portland is, anyway. Which is seemingly appropriate given the hue of today’s baked goods recipe. (In case you missed it, we are officially on the tail end of a large snow storm, at least by Pacific North West proportions, where it snowed for days and no one could drive anywhere and we all got cabin fever.)

I have long been wanting to try some variation of Matcha green tea madeleines. I’m sure, at this point, I have a bunch of recipes on my Pinterest board, and really I was just waiting for the time to come when I actually remembered to purchase Matcha at Tea Chai Té. You’d think it wouldn’t be hard, since I usually visit one of their shops every other week. But remembering is harder than you think.

You know what else is harder than you think? Weighing all of your ingredients. See, every recipe I found for these madeleines had the amounts in weight, or it didn’t have quite enough of this or that for my taste. OR even worse, it had some of the ingredients measured in weight and some in teaspoons or cups. Which is fine, I have a scale. But when it came down to it, and I was finally making these little gems, I was not in the mood to weigh a million things and add a little bit more, a teaspoon at a time, until the weight was exactly right. So… I guestimated. If I was someone else, I would have made this recipe multiple times, adjusting the amounts of ingredients to make sure I was giving you the absolute best variation. But I’m not someone else. I’m me. And this recipe worked. So this recipe is what I’m giving you. I hope that’s ok. And hey, wouldn’t you rather I be me instead of someone else?

Matcha Green Tea Madeleines

Ingredients

2 Tbl Matcha green tea powder
1/2 cup flour (all-purpose)
1 tsp baking powder
8 Tbl butter (1 stick), melted and cooled
3 eggs
1/2 cup sugar
1/4 tsp salt
1 tsp vanilla extract

Instructions

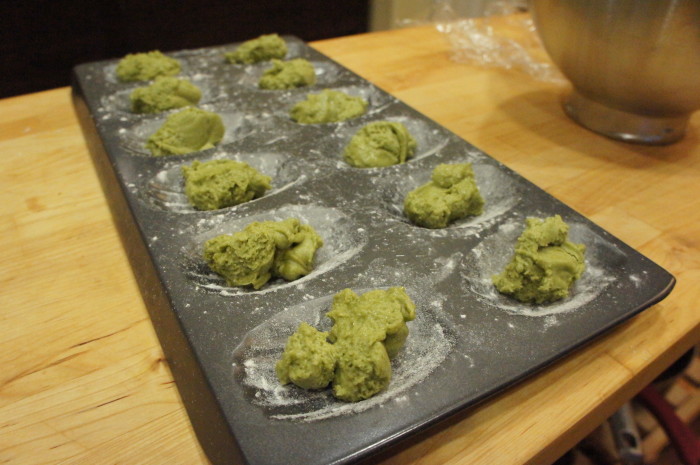
Butter and lightly dust your madeleine pan with flour. Keep the pan in the freezer while you prepare the dough.

In a bowl, sift together the flour, baking powder, and Matcha powder and set it aside. In a bowl, beat the eggs for 1 minute (I used my electric mixer; a handheld mixer would work too), and then add the sugar and salt. Mix until the sugar/egg mixture is pale and a bit thick, about 5-6 minutes.  Add the vanilla, and mix for another minute. Now add in the flour and Matcha mixture, blending until it’s just combined. You’ll want to be gentle when adding the flour mixture, and may even want to use a spatula and gently fold it together – you don’t want to deflate the eggs. If you’re using an electric mixer, I recommend switching from the whisk to the paddle attachment. Once you’ve mixed in the flour mixture, slowly add the butter and beat until the dough is smooth with the mixer on a low speed, or with your spatula. Cover bowl and refrigerate for at least one hour.

Preheat your oven to 375 degrees, and remove the pan from the freezer. In each little madeleine mold, drop about a teaspoon of batter. Bake for ~8 minutes, or until they have puffed up and are golden brown around the edges. Allow the madeleines to cool in the pan for a minute before removing them. I found it easier to remove them by placing the wire rack upside down over the pan and then flipping it over, then lifting the pan off.  These are best enjoyed the same day, preferably right out of the oven, with a nice cup of tea (and no, it doesn’t have to be green tea).