Course

Meyer & Black Lemon Sorbet

Meyer & Black Lemon Sorbet // Serious Crust by Annie Fassler

My mother gave me some spices for Christmas. Three little bags from Oaktown Spice Shop: cinnamon, juniper berries, and ground black lemon (also known as Omani). I was able to find recipes using the cinnamon and juniper berries (still working on making some of my own gin…), but the black lemon was trickier. It’s a traditionally Persian ingredient, and I don’t know a whole lot of Persian cooking resources.

I wrote in to a few places, asked some intelligent minds what I should do with it, and I mostly came away with meat and fish. Rub it on meat and fish, put it in a stew with meat or fish. And even with those suggestions, I couldn’t really find any jumping off points, or recipes to start from or be inspired by. So the ground black lemon had been sitting sadly on my pantry shelf. Until last week, that is.

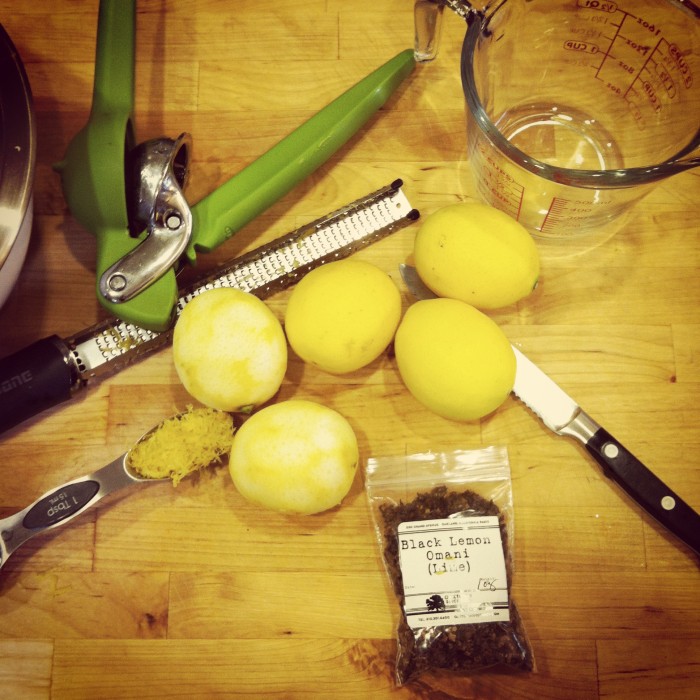
Last week, Portland had a little heat wave. Like, 93 degrees kind of heat wave. Yeah. I was itching to make ice cream. I have a flavor I’d been brainstorming, but decided, in the end, that instead of buying a bunch of heavy cream I would just buy Meyer lemons instead. So that’s what I did. And I decided to finally try using that lonely looking black lemon. And so today I give you Meyer lemon sorbet with black lemon.

Now, if you don’t have black lemon, don’t worry. You can still make a lovely Meyer lemon sorbet and it will be delicious. But if you are feeling curious, or you magically somehow do have black lemon sitting around, use it. It brings a nice, dare I say it, depth of flavor to this sorbet – something unique and hard to describe. The best words I can think of are that it’s a kind of dark citrus flavor… not necessarily sweet, but more complex than that. It lent a lovely je ne sais quoi to the sorbet. And I love that.

Meyer & Black Lemon Sorbet

Ingredients

1 1/2 cups water
1 1/4 cups granulated sugar
1 1/2 tsp ground black lemon (optional)
1 tsp Meyer lemon zest
1 cup Meyer lemon juice (from about 5 Meyer lemons)

Instructions

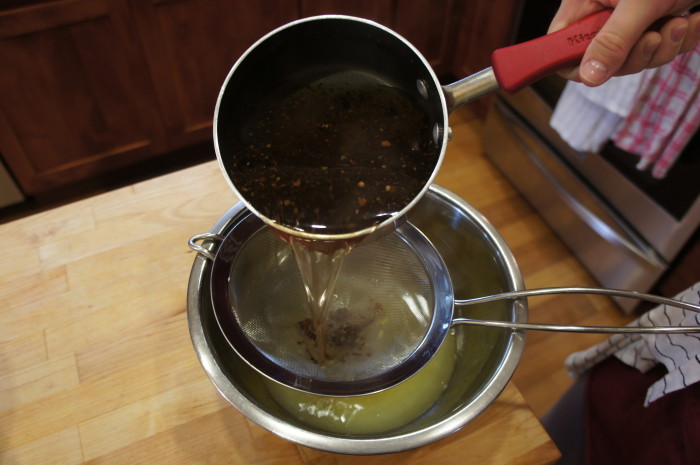
In a small saucepan, combine sugar, water, and black lemon if you’re using it. Bring to a boil over medium heat, allowing the sugar to dissolve and the black lemon to steep. While that is cooking, in a heat-proof bowl combine the lemon juice and zest. Place a sieve over the bowl. Once the sugar is dissolved and syrup has become amber in color from the black lemon (again, if you’re using it), pour through the sieve into the lemon juice. Stir to combine, and place over ice bath to cool. Once cool, churn in your ice cream machine according to instructions. I churned mine for about 20-25 minutes. Pour into a container to freeze. Enjoy while sitting in the sunshine. Or with a bunch of friends, in your living room, playing Cards Against Humanity, like I did.

Kale Stem Pesto

Kale Stem Pesto // Serious Crust by Annie FasslerKale Stem Pesto // Serious Crust by Annie Fassler

I often find myself frustrated with how much stuff I put in my compost. I guess I should stop right there and say, at least I have a compost, right? The beautiful city of Portland has roadside pickup every week, making it so wonderfully easy to make more environmentally conscious choices. There aren’t a lot of cities that do that. Anyway, I know I could save some bones and carrot tops and onion tops and parsley stems for stock… But I just don’t do it. I mean, I do sometimes… But not as often as I should. And there’s one thing lately that I have always felt guilty after putting it in the compost: kale stems. Jonah and I eat a fair amount of kale – usually sautéed with butter and garlic or something like that, sometimes in a salad. But I always am frustrated at the toughness of the stems, and wish I could do more with them.

After a little research and looking around, I mostly found that people who do use their kale stems either sauté them with their kale, simply adding the stems first so they cook for longer, or put them in smoothies. I wasn’t really into either of these options, so I made myself a third one. With the all-in pesto in mind, and a container of pine nuts whining from my pantry, I got to work making some kale stem pesto. I wasn’t planning on sharing this pesto here, since the recipe is really improvised, but I got so many comments and questions about what it was when I posted pictures on my Instagram and Facebook, that I thought, why not? This pesto is certainly a product of whatever you’ve got around, which is generally my theory about pesto. Herbs are good, parmesan is good, and other than that, you can kind of go crazy. Nearly any kind of nut will work, any greens, and you can really play until you find some flavors that you like. I didn’t do any measuring here – mostly just throwing in handfuls of this or that – but below is an approximation of what I used.

The beautiful thing about pesto is that it can be a complete reflection of your kitchen: if you just went to the market and have some radish greens, use them. If you don’t have any pine nuts but plenty of pistachios or walnuts, use them. If it’s raining and you want something heartier, add more cheese.

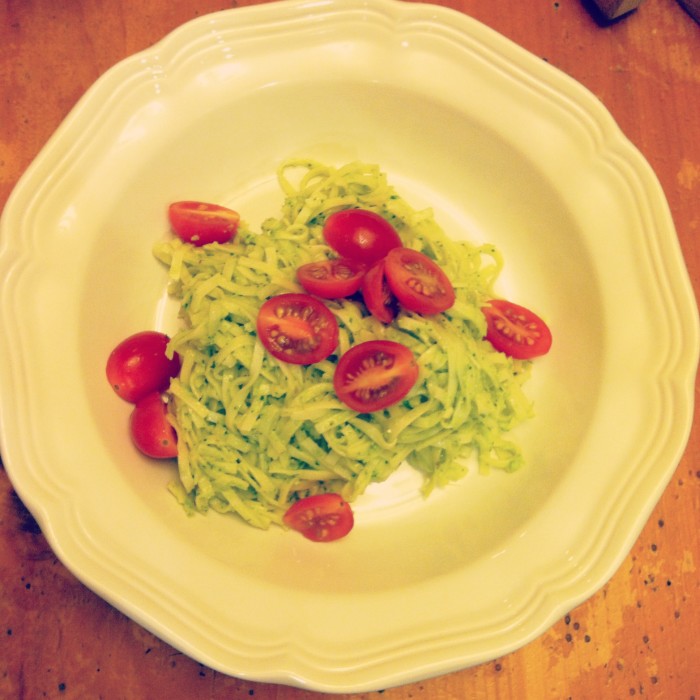
We tossed our kale stem pesto with fresh spaghetti (you can find a recipe here) and topped it with sliced grape tomatoes, which added a really nice juicy brightness. I also like to make a thick piece of toast and slather it with fresh pesto.

Kale Stem Pesto

Ingredients

1 bunch of kale stems, plus probably the equivalent of 1 leaf of kale
1 cup spinach
1/4 cup parsley
~ 3/4 cup pine nuts
Parmesan cheese
Garlic
Olive oil
Salt

Instructions

Fill a small pot halfway with water, salt well, and bring to a boil. Roughly chop kale stems into about 1/2 – 1 inch pieces. Add to boiling water, and cook until stems are easily pierced with a knife. Drain and cool.

In the bowl of a food processor (or blender), combine kale stems, a few small chunks of parmesan, about half the pine nuts, 2 cloves of peeled garlic, and a few glugs of olive oil. Pulse to combine. Add spinach, some parsley, and a hefty sprinkling of salt. The key here is to taste and add. If you want a little more spice, add another clove or two of garlic. If you want it creamier, more nuts, and olive oil. If you want it greener, add more spinach and parsley, or some fresh basil or chard if you’ve got some around.

Rhubarb Bourbon Sour

Rhubarb Bourbon Sour // Serious Crust by Annie Fassler

Sometimes you have a week that is hard, but also totally reviving. The beginning of last week was tough, but things quickly got better: good food was made and fun was had and cocktails were made. And an old friend from college came to visit, which always is exciting and soothing at the same time. Isn’t it nice when people who knew you when (“when” being just a few years ago in this case, but still) can kind of ground you and make everything seem ok? That happened. It was nice.

But before she came to visit, and before there was weekend and all that, there was this cocktail. I had finished the actual rhubarb from the dessert I made for Passover, but I had a bunch of this sour syrup left over. And I had bought a bottle of Bulleit bourbon. So, you know, rhubarb bourbon sour time it is. With a little research and a little improv, Jonah and I whipped up this drink. If you don’t have sour rhubarb syrup laying around, you can make it pretty easily by following a rhubarb simple syrup recipe like this one or this one, but I would cut the sugar so that the tang of the rhubarb can really shine.

Rhubarb Bourbon Sour

Makes 1 cocktail

Ingredients

1 shot (1.5 oz) bourbon
juice from 1/2 lemon
1 tsp powdered sugar (or half a shot of simple syrup) – Note: if you are making rhubarb simple syrup from one of the recipes above, you can nix this sweetener part, or add it to taste.
1/2 shot rhubarb syrup
1 egg white

Instructions

Combine all ingredients in a shaker without ice, shake for about 10 seconds. Add ice, shake thoroughly. Pour into glass. Sip and enjoy. Yeah, it’s that easy.

Cinnamon Raisin Bread

Cinnamon Raisin Bread // Serious Crust by Annie Fassler

I like being home. Traveling the world is awesome, don’t get me wrong. I will happily go on adventures like the one to Vietnam any time. But there is something about coming home to your own bed, your own shower, and your own kitchen. I feel like I need to give all my kitchen tools little hugs and tell them I’ve missed them. Which, at this point, I’ve basically done, because I’ve been cooking up a storm this week.

Portland, however, is being slightly less welcoming than my kitchen. Mostly just in its weather-related mood swings. Seriously, this whole week has been days of sporadically alternating sunshine and rain. Sometimes each lasts 5 minutes, sometimes an hour. But it’s making it awfully hard to cook. What I’m going to make is always determined by my mood, which is often influenced by the weather. Between the rain and sun breaks, I can’t decide if I should be making spring recipes or winter recipes.

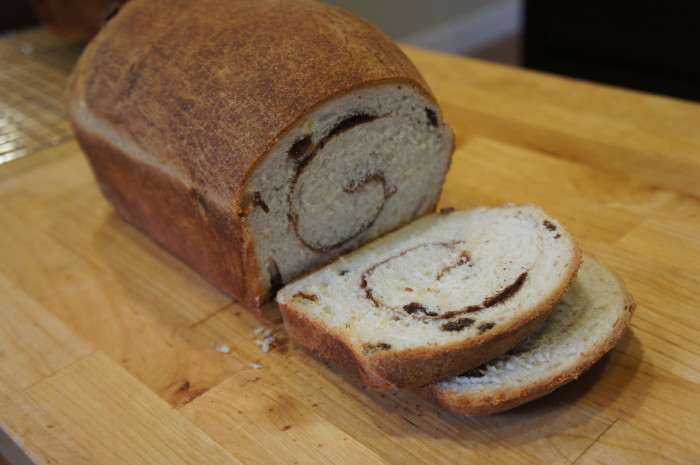
This cinnamon raisin bread is the perfect balance between spring and winter, though I already know I’ll be making it year round. It’s homey and warming thanks to the springy crumb and the way it fills your kitchen with the most comforting smell. But the raisins and cinnamon bring a little fruitiness and fun to the mix, a little surprise if you will. This isn’t just plain ol’ bread, you know. This has a beautiful swirl of cinnamon sugar and beautifully juicy pops of fruit throughout it.

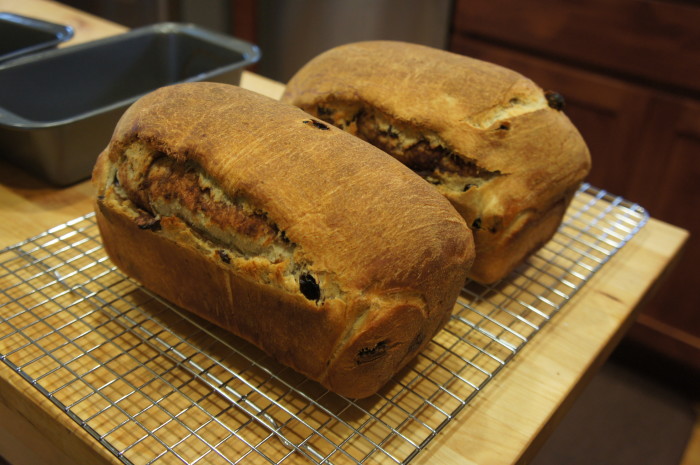
This recipe made two loaves, and I thought for certain I’d freeze one loaf, because my roommates just don’t usually eat that much bread (unless it’s beer bread). But I was wrong. In two days, we are down to half a loaf left. Everyone has been enjoying this bread, toasted, slathered with butter, or raspberry rhubarb jam, or nutella for breakfast and dessert and a snack here and there.

Point is, make this bread and your house will smell like heaven, your friends will love you, and you’ll be perfectly toeing the line between the seasons.

Cinnamon Raisin Bread

Makes 2 loaves

Ingredients

2 1/4 tsps (1 package) dry instant yeast
2 1/4+ cups warm water
3 Tbl and 1/4 cup granulated sugar, divided
1 Tbl salt
3 Tbl butter
6 -7 cups all-purpose flour
1 cup raisins
canola/vegetable oil
1 Tbl cinnamon

Instructions

In the bowl of an electric mixer (or not. If you don’t have one, this can easily be made with the strength of your own two arms.) combine 1/2 cup warm water, the yeast, and 1 Tbl of sugar. Set aside and let sit until it’s foamy. In another bowl, cover the raisins with warm-hot water, at least 2 cups. This step is optional, but it will plump the raisins, making them a bit juicier in the bread. After about 3 minutes, pour 1 3/4 cups of the raisin water off into a measuring cup and discard the rest. Pour the raisin water into the mixing bowl with the yeast, in addition to 2 Tbl sugar, the salt, 2 Tbl melted butter, 3 1/2 cups of flour, and all of the raisins. Mix with the paddle attachment until thoroughly combined, adding up to 3 more cups of flour until the dough is smooth enough to handle, but still moist. Switch from the paddle attachment to the dough hook, and knead for about 7 minutes (10 minutes if you’re kneading by hand). Dump the dough out onto a floured surface, coat the mixing bowl with canola or vegetable oil, and put the dough back into the bowl, turning it to coat, and cover the bowl with a clean dishtowel. Set the bowl in a warm spot (I like to turn on the light over my stove and set it under that) and let it rise for about an hour, or until it’s doubled.

In a small bowl, combine the remaining 1/4 cup sugar and 1 Tbl of cinnamon and mix well. Butter two bread pans. When the dough has doubled, remove it from the bowl onto a floured surface and punch it down, then divide it in half. Roll out one half of the dough into a rectangle that measures roughly 16 by 8 inches. Once rolled out, sprinkle the dough with 1 Tbl of water, and half of the cinnamon sugar mixture. Roll the dough up starting from the short end, and pinch the seam shut. Drop the roll of dough into one of the greased loaf pans. Repeat with the second half of dough. Brush the top of both loaves with the remaining 1 Tbl of melted butter, and cover them again with a clean dishtowel to let them rise for another hour in a warm spot.

About 15 minutes before your bread is done rising, preheat your oven to 425 degrees. Bake the bread for 30 minutes, or until the loaves look beautiful dark brown on top. Remove the loaves from the pans (beware, as cinnamon sugar may have oozed and become rather sticky – aprons are your friend) and set on a cooling rack. I recommend slicing into one of these bad boys when it’s still pretty warm. You can toast it and put a nice layer of cream cheese on top, like I did with my cinnamon raisin bread when I was younger, but a little butter will do nicely as well. Enjoy.