Brownie Cookies with Peppermint Buttercream Frosting

Brownie cookies

Brownie cookies
Brownie cookies

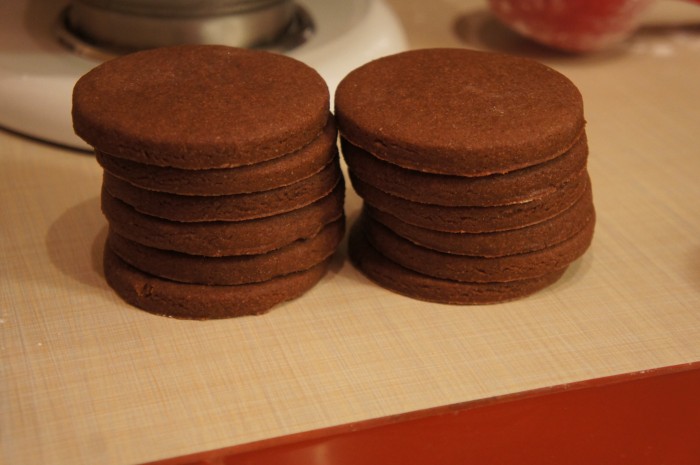
This past week, a friend of ours had her senior degree recital at school (she’s a wonderful singer) and for the after party, I wanted to make some cookies. So I went to the store and bought some ingredients, but it turns out I didn’t buy enough of what I needed (2 oz. of bittersweet chocolate when I really needed 5… oops). So then I searched my favorite food blog of all time, Smitten Kitchen, for a recipe involving ingredients I already had in my kitchen. I found these brownie cookies that looked like a perfect combination of a brownie and a cookie, and also they didn’t look too hard.

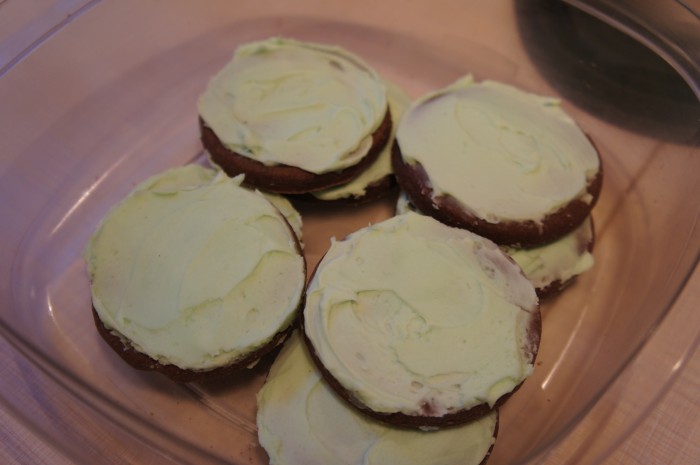
When the cookies came out of the oven, they were delicious, but a little bit dry in my opinion. I think they would have been greatly enjoyed by themselves, but I decided to whip up some buttercream frosting to put on them to add a little moisture. (My friend Carmelle, who is also a baker extraordinaire, and I decided later to add a little peppermint to the icing to make it a little more festive.)

Brownie Cookies with Peppermint Buttercream Frosting

Ingredients

Brownie Cookies

3 cups all-purpose flour
1/2 teaspoon salt
1/2 teaspoon baking powder
1 cup butter, softened (she uses one stick of unsalted, one stick of salted, but I used both unsalted)
1 1/2 cups sugar
2 large eggs
1 teaspoon vanilla extract
2/3 cup unsweetened cocoa

Peppermint Buttercream Frosting

1 stick of butter, softened
1 1/2 – 2 cups confectioners sugar
1/8 teaspoon salt
1/2 tablespoon vanilla
up to 2 tablespoons of milk or cream
1/4 teaspoon peppermint extract

Instructions

Brownie Cookies

Preheat oven to 350 degrees. In a bowl, mix flour, salt and baking powder and set aside. In a mixer (or large bowl) combine butter, sugar, eggs, vanilla and cocoa. Slowly add flour mixture, and mix until smooth. Wrap in plastic and chill for at least one hour.

Roll out cookie dough on floured surface until it’s about 1/4 inch thick (I used my counter because I don’t have a super large cutting board and, hey, it’s kinda fun to just roll dough out on the counter). Cut into desired shapes, place on a buttered baking sheet. Bake for 8 to 11 minutes until the edges are firm and the centers are slightly soft and puffed. Transfer to a wire rack to cool.

Peppermint Buttercream Frosting

Beat the butter for a couple minutes in the mixture to get it nice and creamy. Add 1 1/2 cups confectioners sugar and mix on low speed until the sugar has been incorporated with the butter. Add vanilla, salt, 1 tablespoon of milk, and peppermint and mix for a couple minutes. If the frosting is too thin, add the remaining 1/2 cup of sugar a little bit at a time to make sure you don’t overdo it. If your frosting is too thick, add the remaining 1 tablespoon of milk.

These cookies were  a huge hit! And the recipe made plenty of them too. They were easy and you can easily add spices or other fun things to them to suit them to your tastebuds. I’m thinking a little cinnamon and chili powder to make them Mexican hot chocolate cookies, or some smashed candy canes for the holidays, or chocolate chips… So many possibilities!

Holiday Ale Festival

Holiday Ale Festival

Holiday Ale Festival

So this post doesn’t have a recipe, but I did say (on the “About” page) that I’d write about cool food related things like restaurants, cookbooks, equipment, etc.

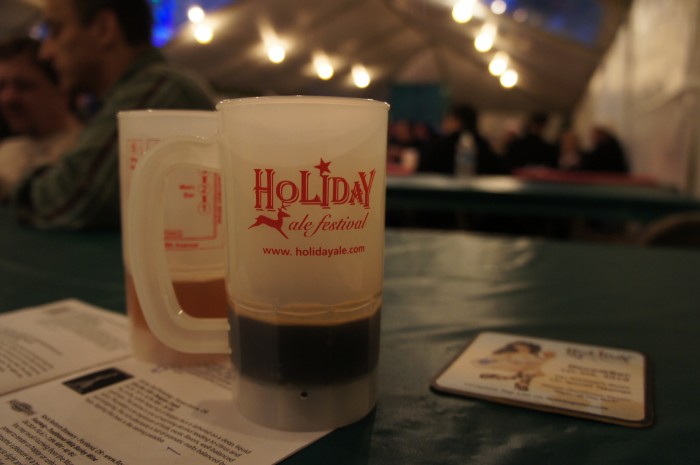
For those of you who don’t know much about Portland, OR, one really cool thing you should know is that the Portland metro area has the largest craft brewing market in the U.S. There are 44 breweries operating in the city, which is more than any city in the world. So we like our beer. Possibly my favorite event in Portland is the Holiday Ale Festival. It usually happens the first weekend of December in Pioneer Square.

They set up big tents right underneath the giant Christmas tree and fill them with delicious beers made especially for the event. Here’s a little quote from the program they give you:

“What makes this festival so special is that you won’t find the beers served here in your grocer’s aisle. We work with every brewery involved to make sure they are sending a product that has either been made specifically for this event, or is a rare or vintage beer that isn’t commonly tapped in the state or won’t be tapped until the festival closes.”

Cool, right? So you buy a ticket, get a cool little plastic mug, a program, and 8 tickets. Each taste of beer (4 oz.) is 1 ticket, unless it’s a limited beer and then it’s 2 tickets. And then you’re free to roam the tents! The beers are so delicious and dangerously strong since they’re often stouts, porters, and really hoppy ales. There were a lot of beers with hints of mint, chocolate, and holiday spices like allspice, nutmeg, and cinnamon.

So here were our favorites:

Annie’s:

  • Columbia River Brewing’s “Drunken Elf Stout” – Imperial Oatmeal Stout with lots of chocolate and coffee flavors
  • Gilgamesh Brewing’s “Chocolate Mint Stout ’11” – American Stout with chocolate and locally grown mint (not too minty like some of the other chocolate mint beers I tasted)
  • Laht Neppur Brewing Co’s “Laughing Boy Stout” – Russian Imperial Stout with cocoa, vanilla, and honey undertones
  • Rusty Truck Brewing Co’s “Belsnickle’s Strong Ale” – Strong Ale brewed with nutmeg, cinnamon, and coriander

Jonah’s:

  • Bear Republic Brewing Company’s “Old Saint Chongo” – Winter Chocolate Wheat Ale with some mexican chocolate with hints of banana
  • Laht Neppur Brewing Co’s “Laughing Boy Stout” – Russian Imperial Stout with cocoa, vanilla, and honey undertones (This was on both of our lists)
  • Oakshire Brewing’s “The Nutcracker” – Gingerbread Imperial Porter with ginger and cinnamon
  • The Commons Brewery’s “Little Brother” – Belgian Dark Strong Ale with a bit of toffee, candy, and chocolate

Banana Bread

Banana Bread

This banana bread recipe came from my aunt Judy’s neighbor. It is honestly the best banana bread I have ever had in my life. And let’s be honest, anything my aunt thinks is delicious probably is because she really knows what she’s talking about. Why? Because she writes cookbooks. Yes, food and cooking runs in the family. Her latest book (which she wrote with her husband, my hilarious uncle) just came out and it’s wonderful, especially if you’re a fan of Mad Men. You can find info on the book and order it here.

Anyway, so Judy fed this banana bread to us one time and now it’s the only banana bread I’ll make.

Banana Bread

Makes 2 loaves

Ingredients

1 1/2 teaspoons baking soda
2 teaspoons baking powder
3/4 teaspoon of salt
2 3/4 cups flour
1 1/2 cups sugar
3/4 cup vegetable oil
3 eggs, beaten
4 or 5 mashed bananas
3 tablespoons of milk
1 tablespoon of lemon juice
1 teaspoon of vanilla
1-2 cups chocolate chips, optional
chopped walnuts, optional

Instructions

Preheat your oven to 350 degrees. Grease and flour two bread loaf pans. In a bowl, combine baking soda, baking powder, salt, and flour. In a separate bowl or an electric mixer if you’ve got one, beat together sugar and vegetable oil. Add eggs and bananas. In a small cup combine milk and lemon juice, mix to curdle. Add this to the liquid ingredients along with the vanilla. Slowly add dry ingredients and mix well. Add as many chocolate chips and/or walnuts as you want (some people like it plain, some really chocolatey, some with just a few chocolate chips).

WARNING! When I mix in the chocolate chips before putting the batter into the pans, my chips always sink to the bottom. What I’ve started doing is just sprinkling them on top and mixing them in a little bit so they’re more evenly spread out.

Anyway now you can divide your batter between the two loaf pans and bake for about 50 minutes or until a knife inserted comes out clean (except for any melted chocolate…yum). Allow to cool.

These breads can be wrapped in foil and a freezer bag and frozen for a while. It’s good in case you are one of those people who can’t help eating stuff that’s around the kitchen, you can make one loaf disappear and save it for later.

Roasted chicken with root vegetables

Roasted chicken with root vegetables

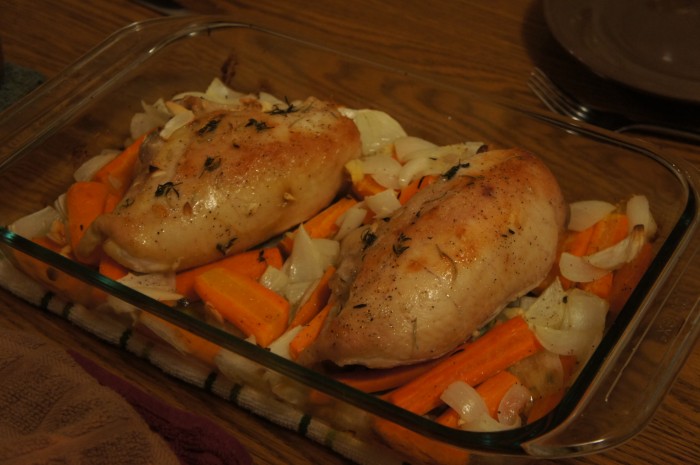
Roasted chicken is, in my opinion, one of the easiest, most delicious meals you can make. Cut everything up, season it, put it in a dish, and stick it in the oven. I promise, anyone can do this. My mom used to make this dinner all the time because it was so simple and didn’t take too much time, and I remember when I finally got the recipe, I thought, “That’s all? Really?”

It makes a really good winter dish because it’s hearty, healthy, warming, and full of root vegetables (or whatever vegetables you want, really).

Roasted Chicken

Note: After the basics listed below, you can add whatever you want. Martha (Stewart… we’re on a first name basis now) adds prunes, which I’ve never done. Sometimes if I want lots of leftovers I do even more veggies. If I want more starch, I add potatoes. You could add turnips, parsnips, shallots, beets… Anything you can roast, you can put in this dish.

Ingredients

2-4 bone in chicken breast halves (skin on!)
a bunch of carrots, peeled, halved, and cut into 1/2 inch pieces
about 6 garlic cloves, quartered
a red onion, halved and cut into wedges
vegetable or olive oil
butter
salt and pepper

Instructions

Preheat your oven to 450 degrees. Rub chicken with butter, place in a baking dish (I always use glass/pyrex). Toss vegetables with some oil and arrange around the chicken in the dish. Season with salt, pepper, and anything else you want (I’ve used thyme, rosemary, tarragon… try a different spice every time!). Jonah and I like to use the fresh bulk herbs at the grocery store in the produce section. They’re so cheap because they’re sold by weight, but a couple sprigs of thyme really weighs almost nothing.

So everything is in the dish, yes? Roast for 10 minutes, then toss the veggies and check on how everything is cooking. Continue roasting until the chicken is cooked through and the vegetables are tender, usually 15-30 minutes depending on your oven.

See how easy that is? Now enjoy it with a good glass of wine (if you’re of age, that is).

Fall Salad (Ad Hoc style)

Fall Salad

I figure that for every couple of posts about baked goods and cookies, I should probably post something a little healthier. This recipe is also from the Ad Hoc cookbook I posted about earlier. This fall salad is simple and delicious. So so delicious. Jonah and I have started eating salad again, thanks to this. Yum. It’s full of parmesan cheese, pine nuts, and even persimmons, which I hadn’t ever had before this salad. Not sure I can say I liked them, but it was certainly an adventure.

Feel free to pick and choose which of these ingredients you want in your salad. For example, we didn’t blanch leeks, but replaced leeks with green onion (not really the same, but whatever floats your boat). Plus, it’s always worth trying something new. Who knows, you may love it.

Fall Salad

Ingredients

Mixed greens
Blanched leeks (I didn’t really feel like blanching leeks, so we used green onions… more on that later)
Persimmons, sliced
Prosciutto
Pine nuts
Parmesan cheese, grated

Instructions

The recipe also called for a sherry vinegar vinaigrette, but I didn’t feel like buying a bottle of sherry vinegar just for this, so we just did a balsamic vinaigrette with balsamic vinegar, olive oil, some minced garlic, and then also put the green onions in here rather than sprinkled on the salad… not sure why.

Now, the persimmons. They kind of tasted a little bit like pears, but with a thicker skin. I dunno if they were worth the money. I can see replacing the persimmons with something like a satsuma or another variety of small orange-type-thing that are available these days.

With or without the persimmons, this salad is both light and filling, and perfect for a fall dinner. It also would be a nice salad course to a fancier meal. Enjoy this healthy and delicious salad!