Vegetarian

Coconut Curried Fried Rice

Fried Rice

Fried rice

Wow. So this recipe happened a long time ago. I’ve recently started rehearsals for a show (my first professional show) in Portland – The Sound of Music! I’m a nun. I know, silly silly. But oh well. So between work, nannying, social media, and rehearsals, I have been a bit fried. Kind of like this rice. So it’s all very fitting.

This rice is easy and delicious. What else do I need to say? I found the recipe on A Cozy Kitchen, a blog I really enjoy. I’ve adjusted it a bit to include things I really like in my fried rice.

Coconut Curried Fried Rice

Ingredients

Turmeric Coconut Rice

1 1/4 cups water
1 cup basmati or jasmine rice
1/2 cup coconut milk
1/2 teaspoon turmeric
1/4 teaspoon salt
1 piece cinnamon stick

Curry Fried Rice

1/4 cup vegetable oil
3 large eggs, lightly beaten
1 garlic cloves, minced
1/2 tablespoon green or red Thai curry paste
1 medium carrot, peeled and diced
3/4 cup frozen peas
1 can pineapple chunks
1 tablespoons soy sauce
1 teaspoons fresh lime juice
1 firm or extra firm tofu, chicken, or other protein (optional)
soy sauce

Instructions

Turmeric Coconut Rice

Combine all ingredients in a rice cooker or a pot and cook. When rice is ready, remove the cinnamon stick and either use immediately or you can refrigerate for a few days until you’re ready to make the fried rice.

Curry Fried Rice

Have all of your ingredients prepped and ready to go when you start as the process moves a little quickly. Heat 1 tablespoon of oil in a large skillet or wok. Add the eggs and cook on medium-high heat. When the edges of the eggs begin to set, gently flip them over or just scramble them, if that’s easier for you. Once the eggs are cooked, remove them from the pan and cut into pieces or strips (that step isn’t necessary if you scrambled them). Wipe the wok clean with a paper towel.

Heat the rest of the oil on medium heat. Add the carrot and cook for a minute, then add the garlic and curry paste and cook for a minute, stirring constantly. Add the rice, peas, and pineapple and cook until heated through. Stir in the egg strips, soy sauce and lime juice.

Meanwhile, slice up your tofu (or chicken or other protein) and cook it to your liking in some Asian influenced sauces. I like to do a little soy sauce and fish sauce or hoisin sauce… the possibilities are endless.

Serve the rice with the tofu, and season with soy sauce and sriracha if you like it hot!

Pasta Salad with Feta and Snow Peas

Pasta salad

Pasta salad

One of my resolutions this summer is to have more picnics. This shouldn’t be too hard, seeing as we have a lovely park a few blocks from our house. So a couple weeks ago, we had our first picnic! I texted a bunch of friends and asked everyone to bring some food and we all met at the park.

Jonah and I brought this miniature amp we have and hooked my phone up and played some music, we had chips, strawberries, veggies and ranch dip, and this delicious pasta salad that Jonah made. It was perfectly filling and refreshing. Great for a summer day! And it was a big hit.  We found the recipe on Martha Stewart’s website. We adapted a little bit (because I’m not a huge fan of bell peppers, which is beginning to change), so here’s our version.

Pasta Salad with Feta and Snow Peas

Ingredients

Coarse salt and ground pepper
1 pound fusilli
4 oz snow peas, strings removed, cut in half
2 scallions, thinly sliced
1/2 cup chopped fresh cilantro
1 cup (4 ounces) crumbled feta cheese (we did a bit more)
2 Tbl olive oil
2 Tbl rice vinegar
1 1/2 tsp balsamic vinegar
1 tsp salt
1/4 tsp pepper

Instructions

Cook your pasta according to the package. During the last minute of cooking, add in the snow peas so they’ll be a little cooked. Drain the pasta and peas and rinse with cold water to cool and stop from cooking. In a large bowl, combine the pasta and peas with scallions, cilantro, feta, oil, vinegars, salt, and pepper. Toss to combine, and serve chilled or at room temperature.

Roasted Corn with Serranos and Onion

Corn

Corn

This corn recipe makes a lovely summer side dish. My dad taught it to me years ago. And it’s one of those recipes that’s really hard to mess up. Want it spicier? Add more serrano (or add more seeds). Want it more caramelized? Roast longer. The only thing I don’t like is how much it cooks down. So it can often turn out to be less than you anticipate. So be aware of that.

Roasted Corn with Serranos and Onion

Serves 2

Ingredients

3 ears of corn
1 medium white onion
Olive oil
Salt

Instructions

Preheat your oven to 375 degrees. Shuck the corn and cut the corn off the cob with a very sharp knife. This part can be a little tricky, so be careful not to cut off your fingers. Sharp knives make this step way easier. And cooking much easier in general. I got a really nice knife for my birthday, and let me tell you, it makes a world of difference.

Moving right along. Put the corn into a baking dish – I used a pie dish, but if you’re making lots, one of those big casserole pyrex dished is good. Chop up the onion, throw that into the dish too. Now, chop up the serrano. Careful not to touch your face. More seeds means more heat, so be aware of how much you’re adding. Mix that in with the corn. Toss with olive oil until just evenly coated (you don’t want it too oily) and salt.

Bake in the oven for anywhere from 30-45 minutes. The longer you cook it, the more roasty and caramelized the corn will get. But be sure to check on it; there’s a point when it crosses the line from roasty and delicious to dehydrated and a little tough. When it’s cooked to your liking, remove and enjoy!

Spring Vegetable Pizza

Spring Veggie Pizza

Spring Veggie Pizza

A couple of weeks ago, Jonah made us the loveliest picnic. We have a beautiful park a few blocks from our house, and on one of the first nice days, he decided to make us a picnic and we’d take it down to the park that looks over the river and the west hills of Portland to watch the sun set. I scored a good one, huh? So, really, he made this spring veggie pizza, but I’m going to post it because he’s already way behind on his posts. Jonah is a big fan of Martha, so of course he found this pizza on her website. We bought the pizza dough at our local grocery store, and he adapted a bit in terms of cheese (the recipe called for gruyere, but he used fontina…we think).

Spring Vegetable Pizza

Ingredients

1 jar (12 ounces) marinated artichoke hearts, drained (reserve the marinade!), hearts quartered if whole
1 bunch asparagus (1 pound), trimmed, cut into 2-inch pieces, and halved lengthwise if thick
1 pint cherry or grape tomatoes, halved
1 pound pizza dough, thawed if frozen and divided in half
salt and pepper
7 ounces Fontina cheese, grated (3 cups)
7-10 slices of prosciutto (optional, but suggested)

Instructions

Preheat your oven to 500 degrees, and put the racks in the upper and lower thirds of the oven. In a bowl, combine the artichoke hearts, asparagus, and tomatoes. Put one of the halves of the dough on a piece of parchment paper and brush it with the artichoke heart marinade. Now roll it out to about a 14-inch long oval, and transfer it (with the parchment underneath) to a rimmed baking sheet). Put half of the veggies on the rolled-out dough, leaving a border of about an inch. Brush the border again with the marinade and sprinkle the pizza with salt and pepper. Repeat to make another pizza. Bake them for 10 minutes, rotating the sheets halfway through. After baking for 10 minutes, sprinkle the cheese over the pizzas and bake until the crust is golden at the edges and the cheese is nice and melty, about 3-5 minutes. Cut into pieces and voila! Pizza!

If you want prosciutto (this makes a great vegetarian meal without it), tear it into smaller pieces and drape it over the pizza. It makes for a nice salty addition.

Mom’s Mac and Cheese

Mom's Mac and Cheese

Mom's Mac and Cheese

Jonah here. Mom, I hope you’re reading this.  Everyone else – let me give you a little background.  This was one of my favorite foods as a kid, not the Kraft Mac and Cheese, but the kind my mom would make from this simple recipe. When I was growing up, we usually had it with broccoli, or a salad.

I asked my mom for this recipe when I went off to college, so she wrote it on an index card and I made it many times throughout my 4 years of school. That index card was magneted to my fridge and now lives in Annie’s recipe box in our kitchen. It’s really easy to make, but really delicious. Thanks Mom, for a childhood of yummy dinners!

Susan’s Mac and Cheese

Ingredients

1 lb. pasta – I use penne
2 Tb. butter
Half of a white or yellow onion, diced
2 Tb. all-purpose flour
1/2 t garlic powder, or more to taste
1/2 t salt
1 cup milk
1 cup grated cheddar cheese, packed in

Instructions

Fill a large pot with water, salt it, and bring it to a boil. Add penne and cook till it’s done; drain.

Meanwhile, melt the butter in a pan. Add the chopped onions and cook until browned and soft.

Add the flour, mix until smooth, then sprinkle in garlic powder and salt (if you don’t have garlic powder, feel free to mince up some garlic and add it with the onion at the beginning). Add milk and let it heat up, then add the cheese and mix in until fully melted.

Return the drained pasta to the pot. Pour in cheese sauce and mix in thoroughly. Serve!

Momofuku Noodle Bowl

Momofuku Noodle Bowl

Momofuku Noodle Bowl

For those of you who saw the title of this post and went “What the hell is a Momofuku?” let me explain. Momofuku is a group of restaurants in New York owned by Chef David Chang. The group includes Momofuku Noodle Bar, Momofuku Ssam Bar, Milk Bar, and a few more. Anyway, I became mildly obsessed when I bought my dad the Momofuku cookbook for his birthday last year (he was obsessed after having eaten at one of the restaurants on a trip to NYC). Momofuku translates in Japanese as Lucky Peach, which is the name of a magazine that David Chang has recently published, all about cooking and eating. It includes articles by some other chef favorites like Anthony Bourdain, Wiley Dufresne, and Mario Batali.

Anyway! I found this recipe for a Momofuku noodle bowl on a blog called A Cozy Kitchen, which I’ve used before and I really enjoy. While the recipe is a little ingredient heavy, it’s really delicious, so although it may be a little extra work to get all this stuff (luckily Jonah and I already had the Asian ingredients), it’s worth it. We use stuff like soy sauce and rice wine vinegar all the time. They’re handy things to have around for a quick and easy meal (feeling lazy? marinate some chicken in soy sauce, mirin, garlic, and olive oil). We did fudge some things though, so I’m putting in the actual recipe and in parentheses what we did.

Momofuku Noodle Bowl

Ingredients

1 medium sized cucumber
¼+ tsp salt
½+ tsp sugar
2 ½ cups (or one bunch) thinly sliced scallions
½ cup (or just one large piece) minced ginger
¼ cup grapeseed oil (we used olive oil because we didn’t have grapeseed)
2 tsp soy sauce
1 tsp rice wine vinegar
1 Tbl olive oil
½ large head of cauliflower, cut into florets
1 lb noodles – ramen, soba, or lo mein (we used udon)

Instructions

Thinly slice the cucumber. In a bowl toss the cucumber with salt and sugar and let it sit for a few minutes and then taste one of the slices. Adjust the salt and sugar as necessary. I ended up probably using twice or even 3 times as much sugar and salt. Just because I wanted it. Thought it tasted better.

In a different bowl combine the scallions, ginger, 1/4 cup of olive oil, soy sauce and rice wine vinegar. Allow to sit and marinate for 30 minutes.

While those items are marinating, heat the Tbl of olive oil in a pan and add the cauliflower. Cook them on high till they start to brown and get a bit crispy. While the cauliflower is cooking, you can boil water and cook your noodles according to the package. Once the noodles are cooked, toss them with the scallion/ginger sauce. Now, serve the noodles in a bowl, and top with the cauliflower and cucumbers.

Now, this is a vegetarian dish, but Jonah and I were hankering for some more protein, so we bought a chicken breast. Jonah cut it up into bite size pieces and cooked it with a bit of fish sauce, hoisin sauce, and soy sauce, and it was good. A delicious addition to the dish. Yum!

Carrot Miso Soup

Carrot Soup

Carrot Soup

Last week Jonah and I were feeling like soup. I had seen a carrot soup with miso recipe on Smitten Kitchen and decided that we should make it because a) it’s healthy and b) I love miso. It’s always nice to find recipes where you either don’t have to go to the store at all because you have everything or you only need to buy one or two things to make it. That was the case, so I was happy.

I’m going to be honest with you guys. I didn’t really like this soup. I liked the taste and everything fine, but I had a lot of trouble with the texture. Kind of reminded me of baby food, which isn’t so great when you’re not a baby. But I’m going to give you the recipe anyway because I think with a little adjusting here and there, the texture problem could be fixed. Whether the solution is more broth or cooking the carrots longer or having a better blender, I’m not really sure, but next time I might even try all of the above.

Carrot Miso Soup

Ingredients

2 Tbl olive oil
2 lbs carrots, peeled and thinly sliced
1 large onion, finely chopped
4 garlic cloves (6 if they’re small), peeled and chopped
1 Tbl finely chopped ginger
4 cups vegetable broth
1/4 cup white miso paste
Toasted sesame oil
2 scallions, thinly sliced

Instructions

Heat the olive oil in a large pot over medium heat. Add the carrots, onion, and garlic and cook for about 10 minutes, or until the onion is translucent. Add the ginger and the broth, cover the pot, and simmer, stirring occasionally, until the carrots are tender when poked with a fork, about 30 minutes.

Now, it’s time to puree the soup. You can either do this in batches in a blender or with an immersion blender. I used an immersion blender, which worked pretty well, but as I said above, maybe not well enough. In a small bowl , whisk the miso together with about a cup of the soup, and stir the mixture back into the pot of soup. Season to taste with salt and pepper. Spoon into shallow bowls and top it all off with a drizzle of sesame oil and a sprinkle of the scallions. We also added a slice of bread. Enjoy!

Beet Tart with Goat Cheese and Greens

Beet Tart

Beet Tart
Beet Tart

Last week, I was in the mood for something light but nice for dinner. After a little hunting, I found a recipe on Desserts for Breakfast for a delicious looking beet tart with goat cheese. Sounds good, no? And, the other great thing? It was super easy. Really though, I’m not just saying that.

Beet Tart with Goat Cheese and Greens

Ingredients

6 large or 4 GIANT beets
olive oil
8 – 10 sprigs of fresh thyme
salt
pepper
1 sheet of puff pastry
1 small package goat cheese
1 small package blue cheese
frisee or mixed greens
freshly squeezed lemon juice

Instructions

Preheat your oven to 400 degrees. Prepare two baking sheets: line one with foil and the other with parchment paper, a silpat, or just grease it with some olive oil. Peel your beets and slice them into slices about 1/4-1/2 inch thick. Remove the thyme leaves from the sprigs, and toss with the beets, olive oil, and a little salt and pepper. Lay the beets on the foil-lined baking sheet and bake for 10-12 minutes.

While the beets are roasting, roll out the puff pastry so it’s a little thinner (into a 10 by 10 inch square or comparably sized rectangle). Also, I didn’t really think about that whole thawing thing, so remember that, otherwise the time will come to use your puff pastry and it will still be a big hunk of ice. I mostly just stretched mine out because I was in someone else’s kitchen sans rolling pin. Anyway, once you’ve rolled or stretched it or whatever, transfer it to the other baking sheet (the one lined with parchment paper or greased). Arrange the beet slices on the puff pastry, leaving a nice edge around the beets, 1-2 inches. Roll the edges of the puff pastry up to create a little crust.

Bake at 400 degrees for 10 minutes, then turn the temperature down to 350 and bake for another 25-30 minutes or until the pastry is golden brown and puffed up and the beets are tender. Remove from the oven and let cool for a little bit.

While the tart is cooling, mix together some of the goat cheese and blue cheese with a fork. I didn’t give exact measurements of how much cheese because you know what cheese you like and how much cheese you’ll want on your tart, so I’m not gonna tell you how to do it. You can figure it out. Toss the greens or frisee with lemon juice, olive oil, and pinch of salt to coat it evenly and serve it alongside or over the tart. Enjoy!

Gnocchi with Spicy Tomato Sauce

Gnocchi
Gnocchi
Gnocchi
Gnocchi
Gnocchi
Gnocchi
Gnocchi

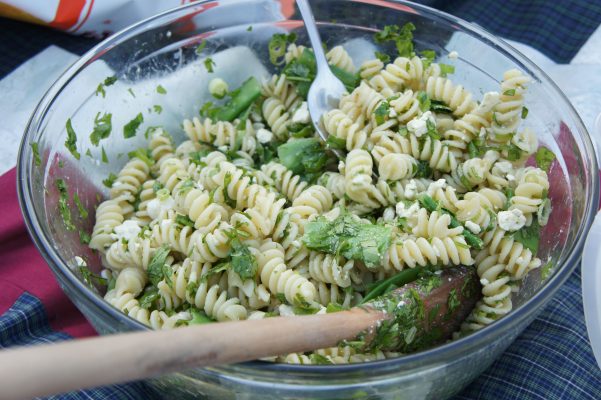
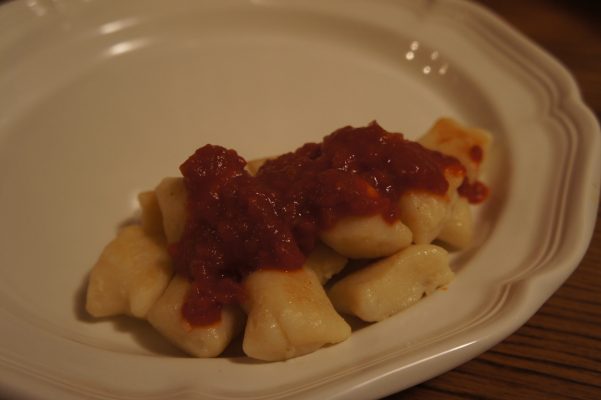
I’ve been lusting after the pasta attachments for my KitchenAid. Dreaming of them, of all the beautiful pasta I would make if I had them. Oh man. I want them so badly. But I don’t have them. And I probably won’t for a while. But I want to make pasta, so I after eyeing a few gnocchi recipes, I thought, hell, I’ll try it.

This may not have been my best decision ever. I mean, you have to start somewhere, right? But I decided to do it when we had a friend coming for dinner. But she was supportive of my endeavors. After reading many recipes and such about how to handle your potatoes and how much flour and egg to add, onward I went. One important thing is you don’t want to put your potatoes in a food processor or use an immersion blender or anything like that. You want to put it through a ricer or a grater or mash it with a fork. I chose the last route.

These gnocchi were pretty good for a first try. As I mentioned before, I think they were a little over-cooked. They also were a little dense, and I’m not sure why. There are a few possible explanations: 1) boiling them instead of roasting them? 2) added to much flour? 3) added too much egg? Who knows, but all of these are variables I plan on futzing with the next time around.

Potato Gnocchi and Spicy Tomato Sauce

Ingredients

Potato Gnocchi

2 lbs russet potatoes
1 tsp salt
1 egg, slightly beaten
1 1/2 cups flour, plus some for rolling/dusting

Spicy Tomato Sauce

1 tsp butter
2-3 large shallots
1/2 tsp red pepper flakes
1 tsp salt
1 28-oz can whole tomatoes, drained
1 15-oz can tomato puree/sauce
a pinch (or two) of sugar

Instructions

Potato Gnocchi

Cut your potatoes in half and put them in a pot of water. Bring the pot to a boil and cook until the potatoes are tender throughout. This will take about 40-50 minutes. When the potatoes are cooked, remove each half one at a time onto a cutting board and peel each piece before you move onto the next. Be careful as they’ll be very hot! But the skins come off pretty easy, and if not, just use a paring knife. Once all the potatoes are removed and peeled, mash them. I used a fork so that I could be more thorough and make sure there weren’t any big clumps. Anyway, mash the potatoes and spread them out on the cutting board so that they can cool.

Once cool, put the potatoes in a bowl, add the egg and salt and mix together. Now add the flour a little bit at a time (I probably did 1/4 cup at a time) and mix it in. You don’t have to add all the flour. In fact, it’s probably better if you don’t (I don’t know this for a fact) because I assume the gnocchi will be less dense when cooked. Just add flour until the dough doesn’t stick to your hands anymore. Now dump the dough onto a lightly floured surface (read: counter) and knead it gently for a few minutes, incorporating more flour if necessary.

After kneading, divide the dough into 6 equal parts, and roll each chunk one at a time into a rope about 3/4 inch thick. Cut each rope into 1 inch pieces. You’ll want to be sure to do this on a floured surface, as the rolling and cutting especially can result in the dough stick to the counter, which makes it hard to…ya know…remove them.

While you’re rolling out your dough, you can bring a large pot of salted water to a boil. When it’s boiling, add the gnocchi in batches. I made the mistake of putting all of mine in at once and I think this caused the ones that were put in at the beginning. So do it in batches. After a little bit, your gnocchi will rise to the top of the pot. Let them cook for another minute after they do that, and then remove them with a slotted spoon to a bowl or colander or whatever. Do the same with the rest of the gnocchi.

I also decided to cook them in a pan after boiling them for 2 reasons: 1) they were pretty mushy and I wanted to dry them out a bit, and I knew this would help. 2) I love gnocchi that has that little bit of crunch from being lightly seared in a pan of butter. Yum. So if you want to do that, melt a bit of butter in a pan and cook the gnocchi in batches until it’s lightly browned on each side.

Spicy Tomato Sauce

Be warned, this pasta sauce has quite a bite to it from the chili flakes. I thought it was a perfect amount of spiciness, but if you are nervous about it, add less than 1/2 a tsp and add more till it suits your tastebuds.

Melt the butter in a saucepan. Add the shallots, pepper flakes, and salt. Cook until the shallots are translucent and beginning to brown. At this point, add the wine and let it cook down. Now add the whole tomatoes and tomato puree, breaking the whole tomatoes up with a wooden spoon as they cook. Taste the sauce, and if it’s a little too spicy, add some sugar (a little bit at a time) and perhaps some wine. Allow the sauce to cook down until it’s the right consistency and put it atop your favorite pasta (or perhaps the gnocchi you just made).

Mexican Bowls

Mexican Bowls

Mexican Bowls
Mexican Bowls

Mexican Bowls

The other night, dinner rolled around, and I was feeling incredibly lazy. Nothing that I could think of eating actually sounded good to me, so I put Jonah in charge. There’s a restaurant here in Portland called Por Que Non that has really good Mexican food. They have this dish called a Bryan’s Bowl that is just a bowl of delicious rice and beans and meat and cheese and guacamole and salsa and everything you could ever want in a little bowl. It’s incredibly good. So Jonah suggested making something like the Bryan’s Bowl, and I was not particularly optimistic, because usually when restaurants have something like that they have some secret delicious sauce they pour over it to make it so freaking good. And we didn’t. But…oh well. So he searched something or other on the internet and found this recipe for Cilantro Lime Rice to use as the base for our Mexican bowls. And man oh man, it made all the difference.

Mexican Rice Bowls

Ingredients

Cilantro Lime Rice

1 cup uncooked white rice
1 teaspoon butter
2 cloves garlic, minced
2 tsp plus 1 Tbl lime juice, freshly squeezed is highly preferred
1 15-oz can vegetable or chicken broth
1 cup water
2 tsp granulated sugar
4 Tbl fresh chopped cilantro

Mexican Rice Bowl

Cilantro Lime Rice
Black Beans
Chopped Red Onion
Chopped tomato (or salsa)
Chopped avocado (or guacamole)
Sour Cream
Hot sauce
Lime wedges
Chopped cilantro
Tortilla chips

Instructions

Cilantro Lime Rice

Let’s start with the rice. Put the rice, butter, garlic, 2 tsp of lime juice, broth, and water in a pan. Bring the contents to a boil, reduce the heat to low, and cover and cook the rice until it’s tender (about 15-20 minutes). While the rice is cooking, mix the leftover Tbl of lime juice with the sugar and cilantro. When the rice is done, remove it from the heat and stir in the cilantro/lime mixture.

Mexican Rice Bowl

While the rice is cooking you can also prep the rest of your ingredients for your bowl. We drained the beans and just heated them in the microwave, chopped the onions, and got out the salsa, guacamole, sour cream, cholula, and some tortilla chips.

Now it’s time to assemble your bowl. I did mine kind of like you would if it were the filling of a burrito, making even layers of all the ingredients I wanted. I also used my bowl as kind of a layered dip and ate it with tortilla chips for an added bit of crunch. Oh man. I may not have been in the mood for this meal at the beginning of the evening, but it really hit the spot! Enjoy!

Japanese Cucumber Salad

Japanese Cucumber Salad

Japanese Cucumber Salad

Last week, Jonah and I made a delicious dinner of this Japanese cucumber salad and Korean marinated beef (to be seen in an upcoming post). This salad was so incredibly simple and delicious. It would be perfect for a summer dinner. It’s very refreshing. But we had it in the winter and it was still so crazy good that I couldn’t stop eating it.

Japanese Cucumber Salad

Ingredients

2 medium cucumbers (or 1 large English cucumber)
1/4 cup rice vinegar
1 tsp sugar
1/4 tsp salt
2 Tbl toasted sesame seeds

Instructions

We bought the sesame seeds in the bulk section at our grocery store (we needed a bunch for the beef too, so it made sense) and you can just toast them in a dry pan over medium heat. Keep an eye on them though, because they can burn quickly.

Peel the cucumbers leaving alternating green stripes of the peel. Slice them in half lengthwise and scoop out the seeds. Now, using a food processor, sharp knife, or one of those mandolin things if you’re one of those people, slice your cucumbers into very thing slices. Think paper thin. Lay your cucumber slices out on a double layered paper towel or a dishtowel to absorb some moisture while you whip up the dressing.

Combine the rice vinegar, sugar, and salt in a bowl, making sure to stir it up to dissolve the sugar. When you’re ready to serve, add the sesame seeds and cucumbers, and toss to coat. Serve!

Eggplant with Buttermilk Sauce

Pomegranate seeds for the Eggplant with buttermilk sauce

Eggplant with buttermilk sauce

Eggplant with buttermilk sauce

The posting of the recipe is long overdue, as I made this dish quite a while ago.  So I may not remember the exact details of everything I did to make this – but here goes.  Have I told you about the unprecedented influx of cookbooks in Annie and I’s apartment?  I went from owning exactly zero cookbooks before Christmas and my birthday this year (Jan 6) to having 4.  That’s a 400% increase in cookbooks within the span of a month!  Anyway, Annie’s mom got me this great cookbook called Plenty, that has some fantastically new and different recipes. This is one of them.

A picture of this eggplant with buttermilk sauce recipe is on the cover of the Plenty cookbook, so I decided to make it.  It looked like nothing I had ever tasted before, and that’s what it ended up tasting like!

Eggplant with Buttermilk Sauce

Ingredients

2 eggplants
1/2 cup olive oil
4-6 thyme sprigs
salt and pepper
1 pomegranate (this is the fun part)
For the sauce:
9 Tbs buttermilk
1/2 cup Greek yogurt
1.5 Tbs olive oil
1 small garlic clove, finely chopped
pinch of salt

Instructions

Preheat the oven to 400 degrees. Cut the eggplants in half lengthwise (see photo below). Now cut some lengthwise incisions on each half, but not all the way through to the skin. This is just to let the oil and juices get around. Make some more diagonal incisions (I sort of did this like you would cut an avocado before you scoop the flesh out).

Place the eggplant halves on a baking sheet, and brush them with the 1/2 cup olive oil until it’s all used up.  Sprinkle with some thyme leaves and salt and pepper.  Roast for 45 minutes, when the eggplant flesh should be soft and browned.

While the eggplant is roasting away, let’s do something fun. To get all the seeds out without digging through the fruit like a raccoon, start by cutting the pomegranate in half.  Hold one half over a bowl with the flesh side facing down into your hand (watch out, your fingers are about to get juicy). Use the back of a wooden spoon and start whacking the back of the pomegranate gently, and then with increased force, until the seeds start to fall out into the bowl.  Don’t lose faith if seeds don’t start raining down right away: it takes a minute for them to start getting loose. It helps to flip the pomegranate half over once in a while to gently pull the membranes apart and pick them out. Do the same thing with the other half.

Make the sauce by whisking all of the sauce ingredients together in a small bowl.  I used Greek yogurt that was honey-flavored, which may have been a mistake.

When the eggplant halves are done, serve by spooning plenty of the sauce over the halves.  Sprinkle your expertly-harvested pomegranate seeds on top and garnish with some more thyme and drizzle with a bit of olive oil.

The taste was amazing – a combination of things I have never tasted in combination before!