Course

Gingered Rhubarb Crisp

Rhubarb
Rhubarb

Rhubarb

You know what has started? Our neighborhood farmer’s market! I couldn’t be more excited. Jonah and I walked over for the first time and bought some sweet little carrots and some of the most beautiful rhubarb I had ever seen in my life. Seriously.

Now, for those who know me, you are award I have an obsession with rhubarb. If you don’t know me, well…now you know that much more. Strawberry rhubarb is my dad’s favorite kind of pie, and he and I spent one summer searching for the perfect recipe. We made probably a pie every other week. And we found what is, in my opinion, the best recipe. I still haven’t decided if I’m going to give you the filling recipe, but if I do it will be later. I’ve already given you the pie dough recipe.

This recipe, however, is one that my older sister discovered a few summers ago. It’s perfect for a) not having any strawberries, but having lots of rhubarb and b) wanting rhubarb dessert but not having enough time to make a pie. That shit’s time consuming. It’s so delicious: the ginger really brings out the tartness of the rhubarb, and I love the nuts in the topping. I halved the recipe because we all know what happens when there’s extra dessert lying around (hint: it ends up in my belly).

Gingered Rhubarb Crisp

Ingredients

Rhubarb Filling

Vegetable oil spray or butter wrapper (see instructions)
3 pounds rhubarb, cut into ½-inch chunks
¼ cup plus 1 tablespoon flour
½ cup sugar
½ teaspoon ground ginger

Crumble Topping

¾ cup all-purpose flour
¾ cup old-fashioned oats
¾ cup packed light brown sugar
¾ cup chopped walnuts
¾ teaspoon ground ginger
6 Tablespoons unsalted butter, melted

Vanilla ice cream, whipped cream, or plain Greek yogurt for serving (I wish we’d had Greek yogurt… sounds so good).

Instructions

Rhubarb Filling

Preheat your oven to 375 degrees and spray an 8- by 8-inch baking pan lightly with the vegetable oil spray and set aside. If you don’t have vegetable oil spray, take the wrapper from the butter you use in the recipe and just rub the pan with that. Jonah and I keep a stash of butter wrappers in our fridge for this exact reason.

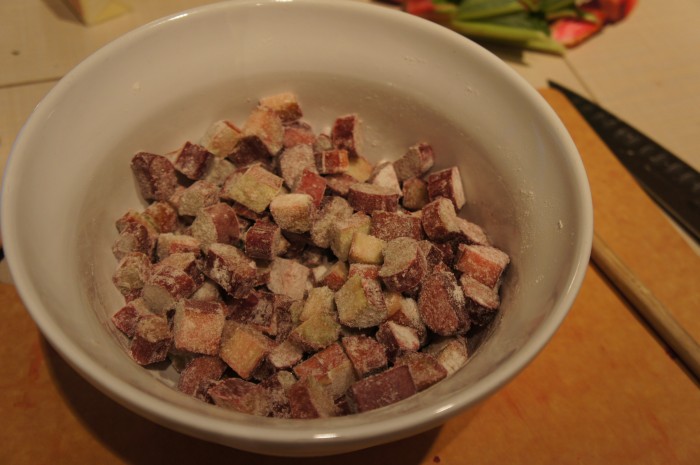
Stir the rest of the filling ingredients (rhubarb, flour, sugar, and 1/2 tsp ground ginger) in a mixing bowl until the fruit is nicely coated with the flour. Spread the rhubarb evenly in the pan and bake it in the middle of the oven for 20 minutes.

Crumble Topping

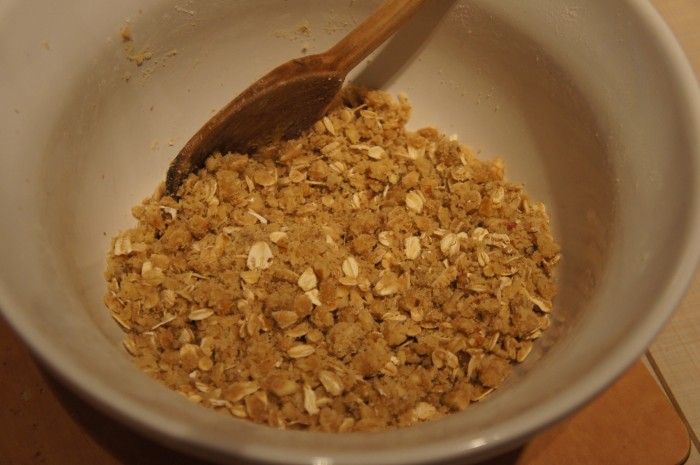
While the fruit is baking, make the crisp topping (you can use the same bowl you used for the fruit – I’m all for fewer dishes): Mix all the topping ingredients except the butter together in the bowl. Pour the melted butter over the dry ingredients, and mix thoroughly until all the ingredients are evenly moistened. With the melted butter. That’s right.

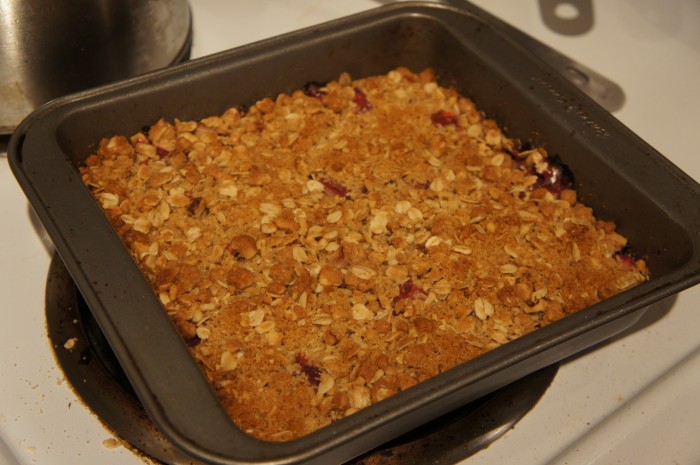
Take the pan of rhubarb out of the oven and spread the topping in an even layer over the fruit. It’s probably a good idea to put the pan on a baking sheet (maybe even lined with foil) to catch any drips. Or just do it in a bigger pan. That’s up to you I guess. Anyway, bake it for another 30 minutes or until the topping is golden brown and the filling is bubbling. Serve warm with ice cream, whipped cream, or Greek yogurt.

Thai-Style Steak Salad

Salad

Salad

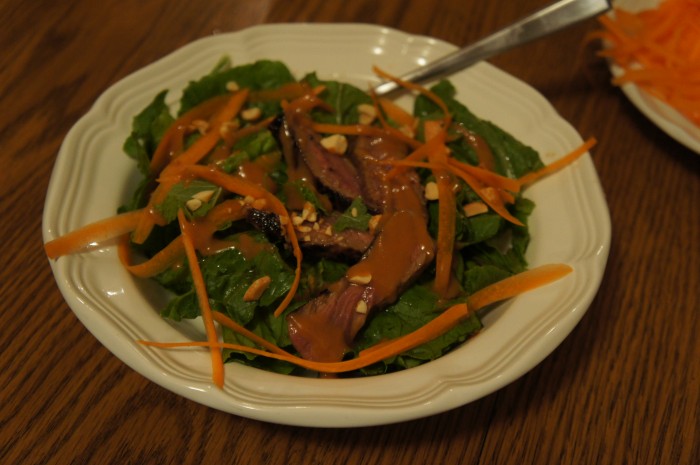
Life has been crazy busy. I know I keep saying that, but then it keeps getting busier. Maybe I’m jinxing it. Anyway, cooking has definitely been put on the back burner, which is a bummer. Mostly because I love good food and I love cooking it. But it’s hard when you come home and you’re tired and you have to look for recipes and then go to the store, etc. Lately, Jonah and I have been all for quick, light meals. I found a bunch of delicious looking main dish salads on Martha Stewart’s website. This is the Thai-Style Steak Salad. We halved it but I’ll give you the original recipe, which serves 4.

Thai-Style Steak Salad

Ingredients

1/4 cup freshly squeezed lime juice
1 tablespoon soy sauce
1 tablespoon sugar
1/4 to 1/2 teaspoon red-pepper flakes
3 tablespoons vegetable oil
2 boneless rib-eye steaks (each 8 ounces and 3/4 inch thick)
Coarse salt and ground pepper
1/2 pound carrots (3 to 4 medium)
1 medium head romaine lettuce, cut crosswise into 1-inch ribbons
1/2 cup fresh mint leaves
1/3 cup salted peanuts, chopped (optional)
Peanut sauce (optional)

Instructions

First, make the marinade by whisking the lime juice, soy sauce, sugar, red pepper flakes, and oil in a bowl. Season the steaks with a bit of salt and pepper, place them in a dish, and pour 1/4 of the marinade over the steaks (save the rest of the marinade in a bowl). Turn the steaks to coat and let them marinate for 30 minutes.

In a large skillet, cook the steaks on medium-high heat. Cook it 2-3 minutes per side for it to be medium-rare. Cook it more if you want. Transfer the meat to a cutting board, tent it with aluminum foil, and let it rest for 5-10 minutes. Slice the steaks nice and thin, preferably 1/4 inch-thick. If they’re too long, you can halve the slices crosswise. Transfer the meat back to the bowl with the marinade and toss it to coat.

While the meat is resting (or marinating, for that matter), peel the carrots into ribbons with a peeler. Chop the peanuts too, while you’re at it. Add the carrots to the bowl with the steak, as well as the lettuce and the mint, and toss to combine. Divide evenly into shallow bowls, sprinkle with the peanuts (and peanut sauce if you want), and serve!

Thai Beef and Basil Stir Fry

Stir fry

Stir fry

Wow you guys. Life has been crazy and a half. After being laid off at the end of February, I just started a new job and I’m totally in love with it. I’m just an assistant really, but the woman I’m assisting is the CEO of this start-up company and she’s super smart, creative, fun, and kind. I’ve been working with her now for two weeks and I’m having such a blast and learning lots. Also, it’s at the same place where Jonah works, so we get to drive to work together (and then not really see each other all day because he’s in the studio and I’m at the CEO’s desk) and then go home! I’ll admit, I was a little worried about it, but it’s really fun, actually. So that’s a little update on my life and perhaps a bit of an excuse as to why it’s been almost a week since I’ve posted. I was so not used to working a full time job that at the end of each day, I was so tired that I didn’t want to cook. But I’m now getting used to the new schedule and getting back in the kitchen.

This stir fry is the most delicious stir fry that I’ve maybe ever had. I found it while surfing food52, one of my new favorite food blog things. It’s really different than a lot of stir fry or Asian-influenced dishes and super flavorful. And pretty dang easy. This recipe serves 2, so if you’re feeding more than that, multiply. I’ve adapted a little bit.

Thai Beef and Basil Stir Fry

Ingredients

Fish Chili Sauce

1/2-1 serrano pepper, chopped
1 Tbl fish sauce
1/4 cup water
1 clove garlic, chopped

Stir Fry

1 Tbl vegetable oil
2/3 lb. ground beef
1 red onion, sliced thinly
1 serrano pepper, chopped (more if you want it spicier)
3-5 cloves of garlic, peeled and chopped
1 Tbl soy sauce, plus some for finishing
1 Tbl fish sauce, plus some for finishing
1/2 tsp brown sugar
1 cup thai basil leaves, packed (I just used regular basil… It was fine)
1 fried egg per person

Rice for serving

Instructions

First, make the chili sauce by combining the four ingredients in a bowl, stir, and set it aside.

Start cooking your rice! It’s always good to do a 2:1 water to rice ratio, bring it to a boil, and then turn down the heat to a simmer, and let it cook, covered. Check it occasionally and when it’s done, turn off the heat. Heat the wok or a fry pan with oil. When the oil starts to smoke, add the garlic, chili, sugar and onion. Cook until the onions have softened and become a golden brown.

Add the meat and cook for about 5 minutes, then add the soy sauce and fish sauce. Fry until the meat is thoroughly cooked, another 2-3 minutes. Remove the pan from the heat and add the basil leaves, mixing them in until they’re wilted. Put the stir fry in bowls over rice and fry an egg per person. Put the egg on the stir fry and you’re done! Accompany with fish sauce and say sauce to taste!

Pistachio Butter Cups

Pistachio Butter Cups

Pistachio Butter Cups

Another recipe brought to you by food52. The same day I made that scallops dinner for Jonah, I also made him these pistachio chocolates (think Reeses cups but with pistachio filling). What can I say, I was feeling loving and ambitious. This was the first time I’ve ever made a candy/chocolate thing, so I was a little scared and often felt like “am I doing this right?” but it all worked out. And actually, now that I’ve done it, I can confidently say that it was pretty easy! But I would definitely advise reading through the whole recipe before you get started (I actually always advise that, but especially in this case).

Pistachio Butter Cups

Ingredients

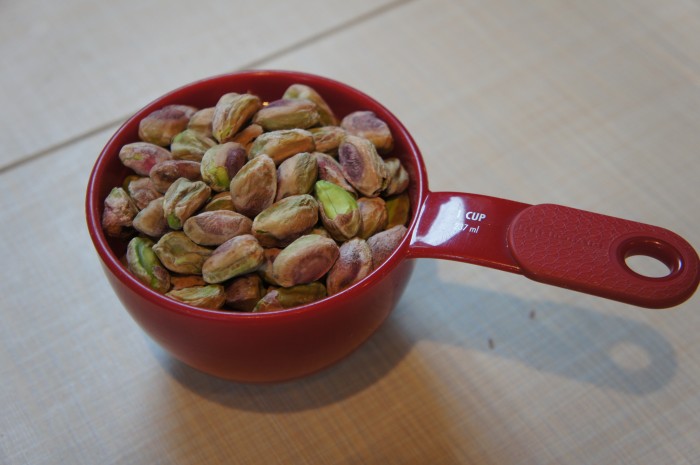
1 cup shelled pistachios
1/4 cup butter
1/2 cup powdered sugar
1/4 tsp salt
12 oz. dark chocolate, chopped

Special equipment: mini muffin liners

Instructions

I found I needed a little more chocolate than the recipe called for, but I think I used too much in the first step, which you’ll see below, and because of that the chocolate overwhelmed the pistachio filling a little bit.

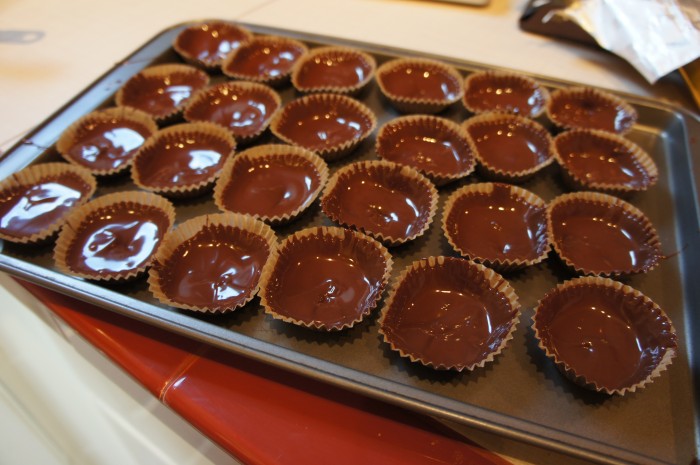
Melt the chocolate in the microwave, stirring every 30 seconds until 75% of chunks are melted, and just stir to melt the rest. Set 24 mini muffin liners out (I did it on a baking sheet so they’d be easier to move and such. Add a spoonful (think maybe 1 1/2 – 2 teaspoons) of chocolate to each liner. Use the back of the spoon to push the chocolate up the sides of the liner. I pushed it up almost all the way to the top (see picture). Put the liners in the fridge for half an hour to cool until they’re solid.

While the chocolate is cooling, put the pistachios, salt, and butter into a food processor and process until smooth. Add the powdered sugar and 1-2 Tbl of water until you have a thick frosting consistency. Remove the chocolate-filled liners from the fridge. You’ll see that because you’ve pushed the chocolate up the sides, you’ve got a nice mini chocolate bowl. Add about 1/2 Tbl to each liner. How to go about this is tricky. I had to use my fingers to kind of smooth out the filling, as I wanted it to be flat (like a Reeses would be), but it stuck more to my fingers than to the chocolate. But I figured it out and it worked just fine.

Reheat the remaining chocolate (as you did above) and spoon it over the pistachio mixture until it’s thoroughly covered. You want the top layer of chocolate to meet the chocolate that was pushed up the sides of the liner so that the pistachio filling is encased in it. Allow to cool and enjoy!