The Best Grilled Cheese

Grilled Cheese

Caramelized Onions for Grilled Cheese
Grilled Cheese assembly

When I was little, I called grilled cheese sandwiches “girl cheese” sandwiches. Makes sense, right? Boys had cooties and therefore shouldn’t be allowed to eat something as crispy and buttery with perfectly melted cheese. I thought it made perfect sense.

Last summer, my friend Corey worked at a food cart here in Portland called the Grilled Cheese Grill. If you haven’t heard of it, they have these really wonderful, creative, goofy grilled cheese sandwiches. My personal favorite is the jalapeno popper: roasted jalapenos, colby jack, cream cheese, and tortilla chips on sourdough.

Sometimes, when lunchtime rolls around in our apartment, I go hunting through our cabinets and fridge shelves and I am just so uninspired. But the other day, that was not the case. We had a fresh loaf of sourdough bread from New Seasons (usually we get whole wheat, but when I have my way, sourdough it is), and all I wanted was a grilled cheese. But I wanted to make it interesting, and the other thing I had been craving? Caramelized onions.

When I told Jonah of this amazing sandwich, he got jealous and made himself one for lunch the next day. The fever is catching…

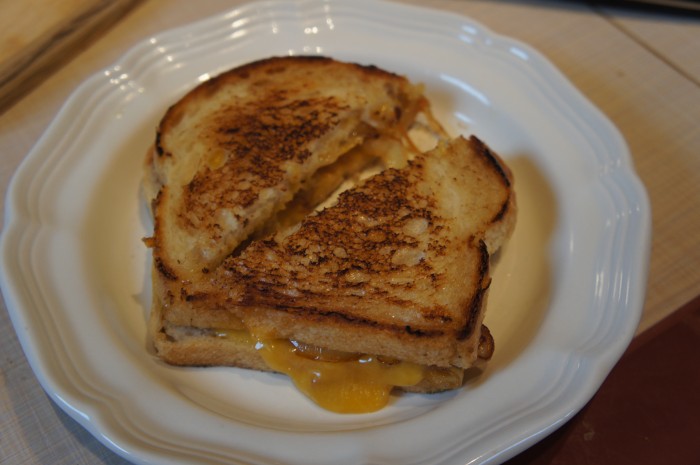
Grilled Cheese with Caramelized Onions

Makes one sandwich

Ingredients

Two slices of bread (preferably sourdough)
Cheddar cheese, sliced into thin pieces (we buy Tillamook sharp cheddar)
Parmesan cheese, sliced into thin pieces
1 small onion, thinly sliced
1/4-1/2 tsp brown sugar
Salt

Instructions

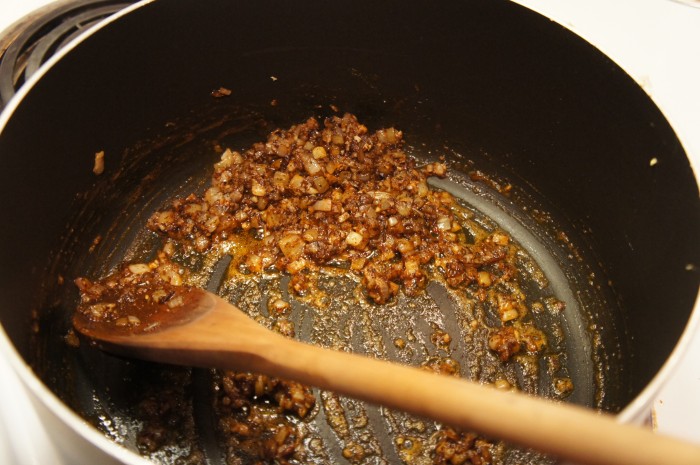
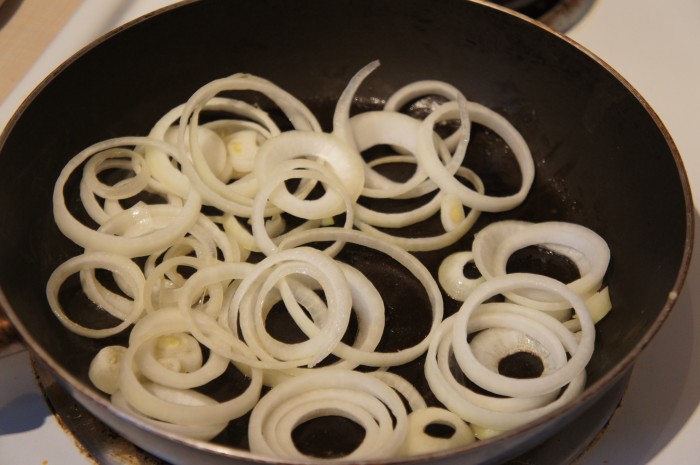
The first step is to caramelize the onions. Throw your onion slices in a pan over medium-low heat. Cover and let them soften for a few minutes, then sprinkle the brown sugar and a pinch of salt over them and stir to coat evenly. Cover and cook, stirring occasionally, allowing the onions to brown and soften all the way. After the onions are softened turn the heat up to medium-high and let them cook for another couple minutes, stirring. This will give them a nice sear on the edges.

While your onions are softening, butter the outsides of your sandwich bread (the side that will hit the pan). Thinly slice the cheddar cheese and put it on BOTH sides of the bread. This is key. Nothing is worse than making a grilled cheese with stuff other than cheese on it and then having the bread slide around because there’s no cheese sticking it in place. I’m serious. I put slices of parmesan on just one side so there wasn’t too much of it: parm is a strong cheese and you don’t want it to overpower anything.

When your onions are ready, lay them on the bed of cheese you have created for them. Put the two sides of the sandwich together, and throw it in the pan over medium heat. Cover it while it cooks (this makes the cheese melt quicker so that you don’t have to burn the bread while you’re waiting for the melting to occur). When the bread is golden brown, flip, and cook until the other side is golden brown too. Put on a plate, cut down the middle, and serve, warm and gooey and cheesy. Enjoy!

Whole Roasted Chicken with Veggies

Whole Roasted Chicken with Veggies

Whole Roasted Chicken with Veggies

You may have noticed that roasted chicken was one of our previous blog posts, but this time its different.  There’s a couple different veggies, but the biggest difference is that I roasted an entire chicken!  I was excited and a little scared to do this.  I’ve seen my mom take apart a chicken many times – but for the most part Annie and I buy chicken parts as we need them; thighs and breasts mostly.

I bought a whole free-range fryer chicken at the store, after learning that the only differences between the fryer and roaster birds are their size – in other words, you can roast a fryer or fry a roaster.  For the most part, I followed a recipe from Thomas Keller’s Ad Hoc cookbook, although I tragically left out onions.  You can use any combination of root vegetables you want – I used leeks, carrots and potatoes.  The best thing about the Ad Hoc cookbook is that it has some great How-To’s with pictures for cutting and trussing a chicken.  For this recipe, I learned how to truss (tie up) a chicken!  Here’s a video of Thomas Keller himself trussing one up, although he does it in a more fancy way in this video than shows in the book.

We ate this last night for dinner, its a great winter-time meal-in-a-dish, and it makes lots of leftovers!

Whole Roasted Chicken with Root Vegetables

Ingredients

1 small whole chicken (smaller the tastier, mine was 4 lbs.)
2 leeks
3-4 carrots
8 golf-ball sized potatoes
1/4 cup oil (canola, olive)
6 garlic gloves, crushed and peeled
6 thyme sprigs
Herb butter (we used leftover herb butter we had from the salmon)
salt and pepper

Instructions

Let the chicken sit out for 1-2 hours to come to room temperature.  Remove anything that’s still in the cavity (neck, heart, etc) and season the cavity with salt and pepper, 3 of the garlic gloves, and 3 thyme sprigs.  Cut out the wishbone for better carving later (good luck, I completely failed at this.  Look up some videos online).  Truss the chicken.

Preheat the oven to 475 degrees. Cut the green tops of the leeks and trim the root end.  Slice them in half lengthwise and wash.  Cut the potatoes in half.  Cut the carrots in half lengthwise and cut into smaller sticks.  Combine all the root vegetables in a large mixing bowl with the remaining 3 garlic gloves and remaining 3 thyme sprigs, plus the oil and season with salt + pepper.

Lay out the veggies in a large baking dish, making a nest in the middle in which to nestle the chicken.  Place the trussed chicken in the bed of veggies, and rub/pour the herb butter on top of the chicken.

Bake for 25 minutes, then turn the heat down to 400 and bake for another 45 minutes. The internal temp of the bird should reach 160 degrees when its done…I had to put it in a bit longer.

Indian Dinner: Chicken Makhani and Spiced Cauliflower

Indian Dinner: Chicken Makhani and Indian Spiced Cauliflower and Potatoes

Indian Dinner: Chicken Makhani and Indian Spiced Cauliflower and Potatoes

Indian Dinner: Chicken Makhani and Indian Spiced Cauliflower and Potatoes

Indian Dinner: Chicken Makhani and Indian Spiced Cauliflower and Potatoes

For a while now, I’ve been wanting to cook an Indian dinner. But I don’t have a cookbook with the kind of curry I wanted to make, so I took to the internet. After much hunting, I found many websites with the same Chicken Makhani recipe, so I decided to try it. If you’ve never had Chicken Makhani, you should. It’s a very creamy, mild curry that is this beautiful orange color. And I’ve been wanting to make it forever. Let me say before you jump in here that this recipe did not taste like the dish I get at our favorite Indian restaurant. Not at all. It was still good, just not what I was expecting. So if you have had Chicken Makhani before, just know that this won’t taste like the dish you’re thinking of. (My grandmother would kill me for ending that sentence with a preposition, but whatever.) Also, I will say that I forgot the step with the cornstarch and water at the end… So maybe it would have turned out different, but I don’t think the taste would have been affected at all. So there you go.

Now, when I was at the grocery store, shopping for this lovely meal, I thought to myself, “Gee, I really should cook a vegetable too.” So I quickly looked up a recipe on Smitten Kitchen (have I made it clear that I love this site yet?) for Indian spiced cauliflower and potatoes. I adapted this so that I wouldn’t have to buy too many more ingredients. I also didn’t do the full recipe; I probably ended up making 3/4 of the original, which yielded plenty for both of us plus leftovers.

Chicken Makhani and Spiced Cauliflower

Ingredients

Chicken Makhani

2 Tbl peanut oil
1 shallot, finely chopped
1/4 white onion, chopped
2 Tbl butter
2 tsp lemon juice
1 Tbl garlic-ginger paste (I wasn’t sure what this was, so I just minced one Tbl worth of ginger and garlic and called it good)
2 tsp garam masala
1 tsp chili powder
1 tsp ground cumin
1 bay leaf
1/4 cup plain yogurt
1 cup half and half
1 cup tomato puree
1/4 tsp plus a pinch cayenne pepper
1 pinch each of salt and pepper
1 lb boneless skinless chicken thighs, cut into bite size pieces
1 Tbl cornstarch
1/4 cup water

Spiced Cauliflower

1 (1 3/4-lb) head cauliflower, cut into 3/4-inch-wide florets
1 1/4 lb potatoes, peeled and cut into 1/2-inch cubes (the recipe called for Yukon Golds, but I just used Russets)
5 tablespoons vegetable oil
1 1/2 teaspoon cumin
3/4 teaspoon salt
1 medium onion, finely chopped
2 garlic cloves, finely chopped
2 teaspoons minced peeled fresh ginger
1/4 teaspoon turmeric
1/4 teaspoon cayenne
1/2 cup water

Instructions

Chicken Makhani

In a large saucepan, heat 1 Tbl peanut oil over medium-high heat. Add the shallot and the onion and cook them until they’re soft and translucent. Add the butter, lemon juice, ginger-garlic paste, 1 teaspoon of the garam masala, chili powder, cumin, and bay leaf. Phew. Cook for a minute, stirring to combine everything thoroughly. Add the tomato sauce and cook for a couple minutes, stirring frequently. Now stir in the the half and half and the yogurt. Bring the heat down to low, and allow the curry to simmer for about 10 minutes, stirring frequently. Season with salt and pepper to taste, remove the curry from heat, and set it aside (preferably covered).

In a skillet, heat the rest of the oil over medium heat. Add the chicken, and cook until lightly browned. Reduce the heat, and add the rest of the garam masala and the cayenne, mixing around until the chicken is evenly coated with the spices. Add a few spoonfuls of the curry to the chicken, and simmer until the liquid has reduced and the chicken is cooked through. Then stir the chicken into the sauce. (Now is when you’re supposed to do the cornstarch: mix together the cornstarch and water in a bowl, then add to the sauce. Stir in thoroughly and cook for 5-10 minutes, or until the sauce is thickened.)

Spiced Cauliflower

Preheat your oven to 475 degrees. In a bowl, toss the cauliflower and potatoes with 3 Tbl of oil, 1/2 tsp of the cumin, and 1/4 tsp of salt. Spread the veggies onto a rimmed baking sheet and bake for about 20 minutes, stirring occasionally. You want the cauliflower tender and browned in spots.

While the veggies are roasting, cook the onion, garlic, and ginger in the rest of the oil in a heavy skillet over medium heat. Stir frequently, and cook until the onions and garlic are soft and starting to brown. Add the rest of the cumin (1 tsp), the turmeric, cayenne, and remaining 1/2 tsp salt, and cook for a couple of minutes, stirring to evenly coat the onions in the spices. Add the water, being sure to scrape up any brown bits from the bottom of the pan, and stir in the veggies. Cover and cook for about 5 minutes, stirring occasionally, or until the potatoes are tender.

Serve curry and cauliflower with rice (I like to add a capful of rice cooking vinegar with the water to give it a little extra flavor), and enjoy!

Polenta Torta with Eggplant Sauce

Polenta Torta with Eggplant Sauce

Polenta Torta with Eggplant Sauce

Polenta Torta with Eggplant Sauce

Polenta Torta with Eggplant Sauce
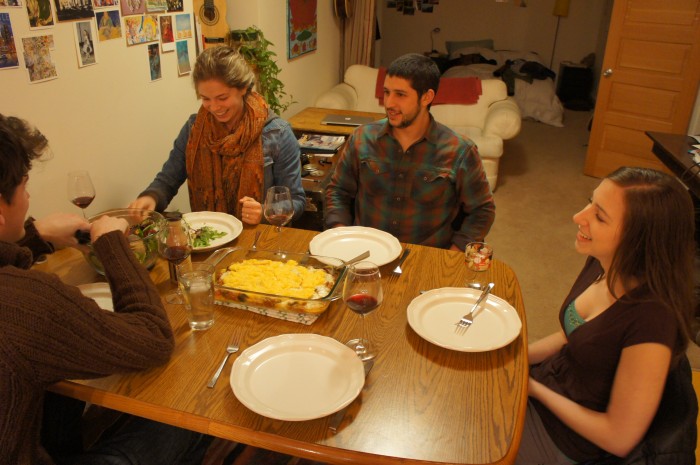
Jonah, Sophie, Johnny, and Mo at the table and ready to eat!

Last weekend, our friends (and newlyweds) Sophie and Johnny were in town. Sophie and Jonah were housemates senior year of college, along with the lovely Maureen (Mo). So we invited the three of them (Mo, Sophie, and Johnny) over for dinner for a little reunion. Mo is a vegetarian, so I immediately went to “Plenty,” that vegetarian cookbook that we are quickly falling in love with. I found a recipe for some eggplant sauce, to be served on top of sweet corn polenta. Alas, it is not corn season, so I decided to use the eggplant sauce to make a polenta torta (recipe found in Alice Waters’ “The Art of Simple Food”). It was a really simple dish, and while we didn’t execute it to the best of our abilities (our dish was too big which made the layering hard) it was still very good. The mozzarella brought a nice pop to the dish, and was really stringy which I love. The eggplant sauce, as I said above, was nice and creamy. It was kind of like a layered pizza, except no crust, just polenta.

Polenta Torta with Eggplant Sauce

Ingredients

Eggplant Sauce

2/3 cup vegetable oil
1 medium eggplant, cut into 3/4 inch pieces
2 tsp tomato paste
1/4 cup white wine
1 cup chopped peeled tomatoes (we used canned, and I ended up using the whole can just to yield a little more sauce)
6 1/2 Tbl water
1/4 tsp salt
1/4 tsp sugar
1 Tbl chopped oregano

Polenta

4 cups water
1 cup corn grits (polenta)
1 tsp salt
3 Tbl olive oil
1/2 cup parmesan cheese (freshly grated)

Polenta Torta

4 cups polenta (hopefully the above recipe yields 4 cups… we didn’t end up measuring)
2 cups tomato sauce (or in this case, Eggplant sauce)
1 cup parmesan cheese (freshly grated)
1/2 pound (2 medium balls) fresh mozzarella

Instructions

Eggplant Sauce

Heat the oil in a large saucepan, add the eggplant. Cook the eggplant on medium heat for ~15 minutes, or until it’s soft and nicely brown. When the eggplant is cooked, drain as much oil from the pan and discard it. Now add the tomato paste and stir it into the eggplant. Cook for about 2 minutes, then add the wine and cook for another minute or so. Now add everything else (tomatoes, water, salt, sugar, and oregano) and cook for another 5-10 minutes to let the flavors deepen. You probably want to keep the pot covered so the sauce doesn’t cook down too much. On the other hand, if it’s looking a little too liquid for your liking, cook it uncovered so it can cook down a little bit. At this point, you can set this aside until you are ready to use the sauce. I made this sauce the morning of the meal, and actually left it on the stove, covered, for many hours.

The great thing about this sauce is the creaminess that the eggplant brings to it. When eggplant has been cooked this long, it kind of falls apart, and I love it when that happens.

Polenta

Now, I’ll be honest with you: I didn’t cook the polenta. Jonah did while I was getting in my workout at the bouldering gym. So I’ll relay what he did to you, but I don’t have any insider tips because I wasn’t there. But here’s what he did: Boil the 4 cups of water in a saucepan. When it’s boiling, whisk in the corn grits and the salt. Now, turn down the heat and whisk until the polenta is suspended in the water and no longer sitting on the bottom of the pan. Cook for 30 minutes – 1 hour (the longer the better, according to Alice Waters), stirring occasionally. Don’t let the polenta get above a low simmer. If at any point the polenta seems to be getting too dry, add a little water. Once the polenta is all cooked, add the olive oil and parmesan cheese.

Polenta Torta

Preheat your oven to 350 degrees. Oil a baking dish (like I said, ours was too big, so keep this in mind when picking what dish to use), and spread 1 1/3 cups of polenta out over the bottom of the dish. Over the polenta, spread half of the eggplant tomato sauce, then half the mozzarella cheese, and sprinkle half the parmesan cheese. Repeat: spread 1 1/3 cups polenta, the other half of the sauce, mozzarella, and parmesan cheese over the dish. End with a layer of the polenta. Because our dish was too big, we only did one layer, which was ok, but it didn’t look as nice as it could/would have if we’d done it right.

Once it’s all layered up, you can put it in the oven for 30 minutes, or until it’s hot and bubbling. Allow to cool for a bit before serving and eating. Enjoy!

Green Pancakes with Lime Butter

Green Pancakes with Lime Butter

Green Pancakes with Lime Butter

Green Pancakes with Lime Butter

Green Pancakes with Lime Butter

In trying to spend less money cooking, Jonah and I have been doing more vegetarian meals. This is why it’s wonderful that Jonah got this cookbook “Plenty” by Yotam Ottolenghi for his birthday. All vegetarian food, very unique ingredients and recipes. These green pancakes are the second thing we’ve made from it (the first was eggplant with buttermilk sauce, which hopefully Jonah will put up on the blog someday…), and they were delicious. Different from anything I’ve tasted and filled with green goodness. We didn’t have everything required for the recipe, so I’ll let you know what we included and what we skipped.

Green Pancakes with Lime Butter

Note: Ottolenghi’s recipe for self rising flour is: 1 cup flour, 1 1/4 tsp baking powder, and a pinch of salt. it’s a little aggravating because you make over a cup of it and then only use 3/4 a cup in the recipe… but I was too lazy to do the math.

Ingredients

Lime Butter

1 stick of butter at room temperature
zest of 1 lime
1 1/2 Tbl lime juice
1/4 tsp salt
1/2 tsp pepper
1 Tbl cilantro (we left this out)
1/2 garlic clove, finely chopped
1/4 tsp chile flakes

Green Pancakes

1/2 lb spinach, washed
3/4 cup self-rising flour (see note above)
1 Tbl baking powder
1 egg
4 Tbl butter, melted
1/2 tsp salt
1 tsp ground cumin
2/3 cup milk
6 green onions, finely sliced
2 fresh green chiles, thinly sliced
1 egg white
olive oil for frying

Instructions

Lime Butter

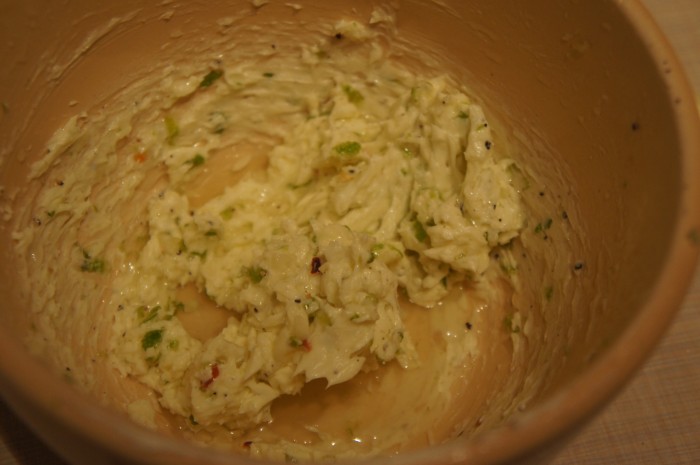
Beat the butter in a bowl until it’s creamy. Add the rest of the ingredients. Wasn’t that hard? The recipe says to put it in plastic wrap, roll it into a sausage shape, and chill until firm. But we just covered it and threw it in the fridge until the pancakes were ready.

Green Pancakes

While your sous-chef (Jonah) makes the butter, you can get started on the veggie prep. Wilt the spinach in a pan, then drain it in a sieve or colander, and when it’s cool, squeeze out as much excess liquid as possible. Chop roughly, and set aside. At this point, you can also chop your green onions and peppers so they’re ready to go when you need them.

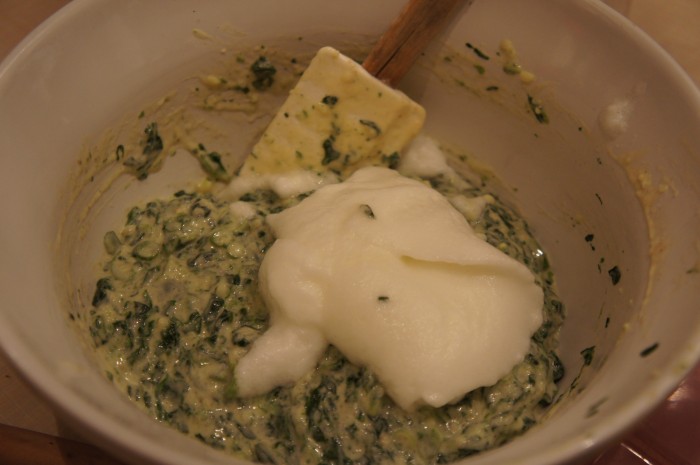
Now, in a mixing bowl (if you have an electric mixer, you can use it, but you’ll want it later to whip your egg white, so be aware that you’ll be swapping bowls and washing it to use it for something else), combine flour, baking powder, the whole egg, melted butter, salt, cumin, and milk. Mix until thoroughly combined and smooth. Now add all those green things you chopped up earlier. In your electric mixer, whisk the egg white “to soft peaks,” meaning you want it to hold a peak, but not be too stiff. Make sense? Now you can gently fold the whipped egg white into the pancake batter.

Heat some oil (think 1/2 Tbl) in a frying pan over medium-high heat. Ladle the batter into the pan, using about 2 Tbl of batter per pancake. You want them to be fairly thin, so press the batter down gently. Cook them for 2 minutes a side, or until they’re nicely golden-brown (or golden-green, as the case may be).

Transfer the pancakes to a paper towel and keep warm. When you’re done with all the batter, enjoy with a slab of lime butter on top! We ate these for dinner, but I can see them being a wonderful breakfast, and also a great way to get kids to eat some spinach! Enjoy!