Lemon Rosemary Palmiers

Lemon Rosemary Palmiers

Lemon Rosemary Palmiers

Lemon Rosemary Palmiers

When I say palmiers, doesn’t something incredibly fancy and impossible to make come into your mind? It does for me. If the name is so French that Jonah can’t say it, it’s gotta be tricky. (Every time I told him I was going to make these, Jonah asked “What’s a palmier again?”) But that is so not true. Especially when you’re just going to use your leftover puff pastry from that beet tart you made… Seriously. So easy.

I found these on Joy the Baker and have been dying to make them. They’ve been calling my name from my Pinterest food board. I adapted the recipe and the method a teensy bit.

Lemon Rosemary Palmiers

Ingredients

1 package puff pastry
3/4 cup of sugar
zest of 1 large lemon
1 teaspoon finely chopped rosemary (fresh is better, but dried will do just fine)

Instructions

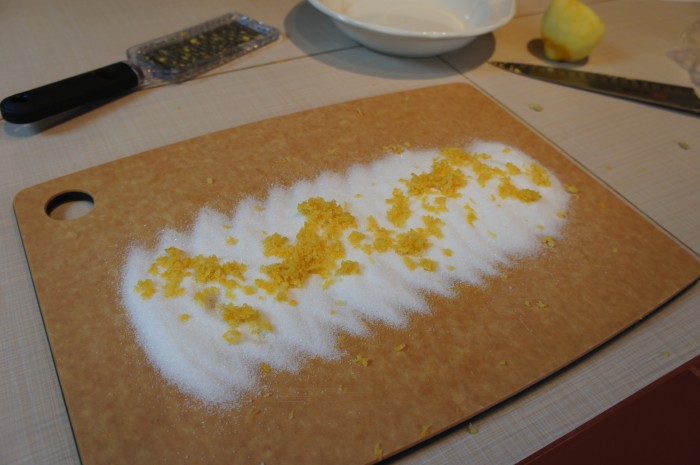
Finely chop the rosemary and set aside.  On a clean, flat surface rub lemon zest into the sugar using a bench knife (if you have one) or the back of a spoon (that’s more like it).  Put the sugar in a bowl and set aside. Unfold the thawed puff pastry onto a lightly (very lightly) floured surface and roll it out a little bit. You don’t need it too much bigger, just like an inch on each side is good. Move the puff pastry somewhere else, sprinkle the surface with about 1/3 of the lemon sugar, and then put the puff pastry back on top of it, pressing it down a bit to get the sugar to stick. Once the puff pastry is down, spread the rest of the sugar and the rosemary over the surface.

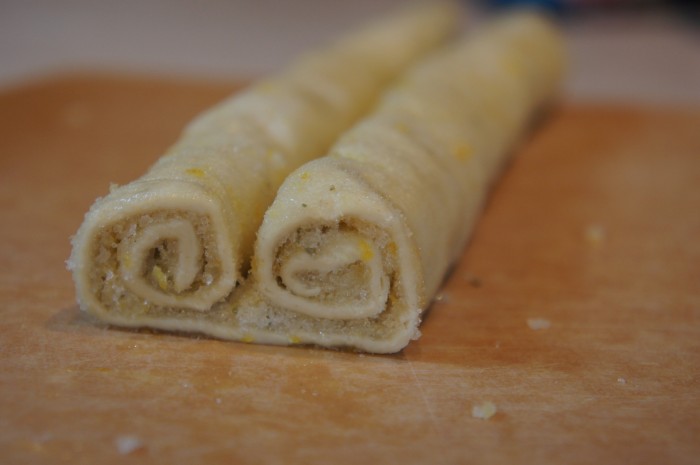
Now tis time to roll. Roll the long side in towards the middle. Then roll in the other long side to the middle. Gently press the sides together so they stick a little bit (though the outside will be covered with lemon sugar, so mine didn’t stick crazy well). Wrap this in plastic wrap and refrigerate it for about an hour, or until it’s cold and relatively firm.

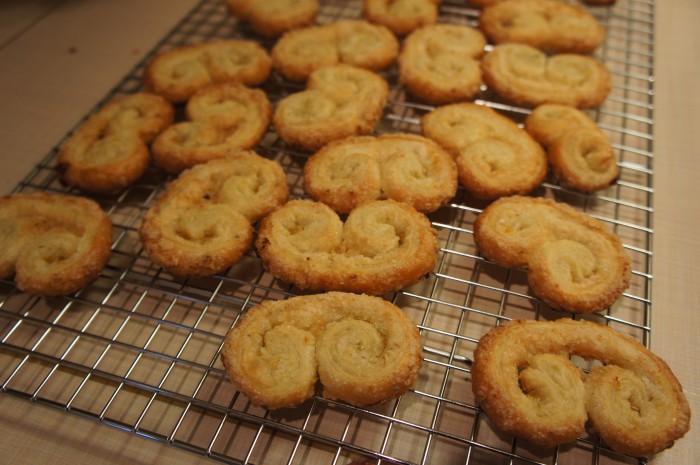
Preheat your oven to 400 degrees. Remove dough from the fridge and slice in about 1/2-inch thick slices.  Place on lined baking sheet (think silpat or parchment paper – I used foil and buttered/floured it, which work well).  Bake for 10 to 15 minutes of until golden brown.  You’ll probably want to rotate the baking sheet halfway through baking.  Keep a close eye on the cookies after about 11 minutes.  They might burn quickly because of all the sugar. Actually, because of the burning sugar, I replace the foil between each batch so it didn’t smoke. Remove the palmiers from the pan pretty much immediately after baking, and put them on a wire rack to cool. Once they’re cool, dig in and enjoy!

Restaurant Review: Stopsky’s Deli

This past weekend I was in Bellevue (across the lake from Seattle) visiting my mom. For many years, Seattle has been lacking in delicious Jewish food. I know this because 1) I grew up in Seattle and we would always go try the new deli only to be disappointed and 2) I am a Jewish food connoisseur because I grew up helping my mother and grandmothers prepare food for Passover, Channukah, and Break Fast on Yom Kippur. There is nothing a Jew loves more than their food. But this past weekend, my mom suggested we go to Stopsky’s Delicatessen (Stopsky’s Deli), a new(ish) deli on Mercer Island. So we went.

Stopsky's Deli
Waiting to be seated. My mom might kill me for posting this, but hey, they all look so happy!

First, let me say, the wait on a Sunday morning was long. We waited about 45 minutes, and by the time we sat down I was crazy hungry (it didn’t help that I had gone to the gym to run about an hour and a half before we even left for breakfast). But I would say it was worth it. The menu has some Jewish classics and some Jew-infused breakfast standards. I settled on the Latkes Benedict, while my sister got the corned beef hash, mom got the cured fish plate, and David got a good old egg plate with latkes and “steak-on” (their kosher version of bacon).

Sadly, when the food arrived, we realized the waiter had mis-heard my order and brought me a pastrami sandwich. It was ok though because my actual order came quickly after they discovered their mistake and they even brought me an apology cookie (which made a perfect snack on the drive home to Portland). I was also ok with my food taking a little longer because by the time I got it I was so hungry that I was able to eat the whole thing. And I would have been sad if I hadn’t been able to because it was SO GOOD. Delicious lemony hollandaise sauce, really nice latkes (which are hard to do), and perfect thinly sliced pastrami. Yum.

Stopsky's Deli
Not my food. But the dish on the right is what my sister got.

So the food was great, the service was pretty good (they were very apologetic about bringing me the wrong food), and the space was very cool too. Lots of big windows to let in light, and the main wall in the dining area was covered in black and white pictures of Jews. Pretty great. If you’re in the area, I’d highly recommend it!

Lemon Baked Cod

Lemon Baked Cod

Lemon Baked Cod

The other day I went to the grocery store in search of something to make for dinner. There was this lovely cod fillet that looked especially appetizing, and, knowing there was a lemon in the fridge with which to dress it, I bought some. After looking at a few recipes online, I decided to make up my own little recipe for lemon baked cod. It was really light and delicious AND easy.

Lemon Baked Cod

Ingredients

1 lb of cod fillet (I actually used about 3/4 of a pound, but this rounds things out and you’ll have leftovers)
1/4 cup butter, melted
2 Tbl lemon juice
1/4 cup flour
1/2 tsp salt
a pinch of pepper
paprika

Instructions

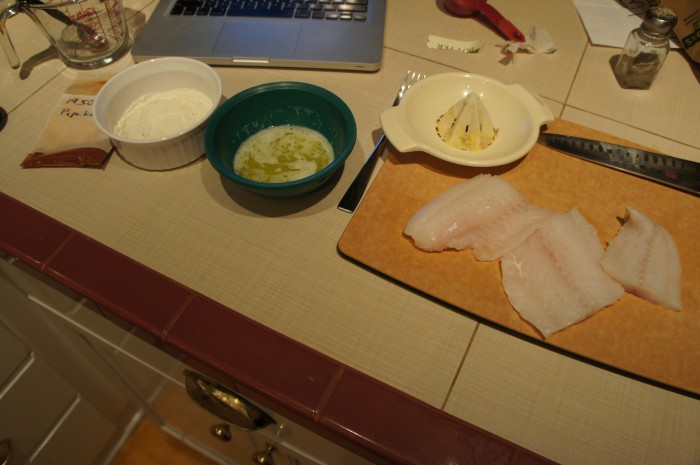
Preheat your oven to 350 degrees. Cut the fish into serving sized pieces. In a small bowl, mix the butter and lemon juice. In another small bowl, combine the flour, salt, and pepper. Dip each piece of fish into the butter mixture to coat, and then into the flour mixture, turning to coat. After dipping, you can put the fish on a baking sheet or dish. Pour the rest of the butter/lemon mixture over the fish and sprinkle it with paprika. Bake for 25-30 minutes, or until the fish flakes easily with a fork. Enjoy! We served ours with couscous and spinach. Yum.

Carrot Miso Soup

Carrot Soup

Carrot Soup

Last week Jonah and I were feeling like soup. I had seen a carrot soup with miso recipe on Smitten Kitchen and decided that we should make it because a) it’s healthy and b) I love miso. It’s always nice to find recipes where you either don’t have to go to the store at all because you have everything or you only need to buy one or two things to make it. That was the case, so I was happy.

I’m going to be honest with you guys. I didn’t really like this soup. I liked the taste and everything fine, but I had a lot of trouble with the texture. Kind of reminded me of baby food, which isn’t so great when you’re not a baby. But I’m going to give you the recipe anyway because I think with a little adjusting here and there, the texture problem could be fixed. Whether the solution is more broth or cooking the carrots longer or having a better blender, I’m not really sure, but next time I might even try all of the above.

Carrot Miso Soup

Ingredients

2 Tbl olive oil
2 lbs carrots, peeled and thinly sliced
1 large onion, finely chopped
4 garlic cloves (6 if they’re small), peeled and chopped
1 Tbl finely chopped ginger
4 cups vegetable broth
1/4 cup white miso paste
Toasted sesame oil
2 scallions, thinly sliced

Instructions

Heat the olive oil in a large pot over medium heat. Add the carrots, onion, and garlic and cook for about 10 minutes, or until the onion is translucent. Add the ginger and the broth, cover the pot, and simmer, stirring occasionally, until the carrots are tender when poked with a fork, about 30 minutes.

Now, it’s time to puree the soup. You can either do this in batches in a blender or with an immersion blender. I used an immersion blender, which worked pretty well, but as I said above, maybe not well enough. In a small bowl , whisk the miso together with about a cup of the soup, and stir the mixture back into the pot of soup. Season to taste with salt and pepper. Spoon into shallow bowls and top it all off with a drizzle of sesame oil and a sprinkle of the scallions. We also added a slice of bread. Enjoy!

Beet Tart with Goat Cheese and Greens

Beet Tart

Beet Tart
Beet Tart

Last week, I was in the mood for something light but nice for dinner. After a little hunting, I found a recipe on Desserts for Breakfast for a delicious looking beet tart with goat cheese. Sounds good, no? And, the other great thing? It was super easy. Really though, I’m not just saying that.

Beet Tart with Goat Cheese and Greens

Ingredients

6 large or 4 GIANT beets
olive oil
8 – 10 sprigs of fresh thyme
salt
pepper
1 sheet of puff pastry
1 small package goat cheese
1 small package blue cheese
frisee or mixed greens
freshly squeezed lemon juice

Instructions

Preheat your oven to 400 degrees. Prepare two baking sheets: line one with foil and the other with parchment paper, a silpat, or just grease it with some olive oil. Peel your beets and slice them into slices about 1/4-1/2 inch thick. Remove the thyme leaves from the sprigs, and toss with the beets, olive oil, and a little salt and pepper. Lay the beets on the foil-lined baking sheet and bake for 10-12 minutes.

While the beets are roasting, roll out the puff pastry so it’s a little thinner (into a 10 by 10 inch square or comparably sized rectangle). Also, I didn’t really think about that whole thawing thing, so remember that, otherwise the time will come to use your puff pastry and it will still be a big hunk of ice. I mostly just stretched mine out because I was in someone else’s kitchen sans rolling pin. Anyway, once you’ve rolled or stretched it or whatever, transfer it to the other baking sheet (the one lined with parchment paper or greased). Arrange the beet slices on the puff pastry, leaving a nice edge around the beets, 1-2 inches. Roll the edges of the puff pastry up to create a little crust.

Bake at 400 degrees for 10 minutes, then turn the temperature down to 350 and bake for another 25-30 minutes or until the pastry is golden brown and puffed up and the beets are tender. Remove from the oven and let cool for a little bit.

While the tart is cooling, mix together some of the goat cheese and blue cheese with a fork. I didn’t give exact measurements of how much cheese because you know what cheese you like and how much cheese you’ll want on your tart, so I’m not gonna tell you how to do it. You can figure it out. Toss the greens or frisee with lemon juice, olive oil, and pinch of salt to coat it evenly and serve it alongside or over the tart. Enjoy!