Year Round

Soy Glazed Salmon and Asparagus with Miso

Soy Glazed Salmon and Asparagus with Miso

Soy Glazed Salmon and Asparagus with Miso

Soy Glazed Salmon and Asparagus with Miso

The other day Jonah and I were feeling up to cooking a big fancy meal. I picked the menu: Soy Glazed Salmon, Eggplant with Miso, served with rice. We got to the store and they didn’t have eggplant though, so I picked up some asparagus instead. Not sure why. But it was the right decision. This salmon is so unbelievably easy. Boil some delicious stuff in a put, put it on a hunk of fish, cook it, put on more stuff, and then eat it. Oh my goodness.

While Jonah was making the salmon, I had to find a new recipe. Lucky for me, I types in “asparagus with miso” and I quickly found a delicious recipe on…Oprah.com. I adjusted ingredients based on what we had as well as some of the eggplant recipes I’d read.

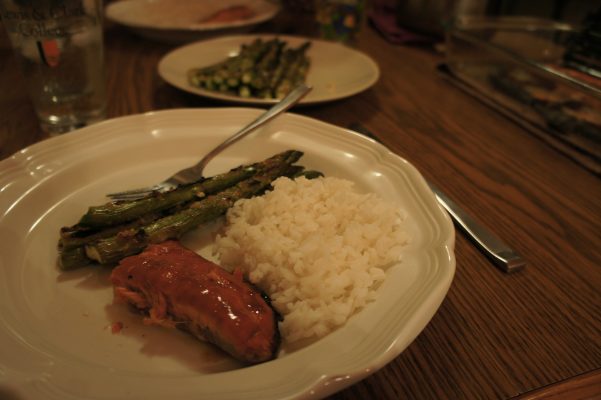
This meal was honestly one of the easiest, most delicious meals I’ve had. I have a tendency when I cook fish to put too much sauce or whatever on it so that it doesn’t really tasted like fish anymore. This salmon still tasted like salmon, but with a little kick of salty and sweet, it was perfect. And the asparagus had little charred bits (which I love) and was a little sweet, a little spicy, and a little tart. They tasted delicious together too. I highly recommend cooking this meal when you want to impress but don’t want to do too much work.

Soy Glazed Salmon with Miso Asparagus

Ingredients

Soy Glazed Salmon

1 lb salmon
1/8 cup soy sauce
1/8 cup maple syrup

Miso Asparagus

1/8 cup miso paste
1-2 clove garlic , minced
1 teaspoon minced fresh ginger (I didn’t have fresh ginger, so I used about half a teaspoon of powdered ginger, I’m sure more than that would be good too)
2 teaspoons fresh lime juice
1 pinch red pepper flakes
1/2 tablespoon sugar (to make it caramelize a little bit)
1 tablespoon mirin
3/4 pounds asparagus , bottoms trimmed
1/2 tablespoon olive oil
Pinch of salt

Instructions

Soy Glazed Salmon

Preheat oven to 450 degrees. The recipe (from the Gourmet Today cookbook which we got on sale at Powell’s for $15) says to line a broiler pan with foil and then oil the broiler rack. We don’t have those things, so we just used an oiled pyrex baking dish, which worked just fine.

Bring the soy sauce and maple syrup to a boil in a small saucepan over medium heat, uncovered, and boil until it reduces to a little more than half (of what you originally had). Put salmon skin-side-down in the dish or on the pan or whatever and pat dry. Set some of the glaze aside for later, and brush the salmon generously with the remaining glaze. Let stand for 5 minutes, then brush again with glaze. Roast the salmon for 10 minutes in the oven. Turn on broiler, brush salmon with glaze again and broil close to the heat (think 6 inches or so, no need to be terribly exact) until cooked through, 3-5 minutes. Once you take the salmon out of the oven, you can brush on the remaining glaze.

Miso Asparagus

Preheat broiler. In a small bowl, combine all ingredients EXCEPT asparagus, olive oil, and salt. Stir well and set aside. On a baking sheet, toss asparagus with olive oil and salt. Cook close to heat (about 6 inches) for about 3 minutes (if you like softer asparagus, like me, cook for 4 minutes), then remove from oven. Spread miso mixture over the asparagus and place back under broiler for 3-5 minutes.

Bread Pudding (and friends to eat it)

Bread Pudding
Bread Pudding

Bread Pudding

Bread Pudding

About a week ago, Jonah and I bought a mini loaf of sourdough bread at the store because we were going to make garlic bread to eat with our spaghetti. But then we made the spaghetti and forgot about the bread. How silly. And then it sat on our counter for a few days and then it was ROCK HARD.

So I, being all resourceful and all, say “let’s make bread pudding!” I’d never made bread pudding before. In fact, I had rarely eaten it before I studied abroad in London, and when I was younger the idea of it kind of grossed me out. Let’s be honest, bread soaked in milk and eggs and baked in the oven doesn’t sound too appealing does it? After a little searching, I combined a few recipes, adding a few of the typical seasonal spices because really, you can add nutmeg and cloves to anything and it’s delicious, and got started.

Bread Pudding

Ingredients

4 cups cubed white bread (I used a crusty sourdough and a couple slices of whole wheat we had in the fridge)
2 cups milk
1/4 cup butter
1/2 cup sugar
2 eggs (beaten)
1/4 teaspoon nutmeg
1/4 teaspoon ground cloves
1/4 teaspoon cinnamon
1 teaspoon vanilla extract

Instructions

Preheat oven to 350 degrees. Cube bread and put it in a large bowl. Combine milk and butter in a small saucepan, cook over medium heat until the butter is melted. Pour the butter/milk mixture over the bread and let stand for at least 10 minutes (I did a little longer because my bread was really crusty and really stale).

Add the remaining ingredients, mixing well (the spices tend to get kind of clumpy in the eggs, make sure they’re all spread out!). Pour it into a greased baking dish or pan. I used a pie dish because it’s what I had around. Bake for 40-50 minutes or until it’s set in the center.

We called a few friends (Mac, Carmelle, and Courtney) to come over and eat this delicacy with us. While we were waiting (impatiently) for the pudding to cool, Carmelle made some delicious whipped cream. All you need for whipped cream is whipping cream, sugar, and vanilla. Carmelle used my electric mixer, but I have also seen her whip cream by hand, and oh is it impressive. Start whipping the cream, add a little sugar and a little vanilla (think 1 cup cream to 1/4 cup sugar to 1 tsp vanilla), and whip till it holds its peak.

Serve the bread pudding with a dollop of whipped cream and enjoy!

Pizza Pizza

Pizza

Pizza
Pizza

Sometimes we don’t have time to make elaborate, fancy meals. I assume it’s the same for everyone out there. There are days when you want to eat something really delicious, but you just don’t have the time or energy. Enter: Pizza. A lot of grocery stores have pre-made pizza dough. And not the kind that are already in discs in plastic bags, the kind that is still in a gooey ball. Sometimes you can ask for it at the deli counter (like at Market of Choice) or sometimes it’s in the refrigerated section (like at New Seasons). Anyway, whoever decided to sell pre-made pizza dough at the store is a genius. Extremely quick, easy, and delicious, this meal is easily tailored to who will be eating with you and what you’re in the mood for!

If you are not feeling lazy and instead are feeling ambitious, you could make your own dough. This is something I am planning on doing soon, I swear. This recipe looks good:

http://www.101cookbooks.com/archives/001199.html

This one also gives step by step pictures, which is really helpful!:

http://www.annamariavolpi.com/pizza_recipe.html

Cook on my friends!

Brownie Cookies with Peppermint Buttercream Frosting

Brownie cookies

Brownie cookies
Brownie cookies

This past week, a friend of ours had her senior degree recital at school (she’s a wonderful singer) and for the after party, I wanted to make some cookies. So I went to the store and bought some ingredients, but it turns out I didn’t buy enough of what I needed (2 oz. of bittersweet chocolate when I really needed 5… oops). So then I searched my favorite food blog of all time, Smitten Kitchen, for a recipe involving ingredients I already had in my kitchen. I found these brownie cookies that looked like a perfect combination of a brownie and a cookie, and also they didn’t look too hard.

When the cookies came out of the oven, they were delicious, but a little bit dry in my opinion. I think they would have been greatly enjoyed by themselves, but I decided to whip up some buttercream frosting to put on them to add a little moisture. (My friend Carmelle, who is also a baker extraordinaire, and I decided later to add a little peppermint to the icing to make it a little more festive.)

Brownie Cookies with Peppermint Buttercream Frosting

Ingredients

Brownie Cookies

3 cups all-purpose flour
1/2 teaspoon salt
1/2 teaspoon baking powder
1 cup butter, softened (she uses one stick of unsalted, one stick of salted, but I used both unsalted)
1 1/2 cups sugar
2 large eggs
1 teaspoon vanilla extract
2/3 cup unsweetened cocoa

Peppermint Buttercream Frosting

1 stick of butter, softened
1 1/2 – 2 cups confectioners sugar
1/8 teaspoon salt
1/2 tablespoon vanilla
up to 2 tablespoons of milk or cream
1/4 teaspoon peppermint extract

Instructions

Brownie Cookies

Preheat oven to 350 degrees. In a bowl, mix flour, salt and baking powder and set aside. In a mixer (or large bowl) combine butter, sugar, eggs, vanilla and cocoa. Slowly add flour mixture, and mix until smooth. Wrap in plastic and chill for at least one hour.

Roll out cookie dough on floured surface until it’s about 1/4 inch thick (I used my counter because I don’t have a super large cutting board and, hey, it’s kinda fun to just roll dough out on the counter). Cut into desired shapes, place on a buttered baking sheet. Bake for 8 to 11 minutes until the edges are firm and the centers are slightly soft and puffed. Transfer to a wire rack to cool.

Peppermint Buttercream Frosting

Beat the butter for a couple minutes in the mixture to get it nice and creamy. Add 1 1/2 cups confectioners sugar and mix on low speed until the sugar has been incorporated with the butter. Add vanilla, salt, 1 tablespoon of milk, and peppermint and mix for a couple minutes. If the frosting is too thin, add the remaining 1/2 cup of sugar a little bit at a time to make sure you don’t overdo it. If your frosting is too thick, add the remaining 1 tablespoon of milk.

These cookies were  a huge hit! And the recipe made plenty of them too. They were easy and you can easily add spices or other fun things to them to suit them to your tastebuds. I’m thinking a little cinnamon and chili powder to make them Mexican hot chocolate cookies, or some smashed candy canes for the holidays, or chocolate chips… So many possibilities!

Banana Bread

Banana Bread

This banana bread recipe came from my aunt Judy’s neighbor. It is honestly the best banana bread I have ever had in my life. And let’s be honest, anything my aunt thinks is delicious probably is because she really knows what she’s talking about. Why? Because she writes cookbooks. Yes, food and cooking runs in the family. Her latest book (which she wrote with her husband, my hilarious uncle) just came out and it’s wonderful, especially if you’re a fan of Mad Men. You can find info on the book and order it here.

Anyway, so Judy fed this banana bread to us one time and now it’s the only banana bread I’ll make.

Banana Bread

Makes 2 loaves

Ingredients

1 1/2 teaspoons baking soda
2 teaspoons baking powder
3/4 teaspoon of salt
2 3/4 cups flour
1 1/2 cups sugar
3/4 cup vegetable oil
3 eggs, beaten
4 or 5 mashed bananas
3 tablespoons of milk
1 tablespoon of lemon juice
1 teaspoon of vanilla
1-2 cups chocolate chips, optional
chopped walnuts, optional

Instructions

Preheat your oven to 350 degrees. Grease and flour two bread loaf pans. In a bowl, combine baking soda, baking powder, salt, and flour. In a separate bowl or an electric mixer if you’ve got one, beat together sugar and vegetable oil. Add eggs and bananas. In a small cup combine milk and lemon juice, mix to curdle. Add this to the liquid ingredients along with the vanilla. Slowly add dry ingredients and mix well. Add as many chocolate chips and/or walnuts as you want (some people like it plain, some really chocolatey, some with just a few chocolate chips).

WARNING! When I mix in the chocolate chips before putting the batter into the pans, my chips always sink to the bottom. What I’ve started doing is just sprinkling them on top and mixing them in a little bit so they’re more evenly spread out.

Anyway now you can divide your batter between the two loaf pans and bake for about 50 minutes or until a knife inserted comes out clean (except for any melted chocolate…yum). Allow to cool.

These breads can be wrapped in foil and a freezer bag and frozen for a while. It’s good in case you are one of those people who can’t help eating stuff that’s around the kitchen, you can make one loaf disappear and save it for later.

Cheddar and Sage Biscuits

Cheddar and Sage Biscuits

Cheddar and Sage Biscuits

A couple of weeks ago, Jonah and I got that nasty cold that’s been floating around. We were both out of commission for a few days, which really sucked. When I started finally feeling a little bit better, I really wanted to make some bread. See, a couple weeks before we got sick I bought some active dry yeast because I really want to start making bread. I’m terrified of it, for some reason, and also I don’t want to go through the learning process. I just want to start making beautiful crusty sourdoughs to begin with. But I think I should learn about the process and the ingredients and all that too, rather than perhaps biting off more than I can chew.

Anyway, back to the story. So I wanted to make bread but I really wasn’t feeling up to it: I was still a little light-headed, not to mention drugged up. But I wanted something bread-like. I recalled a recipe I had seen on marthastewart.com. If you have never been to her website, you really ought to. More recipes, craft, and homemaking ideas than you will ever have time to look at. So I went to my pinterest where I had saved the recipe (more on pinterest later), and got started: Cheddar and Sage Biscuits.

Sounds good, no?

Cheddar & Sage Biscuits

I don’t think it would hurt to add a little more cheese and a little more sage to the recipe. These ingredients were really subtle, and I think I was hoping they’d be a little more obvious in taste. The recipe also says to use a food processor, but mine was not nearly big enough for all this stuff. It nearly overflowed by the time I got to the butter. What I would recommend is putting either half or 3/4 of the flour in to begin with, then everything except the buttermilk, then transferring either to an electric mixer (kitchenaid) or hand mixing and adding in the remaining flour and buttermilk. But I dont’ know, try whatever you want. Just don’t blame me when you can’t fit it all in your food processor.

Ingredients

4 cups all-purpose flour, plus more for working
2 tablespoons baking powder
1 teaspoon baking soda
2 teaspoons coarse salt
2 cups grated sharp white cheddar, or whatever cheddar you have around (also, a little parmesan would probably taste delicious too…)
2 tablespoons chopped fresh sage
3/4 cup (1 1/2 sticks) cold unsalted butter, cut into pieces
1 1/2 cups low-fat buttermilk

Instructions

Preheat oven to 450 degrees. In a food processor, combine flour, baking powder, baking soda, and salt. Add cheese and sage, pulse to combine. Add butter and pulse until mixture is the texture of coarse meal. Add buttermilk and pulse until combined. Turn dough out onto a lightly floured work surface and knead it comes together. Don’t overknead it! With a floured rolling pin, roll dough to a 3/4-inch thickness. With a floured 2 3/4-inch round biscuit cutter (or, you know, a cup), cut out biscuits (reroll and cut scraps).

Place biscuits on a baking sheet, 1 1/2 inches apart (I did only 6 per batch to ensure they had enough room), and bake until puffed and golden, 12 to 15 minutes. Transfer to a wire rack. Serve warm or at room temperature.

They’re also really good if you cut them in half and put them in the toaster for breakfast the next morning. I took little tupperwares of these biscuits to some friends who are still in school at Lewis & Clark. They work their butts off, and so sometimes I really like to bring them a little surprise treat. I think they appreciate it.

30-Minute Chili

30-Minute Chili
30-Minute Chili

30-Minute Chili

I made this for dinner yesterday, and it was the perfect chili for this time of year: hearty, filling, warm, and really easy to make!  Lots of canned foods, so very cheap as well.  This version makes the perfect amount for 2 people with some leftovers.  Double or triple it and you’ll have soup for the whole week!

Also fun fact….it has beer in it!

Its adapted from the recipe for 30-minute chili on marthastewart.com.

30 Minute Chili

Makes 4 servings | 30 minutes

Ingredients

1 Tbl vegetable oil
2 medium onions, chopped
3 cloves garlic, chopped
salt and pepper
3 oz tomato paste
2 Tbl chili powder (or more if you want more heat)
1/2 tsp ground cinnamon
4 oz canned green chiles in sauce, diced
1 1/2 lb. ground beef
2 cans (14.5 oz each) diced tomatoes
1 can (14.5 oz) kidney beans
6 oz lager beer (I used PBR!)
cheddar cheese, grated

Instructions

Heat the oil in a large pot over medium-high heat. Add the onions and garlic and cook until softened, about 3-5 minutes.  Season with salt and pepper.

Add the tomato paste, chili powder, ground cinnamon, and chiles and cook 2-3 minutes. Add the ground beef and cook another 5 minutes, breaking up the ground beef and making sure that it gets browned all over.

Add the cans of diced tomatoes with their juice, the beer, and the can of kidney beans (without their juice). Bring to a boil and then simmer for 5-10 minutes, until kidney beans are nice and tender.

Serve into bowls and sprinkle with grated cheese.  I recommend eating this with corn chips!

Lemon-Garlic Shrimp and Creamy Polenta

Lemon-Garlic Shrimp and Creamy Polenta

Lemon-Garlic Shrimp and Creamy Polenta

Welcome to the first post on Serious Crust!

Tonight, I got home from work and after about an hour of lazing around the apartment, Jonah and I realized it was probably time to figure out what we were going to make for dinner. We had done a lot of cooking yesterday evening (recipes coming soon), and so were a little burnt out; We needed something easy and delicious.

Enter Lemon-Garlic Shrimp and Creamy Polenta: I handled the shrimp while Jonah did the polenta. I would say it took us between 20-30 minutes, and it tasted so good.

Lemon Garlic Shrimp and Creamy Polenta

Serves 2, with leftovers | 20-30 minutes

Ingredients

Lemon Garlic Shrimp

1 Tbl butter
3/4 lb shrimp, peeled and deveined, tails intact
2 cloves garlic, finely chopped
a pinch of chili powder (we had some leftover from last night’s meal, but you can also use cayenne or paprika)
Juice of 1/2 a lemon
1 Tbl chopped parsley

Creamy Polenta

1 tube polenta (you know, those weird looking things at the grocery store)
a little bit of: milk, parmesan cheese, salt, pepper

Instructions

Lemon Garlic Shrimp

Season shrimp with a little salt and pepper. Melt butter in a pan over medium-high heat. Add shrimp, garlic, and chili powder. Cook until shrimp are pink on both sides, about 4 minutes. Don’t overcook them! They can get dry really quickly, so keep an eye on them. When they’re cooked right they’re really juicy and tender instead of chewy. When the shrimp are cooked, put them on a plate to the side. Turn heat down to low, add lemon juice, parsley, and a tablespoon of water and stir. Add shrimp back into the pan to coat it in the sauce.

Creamy Polenta

Put polenta in a pot, cook on medium heat. Add other ingredients until you like the consistency and flavor. Easy, no?

Serve together!