Winter

Buttermilk Devil's Food Cake // Serious Crust by Annie Fassler

Buttermilk Devil’s Food Cake

Buttermilk Devil's Food Cake // Serious Crust by Annie Fassler

Buttermilk Devil's Food Cake // Serious Crust by Annie Fassler

Buttermilk Devil's Food Cake // Serious Crust by Annie Fassler

Buttermilk Devil's Food Cake // Serious Crust by Annie Fassler

My Mom’s birthday was a month ago today, so it seems appropriate that I’m sitting in a tea shop, writing this post, looking at pictures of her with the birthday cake I made for her.

My mother is a pretty damn incredible woman. I don’t know if I’ve told you about her before, but let me. When we were growing up, she was always encouraging us to play. I don’t just mean my sisters and I playing with each other, or playing with dolls, or playing with crafts, but in the larger sense too. She encouraged us to be adventurous, boisterous, and reach for the stars.

If we wanted to make cookies, she was there to help. If we wanted to go out for the basketball team (a mistake I made only once, trust me), she was there at every game. If we wanted to be in plays (which we did… a lot) she drove us to auditions, sat with us while we waited nervously, drove us to rehearsals, helped create costumes, and was always in the front row on opening night, grinning from ear to ear, and often mouthing the words to the songs along with us. She pushed my creativity, she pushed me to try really hard, to do anything I wanted to do. That’s an incredible woman.

When I went off to college and my parents split up, my mom and I had a rough time. It’s been a hard few years of rebuilding, getting to know each other again, and finding the foundation that we had built when I was younger. But it seems since her birthday, my mother’s true unbridled joy and adventure and creativity has reappeared. It has been slowly creeping back for the past couple of years, especially since she has found David, but in the past month, it seems like she’s here to stay.

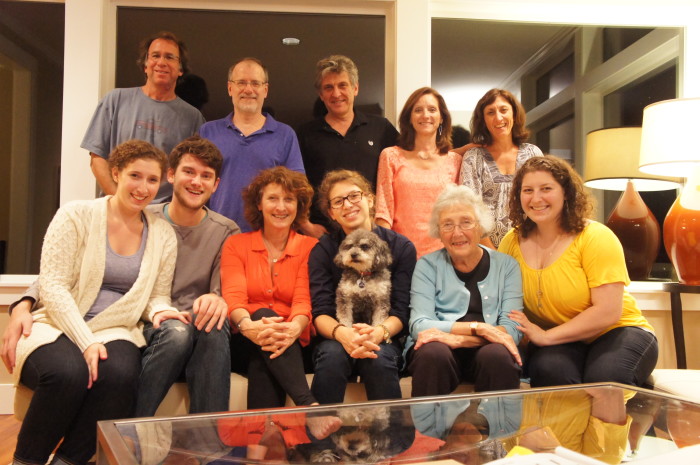
This year was my mom’s 60th birthday (hopefully she doesn’t kill me for writing that…) and we went big. Rather, David went big with many many surprises, and we all helped scheme and plan. She was surprised four separate times: by the arrival of me, my older sister, and Jonah on Friday afternoon; the arrival of her mother, sister, brother-in-law, brother, and sister-in-law on Friday night; by my little sister’s arrival on Saturday morning; and by a surprise party with all of her friends and a live band on Saturday afternoon.

It was the most pure joy I’ve ever seen her exude. It was a beautifully sunny weekend, and on Sunday we all made dinner together, like families do. When I asked my mom what birthday cake she wanted, she said “That buttermilk devil’s food cake I used to make you guys for your birthdays.” Emily, my older sister, immediately remembered this cake, but it took me a while. My mom dug around in her recipe box and pulled out this magazine page from 1985. Under the title it says “Makes 10 servings at $0.88 each.”

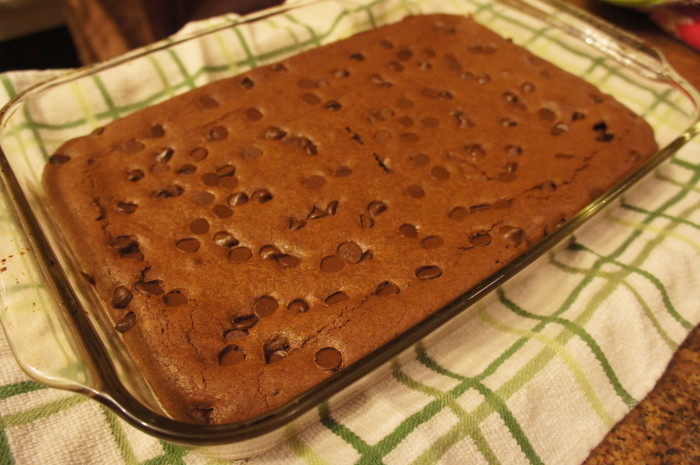
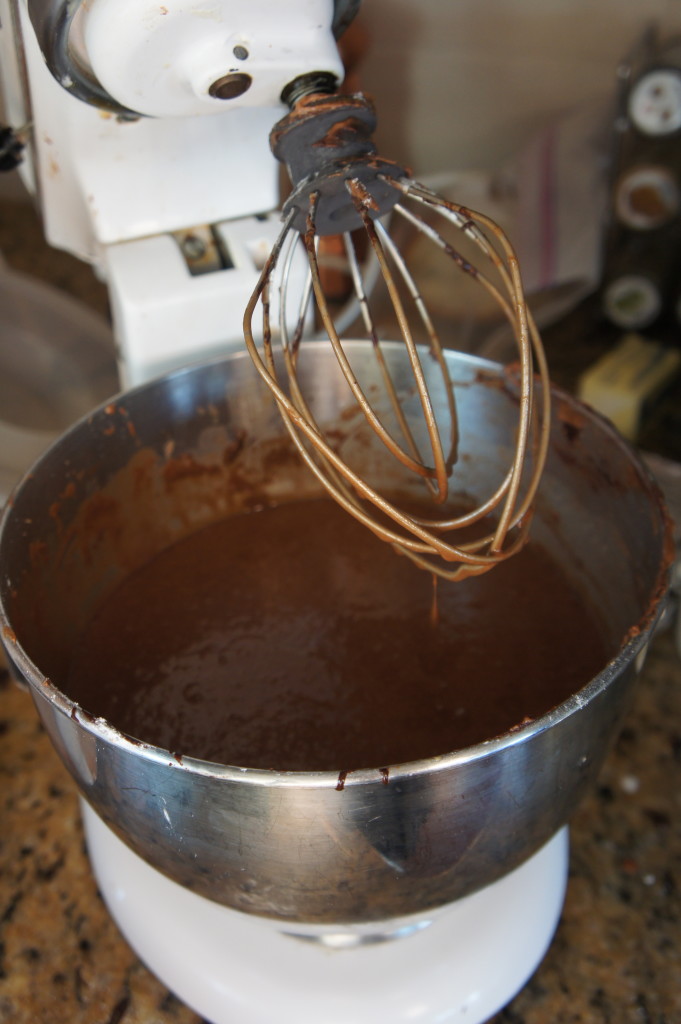
I didn’t remember this cake until I smelled the frosting, and then it came rushing back, which seems appropriate. The cake, and that weekend, reinforced the woman that my mother is and always has been. It’s rich, deep chocolate with an unexpected but welcome twist from the buttermilk and sour cream, perfect for a birthday, but especially perfect for my mother.

Buttermilk Devil’s Food Cake

Ingredients

Devil’s Chocolate Cake

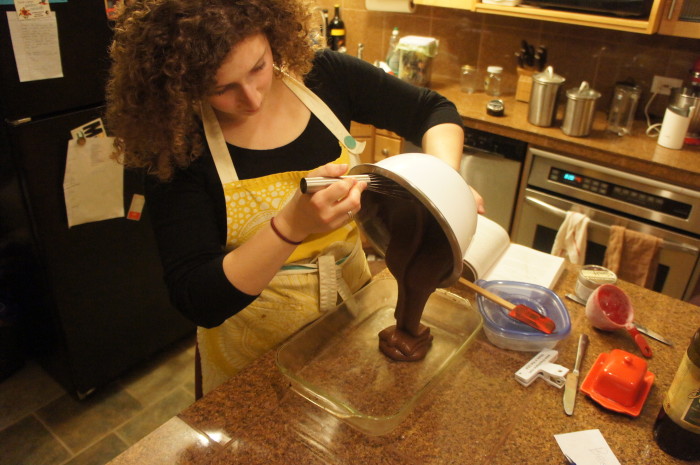
Unsweetened cocoa powder (for dusting the pans)
2 1/4 cups sifted cake flour
2 tsp baking soda
1/2 tsp salt
1/2 cup (1 stick) butter
2 1/2 cups light brown sugar
3 eggs
3 1/2 squares (1 oz. each) unsweetened chocolate, melted
1/2 cup buttermilk
1 cup boiling water
2 1/4 tsp vanilla

Sour Cream Chocolate Frosting

15 squares (1 oz. each) semisweet chocolate
1 1/2 cups sour cream
1 1/2 tsp vanilla
a pinch of salt

Instructions

Devil’s Chocolate Cake

Preheat your oven to 375 degrees. Butter 3 9-inch round cake pans. Line the pans with parchment paper, and butter the paper. Dust the bottoms and sides of the pans with cocoa powder.

Sift together the flour, baking soda, and salt into a bowl. Set aside.

Using an electric mixer (or whatever) beat the butter until it’s light and fluffy. Beat in the sugar until it’s light and fluffy too. Add the eggs one at a time, beating after each addition. Blend in the melted chocolate. My aunt (the cookbook author) had a great tip for this. Anytime I mix warm ingredients (like melted chocolate) into eggs, I get nervous that the eggs are going to cook. Her tip was to start with a little bit, blend it, and then add the rest of it. It makes a big difference. To me anyway.

Alternate adding the flour and buttermilk to the butter mixture, beginning and ending with the flour, until it’s well combined. Stir in the boiling water and the vanilla and divide the batter equally into the 3 prepared cake pans. Bake for 25-30 minutes, or until a knife or toothpick inserted comes out clean. Cool them in their pans for 5-10 minutes, then turn them out onto cooling racks and remove the parchment paper to cool the rest of the way.

Sour Cream Chocolate Frosting

To make the frosting, melt the chocolate in a double boiler over barely simmering water. Remove from the heat, and beat in the sour cream, vanilla, and salt. Beat until it’s creamy and holds it’s shape. Be warned though, once this frosting cools, it hardens because of the chocolate. So frost your cake while the frosting is still soft and warm.

You may want/have to trim your cakes. I didn’t and it work ok. Put a layer on whatever plate you’re using to serve, and spread evenly with some of the frosting. Repeat with the remaining layers, and then frost the sides.

Enjoy with a glass of cold milk, family, and lots of laughs.


Buttermilk Devil's Food Cake // Serious Crust by Annie Fassler

Lasagna // Serious Crust by Annie Fassler

Lasagna, of the cheesiest variety

Lasagna // Serious Crust by Annie Fassler

Lasagna // Serious Crust by Annie Fassler

Sometimes you need to make those meals that yield a million servings so you can eat it all week. The week before the CD release concert we had for Jonah’s new album was absolutely one of those weeks.

We had a few guests staying with us, band practice almost every night, and I had work on the nights I wasn’t rehearsing. It was a busy time, to say the least. So the night of our Kickstarter team meeting, to discuss merch and social media, etc. I made this lasagna, so that we could eat it throughout the week. It was high up on the list of best lasagna I’ve ever made. What made it so good? The homemade sauce, the homemade noodles, and some absurd amounts of cheese.

I’ll admit, however, that this uses a lot of dishes, and has a fair amount of ingredients. But when you’ve got some time and you’re making a meal that will carry you through the week, it’s worth it. I like to think of it as an entire week’s worth of mess (and cleanup).

Cheesy Meat Lasagna

Note: I used a 13×9 inch baking dish, and filled it right up to the brim. I put a baking sheet underneath it to catch any overflow (which was minimal), but still, if you’ve got a slightly bigger baking dish, it might be a good idea to use it.

Ingredients

Noodles

3 eggs
2 cups flour

Meat Sauce

Olive oil
1 medium white onion, chopped
1 carrot, peeled and chopped
3/4 lb ground beef
3/4 lb ground italian sausage
2 cloves garlic, minced
salt, pepper, other Italian seasoning (parsley, basil, oregano, to your liking)
1 12 oz can tomato paste
1 28 oz can crushed (or diced) San Marzano tomatoes (yes, these are expensive, but I found it to be terribly worth it, and they weren’t THAT MUCH more than the other brands)

Ricotta Filling

3 cups ricotta
2 eggs
1/2 tsp freshly ground pepper

1 cup freshly grated parmesan
2-3 cups (preferably freshly) grated mozzarella

Instructions

Noodles

In the bowl of an electric mixer, or using a bowl and whisk, or a bowl and fork, mix up the eggs and flour into a dough. If it’s too wet, add more flour 1 tsp at a time. If it’s too dry, add water 1 tsp at a time. Dump the dough out onto floured surface, knead a few times, and wrap in plastic (or put in a bowl and cover with dishtowel) and allow to rest for 30 minutes.

Meat Sauce

In a large pot, heat 2 Tbl olive oil over medium heat, and add the onion and carrot. Cook until starting to soften. Add the garlic, beef, and Italian sausage, and cook until the meat has browned. Add 1 tsp of salt, 1/2 tsp ground pepper, and whatever other spices you’d like (I did 1/2 tsp dried basil and 1/2 tsp dried parsley). Add the tomato paste and canned tomatoes to the pot (no need to drain them!) and stir to combine. Turn the heat to low and cover, letting it simmer for ~30 minutes.

Ricotta Filling

While your dough is resting and your sauce is simmering you can whip up the ricotta filling. In a bowl, combine the ricotta, eggs, pepper, and 1/2 cup of both the grated mozzarella and parmesan. Store in the fridge until you’re ready to assemble your lasagna.

Roll out your pasta into sheets for lasagna and set aside, covering so that the noodles don’t dry out. Preheat your oven to 375 degrees and lightly coat your baking dish with oil. Spread ~1 cup sauce in the bottom of the dish. Here’s how you’re going to do this: noodles, ricotta, sauce, cheese. That’s your order. On top of the sauce in the bottom of the dish, arrange a layer of noodles; spread 1/3 of the ricotta mixture on top, then 1 cup sauce, and sprinkle with cheese (a mixture of the mozzarella and parmesan). Do that twice (now we’ve got sauce, noodles, ricotta, sauce, cheese, noodles, ricotta, sauce, cheese), and in the next layer, leave out the cheese (so just noodles, ricotta, sauce). Put another layer of noodles on top, spread the rest of the sauce on top, and sprinkle with the rest of the cheese. Phew! If you don’t feel like following my layering instructions, just do whatever you want. It’ll probably work, and you’ve probably eaten enough lasagna in your life to figure out how it works.

Bake the lasagna for 30-40 minutes, rotating it half way through, until the cheese on top is melted and turning golden brown. Remove from the oven and allow to cool/set for 10 minutes before serving. Enjoy!

The Rattlesnake // Serious Crust by Annie Fassler

The Rattlesnake: a cocktail

The Rattlesnake // Serious Crust by Annie Fassler

Sometimes, when you’re spending all day cooking, it’s important to spoil yourself with a cocktail break. And sometimes you are given an all access pass to someone’s liquor cabinet, and you have lots of cocktail blogs to choose from (There Will Be BourbonSpirited Alchemy5 o’clock cocktails…), and you finally pick one called the Rattlesnake, and whip up a batch for all the chefs in the kitchen. Just sometimes.

This cocktail is creamy and light, tasting kind of like a grown up lemon curd/lemon meringue drink. Adapted from There Will Be Bourbon, the recipe below makes enough for 6 drinks. When I’m making that amount, I like to use a trusty tupperware with a good seal instead of a shaker… it means you have to do less work by making all the drinks in one batch.

The Rattlesnake

Makes 6 cocktails

Ingredients

9 oz. bourbon
5 Tbl freshly squeezed lemon juice
1 Tbl sambuca (the recipe called for absinthe, but you can use any anise-liqueur)
2 Tbl powdered sugar (or simple syrup, if you’ve got some around)
3 egg whites

Instructions

Combine all of the ingredients in a tupperware (or cocktail shaker, if you’re only making 1 or 2) with ice. Shake it up! Until the egg whites get nice and frothy. If you want more froth, you can add more egg whites. I wasn’t initially going to add any but when I tasted it without them, it was VERY bourbon-y. So I added half as many as the original recipe called for (which is 1 per drink). I never really realized what egg white did to a drink other than create that frothy foam, but it really mellowed out the flavors. Add bits of whatever you like until it tastes how you want. Strain into glasses filled with ice. If you’re feeling fancy, you can garnish with a lemon peel, or a sprig of mint or rosemary.

Stale Bread Soup // Serious Crust by Annie Fassler

Stale Bread Soup (Ribollita)

Stale Bread Soup // Serious Crust by Annie FasslerStale Bread Soup // Serious Crust by Annie Fassler

I realize that at this point you might be sick and tired of hearing us harp about how great Tamar Adler’s An Everlasting Meal is. But hear me out one more time. Everyone has stale bread. Or at least everyone who has bread at some point and does not eat it all eventually has stale bread lying around. And most of the time it gets thrown away, or responsibly composted. If you are culinarily educated, dear reader, you may already have known of stale bread soup; but as I read Tamar’s book, I was astounded to find out that not only does such a thing exist, but there is a long and ancient tradition of creating soup from leftover bread (Ribollita in Italian).

There are a few things that should be said about stale bread soup. First, it is not a soup in the same way that chicken noodle is a soup; stale bread soup is usually much thicker and feels more like a hearty chili. Second, stale bread soup is more of a general idea and a starting point than a recipe. It is meant to be made with whatever is around, provided you have some stale bread (otherwise, you will be making whatever-is-around soup – which could turn out to be vegetables-in-water “soup” if you don’t have any broth lying around).

The recipe below is adapted slightly from Tamar’s recipe for Ribollita in An Everlasting Meal. In usual Tamar fashion, you will use A LOT of olive oil in this recipe. We have made stale bread soup twice now, so I’ve noted the different things we used.

Stale Bread Soup (Ribollita)

Ingredients

Olive oil
1 onion, diced
2 cloves garlic
Celery, if you have it (I did not)
salt
1/2 cup chopped fresh herbs like parsley or rosemary or thyme (if you don’t have fresh, maybe do 1/4 cup dried?)
1/2 teaspoon chile flakes
Tomatoes in some form, if you want (3 peeled fresh tomatoes, or I used 1 can diced. Made it once without tomatoes as well)
1 bunch leafy greens (I used kale once and cauliflower greens once; other ideas are swiss chard, collard greens, radish greens, etc)
1/4 cup water
2 cups cooked beans (I used a can of black beans both times, Tamar suggests chickpeas or cannellini beans)
2 cups broth from beans or chicken/veggie stock or cans of tomatoes (I used a combo of all three, and you can make up any shortfall with water)
1 piece of Parmesan rind (Do this if you can, because it makes the soup soooo tasty and rich. Also, what else are you going to do with your Parmesan rind?)
2 cups stale bread, crusts removed, torn/cut into 1/2-inch pieces

Instructions

Heat 1/4 inch olive oil (this is just the beginning) in a big-ish soup pot. Cook the onion and garlic (and celery if you have it) until they soften. Add the herbs and chile flakes and a little bit of salt. Add the tomatoes and cook for a few minutes over medium heat.

Chop the greens (and remove from the stems) then add to the pot, and add the water. Cover and cook over low heat until the greens are wilted. Put in all your broths/waters/juices and the beans, plus the Parmesan rind.

(If you have a bunch of Parmesan left, make sure to cut the rind from the rest of the Parmesan. Otherwise, just save the Parmesan rind for when you will next make bread soup. Make sure your Parmesan is big enough that you can keep track of it, because you’re going to take it out later.)

Bring to a simmer, then add the bread and more olive oil (Tamar says to add 1/2 cup, but I was not brave enough and probably added about a 1/4 cup at this point). Cover and cook for 1/2 hour on low, stirring occasionally to make sure the bottom doesn’t burn. The bread will soak up the soup and then liquify into it.  Taste it, add more broth or salt or whatever you want, and then take it off the heat.

Add in another 1/2 cup olive oil (Tamar, are you crazy!?!? I probably added 3 tablespoons here) and take out the Parmesan rind. You can grate Parmesan on top and add some pepper to serve.

This soup is perfect for a windy, rainy, cold, or dark winter/fall night.

Fresh Pasta with Breadcrumbs, Leeks, and Pancetta // Serious Crust by Annie Fassler

Fresh Pasta with Pancetta, Leeks, & Breadcrumbs with Porcini Powder

Fresh Pasta with Breadcrumbs, Leeks, and Pancetta // Serious Crust by Annie Fassler

Fresh Pasta with Breadcrumbs, Leeks, and Pancetta // Serious Crust by Annie Fassler

Fresh Pasta with Breadcrumbs, Leeks, and Pancetta // Serious Crust by Annie Fassler

Porcini powder. Porcini powder? Yes. From the farmers market. I was told it was wonderful, and was given a little bag as a gift. But what to do with the stuff, that’s the question. I’m not sure I made the right choice… This pasta dish had so much going on in it that the porcini flavor was hiding. It was hiding behind the sourdough breadcrumbs and butter it had been sprinkled into, and under the pancetta it had been tossed with, and between the fresh pasta noodles it had been swirled around with.

All that being said, this dish was dang good, if I do say so myself. There were a few elements, and it took a few pans to get it all prepped. So no, this is not one of those magical one pot meals. Certainly not.

My dear friend Elsa was staying with us, and my friend Dylan came over for dinner, as well as Elsa’s friend Sarah, so we had help in manning all the pans. Tamar Adler said in The Everlasting Meal that there is value in, when a guest asks “is there anything I can do to help?” being able to say, “yes.” I have found that to be very true.

Think of this recipe as a guideline. Or a lightly painted upon canvas. You can remove, add, flavor, sprinkle, drizzle anything you like. I must say, though, that I used a different pasta recipe this time, and I liked it much better than the one I had been using. There’s something to be said for trying something new.

Fresh Pasta with Pancetta, Leeks, & Breadcrumbs with Porcini Powder

Ingredients

Fresh Pasta

2 cups all-purpose flour
3 eggs

Toppings

Olive oil
1 large or 2 small leek(s), sliced and rinsed
1 small white onion, chopped
2-3 cloves garlic, minced
Pancetta – the amount is up to you. I like the pancetta that is thin, almost like prosciutto, though that isn’t what we used here. I think if we’d used the thinner kind, it would’ve clung to the noodles better.
Fresh breadcrumbs
Butter
Porcini powder
Salt and pepper

Instructions

Fresh Pasta

To make the pasta, pulse the flour alone in a food processor a few times. In a bowl, beat the eggs and then add them to flour, and process until the dough forms a ball. If your dough is dry and looks like little pea sized pieces of dough, you can add water 1/2 tsp at a time. If it sticks to the bowl of the processor, add flour 1 Tbl at a time. When the dough has formed a ball, turn it out onto a floured work surface and knead for 1-2 minutes. Wrap the dough in saran wrap and set it aside for up to 2 hours to relax (at least 15 minutes). Then roll out the pasta as you usually do and cut it as you normally would.

Toppings

In a pan over medium (or medium low), cook your pancetta, then set aside on a plate with a paper towel on it. Once the pancetta is removed, you can use that same pan to sautée the leeks, onion, and garlic, seasoning lightly with salt and pepper. You may want to add a drizzle of olive oil to the pan to help keep things from sticking. But then again, maybe you won’t.

In another pan, melt some butter, then add the breadcrumbs and as much porcini powder as you feel like adding. Toast the breadcrumbs on low heat, stirring frequently to prevent burning.

As things are moving along, get out a big pot, fill it with water and a healthy serving of salt, and bring to a boil. Add the pasta (I like to cook fresh pasta in batches, as it makes it less likely to stick together). If you’re cooking fresh pasta, it really only needs to cook for a few minutes. I like to remove it when all the noodles are floating. Do you have a better method? I’d like to know it. If you’re cooking your pasta in batches, you can remove it with tongs into a colander to keep the water boiling on your stovetop.

Strain the pasta, put it in a bowl, and toss with all the various bits and pieces. Enjoy with a glass of buttery, nutty white wine and friends, around a table, on a sunny evening.

Saffron Risotto with Mushrooms // Serious Crust by Annie Fassler

Saffron Risotto with Mushrooms

Saffron Risotto with Mushrooms // Serious Crust by Annie Fassler

I mentioned a couple of weeks ago that Jonah and I recently purchased The Family Meal by Ferran Adria. As soon as we got it in the mail, Jonah proceeded to look at the whole book, page by page, cover to cover. Which was really adorable. He was pretty excited. Anyway, a couple days later, I finally got it out and flipped through it, and I too got really excited. There are so many awesome recipes in this book, and the layout is great. It tells you the timeline of your meal (2 hours before, you can start doing task #1, 1 hour before, you can start doing tasks #2 and 3, 40 minutes before… you get the idea), it tells you how much of each ingredient you will need to make the meal for 2 people, 6 people, 20 people, and 75 people. So we can perfectly cook for just the two of us, or we can cook for us and a bunch of friends. Lastly, the recipe itself is in photograph form, so you know exactly what each step looks like, which is such a big thing for a lot of people. And it has super specific instructions, i.e. instead of saying “cook until lightly browned” it says “cook for 16 minutes.” Which is so nice.

Anyway, while flipping through it for the first time, we marked a bunch of the recipes we wanted to try first, and then went to the store to pick up ingredients for a couple meals this week. The coolest thing was that because we had bought a chicken at the farmers market a couple weeks ago, cut it into pieces, frozen the pieces, and made broth out of the carcass, we had almost all of the ingredients we needed for these meals. First up was saffron risotto with mushrooms. I have never made risotto before, and was a bit nervous about it, because it’s one of those things that seems like it might be easy to mess up – overcook, undercook, underseason, overseason… etc. But because the instructions for these recipes are so specific, I had no fear!

Saffron Risotto with Mushrooms

Serves 2

Ingredients

2 1/2 cups chicken stock (can be replaced with vegetable stock)
1 pinch saffron strands
1 1/2 Tbl olive oil
1/4 white onion, finely chopped
2 Tbl white wine
1 cup risotto rice, also called arborio rice
2-6 white mushrooms (it all depends on how big your mushrooms are and how many you want on your risotto)
1 tsp butter
1/4 cup grated parmesan cheese
1 tsp (maybe more) fresh lemon juice

Instructions

Put all of the stock into a sauce pan, cover, and bring to a simmer.

This is the weird part, where I wish you could see the cookbook so you could see the photos. Make a little envelope out of tinfoil, put the saffron threads in it, and toast them in a pan over medium heat for one minute. Don’t le it burn! Remove from the pan and let it cool.

In a large pan or pot, heat the oil over medium heat, then add the onions. Once they’re soft, but not browned, add the wine and scrape up any browned bits from the bottom of the pan. When most of the wine has cooked off, add the rice and let it cook for 3 minutes, stirring all the while. Add one ladle-full of stock, and cook for 2-3 minutes, stirring often to keep it from sticking. Pour the rest of the stock into the pot. Quickly chop the saffron and add it to the pot. Cook the rice for 16 minutes (what precision!), stirring frequently.

While the rice is cooking away, wipe the mushrooms clean with a paper towel, and slice them as thin as you can. You can use a mandolin if you’ve got one, or just a sharp knife. Put them in a bowl and set aside.

When the rice has absorbed the majority of the liquid and is a little al dente, add the butter, and then the parmesan. Stir until the rice is nice and creamy, and season it with salt, pepper, and lemon juice. Spoon the risotto onto plates and top with mushroom slices, and enjoy!

All-in Pesto by Serious Crust

All-In Pesto

All-in Pesto by Serious Crust

A few weeks ago, my dad and Darla came down to Portland for my cousin Lia’s oral thesis defense. I really wanted to go to the farmer’s market before brunch, and Dad came along. My dad is a lover of produce. I cannot tell you how excited he got about the range of items available at our market (and how decently priced everything was compared to his fancy Seattle market). I’ve never seen someone so excited over nettles before.

Anyway, between the two of us, we bought 3 bunches of radishes. My dad, needing to drive back to Seattle with a large dog in the car, was trying to minimize his load as much as possible, ripped the radishes from the greens, and left the greens to me. A la Tamar, I knew I could use them, I just had to figure out how. And then it hit me: pesto.

I have since made 2 batches of the stuff, and people LOVE it. And you can use greens other than radish tops: kale, kohlrabi greens… anything green and leafy. The other beautiful thing about this recipe is that it’s not really a recipe – it’s more like guidelines. Use whatever you’ve got around (ergo the all-in title: you can put it all in), and put it on anything and everything. We started with pasta and went from there: we used it as a rub for a whole chicken and potatoes that we roasted, ate it with cheese and crackers and charcuterie, and (my favorite) topped some crusty bread with fromage blanc, the pesto, and a soft boiled egg.

All-In Pesto

Ingredients

Radish tops, stems picked off, and rinsed
Basil, rinsed
A hard salty cheese, like pecorino romano or parmesan
Pine nuts or shelled pistachios (or any combination of the two)
Garlic, peeled and roughly chopped
Olive oil
Salt

Instructions

In a food processor combine all ingredients. It’s best to start with all of your greens, but about half of everything else, so that you can adjust flavor and texture to your liking. Pulse until smooth, and enjoy!

Kale, squash, and a runny yolk

Kale, Squash, and a Runny Yolk

Kale, squash, and a runny yolk

Sometimes you just need an easy dinner. You need to comb through your fridge, scrounge what ingredients you can, and stand there, for a minute, gazing at your collection, trying to figure out what you can make with all of this. It doesn’t have to be fancy, or even graceful, but tasting good and mildly cohesive would be nice. You’ve got a bunch of kale that you really should use soon, a small, friendly looking butternut squash, and a jalapeño. And eggs. Luckily, the roommates always keep lots of eggs around. And do you know what brings a dish together with ease? A runny yolk.

So you slice up the butternut squash, drizzle with olive oil and salt, mix in some chopped garlic, and lay it out on a baking sheet, laying a couple rosemary springs atop it all, sliding it into the oven to roast. You sautée up the kale with more oil, salt, and garlic, and even some jalapeño. And then, to finish it all off, you soft boil a couple of eggs (one for you and one for the tall fellow you eat dinner with). Simple as that, you have dinner.

Kale, Squash, and a Soft Boiled Egg

Ingredients

A small butternut squash, olive oil, and salt (and anything you’d like to roast with it)
1 bunch of kale, garlic, olive oil, and salt
Eggs

Instructions

Peel and cube or slice the butternut squash into whatever shapes you like to eat. Slide into the oven at about 375 and roast until easily pierced with a fork. Sautée kale with a tsp of olive oil, chopped garlic, and a sprinkling of salt. If you want the kale to steam and wilt a little more, you can add some water to the pan (no more than 1/4 cup) and cover with a lid. After letting the kale steam for a bit, remove the lid and let the water cook off.

To soft boil the eggs, bring a pot of water to a boil. Drop the eggs in, allow to cook for 6 minutes (this can be adjusted depending on how you like your eggs). After 6 minutes, remove the eggs with a slotted spoon, run under cold water, and peel.

Put your egg on top of your kale and squash to let the yolk run over the veggies a bit. It adds a nice rich creaminess. Enjoy.

Simple Brownies

Simple Brownies with Almond

Simple Brownies

Simple Brownies

My co-worker Kelly, who I’ve written about before, has a commune dinner every Monday night. He lives near a bunch of his friends and all of them and their kids (and their pets) all convene for dinner every week. A few weeks ago, Jonah and started joining in. It’s really nice to have that sense of community, which I think can be hard to find when you’re in your 20s and you don’t live near your family.

Going over to Kelly’s on Mondays is so calming. Every member of this group is so kind and funny. They have been having these meals for I’m not sure how many years, but they weren’t even phased when Jonah and I started showing up every week, and have been so incredibly welcoming, pulling up chairs to the table and always making sure we have a drink in our hand. It immediately feels like we’re a part of this family, with the two little boys running around the house and the dogs barking outside. And they feed us delicious food, so I can’t complain.

The first night we went, instead of just grabbing a bottle of wine and heading over (which I was later scolded for not doing), I decided to whip up a batch of brownies. There’s a relatively quick recipe in An Everlasting Meal, so I pulled it out and made a couple of adjustments (mainly replacing half a teaspoon of the vanilla extract with almond extract), and they turned out to be a huge hit. The almond was a really nice and unique flavor with the chocolate.

Simple Almond Brownies

Ingredients

4 oz unsweetened chocolate
2 sticks butter
3 eggs
2 cups sugar
1 1/2 tsp vanilla extract
1/2 tsp almond extract
1 cup flour
a handful (or 2) of chocolate chips, or walnuts

Instructions

Preheat your oven to 350 degrees and grease a 13×9 inch baking dish or pan. In a double boiler on the stove (or a heat proof bowl or a pot over a pot of simmering water), melt the chocolate and butter together, stirring so it’s all nice and smooth. Remove the bowl or pot from heat and let it cool. Once it is cool, add the eggs, beating after each addition. Add the sugar, vanilla, and almond, stir, and then add the flouring, stirring until combined. Pour the batter into the pan and sprinkle the chocolate chips (or walnuts, if you’re using them) on top. You can put on as many as you like or as few. Bake for about 30 minutes, but do the clean knife/toothpick check at 20. Mine took roughly 35 minutes. Enjoy!

Rice Cakes

Rice Cakes (using rice gone wrong)

Rice Cakes
Rice Cakes

Rice Cakes

Sometimes you’re in the kitchen and you have a lot going on and you miss something going wrong. Maybe you accidentally over-salt your pasta or you burn your veggies. There’s a whole (albeit little) chapter in Tamar Adler’s book all about how to save your mistakes. For example, turn those burned veggies into a smoky veggie salad. Or take that over-salted pasta, mix it with some herbs and butter, and make a frittata. The possibilities are endless.

A while ago, Jonah and I made these rice bowls. We doubled the rice recipe, and I must’ve done some math wrong and put in way too much liquid. So, while the rice tasted good, it was definitely a little mushy. After sitting in the fridge sadly for a week, I was thinking of using it to make rice cakes. Jonah reminded me about the “Further Fixes” chapter in An Everlasting Meal, so to the book I went. It kind of told me what I was already thinking of doing, so on I went.

Rice Cakes

Ingredients

roughly 3 cups of overcooked rice
1 large shallot, finely chopped
1/2 leek (if I’d had a whole one, I’d have used it), thinly sliced
salt, pepper
garlic powder
parmesan cheese
olive oil for cooking

Instructions

I heated up the rice in the microwave, drizzling it with water to kind of re-steam it. If your rice won’t stick together (perhaps it’s not quite as mushy as mine was), feel free to stir an egg into the mix. Stir together the rice, shallot, and leek, and add any seasoning you like. I added a few shakes of garlic powder, probably 1/2-1 tsp salt, and probably 1/4 cup grated parmesan. But none of this has to be exact. Put a bunch of stuff you like in there. I bet chopped sage would’ve been good, as would onion and garlic.

Heat some olive oil in a nonstick pan over medium heat, form the rice mixture into patties, and cook on each side until golden brown, roughly 3-5 minutes. Add more oil as you need it. You want them to have a nice crispiness on the outside to add some texture.

We ate them alongside some delicious panko-crusted tilapia and roasted broccoli. They would make a great appetizer for a fancier dinner. Also, they would make a delicious breakfast had I put a fried egg on top. Or melted a slice of cheddar. With some breakfast sausage on the side. See, there are so many uses for botched food! Now go mess up some rice.

Chicken Liver Pâté

Chicken Liver Pâté

Chicken Liver Pâté

Chicken Liver Pâté

Chicken Liver Pâté
Chicken Liver Pâté

Recently I have discovered my love of liver in pâté form. When I was younger and my parents would eat liver, I would screw up my face and impolitely decline a taste. Now I wonder why I was so against the stuff. It’s rich and creamy and makes a delicious spread for a snack or appetizer.

After seeing a recipe in An Everlasting Meal for chicken liver pâté, I had been wanting to try it. But, like anything I’ve never cooked before, I was a little nervous about it. I didn’t know if it could go wrong, and if it could, how badly. I had been checking the meat counter at my grocery store for a few weeks and hadn’t seen any chicken livers until one day, there they were, slimy and maroon, in all their glory. So I grabbed a pound of them. How much did a pound of chicken livers cost me? $2.73. This stuff is cheap AND delicious? I’m so in.

I got home, pulled out my book, and started cooking.

Chicken Liver Pâté

Ingredients

1 lb chicken livers
salt and pepper
roughly 12 Tbl butter (1 1/2 sticks)
2 Tbl white wine (sherry, bourbon, scotch, cognac, or brandy will also do)
1 shallot, finely chopped
1/2 leek, finely sliced
1 small clove garlic, minced
2 Tbl water
a pinch of cloves
a pinch of cinnamon
1/8 bay leaf, crumbled
1/4 cup fresh thyme leaves, chopped (I didn’t do quite a quarter of a cup)

Instructions

Trim any connective membrane type stuff from the livers and season them with some salt and pepper. Melt 1 Tbl of butter in a nonstick pan. When it’s starting to sizzle, add a batch of livers (depending on how big your pan is, you’ll need to cook the livers in 2-3 batches). Don’t crowd them in the pan; leave some space around each liver. Let each liver brown on one side, then flip and brown on the other side. Put the livers on a plate or in a shallow bowl – they will release some juices. Add 1 Tbl of wine to the pan and scrape the brown bits from the pan. Pour the wine over the cooked livers. Add more butter to the pan, and cook the rest of the livers as you did above, skipping the wine step.

After you’ve cooked all the livers, add the shallot, leek, and garlic to the pan with the remaining 1 Tbl of wine and 2 Tbl of water. This will help the veggies become tender. Cook the veggies over medium heat until they’re tender.

When the veggies are done, add them, the livers and their juice, the cinnamon, clove, thyme, and bay leave to the blender. Don’t blend yet! Cube one stick of butter and add the cubes to the blender too. Blend it up and taste. Season as you see fit (I found myself adding more salt…). When it’s seasoned to your liking, put the pâté in a bowl and allow to cool for 30 minutes before serving. It may seem liquidy, but it will solidify as it cools. If you’ve got leftovers (like we did), melt some butter and spread it over the top of the pate, and allow to cool. You can store it like this (according to Adler) for up to 2 weeks.

We liked our pate with crostini and herbed goat cheese, or nut thins and various cheeses from our grocery store’s scrap bin as well as one from the PSU Farmers Market.

beet tart

Beet Tart

beet tart

OK people – I know we read a lot of food books and talk about them all the time, but if there is ONE book you are going to read from our suggestions, let it be An Everlasting Meal by Tamar Adler.  It is amazing book that changed my life, and is sure to make you think and act differently around food.  If you have not read it yet, go read our blog post on her book, and then continue below.

This beet tart is a perfect example of Tamar’s philosophy and grace: if you attacked this beet tart recipe from start to finish in one cooking session alone – it would take most of your day; first you would have to roast the beets (which takes a long time anyway), then make tart dough and chill it for an hour, then bake the tart dough, then put together the filling, bake some more, add the sliced beets, and bake once again.  Sounds daunting! I would never have done this recipe if it wasn’t spread out over many days and incorporated in the general meal preparations for the week.  However, the manner in which it was made made it feel like I was just throwing leftovers together in a very creative way, rather than a labor intensive ordeal.

Here’s what happened: A few days before, Annie and I roasted a whole bunch of veggies for dinner (or was it lunch?).  We filled the whole oven and roasted lots of different veggies with olive oil and salt.  I fit the beets in a small pan with a 1/2 inch of water in the bottom, covered them with foil, and let them roast for a long time (probably too long, I may have forgotten about them).  We ate the other roasted veggies as part of our dinner that night, but we had no intention of eating the beets that day, so we didn’t have to wait around for them to roast.  We let them cool and then peeled them and put them in the fridge before bed.  Now we had roasted beets peeled beets in the fridge.  We had no plan but we had ideas: beet salad, beet pasta, or beet anything; they were simply a nice starting point.

A few days before roasting the veggies, we had made a different veggie tart using the Olive Oil Tart dough recipe that can be found in Tamar’s book, so we had some leftover in the fridge.  A few days later, I looked in the fridge and saw that a perfect storm had brewed for a beet tart.  There, sitting in the fridge waiting to be used, were roasted peeled beets, tart dough, and some leftover ricotta cheese.

If you want to make this recipe from start to finish, more power to you.  However, I would suggest at least making the tart dough a day ahead, and then looking through your fridge to find any vegetables that would work, roast them, and put them on top of the tart in place of beets.

Beet Tart

Note: You’ll want to roast your beets or other vegetables before you make the tart dough.

Ingredients

Olive Oil Tart Dough

2 1/2 cups all-purpose flour
1/3 cup olive oil
1/2 cup ice water
1 teaspoon salt

Beet Tart Filling

1 1/2 cups ricotta (fresh)
1/4 cup olive oil
2 Tb. cream (I think I just used leftover creme fraiche)
1/2 t. salt
2 egg yolks
a pinch of fresh thym or rosemary

Instructions

Olive Oil Tart Dough

Mix all ingredients together in a bowl. If its too dry, add more water, a tablespoon at a time. Divide the dough in half and roll into balls, then put them in the fridge to chill.

Take out one dough ball (you get to save the rest for another day!) and roll it out on a floured counter until its about 1/4 inch thick. Heat the oven to 400 degrees.  Grease the bottom of a 9-inch pie pan and dust with a bit of flour. Lay the crust in the pan and trim the edges. Prick the bottom a few times (this dissuades bubbles from appearing in your tart dough). Cover the crust in aluminum foil and put some dried beans or pie weights in to fill the tart and hold down the dough. Bake for 20 minutes.

Beet Tart Filling

Whisk together filling ingredients. Pour into the pre-baked tart dough (remember to take out the dried beans and aluminum foil!) and bake at 400 degrees for 15 minutes.  Now lay your beet slices (I cut mine into half-moons) on top of the ricotta filling in a single layer and bake for another 10 minutes.  Let it cool and eat at room temperature.

It is very filling and great for lunch the next day and many days after!