Author: Annie

Scallops with Mashed Potatoes and Haricots Verts

scallops

Scallops
scallops

Ok, so I know I’ve talked about how I’m not really crazy about ingredient-heavy recipes. And really, usually I’m not. But when I’m trying to cook a nice, fancy, romantic dinner for someone, I’ll usually put that aside and just go for it. Especially if the recipe is still really not very difficult and I’ve been eyeing it for a while. I found this recipe while surfing around on Food52, which is a great resource for recipes. Seriously, great. I’ve found so many things I want to make. And it’s a cool food community, I’m not sure what the requirements are for posting, but it seems there are a lot of food bloggers who also post there… Anyway, it’s really neat. You should check it out.

So I found this recipe for scallops and accoutrements and it had been sitting on my Pinterest, giving me longing looks whenever I visited, asking “why haven’t you made me yet?” The opportunity arose where I actually had time to go to the store and take my time, buy some wine, and make Jonah a nice dinner. And while he did end up helping (quite a bit) I think he appreciated the gesture. I’ll also say that I usually find it pretty pretentious when people call green beans “haricots verts.” It’s like, we don’t all speak French, why confuse people? They’re just green beans. But I dunno… sometimes it’s fun to throw in some French.

Scallops with Mashed Potatoes and Haricots Verts

Ingredients

4-6 sea scallops (dry pack is way way better than previously frozen, as always)
4 Tbl butter, room temperature
1 tsp shallot, minced
1 tsp garlic, minced
1 1/2 Tbl Italian parsley, minced
enough green beans for 2 (in our case), rinsed and trimmed
3 russet potatoes (medium-large), peeled and cut into chunks
1/2-1 cup heavy cream
2 Tbl butter
2 Tbl chives, minced
salt and pepper
2 Tbl canola oil

Instructions

First things first, some scallops have a little 1/2 inch strip of muscle that attaches it to the shell. It isn’t a nice texture in your mouth, so you’ll want to remove it. (I’ve never had a scallop with this little band, but it’s just good to check and make sure). Now either put them on paper towel on a plate or on a cooling rack over a tray to catch any juices and put them in the fridge.

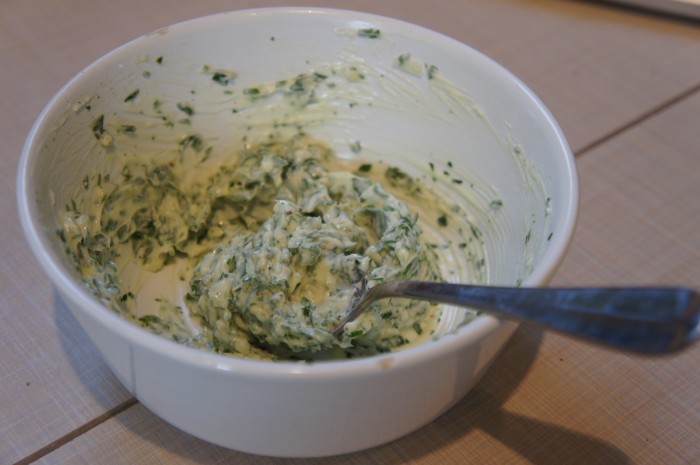
Now the butter: combine the butter, shallot, garlic, and parsley until combined. Was that so hard? No. Moving right along.

Put the potatoes in a large pot of cold water, and season heavily with salt. Put the pot over high heat until it starts to boil. Then reduce the heat (just so it doesn’t boil over, but keep it at a rolling boil) and cook until the potatoes are tender. Drain them in a colander and let them dry for a few minutes. Now you can mash them with a fork, a ricer, BUT I’ve just discovered that an electric mixer makes for a great masher. Throw the potatoes in the bowl, add the butter, and blend (I used the paddle attachment). Once the butter is melted and incorporated, you can add the cream 1/4 cup at a a time until the potatoes are creamy to your liking. Season to taste with salt and pepper. Mix in the chives. If you aren’t ready to serve yet, wait to add the chives until you are.

Take about a teaspoon of the butter you made, throw it in a pan, and add the green beans. Cook over medium heat until done – some like crunchy, some like a little softer, so just keep an eye on them and cook until they’re done to your liking. While those are cooking, bring out the scallops and season them with salt and pepper. Put a large fry pan over high heat and, once hot, add the oil. You want it to shimmer, but not to smoke. Carefully add the scallops (careful as the oil will probably spit a bit and can hurt) and saute until the first side is caramelized. Turn them and caramelize the other side, and remove them from the heat.

Now put a nice serving on a plate, put the scallops on top, and place a little dollop of the butter on top of each scallop. Add the haricots verts (ahem, green beans), and you’re done! That really wasn’t that hard for a fancy dinner with more than a few ingredients, was it? Enjoy with a nice cold glass of white wine (if you’re of age, that is).

Spring Vegetable Pizza

Spring Veggie Pizza

Spring Veggie Pizza

A couple of weeks ago, Jonah made us the loveliest picnic. We have a beautiful park a few blocks from our house, and on one of the first nice days, he decided to make us a picnic and we’d take it down to the park that looks over the river and the west hills of Portland to watch the sun set. I scored a good one, huh? So, really, he made this spring veggie pizza, but I’m going to post it because he’s already way behind on his posts. Jonah is a big fan of Martha, so of course he found this pizza on her website. We bought the pizza dough at our local grocery store, and he adapted a bit in terms of cheese (the recipe called for gruyere, but he used fontina…we think).

Spring Vegetable Pizza

Ingredients

1 jar (12 ounces) marinated artichoke hearts, drained (reserve the marinade!), hearts quartered if whole
1 bunch asparagus (1 pound), trimmed, cut into 2-inch pieces, and halved lengthwise if thick
1 pint cherry or grape tomatoes, halved
1 pound pizza dough, thawed if frozen and divided in half
salt and pepper
7 ounces Fontina cheese, grated (3 cups)
7-10 slices of prosciutto (optional, but suggested)

Instructions

Preheat your oven to 500 degrees, and put the racks in the upper and lower thirds of the oven. In a bowl, combine the artichoke hearts, asparagus, and tomatoes. Put one of the halves of the dough on a piece of parchment paper and brush it with the artichoke heart marinade. Now roll it out to about a 14-inch long oval, and transfer it (with the parchment underneath) to a rimmed baking sheet). Put half of the veggies on the rolled-out dough, leaving a border of about an inch. Brush the border again with the marinade and sprinkle the pizza with salt and pepper. Repeat to make another pizza. Bake them for 10 minutes, rotating the sheets halfway through. After baking for 10 minutes, sprinkle the cheese over the pizzas and bake until the crust is golden at the edges and the cheese is nice and melty, about 3-5 minutes. Cut into pieces and voila! Pizza!

If you want prosciutto (this makes a great vegetarian meal without it), tear it into smaller pieces and drape it over the pizza. It makes for a nice salty addition.

World Peace Cookies (or Extremely Chocolate Cookies)

Chocolate Cookies

Chocolate Cookies
Chocolate Cookies

One of my favorite care packages that I got in college was from my dad. It arrived the week before finals, and included all kinds of stuff to help get me through the very stressful time: chocolate covered coffee beans to help with the all nighters, delicious tea to help me fight off illness, dried fruit and other healthy snacks to keep me going during the long days, etc. It made me feel so much better about all the work I had to do, and made it feel like he was there, pushing me to get everything done and do the best I could.

Anyway, so I was thinking about my baby sister, who is about to enter finals week. And she’s had a bit of a rough semester, with some health issues (she may have to haver her tonsils out this summer, ouch) and all kinds of yuck-o stuff. And I thought, you know what would make her feel better? A care package full of funny and delicious things to help her get through the toughest part of the school year. Plus, let’s face it, I’ll take any excuse I can get to make cookies. I’d been eyeing this recipe from Smitten Kitchen for these chocolate cookies called “World Peace Cookies.” Apparently the title is based on the idea that if everyone in the world had these cookies, there would be peace. And they are pretty dang good.

World Peace Cookies

Ingredients

1 1/4 cups all-purpose flour
1/3 cup unsweetened cocoa powder
1/2 tsp baking soda
1 stick plus 3 Tbl unsalted butter, at room temperature
2/3 cup (packed) light brown sugar
1/4 cup granulated sugar
1/2 tsp fleur de sel or 1/4 tsp fine sea salt
1 tsp vanilla extract
5 ounces bittersweet chocolate, chopped into chips, or a generous 3/4 cup store-bought mini chocolate chips

Instructions

Sift the flour, cocoa and baking soda together into a bowl. Set aside. In an electric mixer with the paddle attachment, beat the butter on medium speed until soft and creamy. Add both the brown and granulated sugars, the salt, and the vanilla extract before beating for another couple of minutes.

Turn off the mixer. Pour in the flour/cocoa mixture and pulse the mixer at low speed about 5 times, a second or two each time. (A nice trick when pulsing flour and or cocoa: cover the bowl with a dishtowel, draped over the mixer, to protect yourself from inhaling the ingredients and to protect your kitchen from a total mess.) If, after a few pulses, there is still a lot of flour on the surface of the dough, pulse a couple of times more. After everything is all mixed in, continue mixing on a low speed for about 30 seconds more, just until the flour disappears into the dough. As with anything with lots of butter, you want to work the dough as little as possible. Don’t worry, the dough will be crumbly. Toss in the chocolate pieces and mix to incorporate.

Dump the dough out onto a work surface, gather it together and divide it in half. One half at a time, shape the dough into logs about an inch and a half in diameter. Wrap them in plastic wrap and stick them in the fridge for at least 3 hours. Towards the end of the three hours, you can preheat your oven to 325 degrees. Line your baking sheets with parchment, silpats, or just grease them lightly like I did.

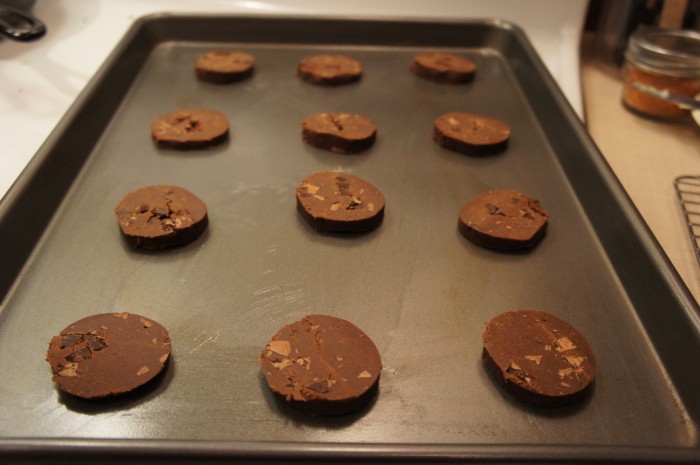
Pull the logs out of the fridge, unwrap, and with a sharp knife, slice them into 1/2-inch thick rounds. They may crumble: don’t worry, just squeeze the bits back together. Put the rounds on a baking sheet, leaving about an inch in between them. Bake for about 12 minutes. They won’t look that done, but they are. I promise. Allow to cool on the sheet for at least a couple minutes before transferring them to a cooling rack. Good luck letting them cool all the way before munching on a few accompanied by a glass of cold milk. Yum.

Momofuku Noodle Bowl

Momofuku Noodle Bowl

Momofuku Noodle Bowl

For those of you who saw the title of this post and went “What the hell is a Momofuku?” let me explain. Momofuku is a group of restaurants in New York owned by Chef David Chang. The group includes Momofuku Noodle Bar, Momofuku Ssam Bar, Milk Bar, and a few more. Anyway, I became mildly obsessed when I bought my dad the Momofuku cookbook for his birthday last year (he was obsessed after having eaten at one of the restaurants on a trip to NYC). Momofuku translates in Japanese as Lucky Peach, which is the name of a magazine that David Chang has recently published, all about cooking and eating. It includes articles by some other chef favorites like Anthony Bourdain, Wiley Dufresne, and Mario Batali.

Anyway! I found this recipe for a Momofuku noodle bowl on a blog called A Cozy Kitchen, which I’ve used before and I really enjoy. While the recipe is a little ingredient heavy, it’s really delicious, so although it may be a little extra work to get all this stuff (luckily Jonah and I already had the Asian ingredients), it’s worth it. We use stuff like soy sauce and rice wine vinegar all the time. They’re handy things to have around for a quick and easy meal (feeling lazy? marinate some chicken in soy sauce, mirin, garlic, and olive oil). We did fudge some things though, so I’m putting in the actual recipe and in parentheses what we did.

Momofuku Noodle Bowl

Ingredients

1 medium sized cucumber
¼+ tsp salt
½+ tsp sugar
2 ½ cups (or one bunch) thinly sliced scallions
½ cup (or just one large piece) minced ginger
¼ cup grapeseed oil (we used olive oil because we didn’t have grapeseed)
2 tsp soy sauce
1 tsp rice wine vinegar
1 Tbl olive oil
½ large head of cauliflower, cut into florets
1 lb noodles – ramen, soba, or lo mein (we used udon)

Instructions

Thinly slice the cucumber. In a bowl toss the cucumber with salt and sugar and let it sit for a few minutes and then taste one of the slices. Adjust the salt and sugar as necessary. I ended up probably using twice or even 3 times as much sugar and salt. Just because I wanted it. Thought it tasted better.

In a different bowl combine the scallions, ginger, 1/4 cup of olive oil, soy sauce and rice wine vinegar. Allow to sit and marinate for 30 minutes.

While those items are marinating, heat the Tbl of olive oil in a pan and add the cauliflower. Cook them on high till they start to brown and get a bit crispy. While the cauliflower is cooking, you can boil water and cook your noodles according to the package. Once the noodles are cooked, toss them with the scallion/ginger sauce. Now, serve the noodles in a bowl, and top with the cauliflower and cucumbers.

Now, this is a vegetarian dish, but Jonah and I were hankering for some more protein, so we bought a chicken breast. Jonah cut it up into bite size pieces and cooked it with a bit of fish sauce, hoisin sauce, and soy sauce, and it was good. A delicious addition to the dish. Yum!