Author: Annie

Beer Bread

This recipe is a bit famous in my family. And I wanted to be sure to share it with you while there is still Pumpkin Beer on the shelves because that’s my favorite kind of beer to use. We got this bread recipe from a friend of my sister’s from college, Graham. As soon as Emily introduced me to it, I was hooked. However, it’s not the healthiest (as you will see, you dump a melted stick of butter over the whole thing), so I try not to make it all too often. This specific one I made to take to the first rehearsal of a play I was just cast in. Baked goods always make a good first impression.

Beer Bread

Makes 1 loaf

Ingredients

3 cups of flour
3 tsp baking powder
1 tsp salt
1/4 cup sugar
1 can/bottle of beer (12 oz) – Having made this a few times, here is my take on what beer to use: Nothing too dark or hoppy, it gives the bread kind of a funny aftertaste. Seasonal beers are nice (think pumpkin ale or christmas beers), as are more fruity beers (back when the only beer I liked was apricot hefeweizen, that worked well), and anything on the lighter side. But I would steer clear of IPAs and reds.
1 stick of butter, melted

Instructions

Preheat your oven to 375 degrees. Mix dry ingredients in a bowl. Add beer, stir to combine. Grease a bread pan, and dump the dough into it. Warning: the dough will be sticky. Put the bread pan on a rimmed baking sheet – this is important as you won’t want the butter to seep over and just end up in the bottom of your oven. In a small bowl, melt the stick of butter in the microwave. Pour the melted butter over the dough in the bread pan. Bake for 1 hour, turning halfway through.

Remove the bread from the oven, run a knife around the edge of the pan, and turn out onto a cooling rack to cool. This bread is pretty crumbly, so good luck getting it to stay in one piece when you slice it. But it’s so worth it. Enjoy!

Whole Wheat Chocolate Chip Cookies

Chocolate Chip Cookies

When you have found possibly the best chocolate chip cookie recipe ever, it is hard to find recipes for chocolate chip cookies that still inspire you. You know what I mean? It’s like, well I found the best ones, so why not just make those? I’ll tell you why: while they are delicious, they require buying fancy chocolate (instead of just using the perfectly good chocolate chips you already have in your kitchen) and sifting. I’ll sift for Thomas Keller, but only so often.

So when I wanted to make cookies a while ago but not the fanciest best ones ever, I went to one of my favorite (food) blogs: Orangette. I have used this blog before, but I have re-fallen in love with it since reading the author’s book, A Homemade Life. Now, I feel that Molly Wizenberg and I were meant to be friends, and I am determined to make it happen. If you like reading about food, I definitely suggest it. There are also recipes in it, so if you don’t like the story, you can at least make some delicious food. Anyway, she had this recipe for whole wheat chocolate chip cookies that just looked so simple and divine… So I made them.

Whole Wheat Chocolate Chip Cookies

Ingredients

3 cups whole wheat flour
1 ½ tsp. baking powder
1 tsp. baking soda
1 ½ tsp. kosher salt
2 sticks cold unsalted butter, cut into ½-inch cubes
1 cup lightly packed dark brown sugar
1 cup sugar
2 eggs
1 tsp. vanilla extract
8 oz. bittersweet chocolate, roughly chopped into ¼- and ½-inch pieces, or bittersweet chips

Instructions

Preheat your oven to 350 degrees. Line two baking sheets with parchment paper or just butter them. Mix the flour, baking powder, baking soda, and salt in a bowl. Set aside.

Put the butter and sugars in the bowl of a stand mixer fitted with the paddle attachment (if you’ve got it. If you don’t, I advise bringing your butter to room temperature before you mix it). Bring the mixer up to a lower speed and mix JUST until the butter and sugars are blended (this should take about 2 minutes if your butter is cold). Add the eggs one at a time, beating well after adding each one. Add the vanilla, mix. Now add the flour mixture, and mix on a low speed until it is just mixed (have you noticed a key with this recipe is not over-mixing it? Honestly, that goes for most recipes. But moving on…) Add in your chocolate and mix. This is where it gets tricky, as the dough is fairly dry. Just do the best you can.

Using a spoon, put ~3 Tbl. sized scoops of dough on the cookie sheet, leaving plenty of room between the cookies (I would say at least 2 inches, 3 to be safe). Mine didn’t spread as much as the ones on Orangette, but always better safe than sorry. Bake for 16 to 20 minutes, rotating the sheets halfway through, until the cookies are evenly browned. I have found, when it comes to baking cookies, that I need to take the cookies out of the oven sooner than I think I do… I have a tendency to over-bake. Transfer the cookies to a rack to cool. Enjoy with a nice glass of cold milk.

Birthday Dinner at Beast

As some of you may know, my birthday recently happened. It was a day full of wonderful gifts and time with friends (and cousins!) out and about. Long before my birthday (on Nov. 1) Jonah texted me and said he was making plans for Nov. 2 (a Friday night), so to please reserve that night. I was really good and didn’t look up anything happening in Portland on that night. But as the day came closer, I started asking more questions. It went like this:

“Are we going to a concert?”
“Maybe.”
“Are we going to a restaurant?”
“Maybe.”
“Will any of our friends be there?”
“Maybe.”

The worst. Not actually, because I did really want to be surprised. But Jonah is usually not so great at hiding surprises, so I was impressed. He helped me dress (“Portland fancy”), and we headed out. I had no idea where we were going, and I almost feel like he took a complicated route just to mess with my head. But finally, we parked, and walked down the street to arrive at Beast for the 8:45 seating!

I could not have been more excited. I never thought I’d tear up at the thought of dinner, but it happened. The time came to be seated and we got to check out the menu and order a bottle of wine (it was quite warm in the restaurant, so we went with a bottle of Sancerre, which I recently read “really opens up the palate.” Maybe I know more than I think I do about drinking… Haha, not.)

I did not take any pictures of the food because lately, I’ve been working on enjoying experiences while I’m having them instead of documenting to reflect later. Sometimes, it’s better to have just memories instead of lots of pictures, you know? So I’ll tell you about our meal:

Beast

I could not have been more excited. I never thought I’d tear up at the thought of dinner, but it happened. The time came to be seated and we got to check out the menu and order a bottle of wine (it was quite warm in the restaurant, so we went with a bottle of Sancerre, which I recently read “really opens up the palate.” Maybe I know more than I think I do about drinking… Haha, not.)

I did not take any pictures of the food because lately, I’ve been working on enjoying experiences while I’m having them instead of documenting to reflect later. Sometimes, it’s better to have just memories instead of lots of pictures, you know? So I’ll tell you about our meal:

Course 1: Spinach veloute & shellfish mousse. A delightful start to the meal. A veloute is a stock+roux sauce or soup, and this one had spinach blended in, as well as spinach oil drizzled across the top. It then had a scoop of shellfish mousse plopped on top, which kind of melted into the warm soup as you ate it. It was creamy and smooth and had a very light but powerful flavor. Also, I want to steal their soup spoons.

Course 2: Charcuterie plate. Now, not everything that was on the plate was on the menu, so I’ll do my best to remember. Each of the following was in a little bite sized serving around the edge of the plate, almost like a clock. In the middle of the plate was a light salad of arugula, sliced radishes, and tete de cochon (kind of like a forcemeat made out of various pig’s head parts, then sliced very thin). Starting at 1 o’clock, we had a leaf lard cracker with chicken liver mousse and a pickled shallot slice. Next: a pickled carrot and green been; steak tartare with a quail egg yolk on a mini toast; duck rillettes; spicy pork crackling; a cornichon and mustard; pork & pistachio pate; and lastly, foie gras on a peanut cracker with some kind of (fruity) gelee. This was a pretty amazing course – all these delightful bites of unexpected rich flavors. It also was the first time that Jonah had ever had foie gras, so that was exciting.

Course 3: A cleanser course between the charcuterie plate and the main, not on the menu. A poached quince and lemon sorbet.

Course 4: Strip loin roast with duck-fat caramelized brussel sprouts (!!!), whipped potatoes, red wine-beef jus, and crispy celeriac (fried celery leaves). This was possibly the best meat dish I’ve had in my life, or at least a very long time. The roast was cooked perfectly. The brussel sprouts were amazing (I mean, duck fat, come on!). The potatoes were light and creamy, and the jus was lovely and rich in both taste and color. I could have eaten this dish and walked away from this meal happy. It was perfection. Sometimes I forget how important execution is, but this reminded me. Each element of this dish was cooked perfectly, seasoned perfectly, and went together so well. Also, at this point, I was starting to get full. Uh oh.

Course 5: After a little break, we were brought roasted beets and bacon pickled celery with house cured and smoked trout, horseradish-tarragon cream and trout roe. While this dish was good, it felt a little underwhelming compared to the meat dish we had just been served. Visually, it was beautiful and very colorful. I am a big fan of fish, but smoked is not my favorite preparation, and because the beets were not sauced a whole lot (the horseradish cream was on the other side of the plate, and there wasn’t a ton of it), it sometimes got a little bland. All that being said, it was still good, just not as “knock your socks off” as the other dishes.

Course 6: Cheese plate with 3 cheeses, quince paste, fried marcona almonds, bee pollen shortbread, and wildflower honey. This cheese was goooood, and it was really fun to try all the different combinations on the plate. One cheese with the quince paste, one with the honey, a bite of salty almond, etc. It was fun and playful to try pairing things on my own, so I enjoyed that. Also, if you have never had marcona almonds, do it now. They are a little pricey, but they’re so amazing. The shortbreads were wonderfully buttery too, a nice sweet end to the dish.

Course 7: The only other picture I took at the restaurant was of this chocolate-ginger stout cake with candied fresh young ginger, cinnamon ice cream, all on a puddle of caramel.

Dessert at Beast

Often at nice restaurants like these, the dessert can be a little lackluster. So, while I had high hopes, I was trying not to let them get too high. The waiter lit a little candle on my plate, and there was a small applause from the people sitting with us (Beast has communal tables – and happy birthday had already been sung at the other table, so I didn’t want them to sing again). There was no reason not to get my hopes up. This cake was perfectly moist and chocolatey. The ice cream was so cinnamon-y without being overpowering, and the caramel had a hint of this fruity-flowery taste, which was probably my favorite part of the dessert.

After 3 hours of eating the most carefully prepared, beautifully plated, cared for food, it was time to go. We lingered, finishing our wine, and ended up being the last folks to leave the restaurant. But I’ll admit, I never wanted to leave, I wanted that meal and that night to last forever. Now I’ve to to figure out what to get Jonah for his birthday that could ever compare.

Butternut Squash Enchiladas

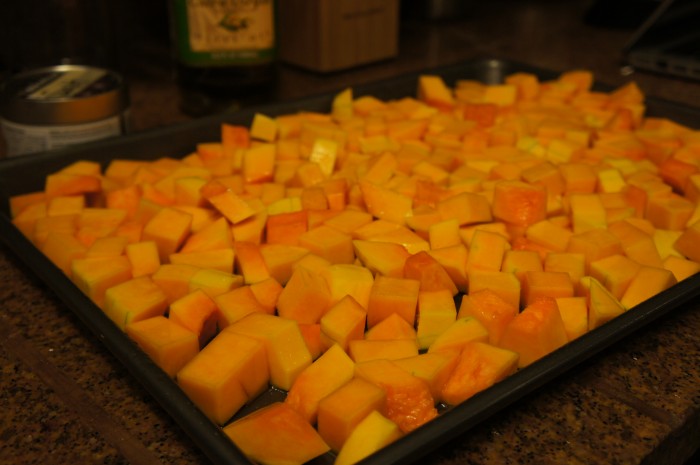
Squash for Enchiladas

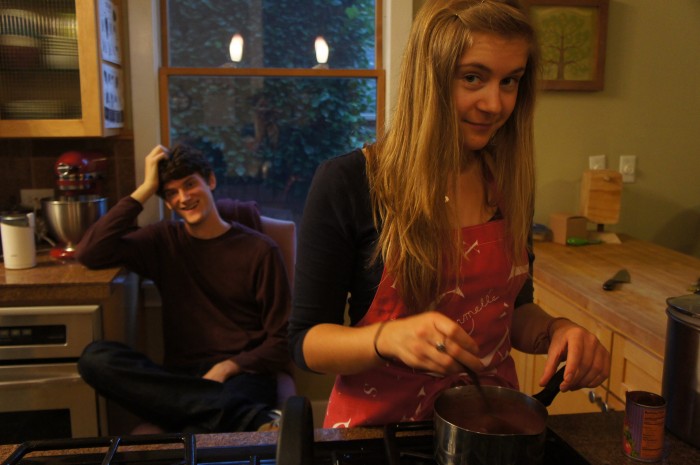
Carmelle makes enchilada sauce
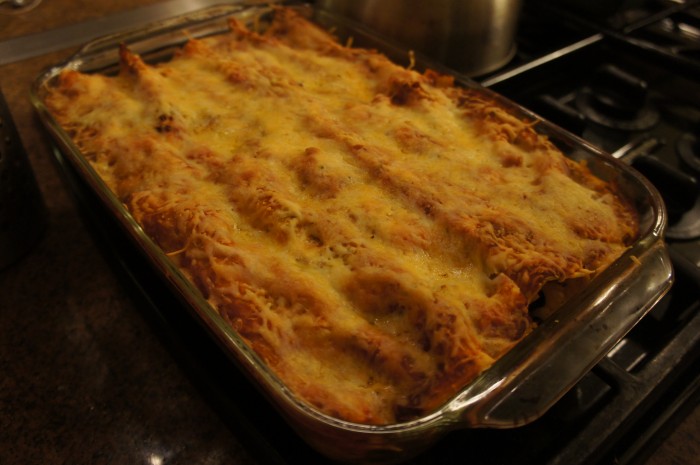
Squash enchiladas pre-cheese

Squash Enchiladas

Fall is a perfect excuse to put squash in, oh, just about everything you make. Squash ravioli? Yes. Squash cake? Absolutely. Squash enchiladas? Of course.

The inspiration for this meal came from 1) the abundance of squash at the grocery store, 2) the fact that I’d had something similar (some kind of squash taco) at a restaurant here in Portland called Oba, 3) there were people coming for dinner, and I wanted to make something easy that was basically a meal in a dish. This was exactly that, a delicious, relatively easy meal in a dish. I’ll also say this: this was loosely based on a squash enchilada recipe I found, but I was quasi-doubling it. Also, I bought too big of a squash because it was pretty. So we had lots of extra filling, which I just threw in a pan, covered with enchilada sauce and cheese, and baked on it’s own, sans tortillas. But I’ll try adjusting amounts below so that you don’t have that same problem.

Butternut Squash Enchiladas

Ingredients

One ~2 lb butternut squash, peeled, seeded, and cubed
Olive oil & salt
1 can black beans, rinsed
1 medium onion, diced
mild green salsa (we used one of those little cans from the grocery store)
12 small corn tortillas
1-2 cans enchilada sauce (Carmelle made our enchilada sauce because she is a Mexican food guru… but I was prepping the filling, so I wasn’t paying attention. Dang!)
1 bag of mexican blend shredded cheese

For serving: sour cream and sliced avocado

Instructions

First, preheat your oven to 400 degrees. Spread your squash on a large baking sheet, toss with olive oil and salt, and bake for 20 minutes, or until squash is tender. Remove from oven and allow to cool for a few minutes before putting into a large mixing bowl. Add the black beans and onion and mix to combine. At this point, you can lower the temperature of your oven to 350 degrees.

Cover the bottom of a large casserole dish with a layer of enchilada sauce and about half the can of salsa. Warm the tortillas a little bit, one by one, in a pan with a little bit of olive oil, just so that they won’t break when you stuff them. Take a warm tortilla, fill it with the squash/bean/onion mixture, a sprinkle of the cheese, and roll it up. The ends don’t need to be all nice and tucked in, but you want the tortilla to overlap enough… Does that make sense? Fill the dish with filled, rolled tortillas, and cover with enchilada sauce, salsa, and the rest of the cheese (or just however much cheese you want).

Throw that dish in the oven (don’t throw it, actually… that would be bad) for 30 minutes, or until the cheese is bubbling and a bit brown. Allow to cool for a few minutes before serving with sour cream and slices of avocado. Enjoy!