Breakfast

Cinnamon Raisin Bread // Serious Crust by Annie Fassler

Cinnamon Raisin Bread

Cinnamon Raisin Bread // Serious Crust by Annie Fassler

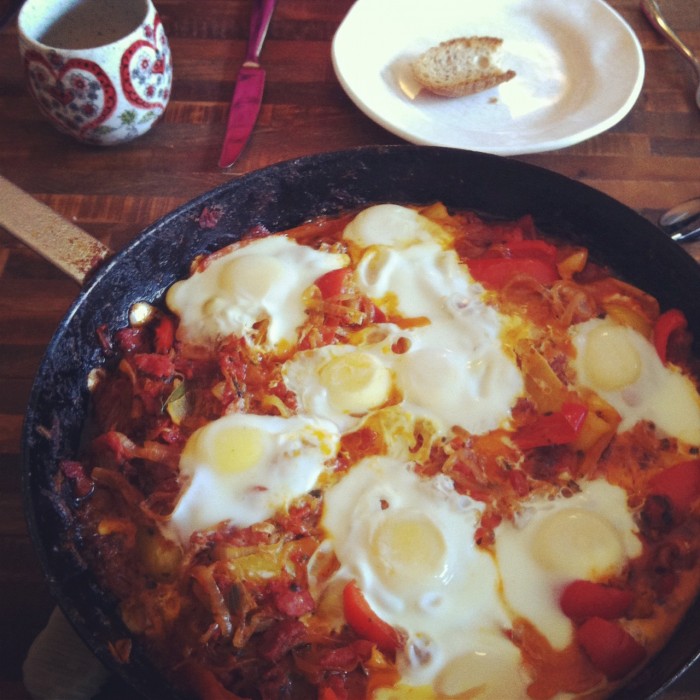
I like being home. Traveling the world is awesome, don’t get me wrong. I will happily go on adventures like the one to Vietnam any time. But there is something about coming home to your own bed, your own shower, and your own kitchen. I feel like I need to give all my kitchen tools little hugs and tell them I’ve missed them. Which, at this point, I’ve basically done, because I’ve been cooking up a storm this week.

Portland, however, is being slightly less welcoming than my kitchen. Mostly just in its weather-related mood swings. Seriously, this whole week has been days of sporadically alternating sunshine and rain. Sometimes each lasts 5 minutes, sometimes an hour. But it’s making it awfully hard to cook. What I’m going to make is always determined by my mood, which is often influenced by the weather. Between the rain and sun breaks, I can’t decide if I should be making spring recipes or winter recipes.

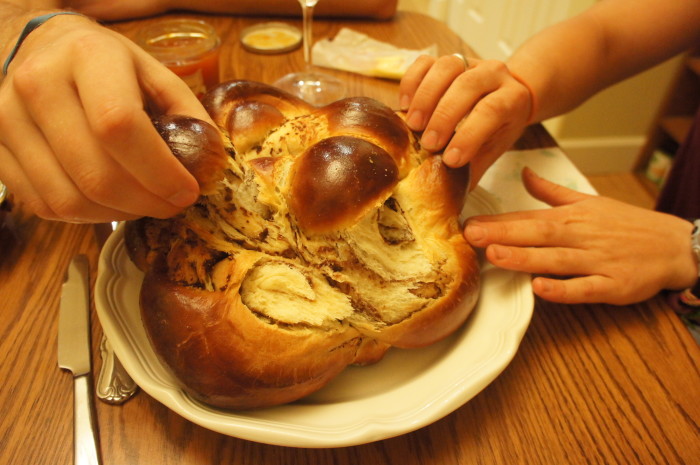
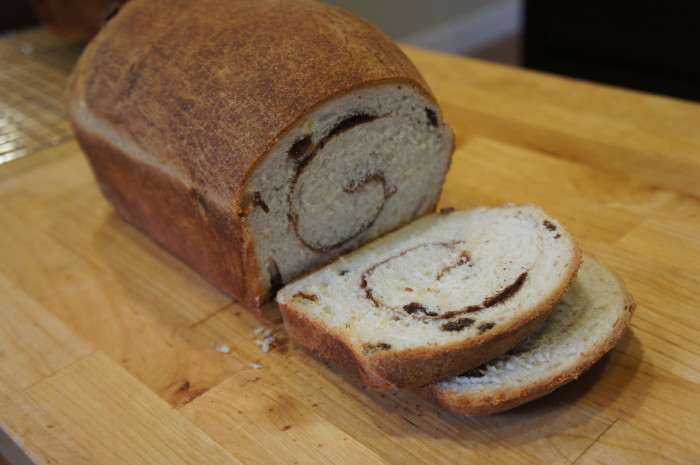
This cinnamon raisin bread is the perfect balance between spring and winter, though I already know I’ll be making it year round. It’s homey and warming thanks to the springy crumb and the way it fills your kitchen with the most comforting smell. But the raisins and cinnamon bring a little fruitiness and fun to the mix, a little surprise if you will. This isn’t just plain ol’ bread, you know. This has a beautiful swirl of cinnamon sugar and beautifully juicy pops of fruit throughout it.

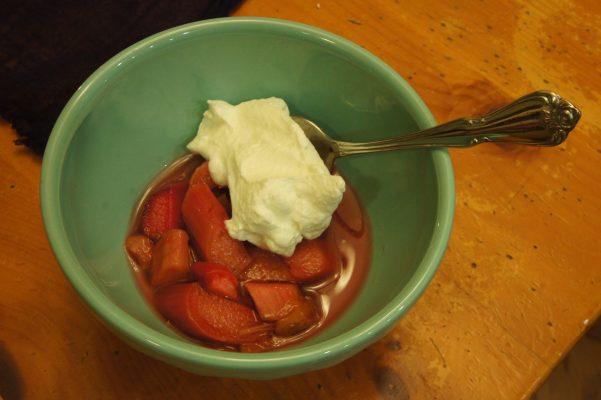
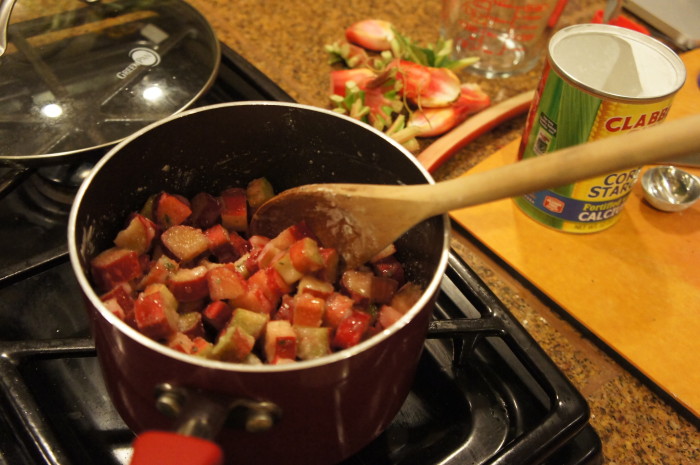
This recipe made two loaves, and I thought for certain I’d freeze one loaf, because my roommates just don’t usually eat that much bread (unless it’s beer bread). But I was wrong. In two days, we are down to half a loaf left. Everyone has been enjoying this bread, toasted, slathered with butter, or raspberry rhubarb jam, or nutella for breakfast and dessert and a snack here and there.

Point is, make this bread and your house will smell like heaven, your friends will love you, and you’ll be perfectly toeing the line between the seasons.

Cinnamon Raisin Bread

Makes 2 loaves

Ingredients

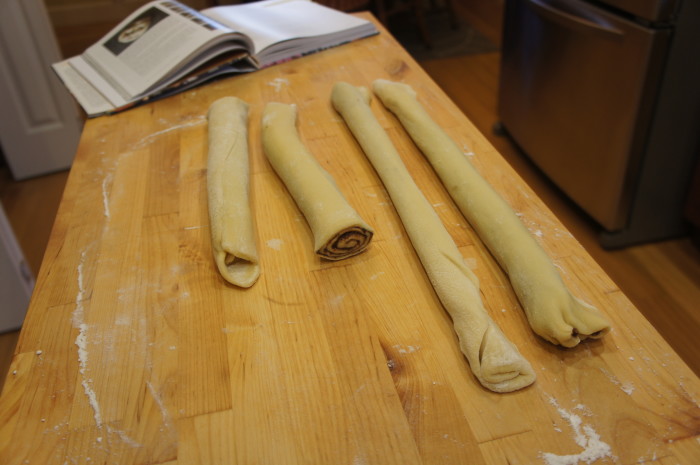
2 1/4 tsps (1 package) dry instant yeast
2 1/4+ cups warm water
3 Tbl and 1/4 cup granulated sugar, divided
1 Tbl salt
3 Tbl butter
6 -7 cups all-purpose flour
1 cup raisins
canola/vegetable oil
1 Tbl cinnamon

Instructions

In the bowl of an electric mixer (or not. If you don’t have one, this can easily be made with the strength of your own two arms.) combine 1/2 cup warm water, the yeast, and 1 Tbl of sugar. Set aside and let sit until it’s foamy. In another bowl, cover the raisins with warm-hot water, at least 2 cups. This step is optional, but it will plump the raisins, making them a bit juicier in the bread. After about 3 minutes, pour 1 3/4 cups of the raisin water off into a measuring cup and discard the rest. Pour the raisin water into the mixing bowl with the yeast, in addition to 2 Tbl sugar, the salt, 2 Tbl melted butter, 3 1/2 cups of flour, and all of the raisins. Mix with the paddle attachment until thoroughly combined, adding up to 3 more cups of flour until the dough is smooth enough to handle, but still moist. Switch from the paddle attachment to the dough hook, and knead for about 7 minutes (10 minutes if you’re kneading by hand). Dump the dough out onto a floured surface, coat the mixing bowl with canola or vegetable oil, and put the dough back into the bowl, turning it to coat, and cover the bowl with a clean dishtowel. Set the bowl in a warm spot (I like to turn on the light over my stove and set it under that) and let it rise for about an hour, or until it’s doubled.

In a small bowl, combine the remaining 1/4 cup sugar and 1 Tbl of cinnamon and mix well. Butter two bread pans. When the dough has doubled, remove it from the bowl onto a floured surface and punch it down, then divide it in half. Roll out one half of the dough into a rectangle that measures roughly 16 by 8 inches. Once rolled out, sprinkle the dough with 1 Tbl of water, and half of the cinnamon sugar mixture. Roll the dough up starting from the short end, and pinch the seam shut. Drop the roll of dough into one of the greased loaf pans. Repeat with the second half of dough. Brush the top of both loaves with the remaining 1 Tbl of melted butter, and cover them again with a clean dishtowel to let them rise for another hour in a warm spot.

About 15 minutes before your bread is done rising, preheat your oven to 425 degrees. Bake the bread for 30 minutes, or until the loaves look beautiful dark brown on top. Remove the loaves from the pans (beware, as cinnamon sugar may have oozed and become rather sticky – aprons are your friend) and set on a cooling rack. I recommend slicing into one of these bad boys when it’s still pretty warm. You can toast it and put a nice layer of cream cheese on top, like I did with my cinnamon raisin bread when I was younger, but a little butter will do nicely as well. Enjoy.

Baked Rhubarb with Lemon and Cardamom // Serious Crust by Annie Fassler

Baked Rhubarb with Lemon and Cardamom

Baked Rhubarb with Lemon and Cardamom // Serious Crust by Annie Fassler

Baked Rhubarb with Lemon and Cardamom // Serious Crust by Annie Fassler

It’s raining in Portland. I know, surprise, surprise. But it wasn’t that long ago that the sun was shining and I even got a sunburn. Seriously! Last weekend, Jonah’s mom and Grandma were in town for the day, and we took them to the PSU Farmer’s Market, which has got to be one of my favorite things about Portland. The sun was shining, I wasn’t even wearing a jacket, and there was beautiful crimson rhubarb everywhere! Rhubarb has got to be one of my favorite ingredients of all time, so I was excited, to say the least.

As I was getting ready for Passover dinner on Tuesday, I decided to nix the matzo crunch in favor of something a little more reminiscent of springtime: some baked rhubarb. After doing a little recipe hunting and finding this recipe on Food52 and this recipe on Orangette, I decided to do a little adapting. This recipe is so easy and delicious – I love the slightly sour flavor of the rhubarb and the hint of lemon, cardamom, and earl grey. I balanced the tartness with some fresh whipped cream, but ice cream, fresh ricotta, or yogurt are also great options.

Baked Rhubarb with Lemon and Cardamom

Ingredients

6 cups rhubarb, cut into 1-inch pieces
1 cup granulated sugar
1 meyer lemon, juiced
1/8 tsp cardamom
3/4 cup steeped and cooled earl grey tea

optional: fresh whipped cream, ice cream, fresh ricotta, or yogurt for serving

Instructions

Preheat your oven to 350 degrees. In a baking dish, combine rhubarb, sugar, lemon juice, cardamom, and tea. Stir to combine. Bake for 15 minutes, stir, and bake for another 15 minutes. Remove from oven, and allow to cool. You can serve the rhubarb warm, room temperature, or chilled, all are wonderful. Yes, that’s it. Can you believe how easy this is?

P.S. The leftovers, if there are any, taste delicious stirred into your yogurt and granola the next morning. Or on top of pancakes. Just saying.

Matcha Green Tea Madeleines // Serious Crust by Annie Fassler

Matcha Green Tea Madeleines

Matcha Green Tea Madeleines // Serious Crust by Annie Fassler

Matcha Green Tea Madeleines // Serious Crust by Annie Fassler

Everything is melting. Meeeeelllllting! It’s like I’m the wicked witch of the west. Or rather that Portland is, anyway. Which is seemingly appropriate given the hue of today’s baked goods recipe. (In case you missed it, we are officially on the tail end of a large snow storm, at least by Pacific North West proportions, where it snowed for days and no one could drive anywhere and we all got cabin fever.)

I have long been wanting to try some variation of Matcha green tea madeleines. I’m sure, at this point, I have a bunch of recipes on my Pinterest board, and really I was just waiting for the time to come when I actually remembered to purchase Matcha at Tea Chai Té. You’d think it wouldn’t be hard, since I usually visit one of their shops every other week. But remembering is harder than you think.

You know what else is harder than you think? Weighing all of your ingredients. See, every recipe I found for these madeleines had the amounts in weight, or it didn’t have quite enough of this or that for my taste. OR even worse, it had some of the ingredients measured in weight and some in teaspoons or cups. Which is fine, I have a scale. But when it came down to it, and I was finally making these little gems, I was not in the mood to weigh a million things and add a little bit more, a teaspoon at a time, until the weight was exactly right. So… I guestimated. If I was someone else, I would have made this recipe multiple times, adjusting the amounts of ingredients to make sure I was giving you the absolute best variation. But I’m not someone else. I’m me. And this recipe worked. So this recipe is what I’m giving you. I hope that’s ok. And hey, wouldn’t you rather I be me instead of someone else?

Matcha Green Tea Madeleines

Ingredients

2 Tbl Matcha green tea powder
1/2 cup flour (all-purpose)
1 tsp baking powder
8 Tbl butter (1 stick), melted and cooled
3 eggs
1/2 cup sugar
1/4 tsp salt
1 tsp vanilla extract

Instructions

Butter and lightly dust your madeleine pan with flour. Keep the pan in the freezer while you prepare the dough.

In a bowl, sift together the flour, baking powder, and Matcha powder and set it aside. In a bowl, beat the eggs for 1 minute (I used my electric mixer; a handheld mixer would work too), and then add the sugar and salt. Mix until the sugar/egg mixture is pale and a bit thick, about 5-6 minutes.  Add the vanilla, and mix for another minute. Now add in the flour and Matcha mixture, blending until it’s just combined. You’ll want to be gentle when adding the flour mixture, and may even want to use a spatula and gently fold it together – you don’t want to deflate the eggs. If you’re using an electric mixer, I recommend switching from the whisk to the paddle attachment. Once you’ve mixed in the flour mixture, slowly add the butter and beat until the dough is smooth with the mixer on a low speed, or with your spatula. Cover bowl and refrigerate for at least one hour.

Preheat your oven to 375 degrees, and remove the pan from the freezer. In each little madeleine mold, drop about a teaspoon of batter. Bake for ~8 minutes, or until they have puffed up and are golden brown around the edges. Allow the madeleines to cool in the pan for a minute before removing them. I found it easier to remove them by placing the wire rack upside down over the pan and then flipping it over, then lifting the pan off.  These are best enjoyed the same day, preferably right out of the oven, with a nice cup of tea (and no, it doesn’t have to be green tea).

Gougères // Serious Crust by Annie Fassler

Gougères

Gougères // Serious Crust by Annie Fassler

Gougères // Serious Crust by Annie Fassler

I recently had a serious gougères craving. Which is not a normal craving. Normal people crave… I don’t know what. But my guess is not cheesy little dough puffs. Right?

Also, I’ve discovered I have a lot of cookbooks. I knew this. But when I was looking for a recipe to use for these gougères, I realized I have a few cookbooks that I have never even opened. Mostly these are ones I got for free. For example, I have about 5 old James Beard cookbooks. How many different recipes for one thing can the man really have? I think I need to do a little research and then pick one or two to keep. Because also, my cookbook bookshelf is officially overflowing. Books are starting to get piled on top of books, so you can’t see what they are, and everything falls out when you pull out your selection. Not good.

I also decided that I want to be the kind of person that writes notes in my cookbooks. In pencil. But still. Rather than attempting to remember what I liked about a recipe or what I did differently or what didn’t work, I should just write myself little notes in the margins. Or be like my Aunt Elise, who has layers of post-its all over her favorite recipes.

So, my February resolutions: clear out some cookbooks, or at least USE the ones I haven’t used yet and if I don’t like them, think about getting rid of them; and make notes in the margins. Totally doable, I think.

Gougères

Ingredients

1/2 cup water
1/2 cup milk (I used 2%)
1/2 cup (1 stick) unsalted butter
3/4 tsp salt
1/4 tsp freshly ground pepper
1 cup flour
4 eggs
1 1/2 cups grated Gruyère cheese OR 1 cup grated gruyère and ~1/2 cup grated Parmesan
a pinch of cayenne pepper
1 tsp of dry mustard (optional – I didn’t add this, but wished I had afterwards, as my gougères were missing a bit of bite to them)

Instructions

Preheat your oven to 375 degrees. In a medium saucepan over medium heat, combine water, milk, butter, salt, and pepper; Cook until the butter melts. Add the flour in one batch, and stir with a wooden spoon or spatula. The mixture will become this strange, shiny, kind of gelatinous mixture, and will pull away from the sides of the saucepan. Remove the pan from the heat, and add the eggs one at a time, stirring after each addition. It will seem, for a short while after you add each egg, that it won’t incorporate. I promise it will. There will be a magical moment where all of a sudden, the egg and the flour decide they like each other and want to be the best of friends. After adding all of the eggs, the dough should be nice and glossy. Add 1 cup of the grated Gruyère, dry mustard if you are using, and cayenne, and combine thoroughly.

Butter a baking sheet or line it with parchment or silpat, and drop the batter on by tablespoon. Sprinkle the tops with the remaining grated Gruyère or Parmesan. Bake for 25-35 minutes, until puffed up and golden brown. Allow to cool for a couple of minutes before indulging, as they’re full of steam and can be very hot.

The perfect granola equations // Serious Crust by Annie Fassler

The Perfect Equation (for Granola, anyway)

The perfect granola equations // Serious Crust by Annie Fassler

First, let me apologize for disappearing for a little while. I was laid up in bed with a really terrible cold for most of this week. There was lots of tea, cough drops, movies, tom kha soup, and knitting. But now that I’m back from the land of the ill, let’s talk about granola a little bit.

For a while now, I’ve been making the recipe from Orangette or another friend’s secret granola recipe. And every time I’ve tried to go rogue (aka not exactly following a recipe), my granola ends up too dry, or not sweet enough, or not as crispy as I like it. And I’m not the kind to make the same recipe a thousand times trying to add a teaspoon more of this or up the temperature 13 degrees. It’s not going to happen.

So when I happened upon a granola equation, on Buzzfeed of all places, I immediately wrote it down on a little notepad I’ve started carrying with me wherever I go (can’t recommend that enough). And I’ve used it many times. I’ve made a couple adjustments, and I have a couple of suggestions in terms of which way to lean on some of their more vague instructions, and I want to share it with you.

The Perfect Granola Equation

Ingredients

Dry Ingredients

3 1/2 cups grain This is where most people use oats. I use oats. I guess if you want to use barley or whatever, you can.

1 – 1 1/2 cups nuts I’ve been using mostly a mix of whatever I have around. I like half pecans, half sliced almonds, but I’ve also used walnuts.

1 tsp salt

1 – 2 cups seeds I would suggest leaning towards one cup instead of two. Otherwise it can quickly start to feel like you’re eating birdseed. I’ve been mostly using pumpkin seeds and sunflower seeds (old habits and all that), but I’m itching to try sesame seeds too.

1 cup coconut If you really dislike coconut, you can go without, but it adds a lovely nutty toasty flavor to the granola that I adore.

Spices You can really add as many as you like, but don’t get too crazy. A teaspoon of cinnamon is always a good place to start, and after that, maybe add a quarter teaspoon of one or two other things. I always use a quarter teaspoon of cardamom, and because it’s the holiday season and I associate nutmeg with the holidays, I’ve been adding a quarter teaspoon of that as well.

1 cup dried fruit I’m personally not a fan of dried fruit in my granola – I’d rather cut in a banana or peach or some berries – but if you are, you can add it after baking. If you’re adding something big like dried apricot or figs (as opposed to something small like dried cranberries or cherries), cut it into a rough dice before tossing it in with the granola.

Wet Ingredients

1/2 – 3/4 cup sweetener I like to do mostly maple syrup, though it can get a little pricy. Sometimes I’ll do half syrup and half honey. Agave is another good option.

1/4 – 1/2 cup oil I used to use solely olive oil – I liked the kind of savory-ness it brought to the granola – but I’ve started doing half olive oil and half coconut oil, and I am a big big fan.

1 tsp vanilla

Instructions

Preheat your oven to 300 degrees. Mix dry ingredients in a large mixing bowl. Add wet ingredients, stir until thoroughly combined and coated. Line a rimmed baking sheet with parchment paper, and spread the granola on the parchment. Bake for 45 minutes, stirring every 15 minutes (unless you like clumpier granola, in which case stir once halfway through). Remove from oven, allow to cool, and enjoy.

Earl Grey Madeleines // Serious Crust by Annie Fassler

Earl Grey Madeleines

Earl Grey Madeleines // Serious Crust by Annie FasslerEarl Grey Madeleines // Serious Crust by Annie Fassler

Elsa has discovered my secret.

My dear friend Elsa and I were hanging out quite a bit when she finally got back from her worldly travels this summer, as she was job hunting, so had her days free, just like I do. She came over one afternoon, and we decided to bake something. I started looking for recipes, and suggested rosemary shortbread, thyme/sea salt/chocolate chunk cookies, or these earl grey madeleines from Baking a Moment. She looked at me and said “Are we only allowed to make things that involve weird flavor combinations?”

She’s right. I like trying new flavor combinations. Why have chocolate chip cookies when you can add thyme? Or plain shortbread when you can add rosemary? Why not spice it up a bit? Plus, combinations like this are becoming rather mainstream. I think I’ve got her on the weird flavor combo train at this point, but she still teases me all the time. Anyway, on that afternoon, I convinced her to make earl grey madeleines with me. And dang, were they good.

For the record, Elsa made me zucchini, jalapeno, lime cookies for my birthday.

Earl Grey Madeleines

Ingredients

6 Tbl unsalted butter
3 bags earl grey tea
2 tsp light brown sugar
2 tsp honey
2 eggs
1/4 cup granulated sugar
1/3 cup all-purpose flour
1/2 tsp baking powder
1/4 tsp kosher salt

Instructions

Preheat your oven to 350 degrees.

In a small pot on the stove, melt the butter. While the butter is melting, cut open the tea bags, and then stir the loose tea into the melted butter. Allow to steep over low heat for about 5 minutes, then remove from the heat and allow it to steep for another 5 minutes. Strain the tea butter. I used a mesh sieve that I overlayed with the tea bags (which I had cut to make sheets). If you have cheesecloth, you can use that.

Stir the brown sugar and honey into the tea butter. They may stay kind of separated, and you can slightly reheat to try to combine them better. Ours wouldn’t really combine no matter how much we reheated them, and everything worked out just fine. So don’t stress about it.

Here’s another weird step. In a (preferably metal) mixing bowl, combine the eggs and granulated sugar. Fill another bowl with very hot water, and put the bowl of eggs/sugar into the bowl of hot water. Mix this with your fingers (I know, I know) until the eggs feel slightly warm and the sugar has dissolved and is no longer grainy. When you’ve reached that point, you can remove the bowl from the water and whip the eggs/sugar on high until it has tripled in volume.

In another bowl (I know, it’s a bowl heavy recipe), sift together the flour, baking powder, and salt. Gently fold the egg mixture in in two additions. Pour a little bit of this batter into the tea butter, stir it up, and then pour the tea butter into the batter. Again, gently fold until thoroughly combined.

Spoon the batter into a buttered and floured madeleine pan. You only need to fill up the molds about 2/3 of the way. Bake for 8-10 minutes, or until they’re golden-brown around the edges. Remove the madeleines from the pan immediately and allow them to cool on a wire rack. Enjoy with a glass of milk, a nice coffee, or tea!

Fig Challah // Serious Crust by Annie Fassler

Fig and Olive Oil Challah

Fig Challah // Serious Crust by Annie Fassler

Fig Challah // Serious Crust by Annie Fassler

On Rosh Hashanah, I did something really un-Jewish and un-Kosher by making shrimp for dinner. But I kind of half made up for it by making fig, olive oil, and sea salt challah from the Smitten Kitchen cookbook. And that makes things kind of ok, right? (Let’s not even talk about the fact that there was no fasting or breaking of fast on Yom Kippur as I had band practice and work, both of which require much sustenance. Don’t tell my Bubbe.)

This challah has been on my “to make” list for so long. I was waiting for figs to be in season (only to realize after I went to the store and bought fresh figs that the recipe calls for dried figs… oops… way to follow your own rules, Annie) AND I’d never made challah before. TERRIBLE JEW, I know. But you know, bread is mildly scary to me, and braided bread that’s supposed to look all shiny and pretty? That much scarier. But a holiday is a good enough reason to man up and do anything, so I went for it. And man oh man, it was good. This recipe is pretty much straight from Smitten Kitchen.

Fig and Olive Oil Challah

Ingredients

Bread

2 1/4 tsp active dry yeast (1 packet)
1/4 cup plus 1 tsp honey
1/3 cup olive oil, plus some for the bowl
2 eggs
2 tsp flaky sea salt (such as Maldon, which you really should have around because you should be putting it on everything because it is awesome)
4 cups all-purpose flour

Fig Filling

1 cup dried figs, stemmed and roughly chopped
1/8 tsp orange zest (I eyeballed this, because you know, who has an 1/8 tsp measure)
1/2 cup water
1/4 cup orange juice
1/8 tsp sea salt
freshly ground black pepper (you’ll only need a few grinds)

Egg Wash

1 egg
flaky sea salt

Instructions

Bread

In a small bowl, combine the yeast and 1 tsp of honey with 2/3 cup of warm water. Stir it up, and let it sit for a few minutes until it gets foamy. In the bowl of your mixer with the paddle attachment (or you know, with a wooden spoon and a bowl if that’s your jam), combine the yeast mixture with the rest of the honey, the olive oil, and the eggs. Then add the flour and salt, and mix it until the dough starts to come together. Once it comes together, switch to the dough hook and let it run on low for 5-8 minutes. Put the dough on the counter for a moment while you coat the bowl in olive oil, put the dough back in the bowl, and cover with saran wrap for an hour, or until the dough doubles in size.

Fig Filling

While the dough is rising, it’s fig paste time. Put the figs, zest, water, juice, salt, and a few grinds of black pepper in a saucepan and bring to a simmer over medium heat. Cook this fig mixture until the pieces of fig are soft, having absorbed the water and juice, stirring occasionally (should take about 10 minutes). Turn off the heat, and allow to cool for a while before putting it in a food processor and processing until it resembles a paste, like a relatively smooth jam. Set it aside to cool the rest of the way.

Once your dough has roughly doubled, turn it out onto a floured surface and divide it in half. Roll the first half out into “an imperfect rectangle,” spread half of the fig filling over the dough, and roll it up into a long log, trapping the filling within. You’ll want to be careful when you roll out your dough that it still has some thickness to it, as I had a few tears in mine which made everything a little tricky for me. Roll out/stretch the log as long as you can without breaking or tearing it, and then divide it in half. Repeat this whole process with the second half of the dough. You should have four fig-filled ropes of dough.

Next comes the weaving, which I’m not even going to try to explain. Instead, you should head to over to Smitten Kitchen to look at the pictures and read her instructions. I never could have woven it without those pictures. Oy. Once woven up into a beautiful mound of deliciousness, transfer the dough to a baking sheet prepped with parchment paper (or silpat, I suppose).

Egg Wash

In a small bowl, beat the egg for the wash, and brush it over the challah. Let it rise for another hour, but start heating your oven to 375 degrees about halfway into the rise. Before putting it in the oven, brush the challah again with the egg wash, and bake it in the middle of your oven for 35-40 minutes. If it starts to get dark (like mine did), you can cover it with foil for the rest of the bake (like I didn’t). Remove from oven and allow to cool before serving. Tear off pieces with loved ones, and add a dab of butter and jam, if you like. Enjoy.

Blackberry Coffeecake // Serious Crust by Annie Fassler

Blackberry Coffeecake

Blackberry Coffeecake // Serious Crust by Annie Fassler

Blackberry Coffeecake // Serious Crust by Annie Fassler

I do hope I’m getting you this blackberry coffeecake recipe before it’s absolutely impossible to find blackberries. Please don’t hate me if I’m not.

I’m feeling really torn about summer’s departure and fall’s arrival. I know earlier I said I was excited, but now that it’s happening, and there’s that chill in the air, and there have been a few days of drizzle, I find myself kind of having to mentally prepare myself for the gray that comes and stays for months and months and months. I like the chill, and I can’t wait to wear sweaters and drink tea and cook the food that comes with fall… but I don’t know. It doesn’t have that same carefreeness that summer has.

But I’ll live. This recipe came from my having leftover blackberries, and just really wanting to make coffeecake. I woke up one morning, Jonah was still in bed, the roommates were out of town, and I snuck downstairs and made a coffeecake (adapted from Tide and Thyme) on a Sunday morning. It was a lovely peaceful way to spend the morning. And everyone likes coffeecake. Everyone.

Blackberry Coffeecake

Ingredients

Crumb Topping

½ cup all-purpose flour
1/3 cup brown sugar
1/2 tsp lemon zest
4 tbsp. (2 oz.) unsalted butter, melted and cooled slightly
1/2 cup sliced almonds

Blackberry Cake

1 3/4 cups all-purpose flour
1 cup sugar
2 tsp. baking powder
¼ tsp. baking soda
¼ tsp. salt
3 eggs
1 cup sour cream
1 tsp. vanilla extract
2 cups fresh blackberries

Instructions

Crumb Topping

Preheat your oven to 350 degrees. Butter and flour a 10-inch springform pan (which, by the way, I’m convinced might be the greatest things ever, if you grease it enough). Make the crumb topping by combining all of the ingredients except the almonds in a bowl and mixing it up to combine. It should be kind of crumbly. You can also add some oats if you’d like. Set the topping aside.

Blackberry Cake

In a large mixing bowl (perhaps maybe the bowl of an electric mixer), combine the flour, sugar, baking powder and soda, and salt. In a separate mixing bowl, use a whisk to mix together the eggs, sour cream, and vanilla. Make kind of a well in the middle of the dry ingredients, pour in the wet, and stir it up just until it’s evenly combined and there are no flour patches or streaks. Pour the batter into the prepared springform pan and make sure it’s evenly distributed. Place the blackberries gently on top, making sure they are evenly distributed (wow, can’t get enough of that phrase, huh?) and covering the top of the batter. Now sprinkle the crumb topping on top of the blackberries, and then top with the sliced almonds.

Bake the coffeecake until the top looks all perfectly golden brown, and it passes the clean toothpick/knife test, 40-50 minutes. Put the pan on a cooling rack, and let it cool for ~20 minutes, or as long as you can wait. Run a knife around the edge before removing the sides of the springform. Slice it up and serve with coffee or tea, and maybe a bowl of fruit.

Rhubarb Thyme Hand Pies

Rhubarb Thyme Hand Pies

Rhubarb Thyme Hand Pies

Rhubarb Thyme Hand Pies

It’s early spring. Do you know what that means? It means rhubarb. Yep. I couldn’t be more excited. Jonah and I went to the farmer’s market and I picked up about two pounds of the it and I decided to make Rhubarb Thyme Hand Pies. Now, I have only made hand pies once before, and they were delicious. I followed a recipe from the Dahlia Bakery cookbook, so the dough was specifically for hand pies, as was the filling. But I didn’t really have a recipe for these, so I decided to wing it.

Part of my concern with kind of winging it was that the dough would be too delicate and flaky to hold up as a handpie. Second, I worried that the filling, being mostly rhubarb which falls apart as soon as it’s cooked, would be too liquidy, not enough solid. So I did a little research, and while I wasn’t completely happy, it was certainly a first step. I think I made the pies a bit too big. I didn’t really want to do the 3.5 inch circular cookie cutter route (cutout two circles, run milk around the edge of the bottom one, fill inside the milk edge with filling, put another circle on top and seal the edges), so instead I divided my dough into 8 pieces and rolled each one out until it was about 1/4 inch thick. I like the way these are shaped better, a little more rustic seeming, but I do think that they might’ve held up better if I had gone the cookie cutter route. The dough was, as I was concerned about, a little too delicate and started to crumble when you picked it up. And I certainly could’ve put more filling in each pie (the leftover filling is in a tupperware at home, and I’m looking forward to stirring it in with some Greek yogurt for a snack later).

All that being said, they were definitely tasty, and I would recommend them! But hopefully I’ll be trying another batch here soon with a few changes. I’ll let you know how it goes.

Rhubarb Thyme Hand Pies

Ingredients

Pie Crust

2 cups flour
1 cup butter (2 sticks), cold, cut into cubes
1 tsp salt
up to 1/4 cup water

Rhubarb Filling

4 cups rhubarb, in a half inch dice
3/4 cup sugar
1/2 – 1 tsp fresh thyme
Milk for sealing

Instructions

Pie Crust

In a mixer or a food processor, combine the flour, butter, and salt. If the dough is not coming together, add water, 2 Tbl at a time, until it does. Form dough into two discs, wrap in saran wrap, and refrigerate for at least 1 hour.

Rhubarb Filling

While the dough is refrigerating, put cubed rhubarb, sugar, and thyme into a small saucepan. Over medium heat, cook the rhubarb until it breaks down and simmers for a couple minutes. Allow the filling to cool while the dough finishes up in the fridge.

Preheat your oven to 375 degrees. Divide each disc into 6 even pieces (I only did 4 and the hand pies were too big, in my opinion). On a floured surface, roll each piece of dough into as circular a shape as you can. You’re going to be folding them in half, so even if they’re not so round, symmetrically misshapen is best. Line a baking sheet with parchment paper, and assemble the pies on the baking sheet. What does assembling them entail? Well, dunk your fingers in milk and wet the edge of your circle of dough. Fill half of that circle, inside the milk line, with the rhubarb filling, and fold the opposite side of dough over the filling. Press around the edges, allowing the milk to seal the two sides of the dough together. With a fork, press around the edges, and use a knife to cut three little slits in the top for steam (this way the pies are less likely to explode). I was able to fit 4 on a pan, but because yours will probably be smaller, you may be able to fit 6. Bake for 20-35 minutes or until the dough looks cooked and the edges are golden brown. Allow to cool for about an hour before digging in.

Shakshuka

Shakshuka for breakfast! Looks amazing.

I have discovered possibly the best Israeli-inspired brunch dish of all time. You think that’s a really specific category? It’s not. I know this because I now have two whole cookbooks from chef Yotam Ottolenghi (“Plenty” and “Jerusalem”). Born and raised in, guess where, Jerusalem, Ottolenghi moved to London in 1998 where he has a deli chain and a restaurant (or two… I’m not positive). Anyway, last year, my mom gave Jonah “Plenty” for his birthday, and while the pictures are absolutely beautiful and the food looks delicious, the recipes are a little intimidating. Lots of kind of obscure ingredients like muscovado sugar and tamarind paste and harissa. So we made maybe one or two things from it. But in the last year, we have grown much more ambitious in the kitchen, so when I was in Berkeley visiting my sister and I saw “Jerusalem” (and it’s latke recipe, which I will sharing with you shortly) I wanted it. Badly. And guess what. I got it. For my birthday. From my sister. Because my family is awesome and gifts each other beautiful cookbooks and kitchen appliances.

Anyway, when I was home for Thanksgiving, my dad made the shakshuka out of “Plenty” for brunch one morning. (Let it be noted that there is ALSO a shakshuka recipe in “Jerusalem” and that they are, indeed, different.) Now, as one who has only recently grown to love bell peppers, I was skeptical about liking this dish. It is, afterall, mostly bell peppers. But oh my gosh you guys. Go make this NOW. It’s so amazing. Really complex flavors (thanks saffron and muscovado sugar), brilliant colors, and delicious leftovers. Best enjoyed with some crusty bread (think rye or a French batard or something like that).

Shakshuka

Serves 4 generously

Ingredients

1/2 tsp cumin seeds
3/4 cup olive oil or vegetable oil (I would maybe do a little less than this, but try it and see what you think)
2 large onions, sliced
2 red bell peppers, sliced into 3/4-inch slices
2 yellow bell peppers, same preparation
4 tsp muscovado sugar (yes, it’s an obscure ingredient, but now I want to put it in everything)
2 bay leaves
6 sprigs worth of thyme leaves, roughly chopped
2 Tbl chopped parsley
2 Tbl chopped cilantro, plus extra for garnish
6 ripe tomatoes, roughly chopped (if it’s not tomato season, 2 small cans of canned tomatoes will work perfectly, but I would recommend draining most if not all of the juice first.)
1/2 tsp saffron threads
pinch of cayenne
salt and pepper
up to 1 1/8 cups water
4-8 eggs

Instructions

In a very large pan (seriously, probably the biggest pan you’ve got is a good idea), dry roast the cumin seeds on high heat for a couple of minutes. Add the oil and onions, and saute for about 5 minutes. Then add the peppers, sugar, bay leaves, thyme, parsley, and cilantro, and keep cooking it on high heat for 5-10 minutes, until everything is starting to get some nice color to it.

Now add the tomatoes, saffron, cayenne, and a bit of salt and pepper. Bring the heat down to low and cook for 15 minutes. If you aren’t using canned tomatoes, keep adding water during this time so that the mix has kind of a chunky spaghetti sauce consistency. Because the canned tomatoes were pretty juice and I didn’t drain them completely, I found no need to add water. Give the mixture a taste, and adjust the seasoning as you see fit. More salt? More pepper? More muscovado sugar? Go nuts.

After 15 minutes on low heat, go ahead and remove the bay leaves. Now Ottolenghi has you divide the mixture among 4 little frying pans, but let’s face it, I’m not going to unnecessarily dirty 4 extra dishes. If it’s a fancy breakfast and you’ve got those adorable mini cast-iron skillets, maybe that’s your thing. But I just kept it all in the same one big pan for this part. Make some gaps in the pepper mix, and break one egg into each gap. (I surveyed my crowd to see how many eggs we each wanted, so I did 6.) Sprinkle with some salt and cover the pan with a lid (or tightly with some foil, if your pan doesn’t have a lid). Cook on “a very (!) gentle heat” for 10-12 minutes, or until the eggs are just set. A runny yolk is preferable. Sprinkle with cilantro and serve with some crusty bread. Enjoy! I promise, once you make this, you’ll come up with a million excuses/occasions to repeat it. It’s so delicious. And as I said, it makes great leftovers because the flavors just get to deepen even more.

Beer Bread

This recipe is a bit famous in my family. And I wanted to be sure to share it with you while there is still Pumpkin Beer on the shelves because that’s my favorite kind of beer to use. We got this bread recipe from a friend of my sister’s from college, Graham. As soon as Emily introduced me to it, I was hooked. However, it’s not the healthiest (as you will see, you dump a melted stick of butter over the whole thing), so I try not to make it all too often. This specific one I made to take to the first rehearsal of a play I was just cast in. Baked goods always make a good first impression.

Beer Bread

Makes 1 loaf

Ingredients

3 cups of flour
3 tsp baking powder
1 tsp salt
1/4 cup sugar
1 can/bottle of beer (12 oz) – Having made this a few times, here is my take on what beer to use: Nothing too dark or hoppy, it gives the bread kind of a funny aftertaste. Seasonal beers are nice (think pumpkin ale or christmas beers), as are more fruity beers (back when the only beer I liked was apricot hefeweizen, that worked well), and anything on the lighter side. But I would steer clear of IPAs and reds.
1 stick of butter, melted

Instructions

Preheat your oven to 375 degrees. Mix dry ingredients in a bowl. Add beer, stir to combine. Grease a bread pan, and dump the dough into it. Warning: the dough will be sticky. Put the bread pan on a rimmed baking sheet – this is important as you won’t want the butter to seep over and just end up in the bottom of your oven. In a small bowl, melt the stick of butter in the microwave. Pour the melted butter over the dough in the bread pan. Bake for 1 hour, turning halfway through.

Remove the bread from the oven, run a knife around the edge of the pan, and turn out onto a cooling rack to cool. This bread is pretty crumbly, so good luck getting it to stay in one piece when you slice it. But it’s so worth it. Enjoy!

Flinsen (Or Pflinzen)

Flinsen

In honor of Father’s Day, Jonah and I made flinsen. Whenever we see Jonah’s dad, Randy, he makes us flinsen. Randy will stand at the stove and make these pancakes, handing them out one at a time, hot off the stove, until everyone is full. Then he will sit down and eat. What a caring dad, right? I love Randy. (Another awesome thing about Randy is that he makes cheese, and good cheese at that!)

Flinsen

Ingredients

1 egg per person
1/2 cup flour per person
milk

Toppings for serving: yogurt, maple syrup, jam, sliced fruit, butter, and cinnamon sugar are all good options!

Instructions

Flinsen are easy. Put one egg per person that will be eating in a bowl and scramble them. Now add 1/2 cup flour per person. Now add milk until it’s the right consistency. “Wow, Annie,” you must be thinking, “That’s a great instruction.” I know, I know. You want it to be like really thin pancake batter. Think crepes.

Throw a slab of butter into a 10 inch fry pan over medium heat. Spread the melty butter around, and take about a 1/4 cup measure full of batter, and dump it into the pan. Here’s the tricky part. While you’re pouring the batter into the pan, you need to pick up the pan and swirl it around so the batter makes a thin layer over the whole pan. It may take a couple tries to get the hang of it, but you can do it! Pile them on a plate (or a pan and put them in a low oven to keep them warm).

Now comes filling time. You can put whatever you want inside, kind of like a crepe. Jonah’s got me hooked on greek yogurt and a drizzle of syrup. Jam is also good, sliced fruit is too, and even plain ol’ butter and cinnamon sugar. Enjoy!